Looking to set up your Small Business WordPress Website?
Then this guide is for you.
The website makes it easy to connect with your prospects and customers and showcase your offerings to your target audience.
Setting up a business website may seem daunting at first, especially if you don’t know about coding, but don’t worry.
Content management systems (CMS) like WordPress do not require you to be a coder, so even without any programming proficiency, you can build and publish your first WordPress business website!
We will guide you on how to make a small business website with WordPress from scratch.
So, let’s dive in!
- How to Create Business Website with WordPress
- Step 1: Domain Name and Hosting Service
- Step 2: Install WordPress
- Step 3: Install Responsive Theme
- Step 4: How To Install & Activate Responsive Starter Templates Plugin?
- Step 5: How To Import The One Page Business Template?
- Step 6: How To Change The Logo?
- Step 7: How To Edit The “One Page Business“ Using Elementor?
- FAQ
- Conclusion
How to Create Business Website with WordPress
To create a business website, all you have to do is follow these simple steps:
Step 1: Domain Name and Hosting Service
Let’s look at the 2 main things we need before we get into the actual nitty-gritty of making a website.
A Domain Name
A domain name is the address of your website. An easy way to come up with the domain name for your site is to use the name of your business and choose .com as the extension.
Check whether the domain name is available using a website like Namecheap. If the website is available, you can go ahead with it; otherwise, you can tweak the name a bit or choose a different extension, such as .net or a country-specific extension.
A Web Hosting Plan
Web hosting is the place where your website data is stored. You can choose from multiple web hosting service providers, but for illustrative purposes, we will stick to Bluehost for this article.
When you land on the homepage of Bluehost, begin by clicking on the Get Started Now button:

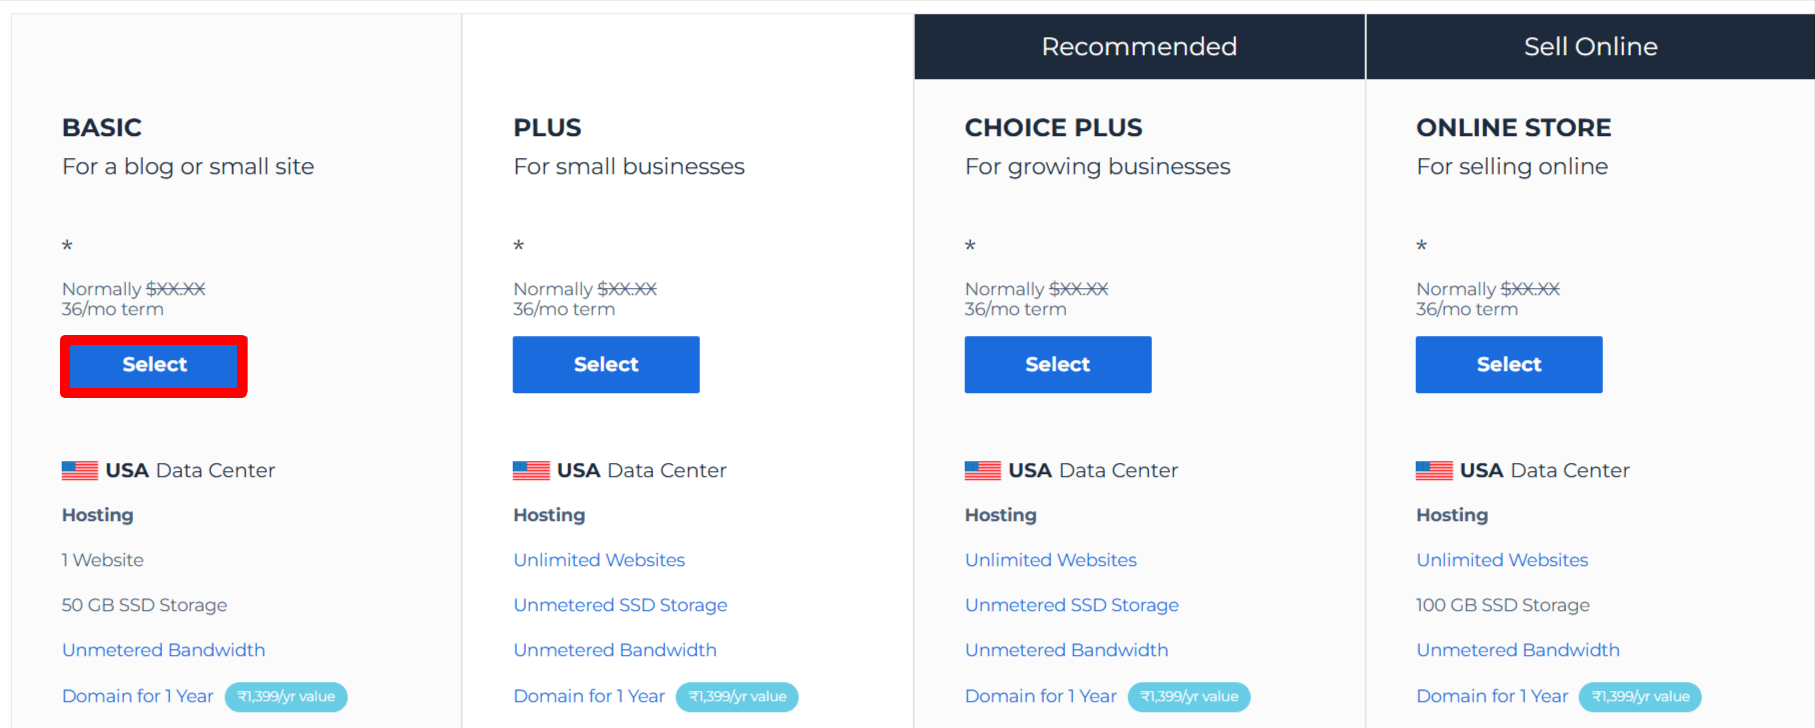
Upon clicking, you will be taken to their signup page, where you will be asked to choose a pricing plan among the following three plans.
If you are a small to mid-level business, choosing the basic plan is wise. You can always upgrade as the scope of your business grows.
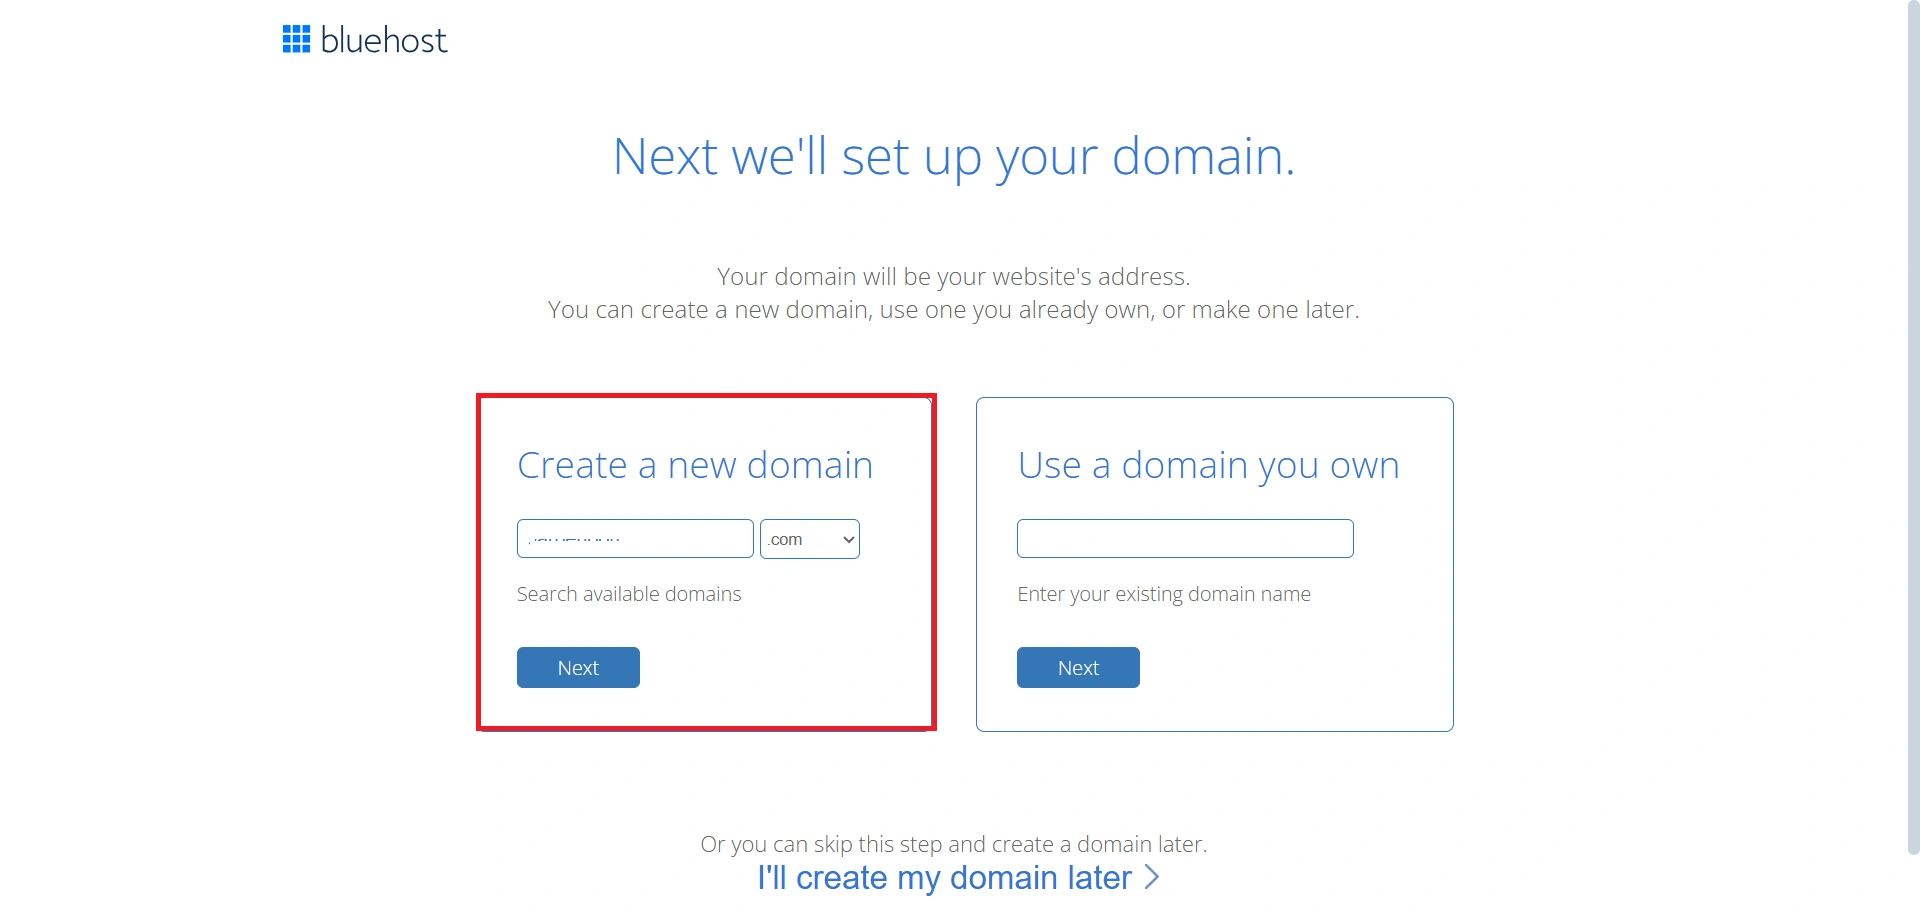
After selecting the plan, you have to enter your website’s domain name.
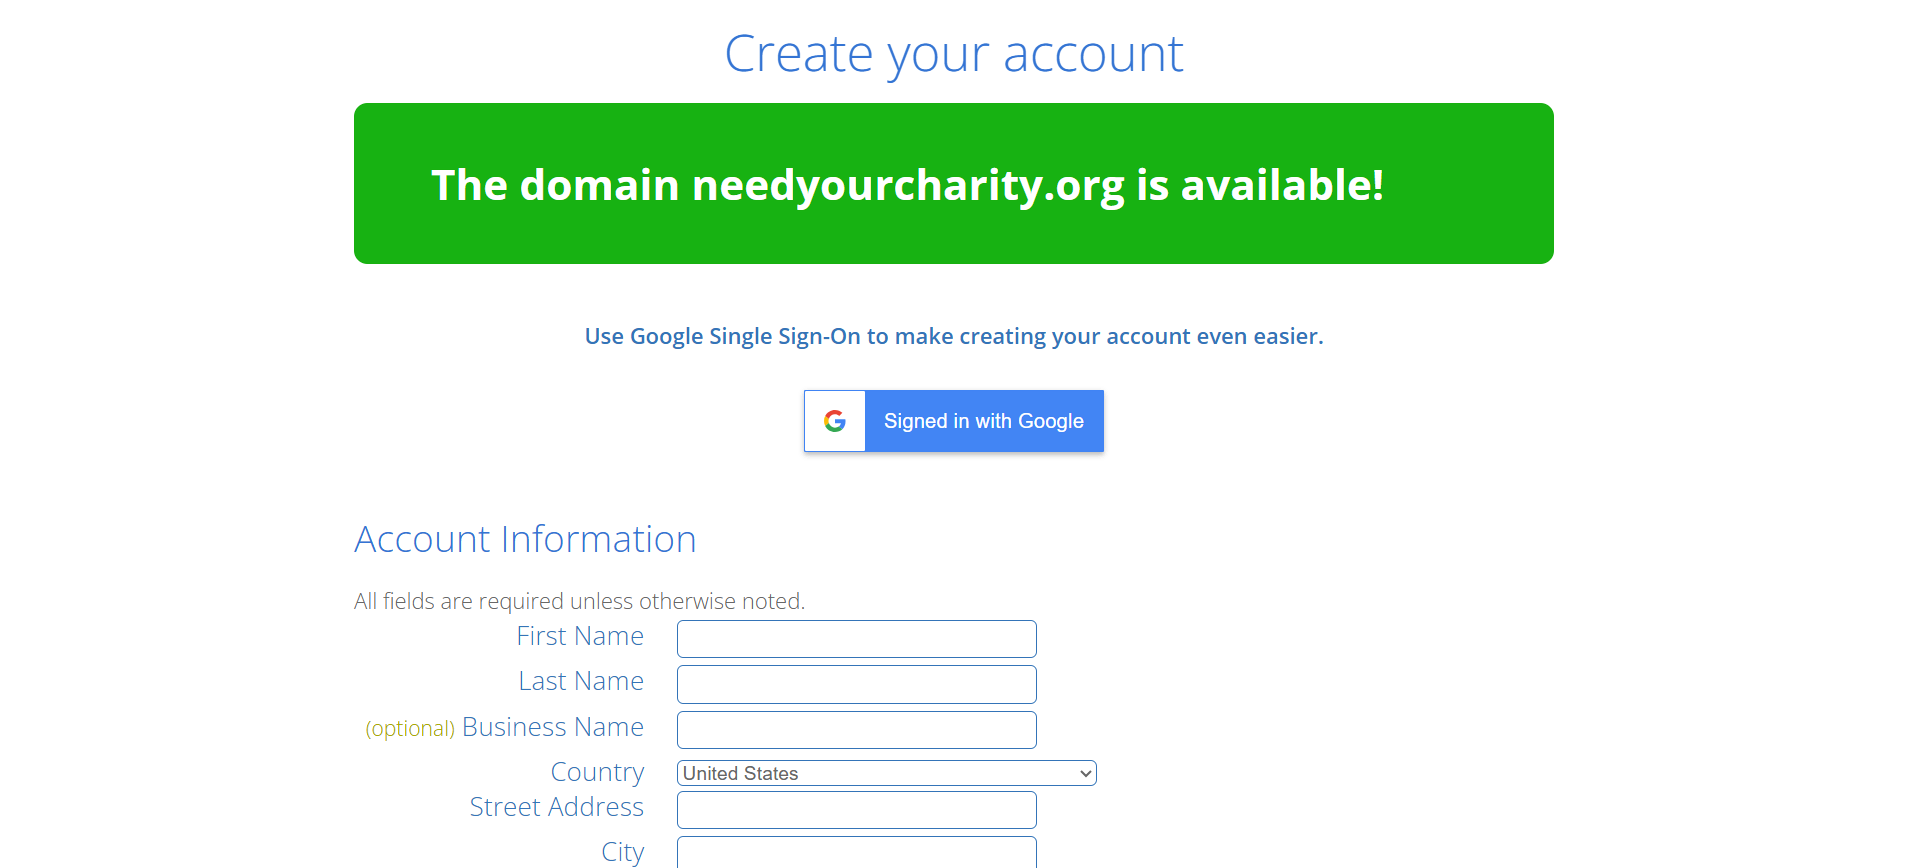
Then create your account and proceed with the payment.
After adding the payment details, you’ll receive a confirmation email. Once you’re registered with Bluehost, you’re good to go!
Step 2: Install WordPress
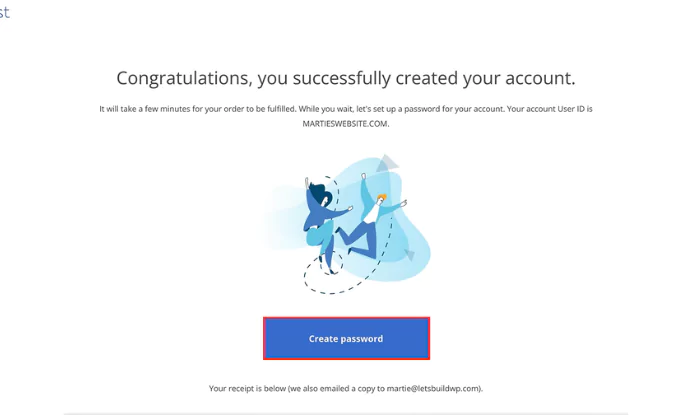
After that, click “Create Password.“
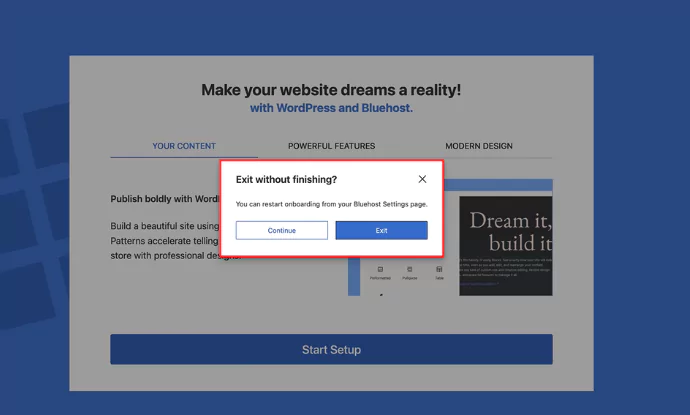
Complete a few more steps, and then this box will appear like a button to exit and start the installation.
Congratulations! You’ve successfully installed WordPress, and now you are ready to build and customize your site.
Step 3: Install Responsive Theme
The Responsive theme can be installed and used as any standard free WordPress theme. Follow the steps below to install the Responsive theme manually from the WordPress admin dashboard:
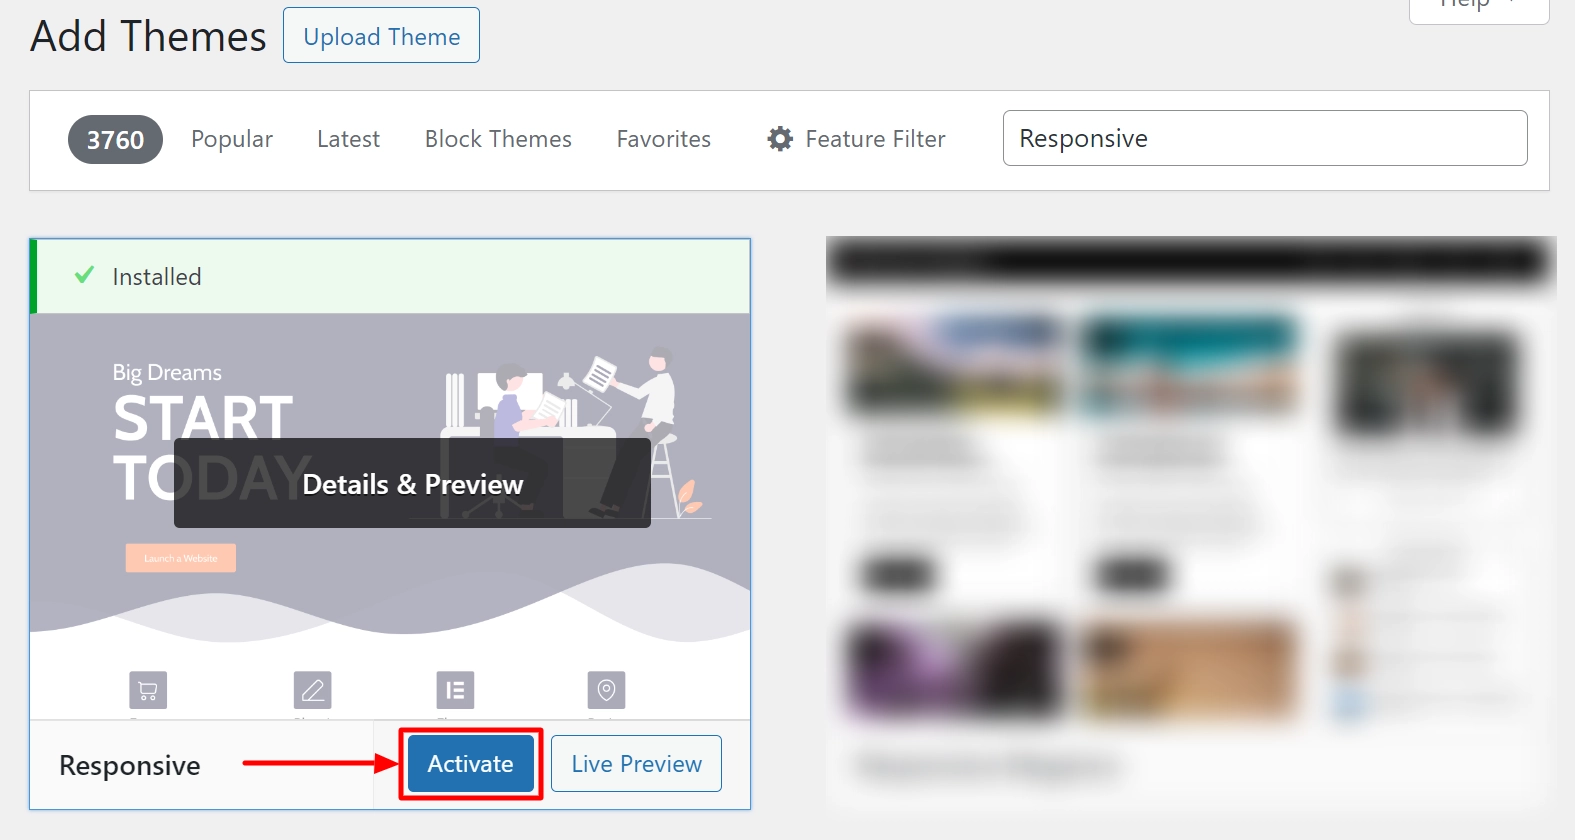
- Go to your WordPress Dashboard > Appearance > Themes > Add Theme> Search for Responsive. Install and activate it.
Once you’re done, it’s time to install the Responsive Starter template.
Step 4: How To Install & Activate Responsive Starter Templates Plugin?
The Responsive Plus plugin extends the functionality of the popular Responsive theme by adding the ready site importer feature.
It comes with free, ready-to-use WordPress website templates that can be easily customized using the Elementor page builder.
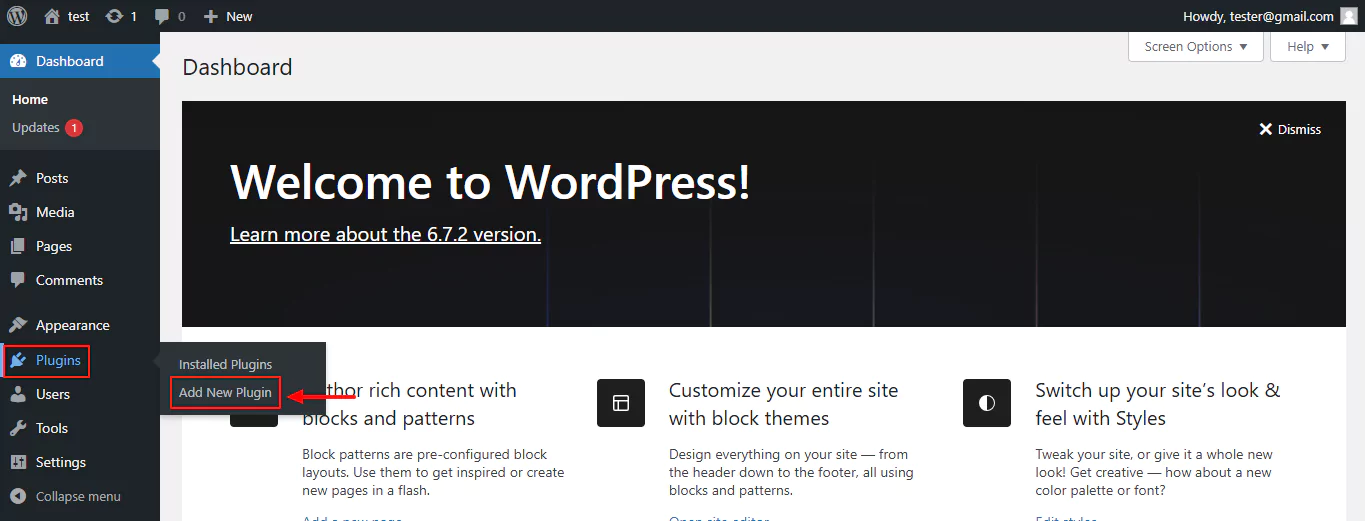
- Go to Plugins > Add New
3. Search for Responsive Plus. Install and activate it.
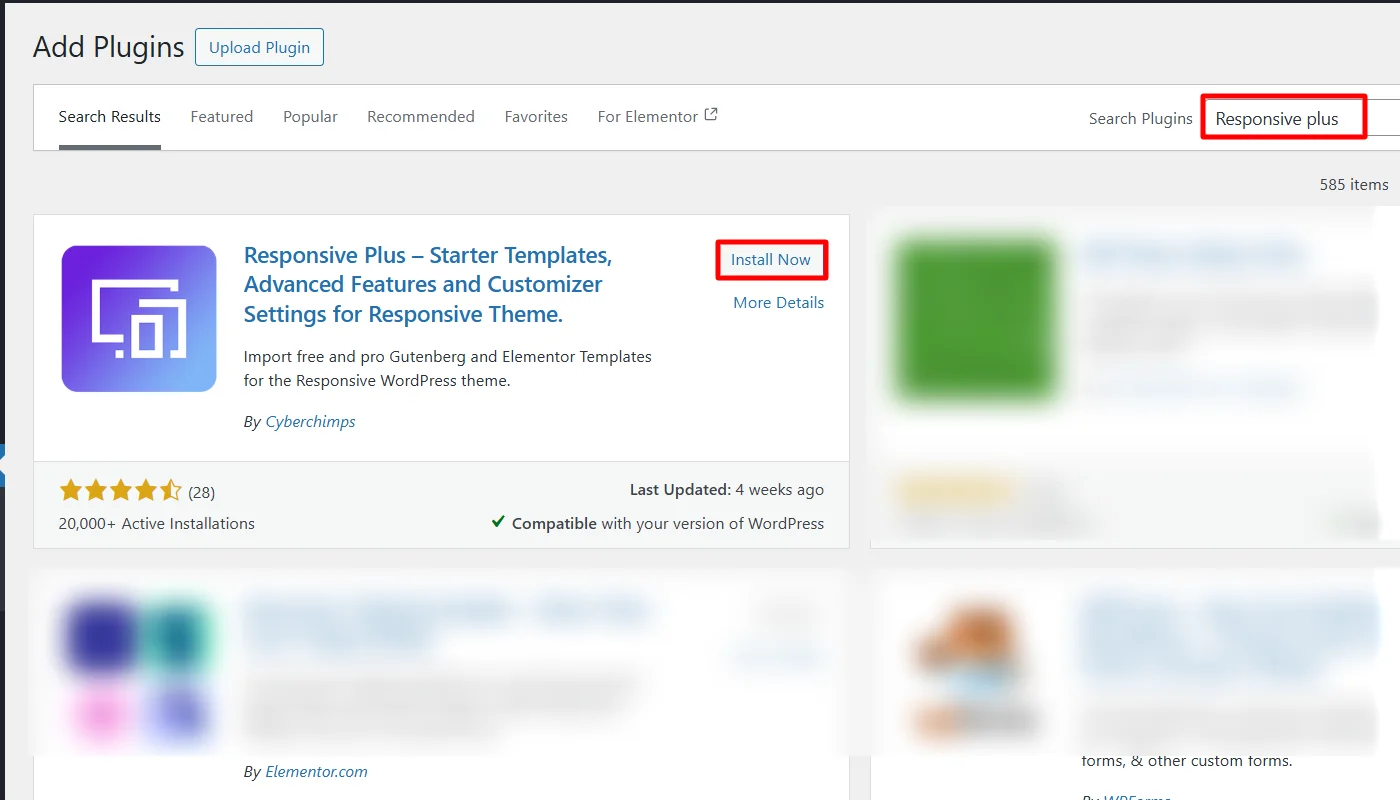
Now let’s see how to import the Business template.
Step 5: How To Import The One Page Business Template?
One Page Business is a ready-to-use, powerful WordPress template specially designed for small businesses. It comes with all the features that will make your business grow.
The theme comes with an integrated contact form to increase your email inquiries. A separate Services section will let you display a brief overview of the services you offer. And all of this can be imported with a single click of your mouse!
Follow the steps below to import the One Page Business ready site:
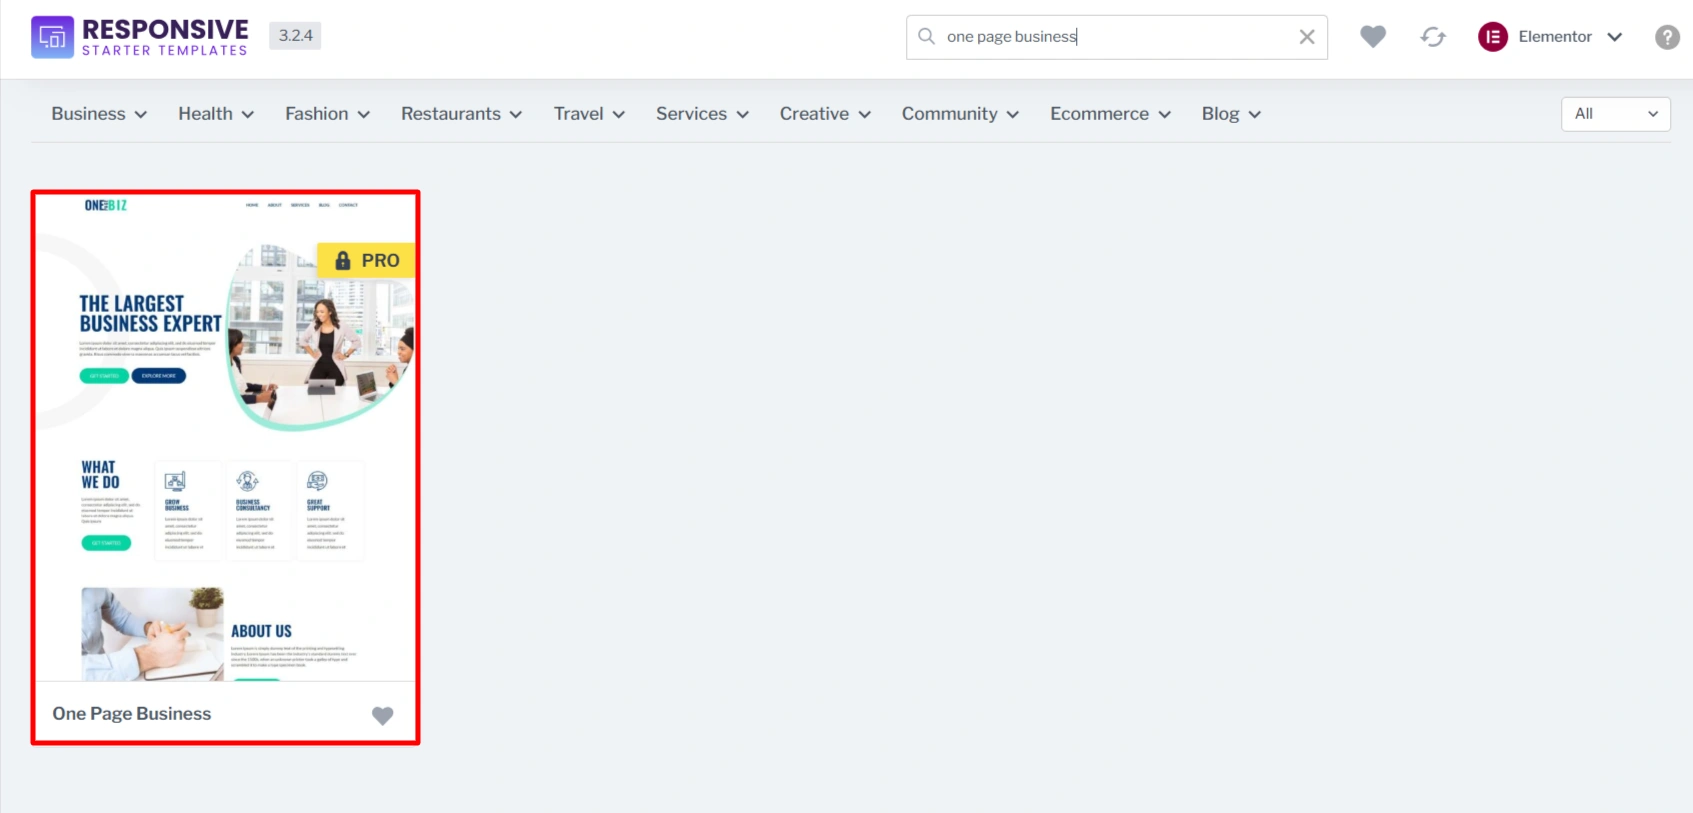
- From the WordPress dashboard, navigate to Appearance > Template and select the “One Page Business” website to import.
- On the preview page, you will see the website, and you can see the “Import Site” button.

3. Once you click on Import site, it will ask you to connect your site with Cyberchimps Responsive. If you already have an account, connect with your existing account or create a new one.
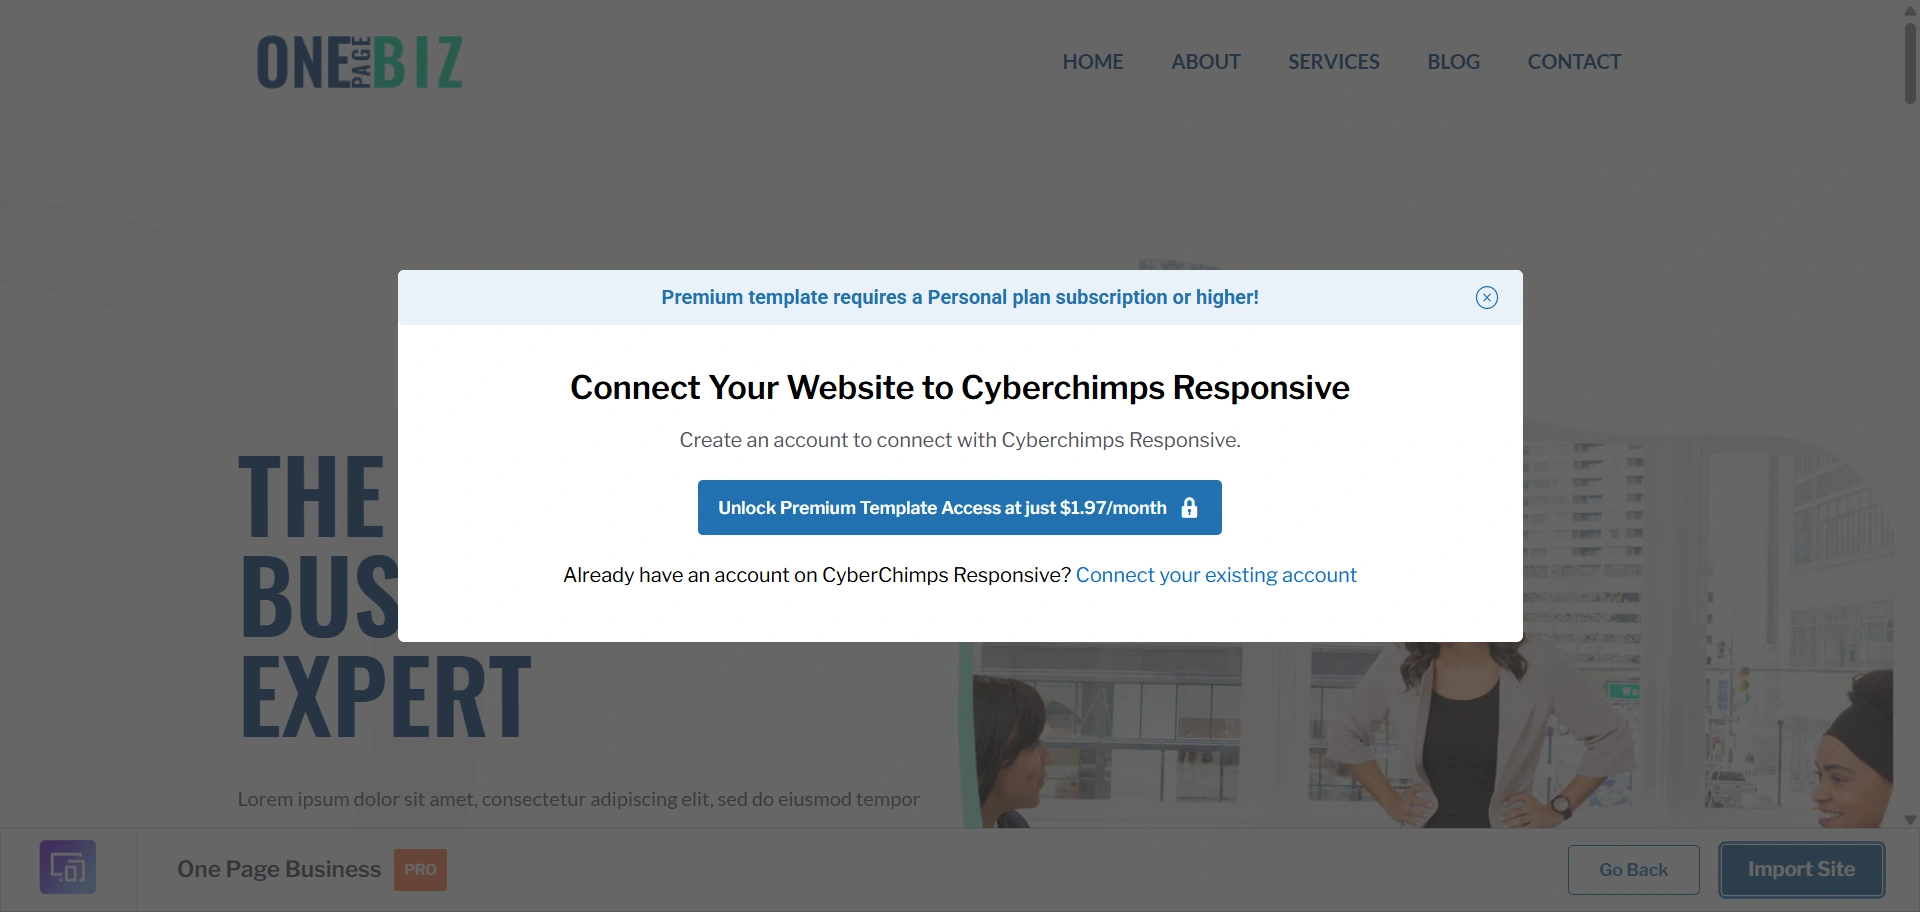
4. Connect your site to Cyberchimps Responsive.

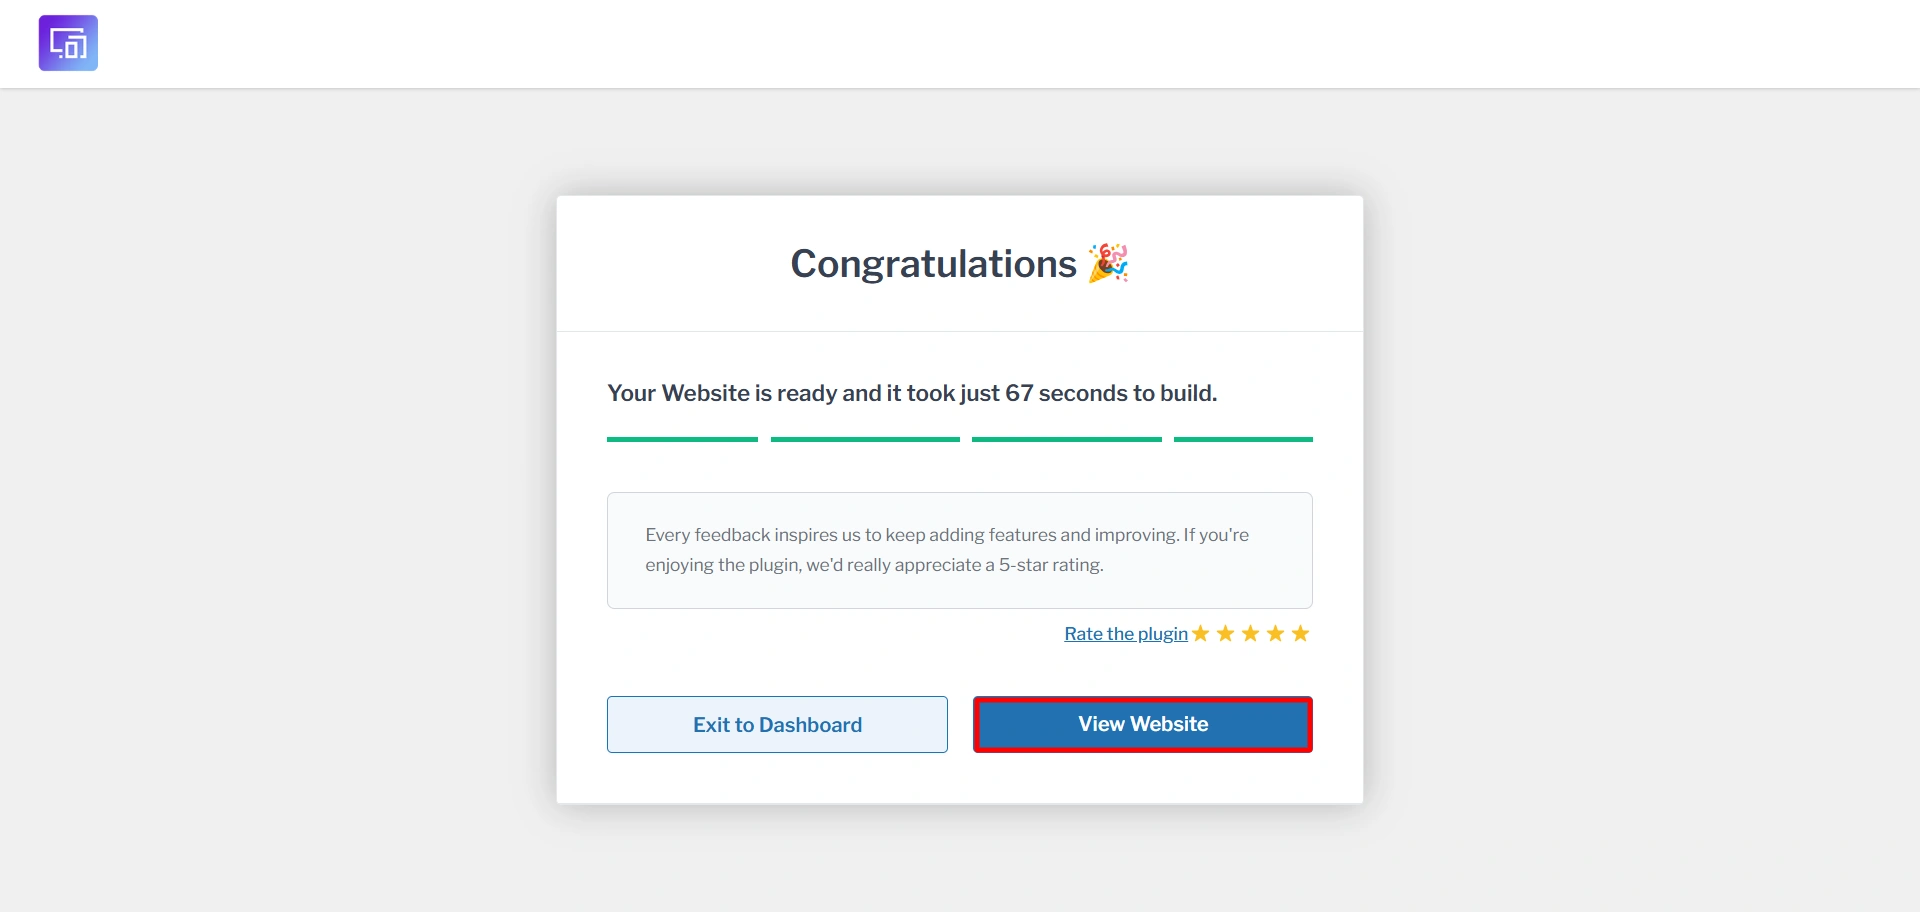
5. Click on Start Importing.
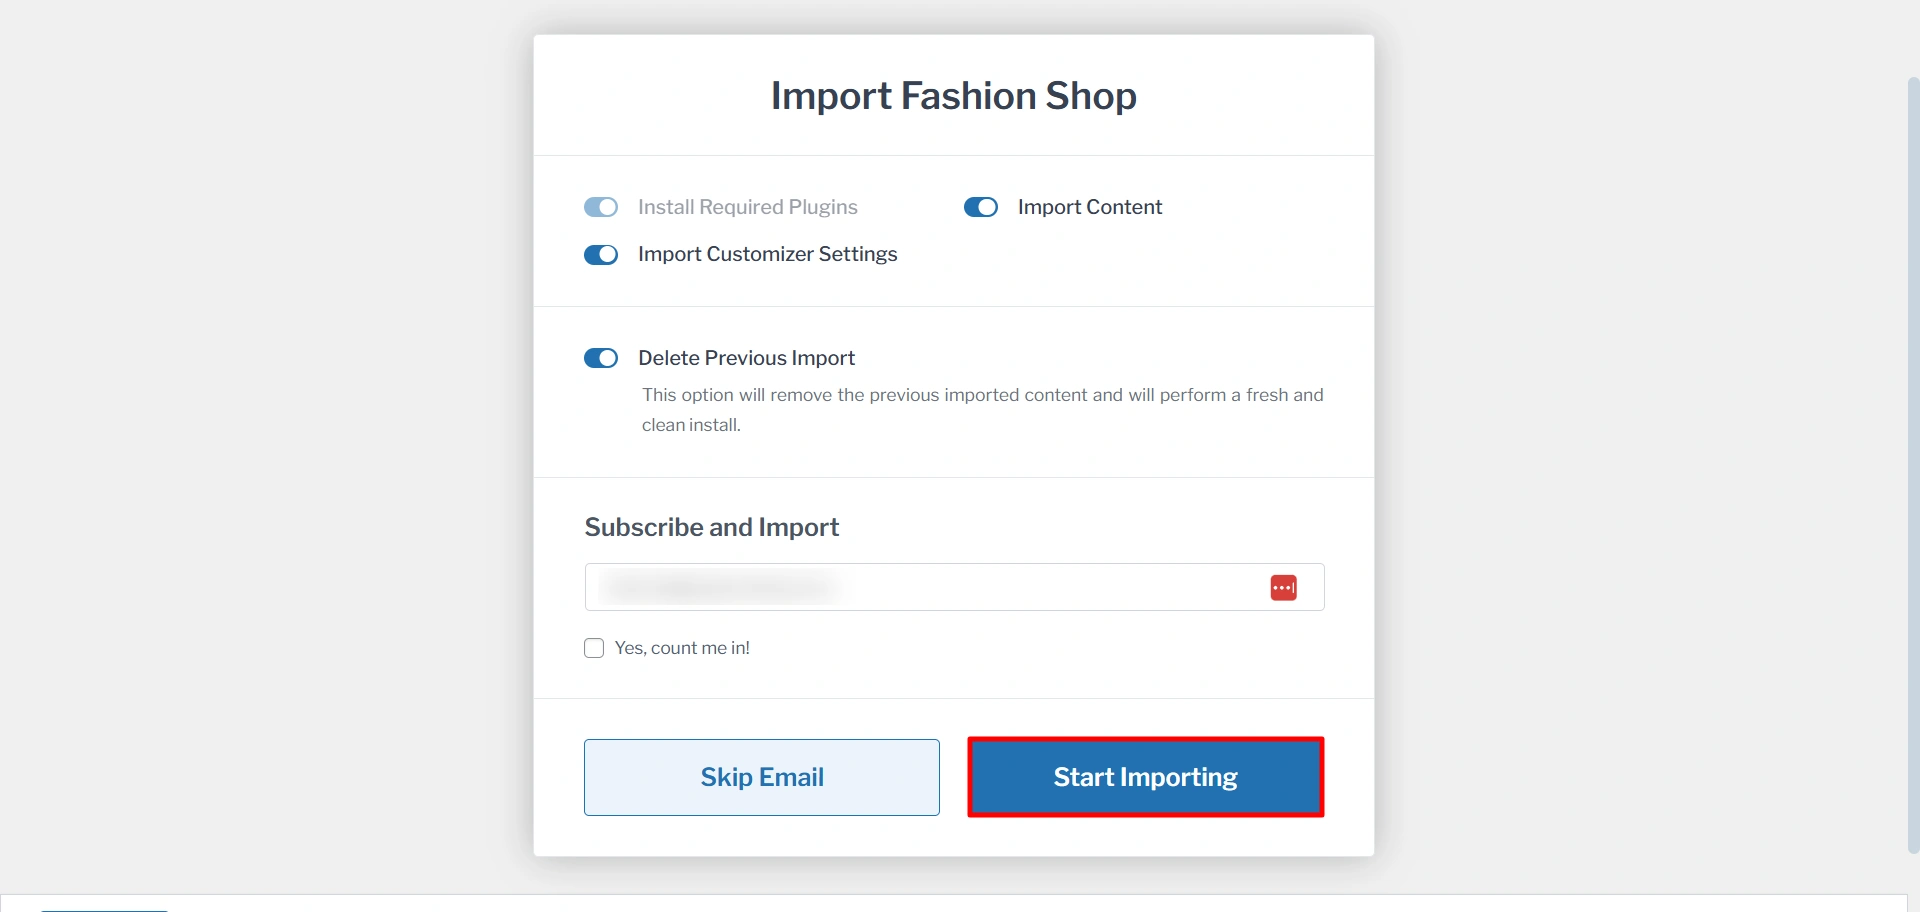
6. Now you are all ready to see your website.
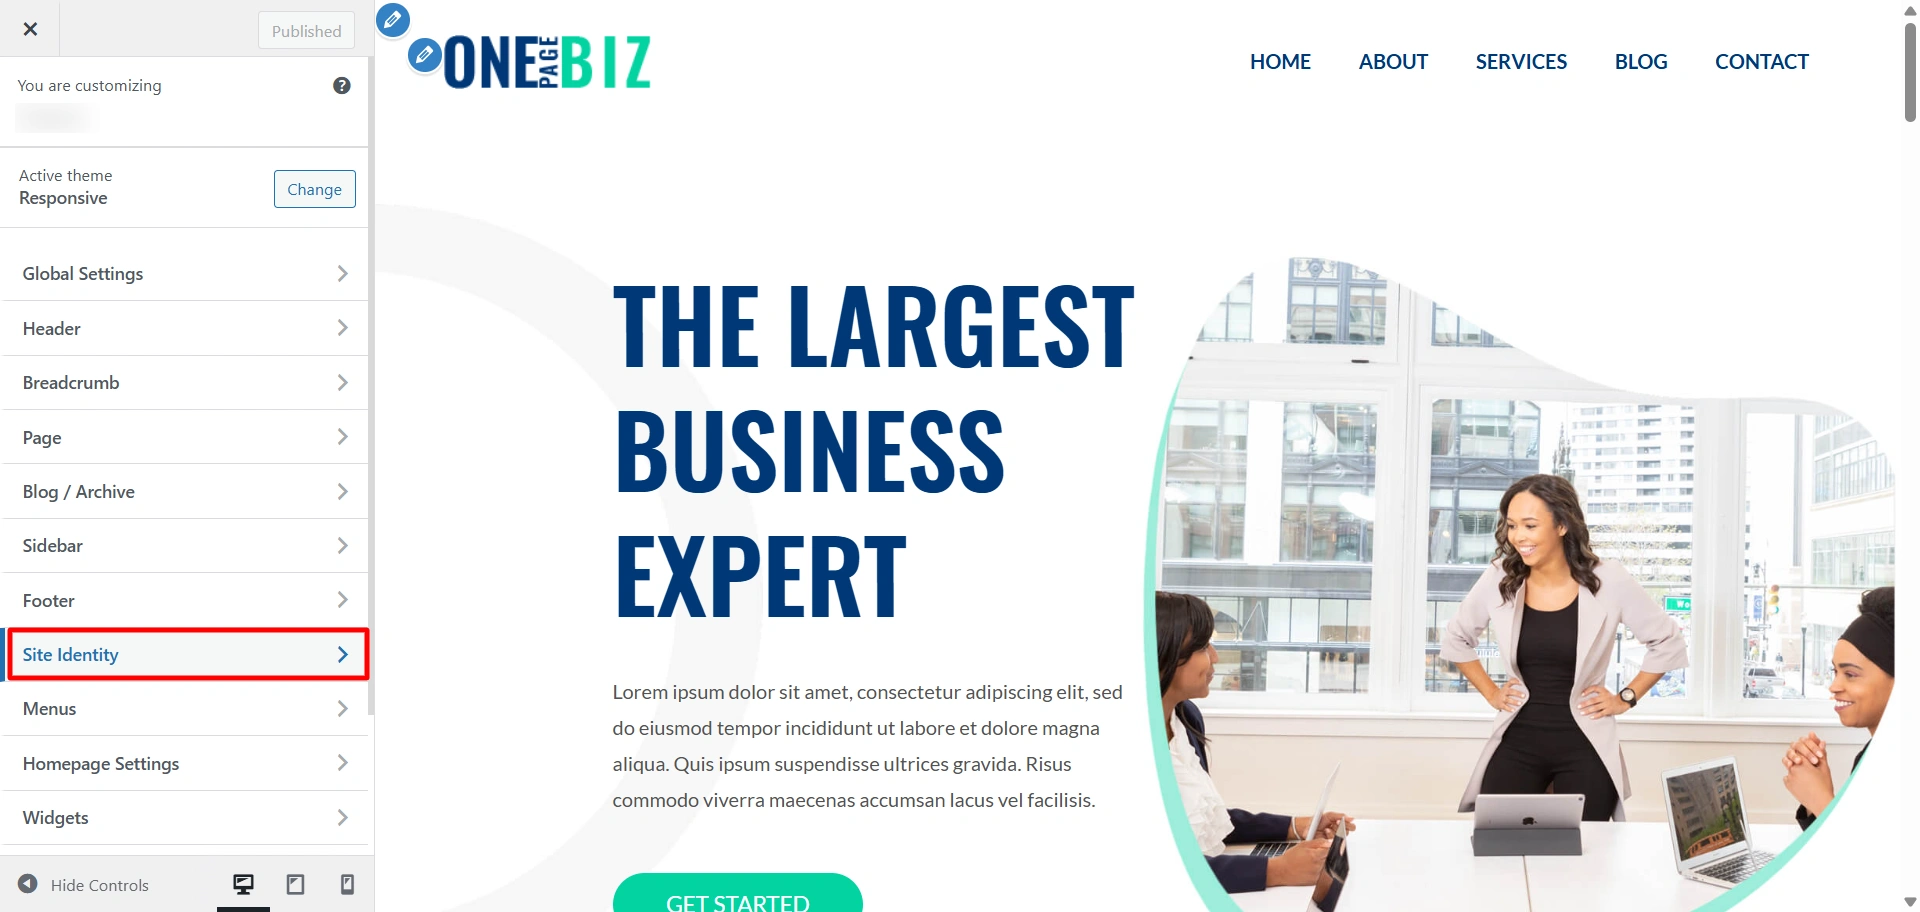
Step 6: How To Change The Logo?
Follow the steps below to change the logo of your website:
- From the WordPress dashboard, navigate to Appearance > Customize
- On the next page, select Site Identity
3. Next, click on the “Select Site logo” button to upload your logo image file.
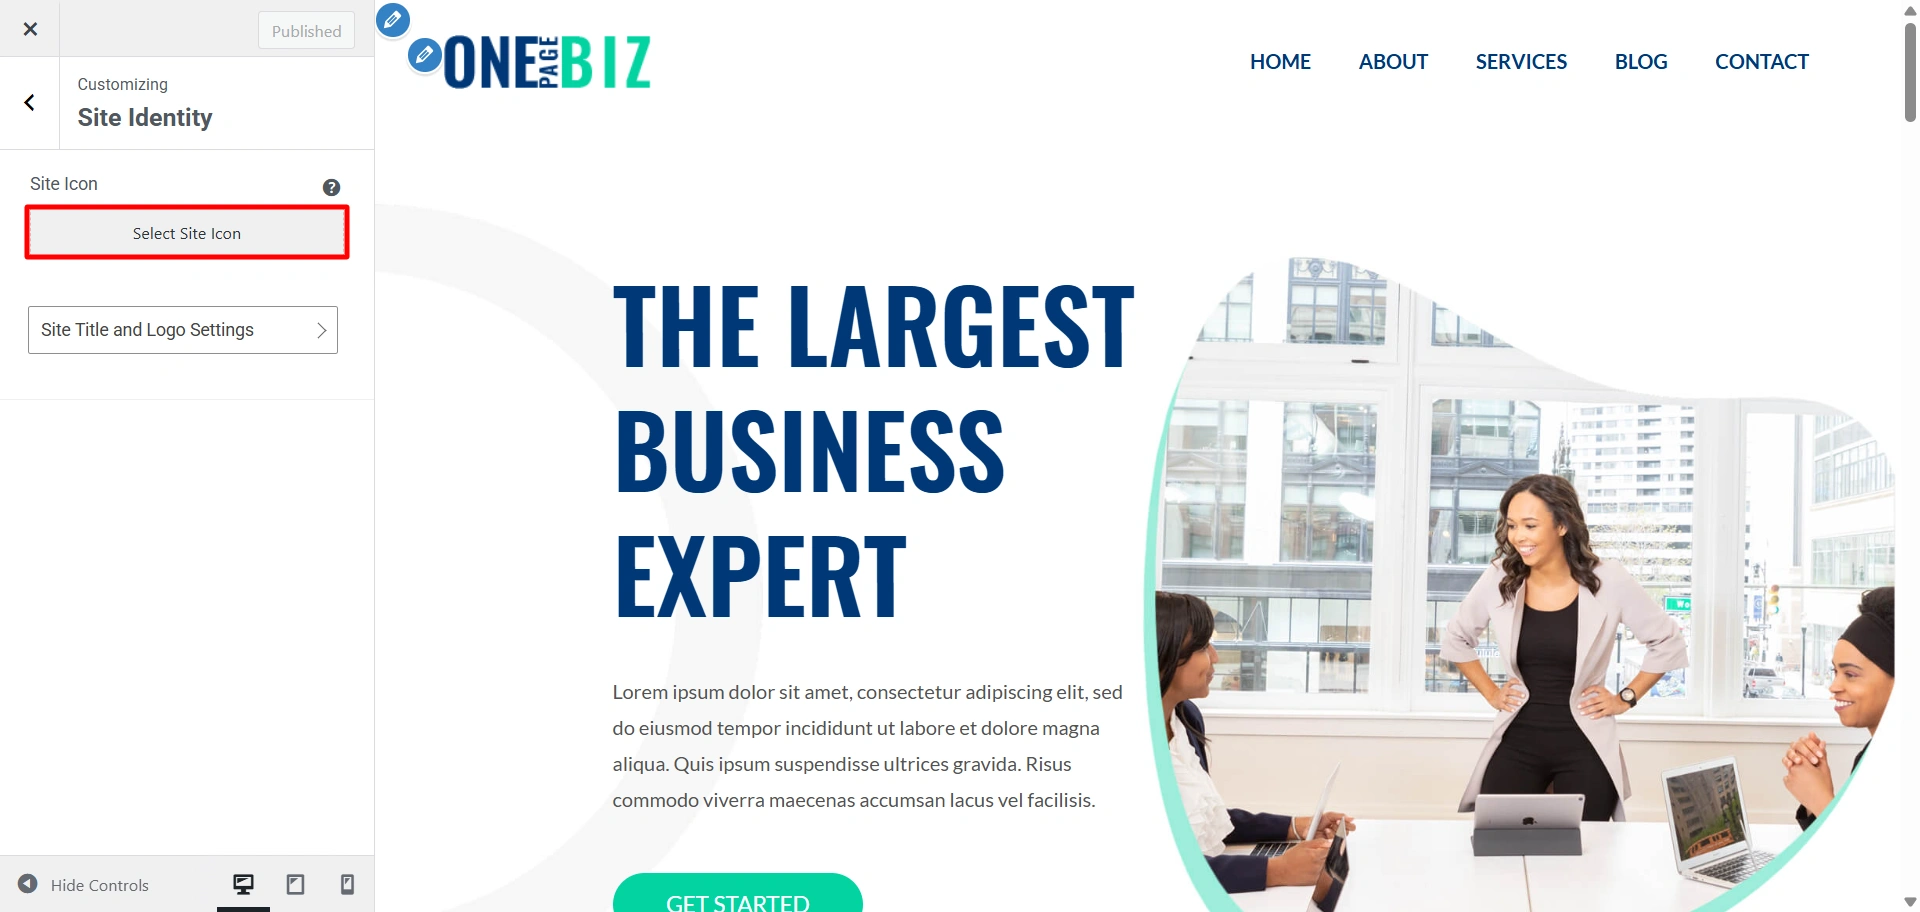
*Note: Suggested image dimensions are 300 by 100 pixels. The maximum upload file size is 40 MB.
Step 7: How To Edit The “One Page Business“ Using Elementor?
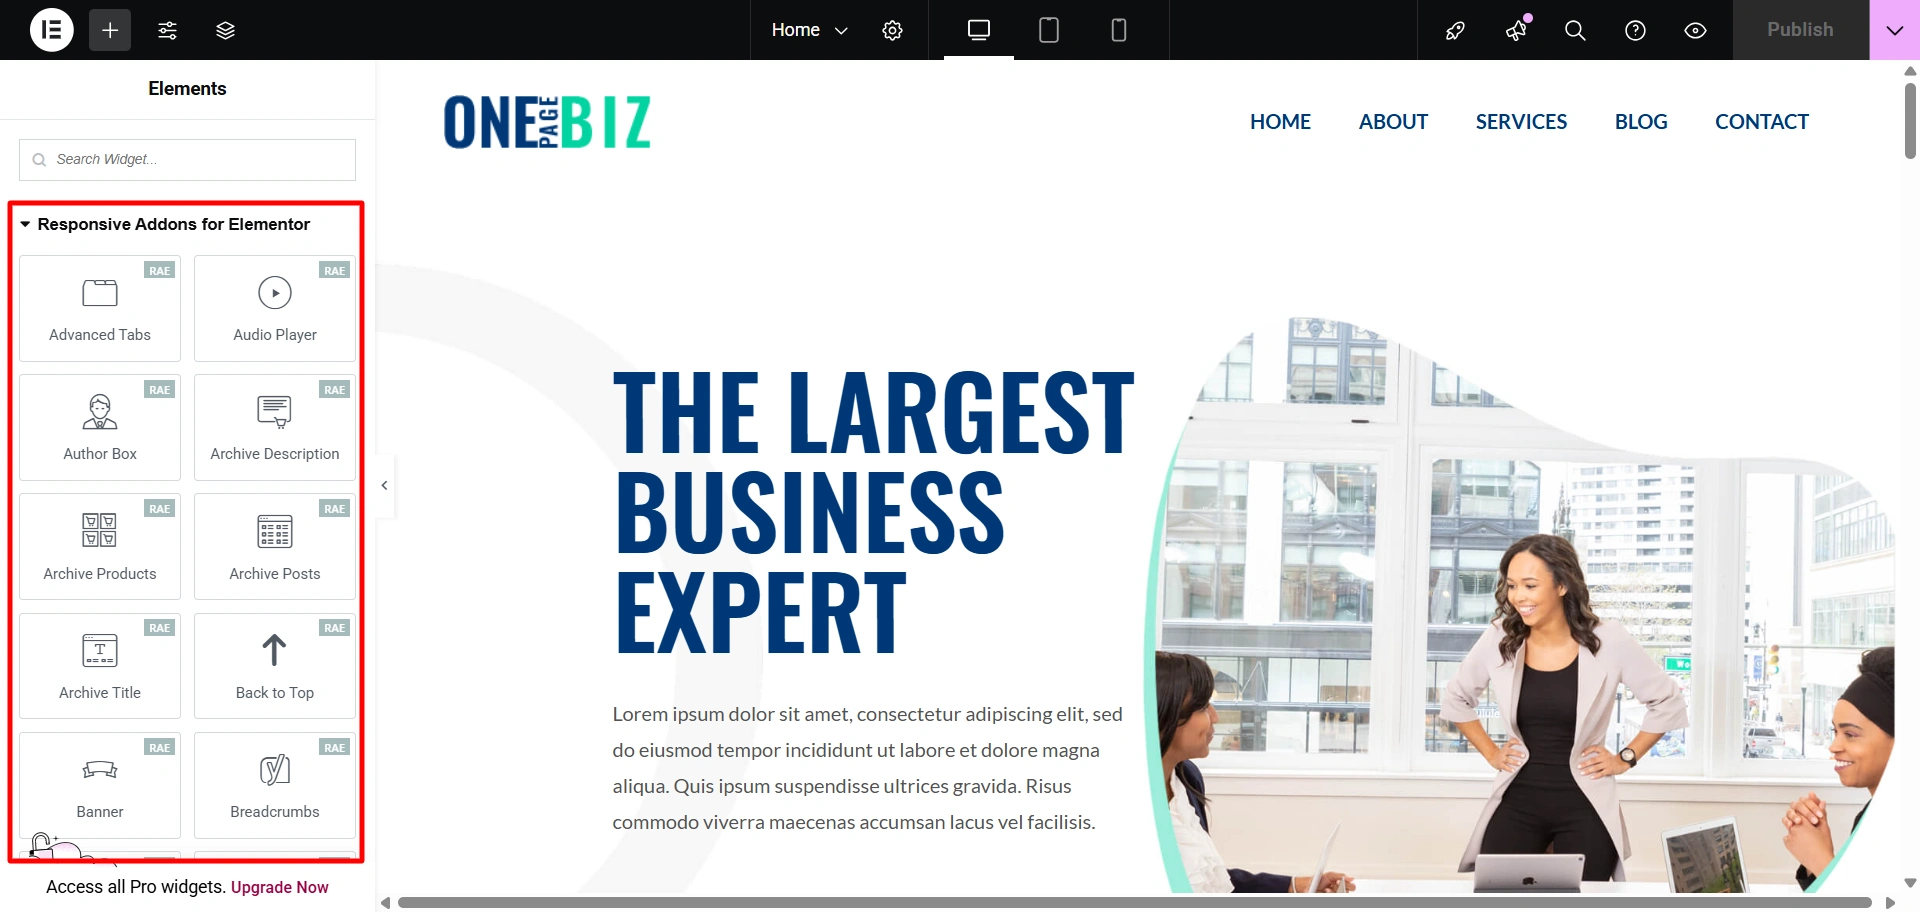
To edit your website in Elementor, you can install Responsive Addons for Elementor. It offers over 80+ customizable widgets that are free of charge and easy to work with.
Follow the steps below to edit the “One Page Business” website using Elementor drag-and-drop page builder.
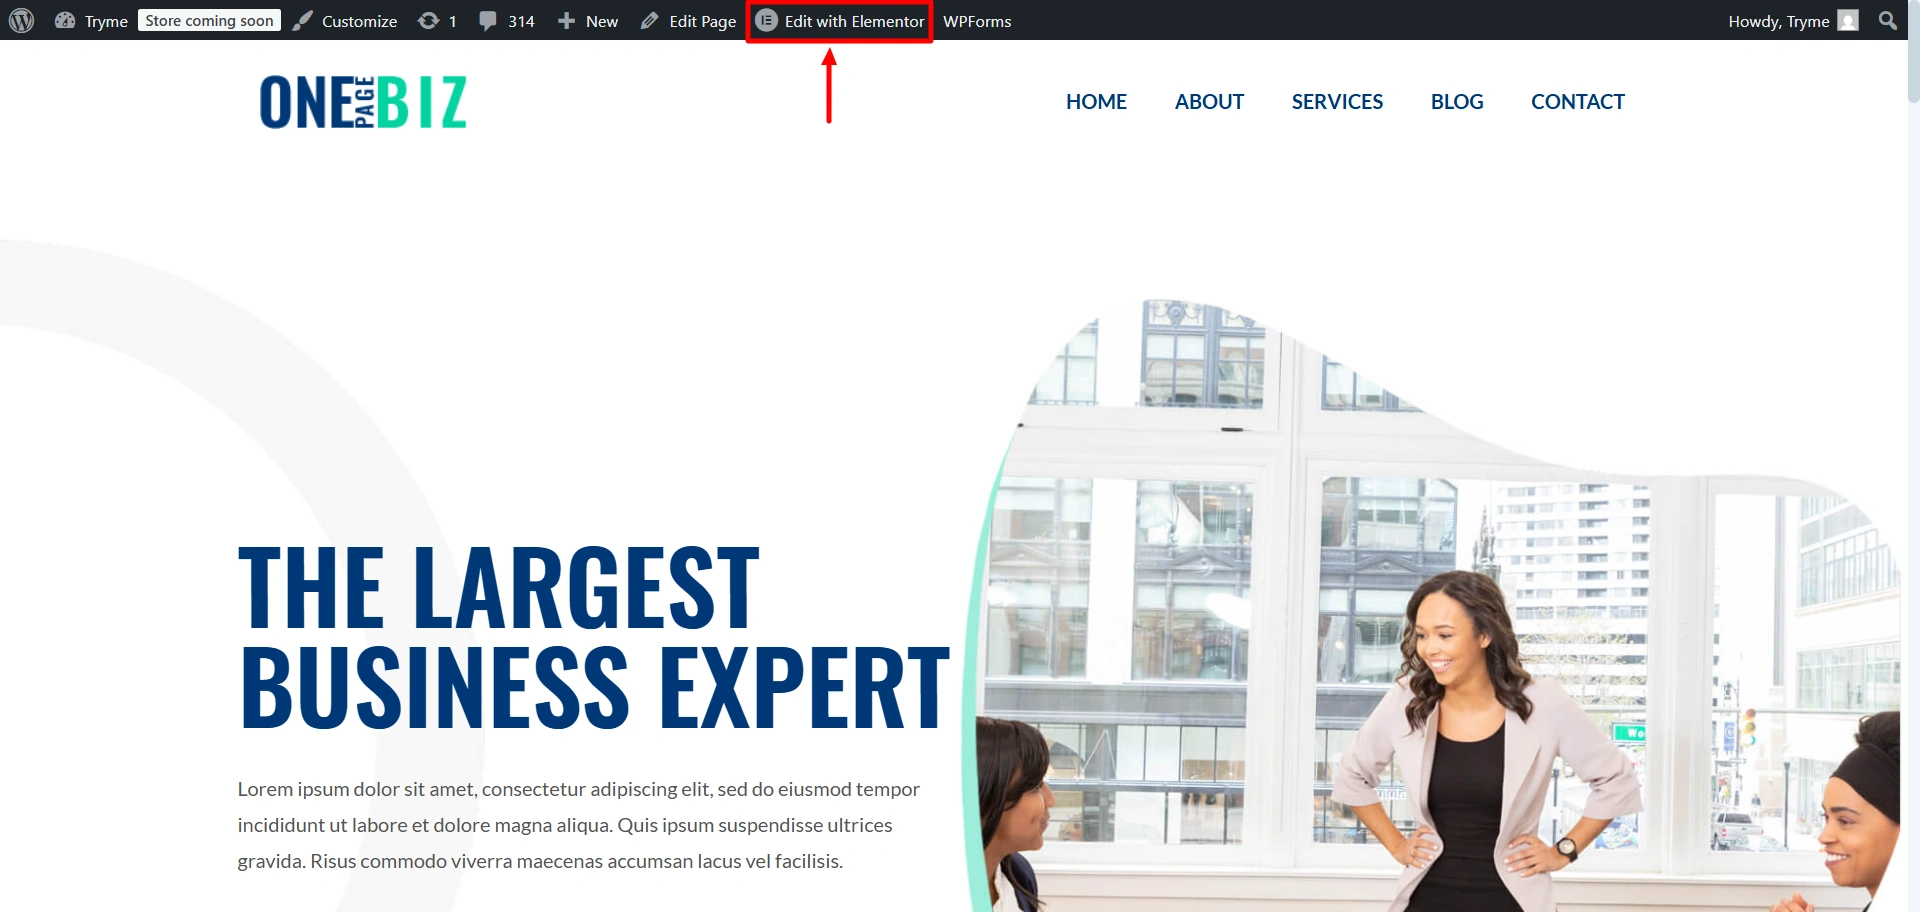
1. Your website will open up, select “Edit with Elementor” to start editing your “One Page Business” website using Elementor.
2. Here you will see all the widgets by REA to use them, you can drag and drop them to the place you want.
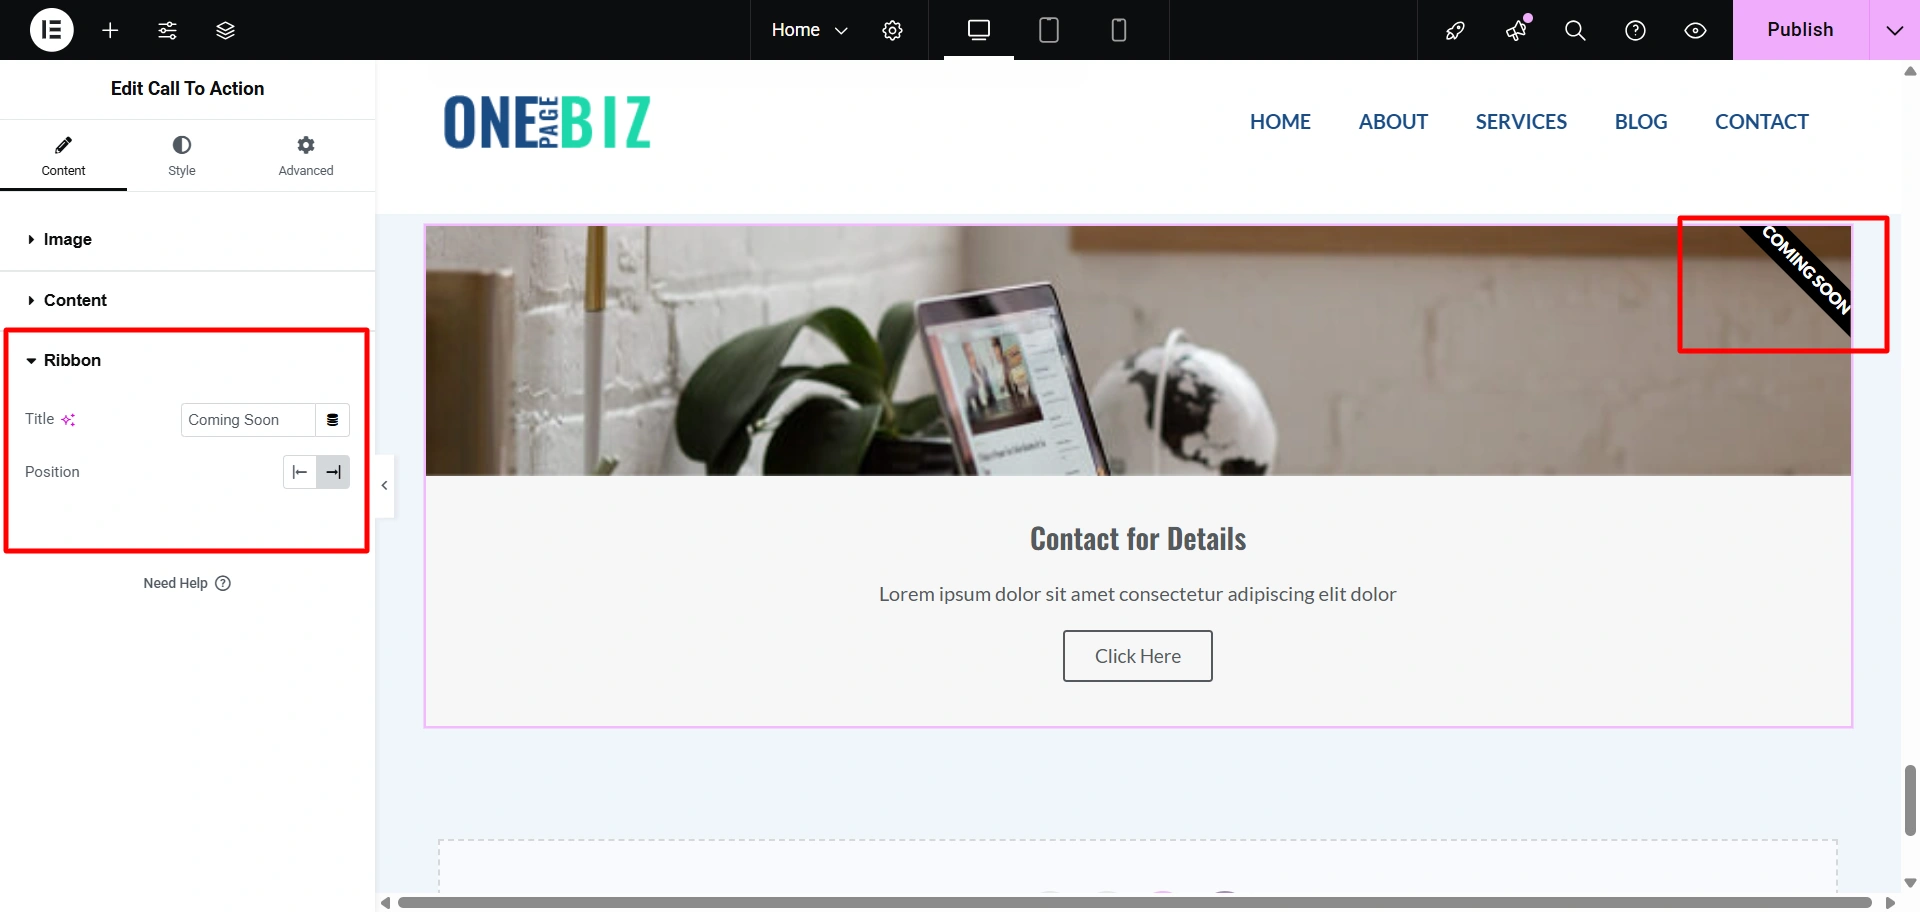
3. For instance, let’s add a Call to Action button, using REA.
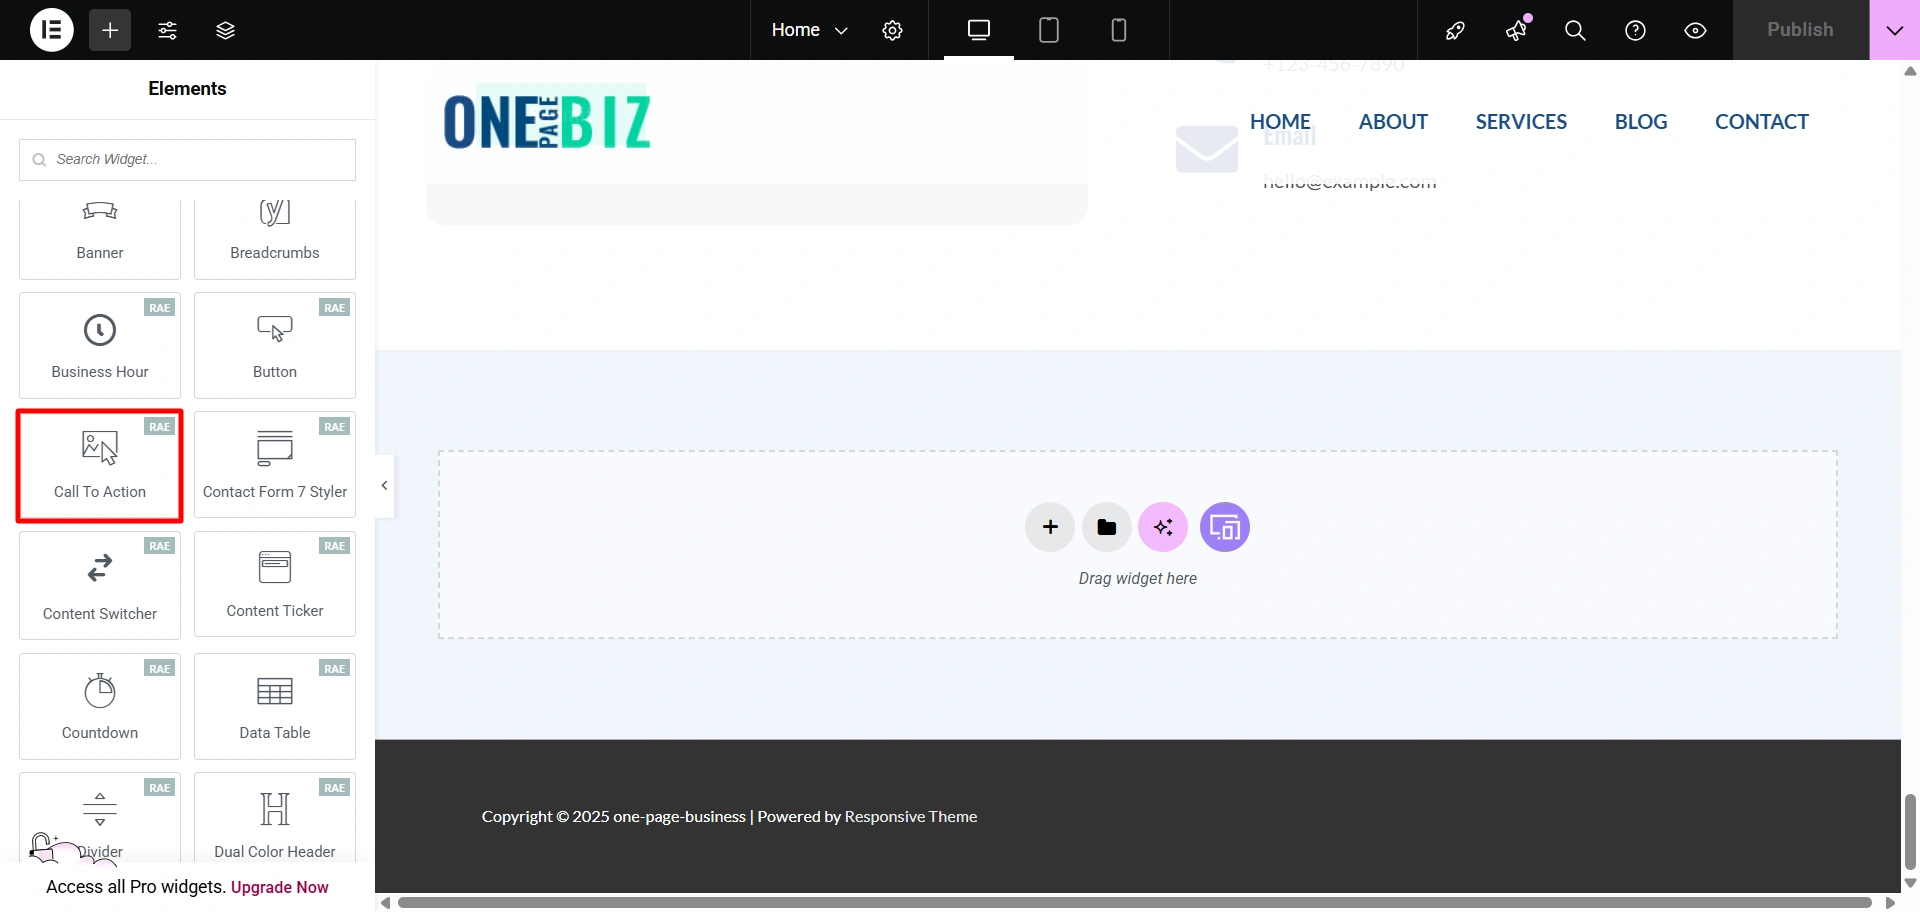
4. Drag and drop the widget, and select the image that you want to display in yoy button.
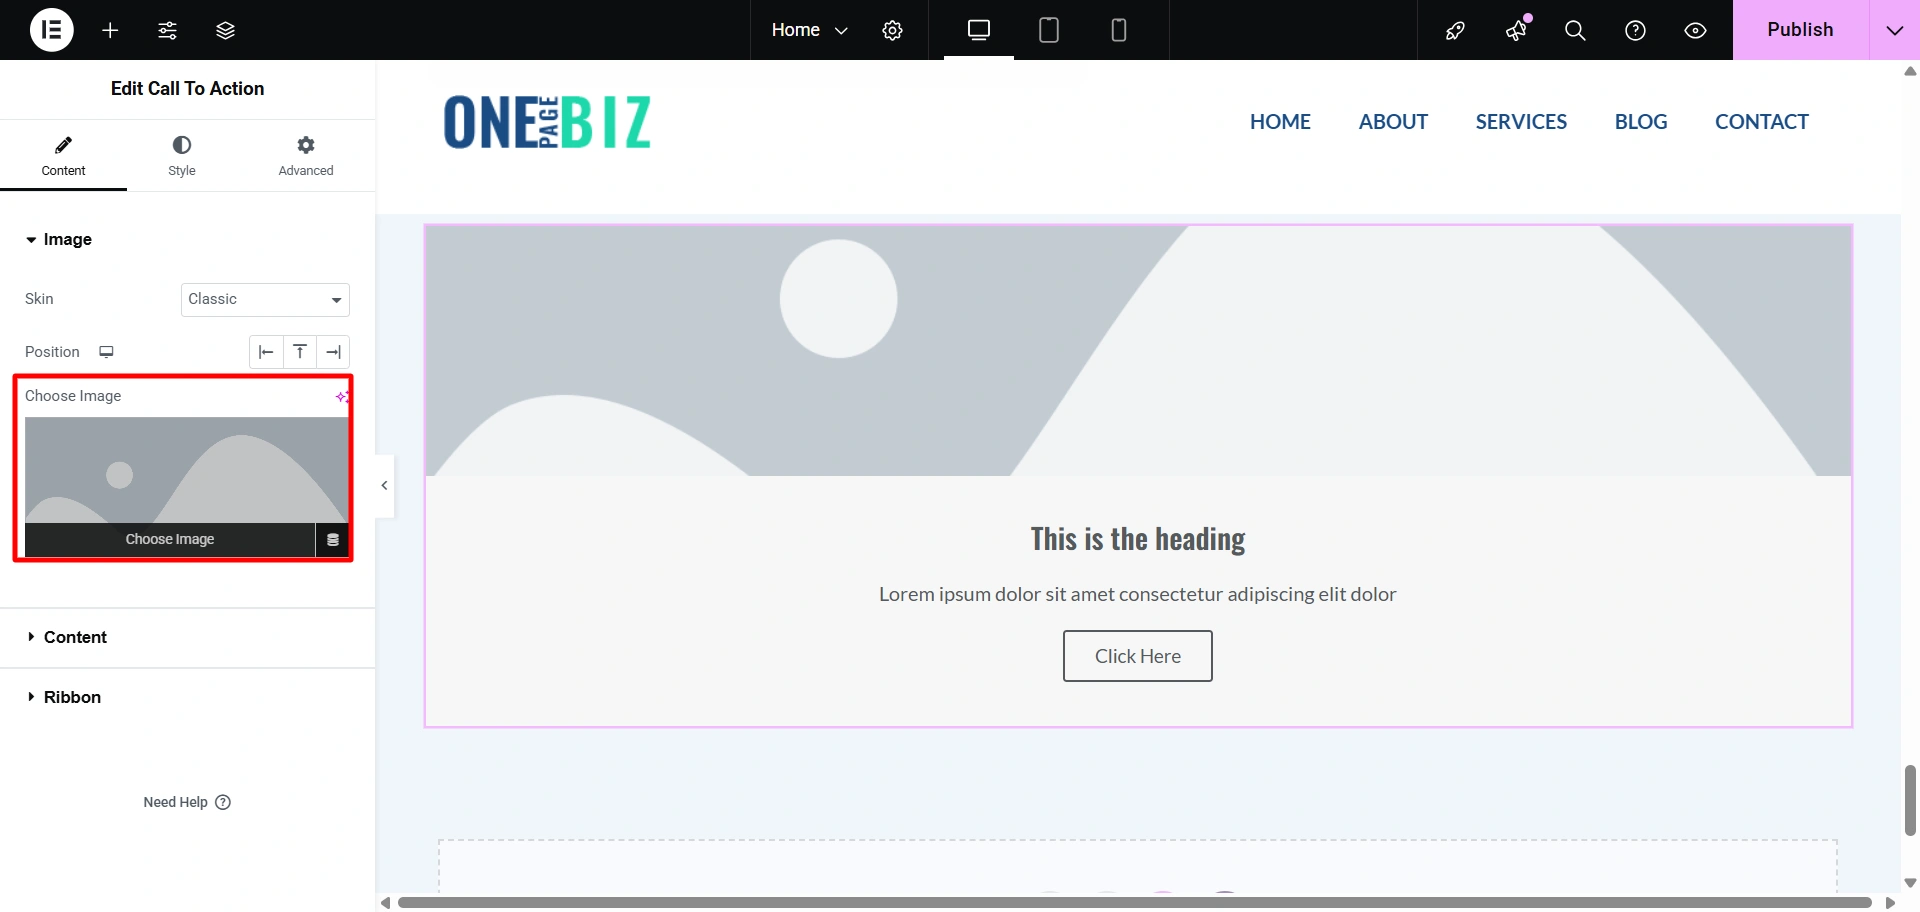
5. You can edit the content for your button.
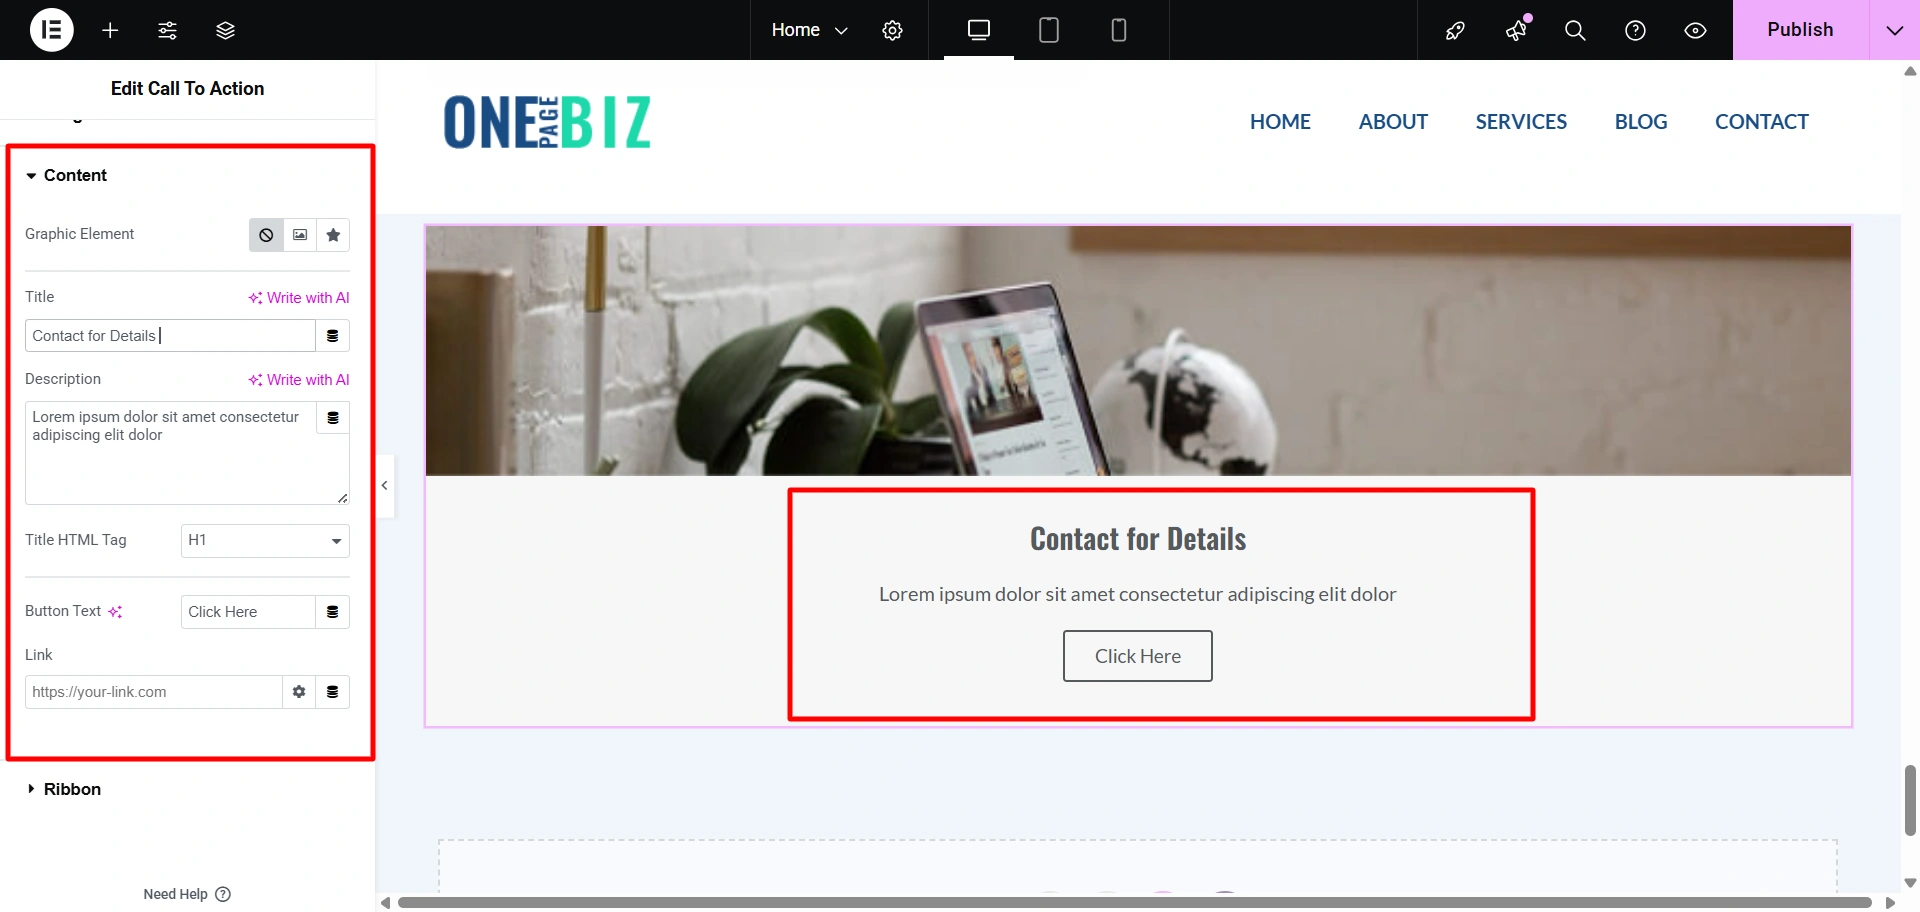
6. And lastly, you can add ribbons to your call-to-action button.
If you want to use such amazing widgets, you can read this blog on how to add a pricing table, how to create a data table, or how to add an icon box.
FAQ
From your WordPress Dashboard, go to Appearance > Themes > Add theme. Then, search for “Responsive theme”, install it, and activate it.
This plugin extends the functionality of the Responsive theme by providing 250+ ready-to-use WordPress website templates that can be easily customized using the Elementor page builder and Gutenberg Editor.
From your WordPress dashboard, navigate to Appearance > Template and select the “One Page Business” website. On the preview page, click “Import Site”. You’ll be asked to connect your site with Cyberchimps Responsive before starting the import process.
Conclusion
If you’ve come this far, then you would have realized that creating a business website on WordPress is not as difficult as it seems.
WordPress is a powerful yet flexible CMS where you can find tons of free themes that let you build professional-looking websites in a short period of time.
If you like this guide, you can consider reading
- How to Create a Christmas Website Using WordPress – Easy Method
- How to Start an Online Thrift Store
- How to Create a WordPress Multilingual Site with Elementor
Grab the Responsive theme today!


