
Thinking about creating your own accounting website, but not sure where to start?
You’re in the right place! Whether you’re someone who is fresh out of college or someone who has been involved in an accounts firm for years, I am sure you must have thought about becoming your own boss and starting your own business!
There’s just so much to consider before creating your accounting website. From choosing a business name to building an online presence for your firm, it can feel overwhelming.
In today’s digital-first world, most people head straight to Google to search for the tiniest thing, and if you don’t have a website, you’re straight-up missing out!
That’s where the Responsive Theme by Cyberchimps comes in. The Responsive theme is a top-rated, WordPress theme known for its full mobile compatibility, fast loading, and seamless integration with many popular plugins.
In this guide, we have mentioned everything you need to start your accounting website, step-by-step. You do not need have any coding or design skills to create stunning visuals.
So roll up your sleeves and follow our guide to create your accounting website to start bringing in those clients!
How to Build an Accounting Website
Learn how to build a professional looking accounting website from scratch by following the steps given below without having to code.
1. Choosing Your Domain Name and Web Hosting Plan
If you are a beginner, you might have heard that you need a domain name in order to start a website. However many confuse domain name with a hosting service.
A domain name is the address of your website on the internet. It is the name that users type to get to your website. For example, cyberchimps.com or wpeka.com.
Web hosting is basically where your website’s files are stored. The hosting service allows the websites to be accessible via the World Wide Web.
A domain name can cost from $0.99 up to $12 per month while a web hosting costs about $8 a month on an average. That sounds like a lot of money! Doesn’t it?
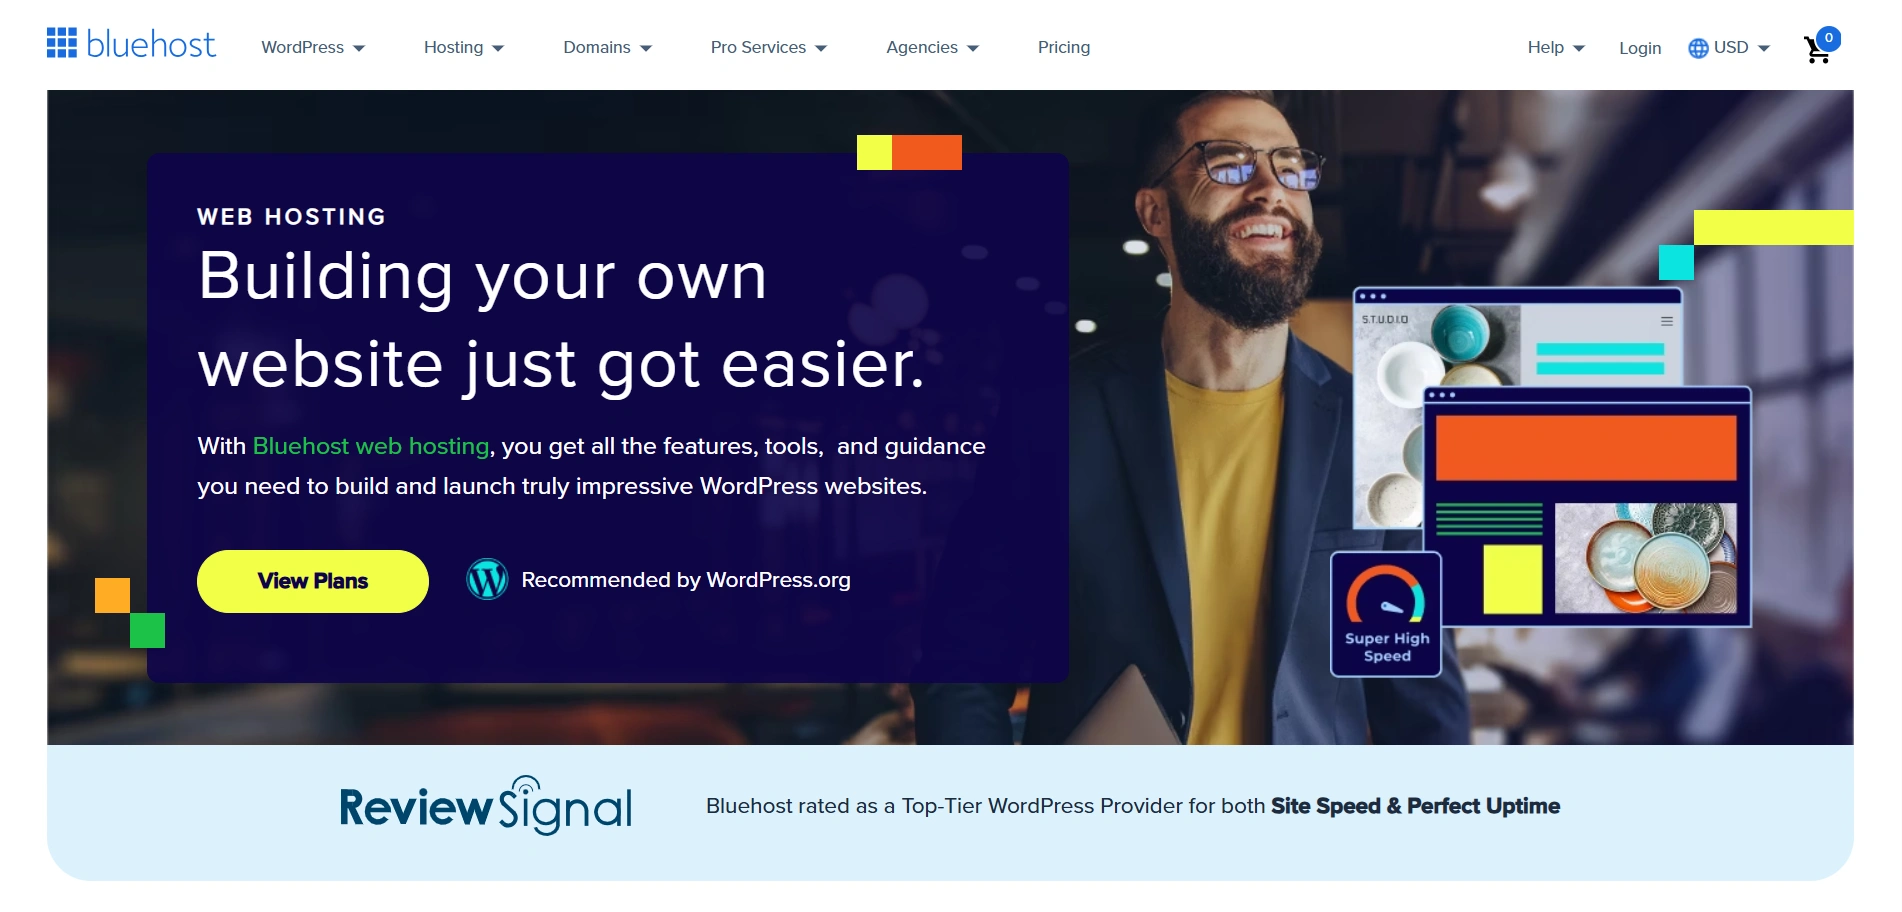
Thankfully, Bluehost which is one of the best hosting providers are providing a free domain name with about 65% off on its web hosting plan
2. Installing WordPress
Let’s see how to easily install WordPress with Bluehost. It offers a 1-click installation of WordPress and other CMS such as Joomla and Drupal.
As you enter the Bluehost website, you will be provided with a “Get Started” button in the homepage.
Click on the “Get Started” button.
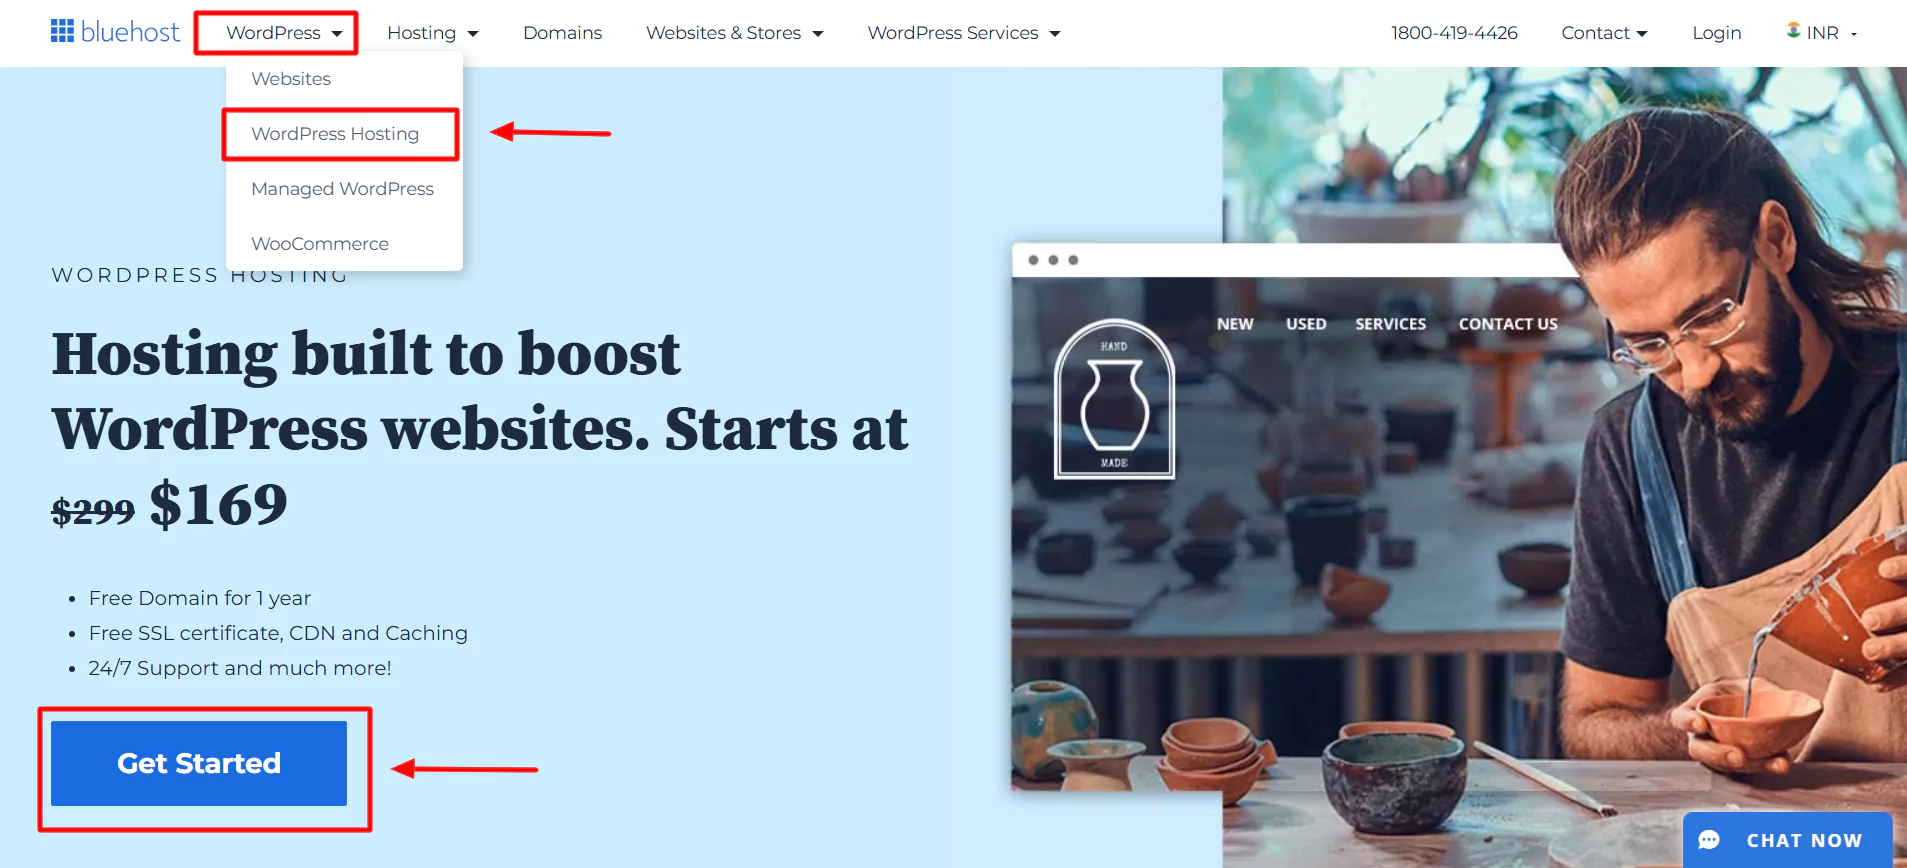
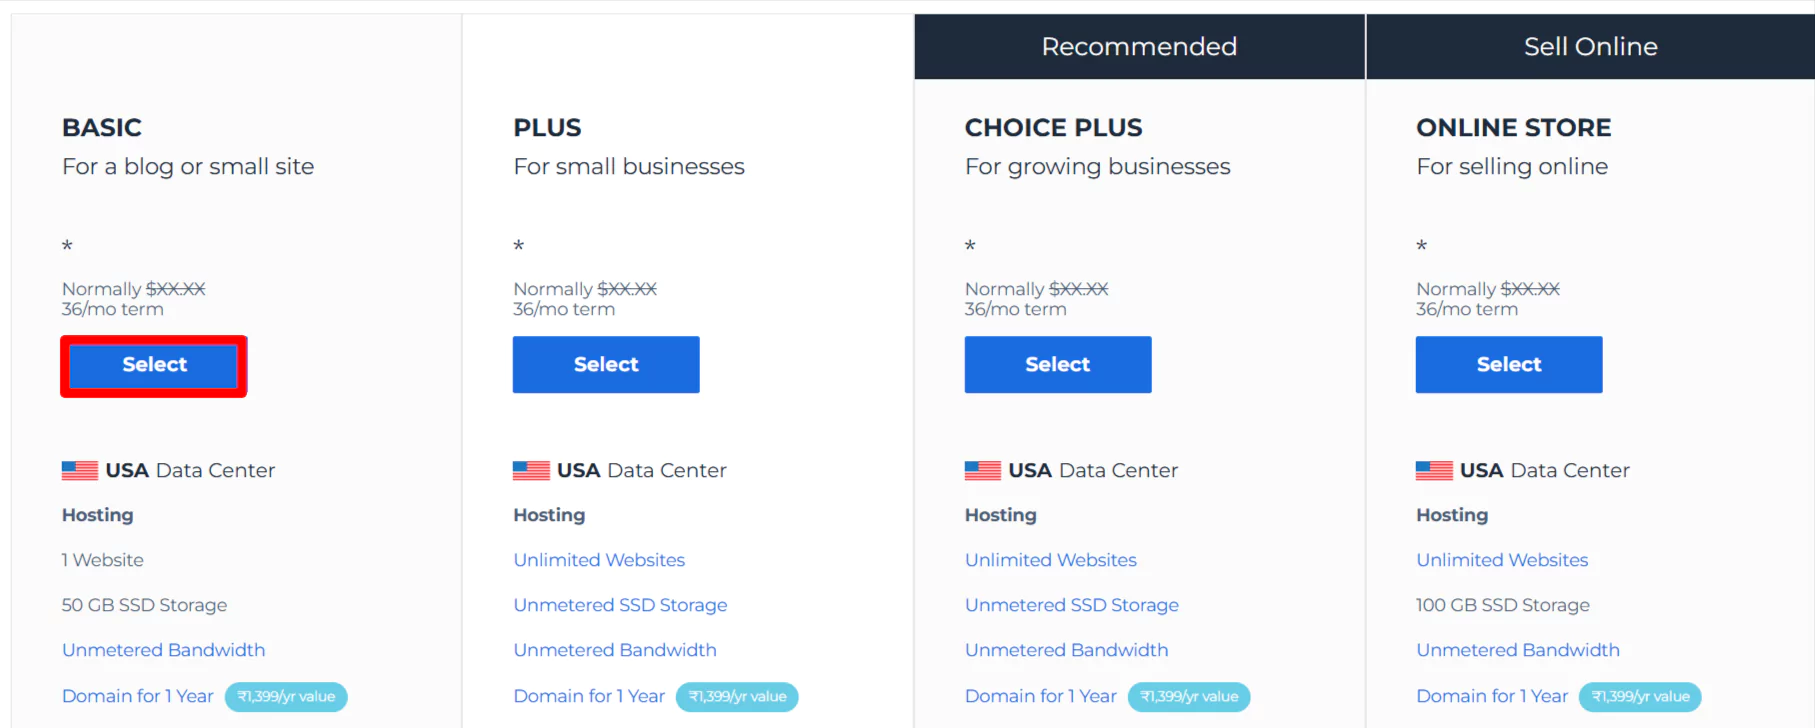
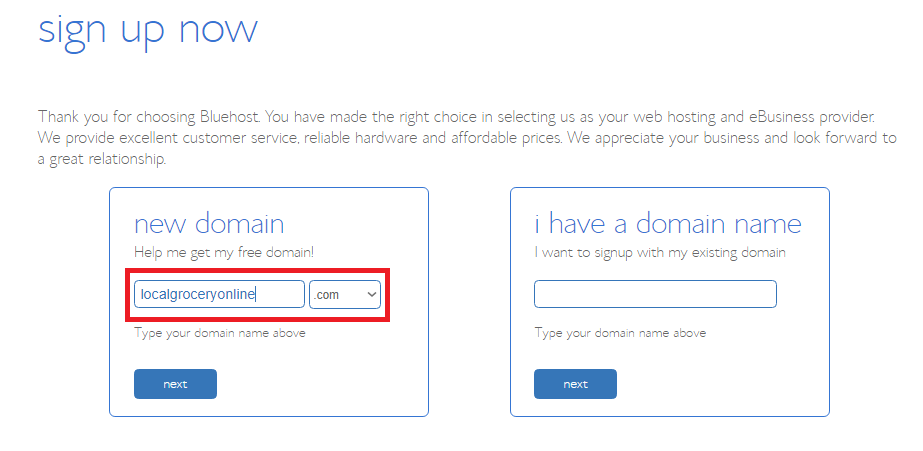
Upon clicking, you will be taken to their signup page, where you will be asked to choose a pricing plan.
If you are running a small-scale or mid-scale business, it’s wise to choose the Plus plan.
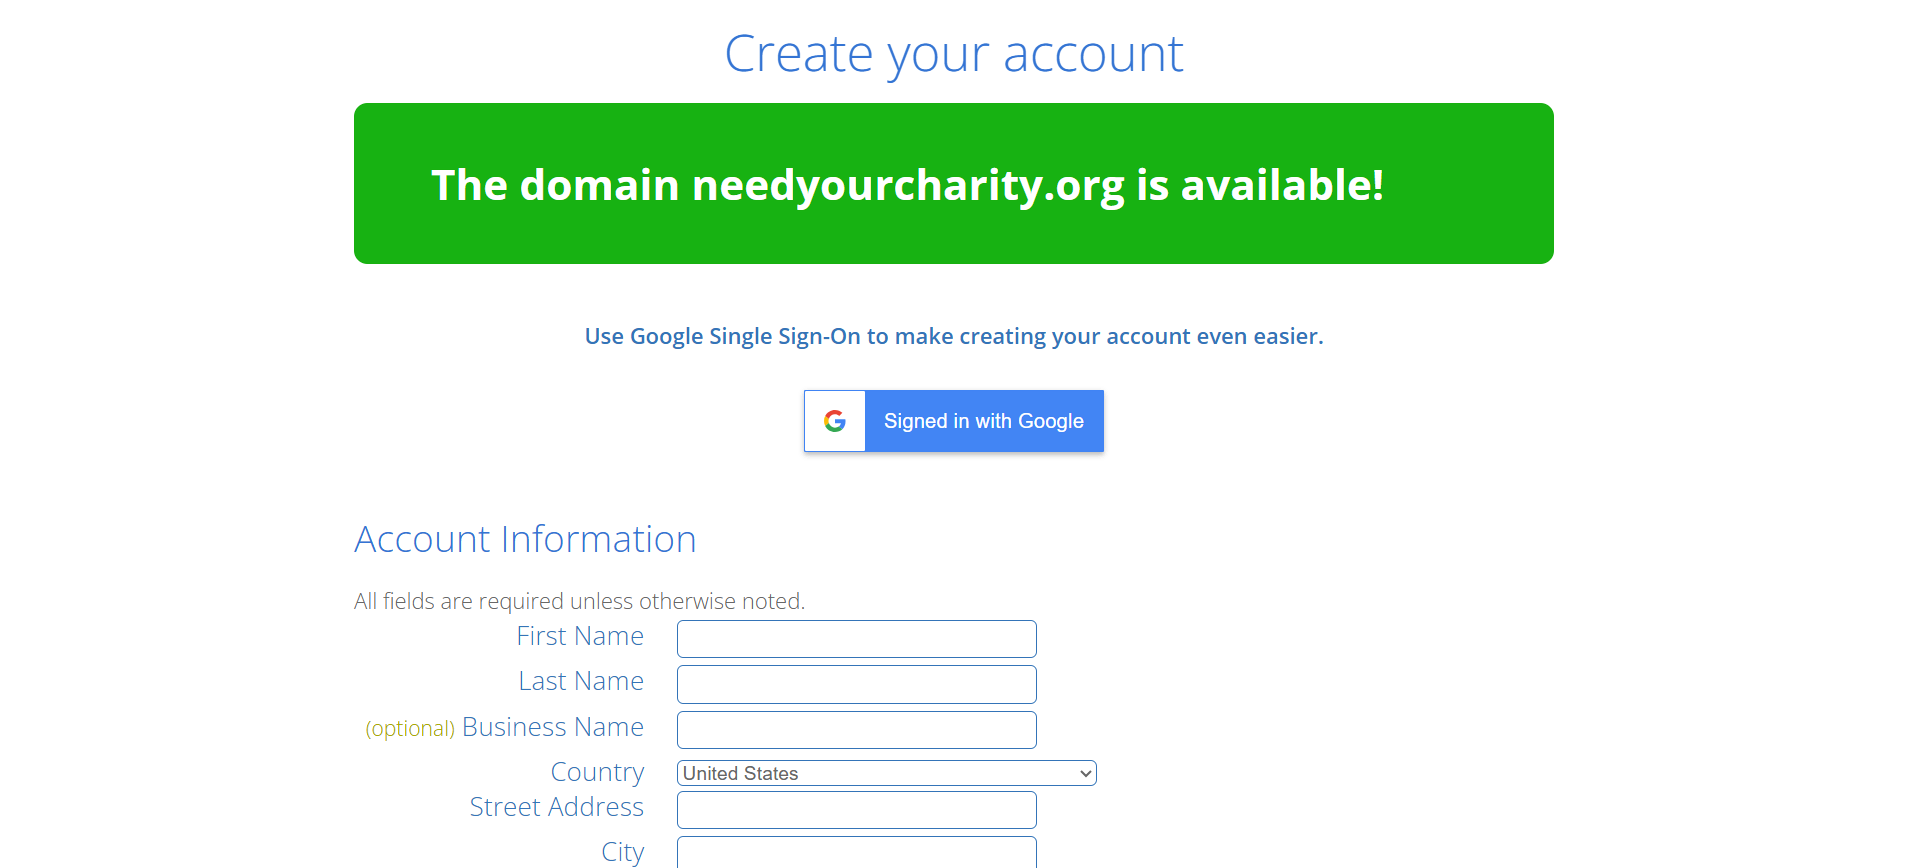
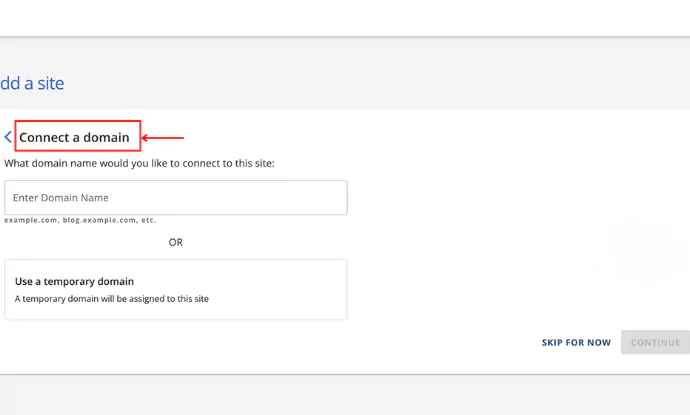
After selecting the plan, you have to enter the domain name of your website.
Fill in all the required fields and submit your payment.
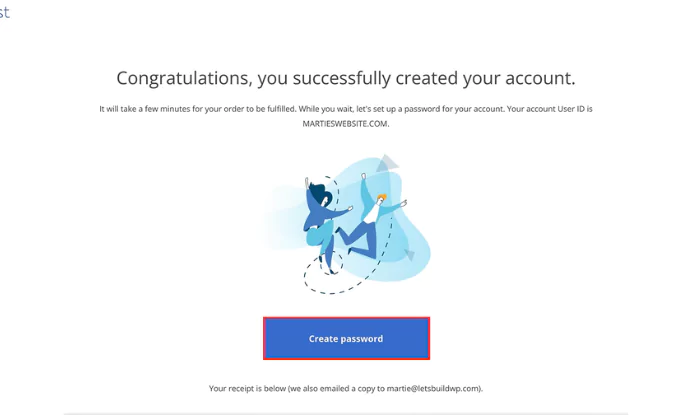
After completing the payment, you can create an account with Bluehost.
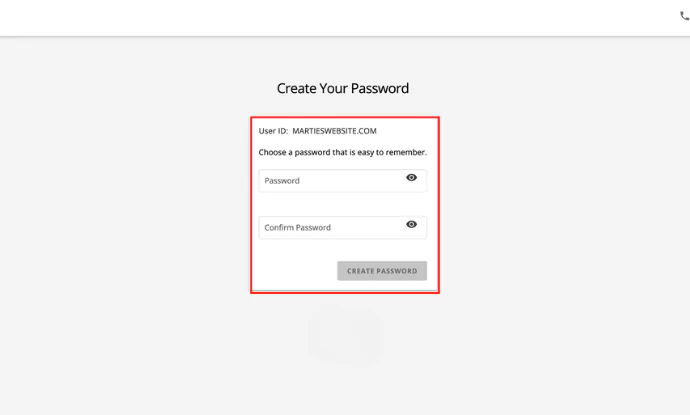
Click on Create password.
Enter your password, and you’re all done setting up Bluehost. Next, let’s look at how to download WordPress.
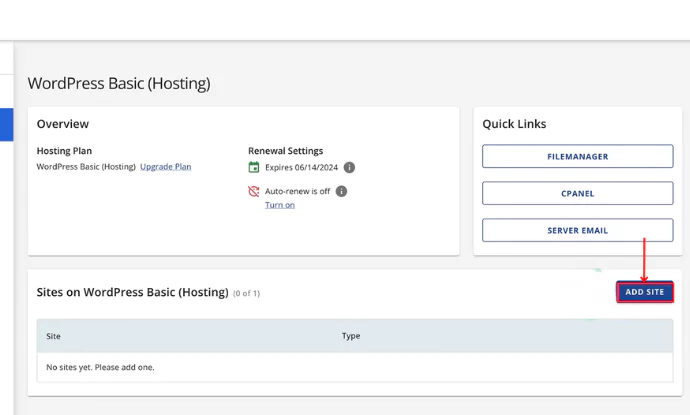
Once done with web hosting and the domain name, the next step is to install WordPress.
Select WordPress Hosting.
Click on Add Site.
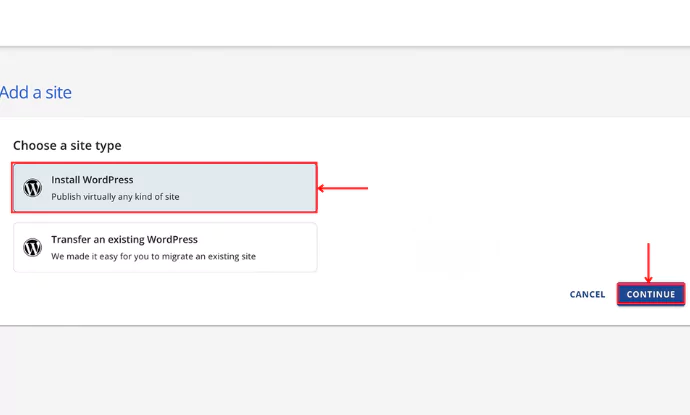
Click on Install WordPress > Continue.
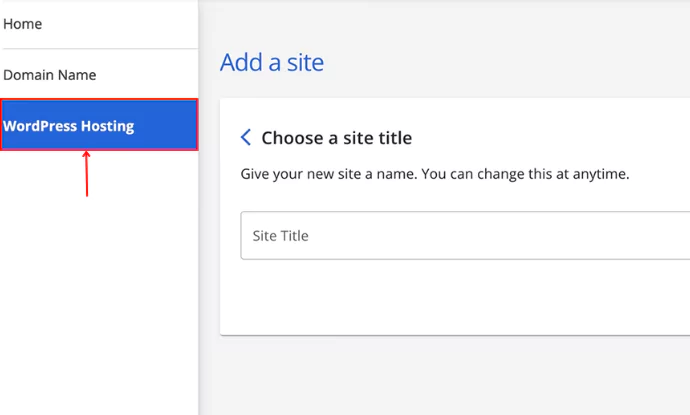
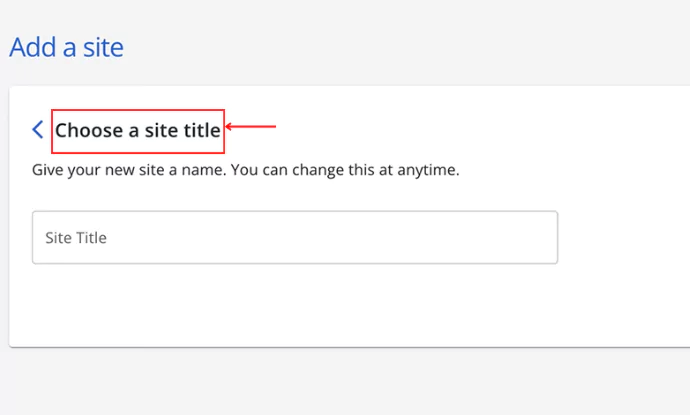
Give a name to your site by clicking on “Choose a site title“
Enter the domain name that you wish to be addressed as and click Continue.
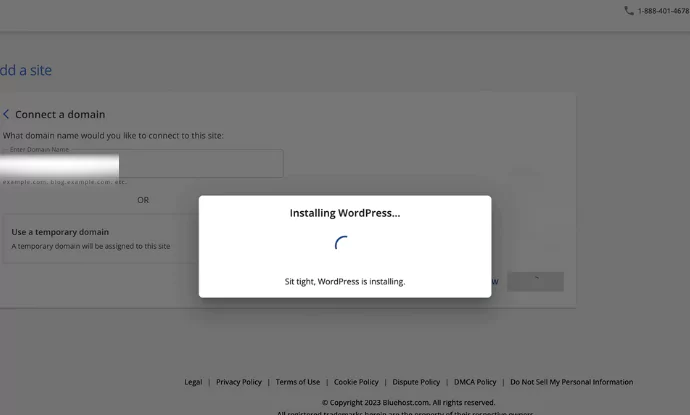
Once you click “Continue,” WordPress is installed.
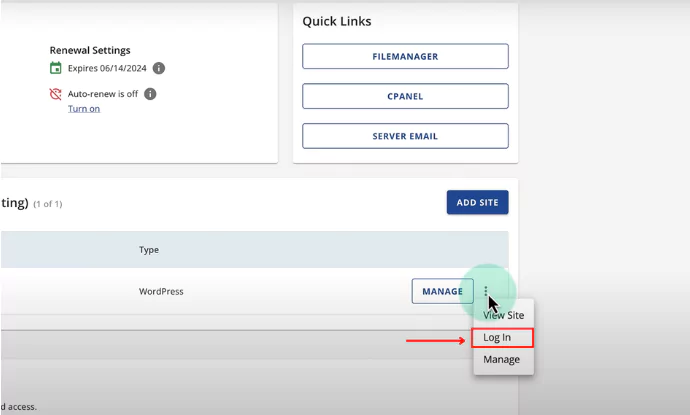
Click on the menu and click on Log in.
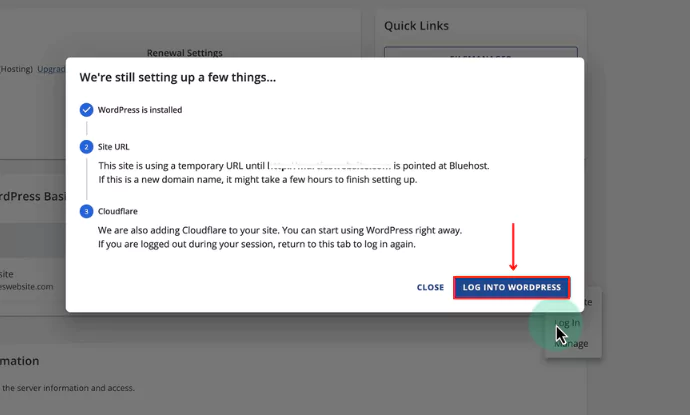
Now, Click on “Log into WordPress.”
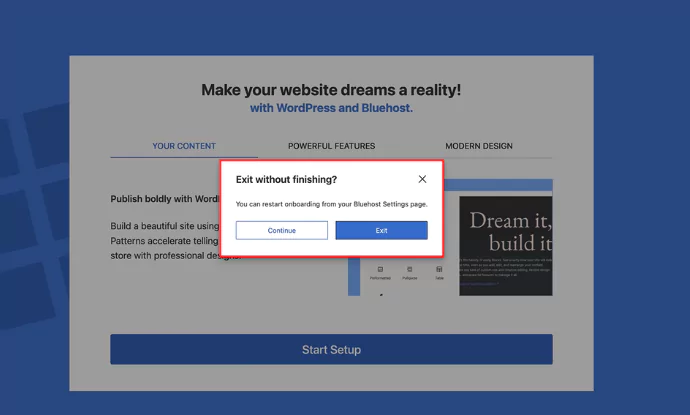
Click on Exit to WordPress.
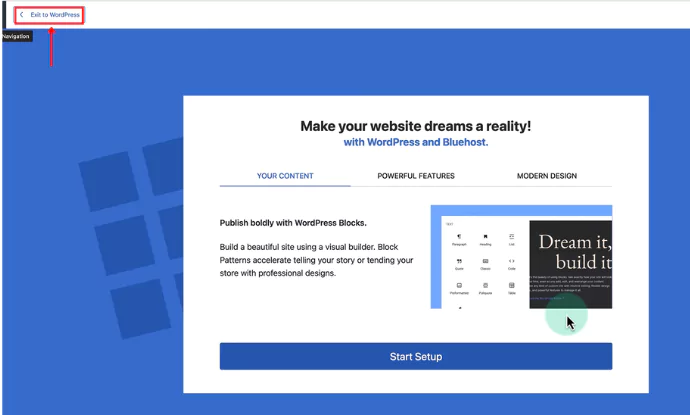
Exit, and you will be redirected to the WordPress dashboard.
3. Installing and Activating the Responsive Theme
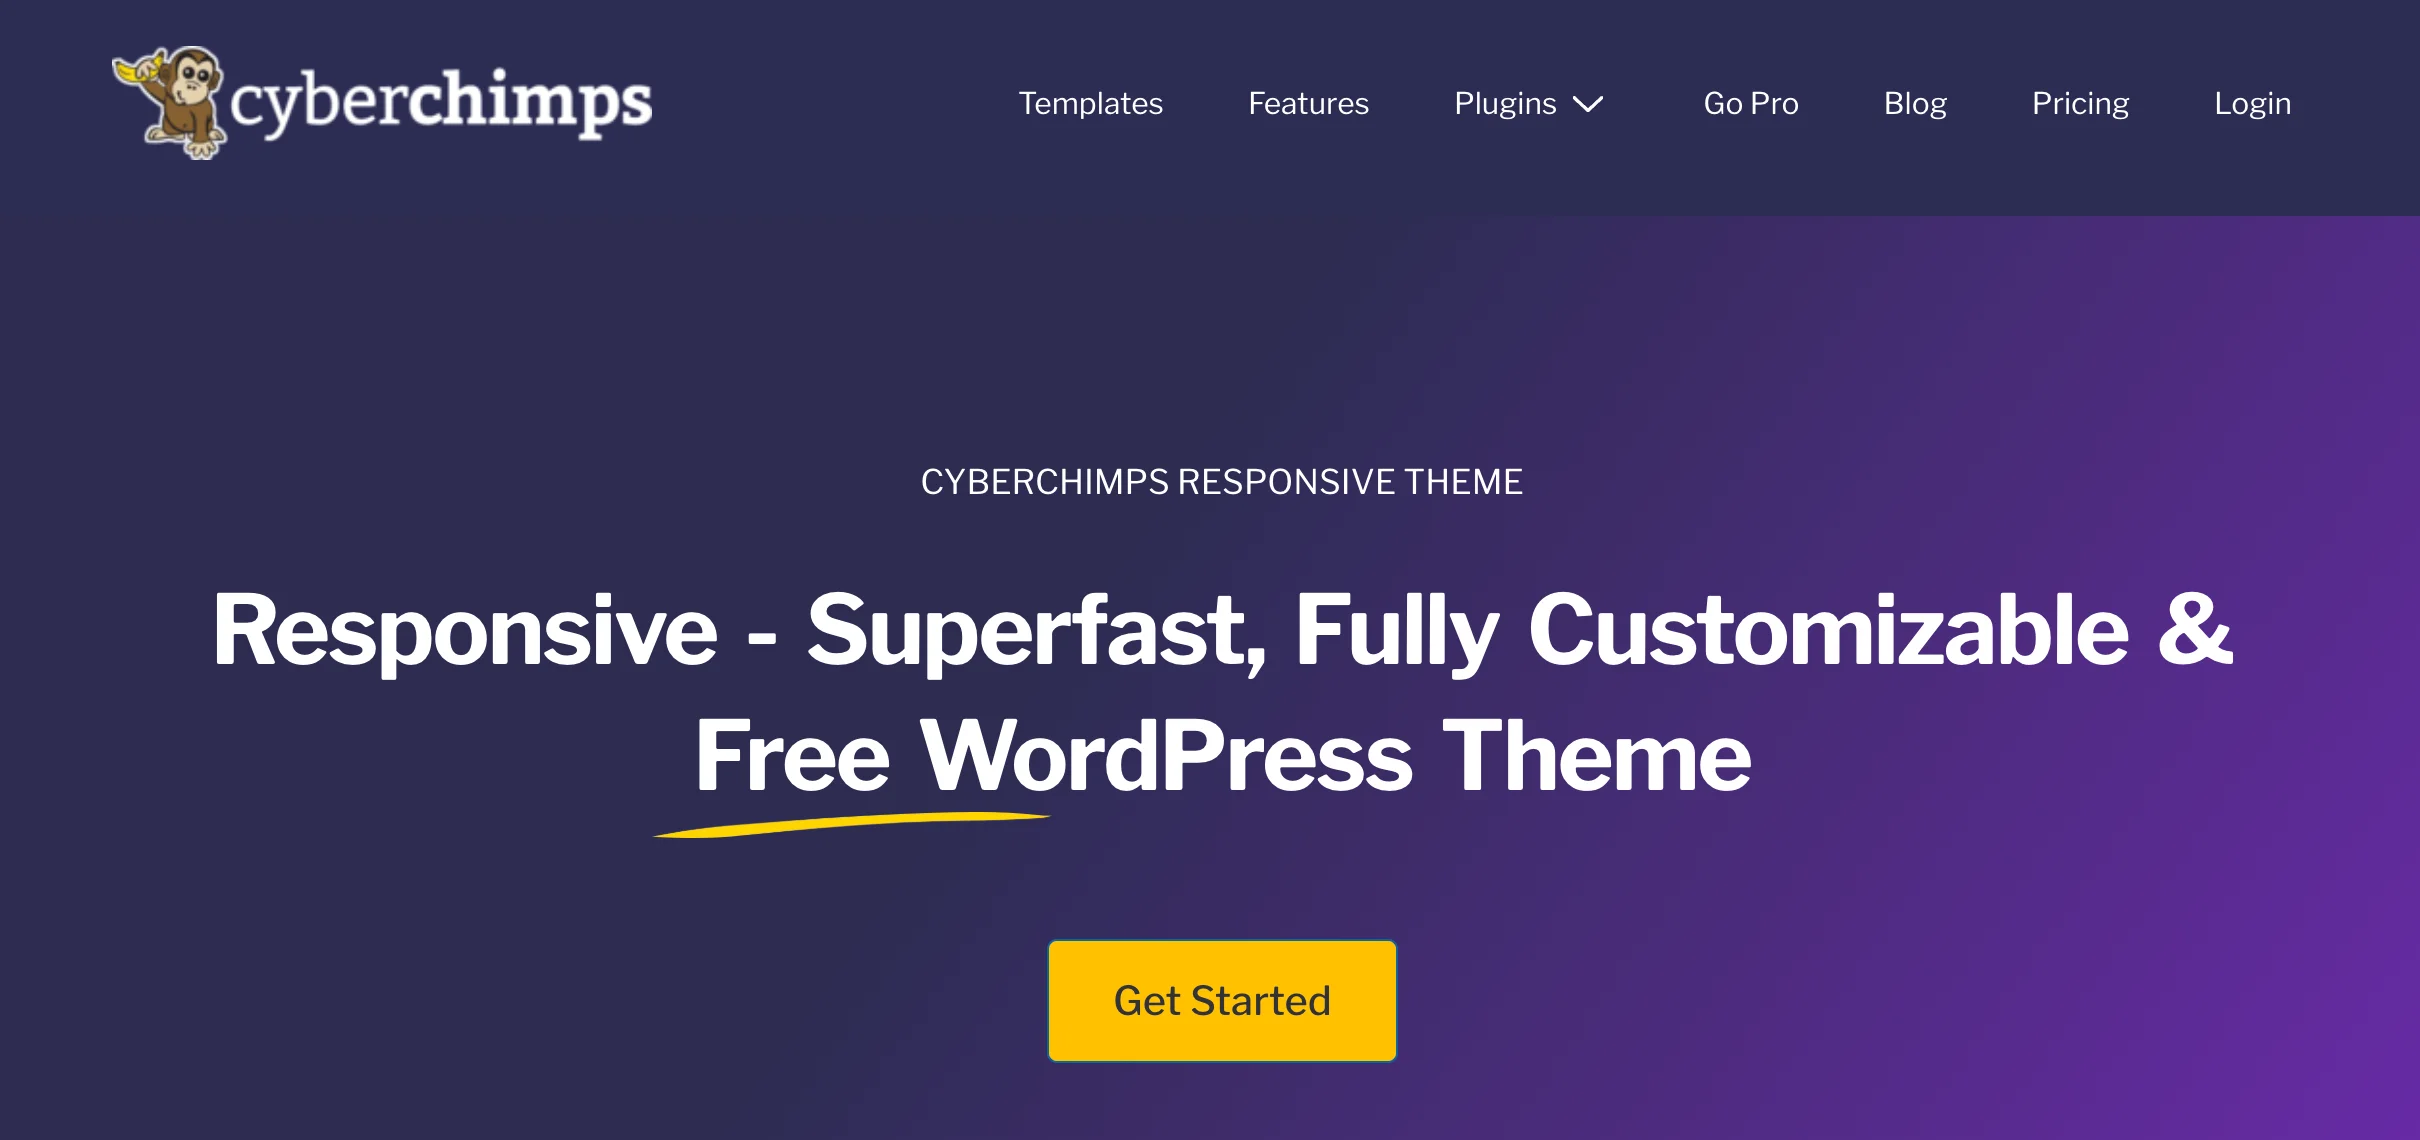
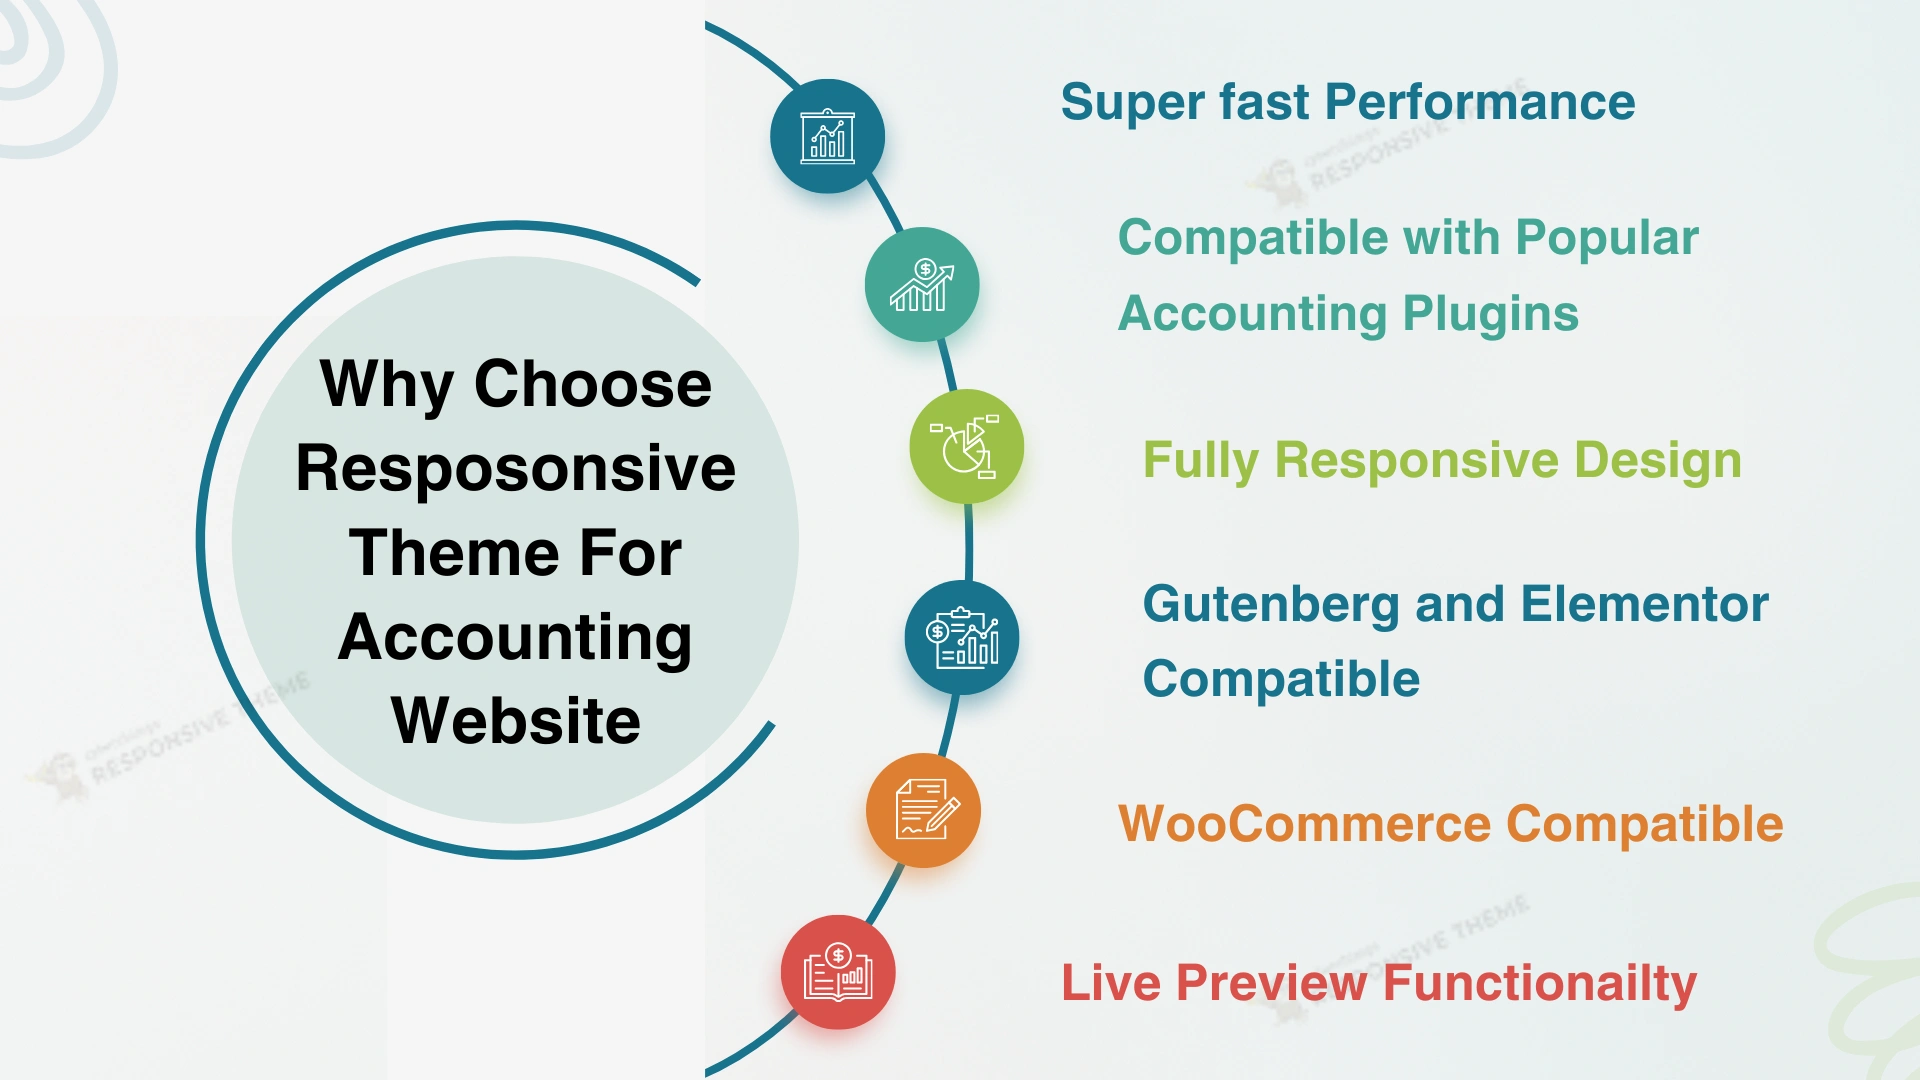
The Responsive theme is a free WordPress theme designed for full mobile compatibility, and is one of the top WordPress themes anyone could lay their sight on.
The theme currently holds a rating of 4.7 in the WordPress directory. The Responsive Theme is known for achieving a 100% GTmetrix score for tested websites, making your websites load super fast and ensuring website visitors get a superior experience.
Additionally, the theme works seamlessly with its companion plugin, Responsive Plus—Starter Templates, which features over 250+ ready-to-use website templates for quickly creating Elementor and Gutenberg based websites with a single import.
Here are a few Responsive Theme highlights:
- It is compatible with all the popular plugins, including Contact Form 7, Mailchimp, Yoast, WooCommerce, WP Legal Pages Pro, and more.
- Has built-in multilingual support that lets you translate the content in multiple languages. Currently, the theme can be translated into 45 other languages.
- Includes a comprehensive customization options, such as a visual composer with unique color and font presets, a header and footer builder, and user-friendly navigation settings.
- Offers a live first-user interface for a clear preview of the modifications you apply.
Below are the steps to install the Responsive theme from WordPress:
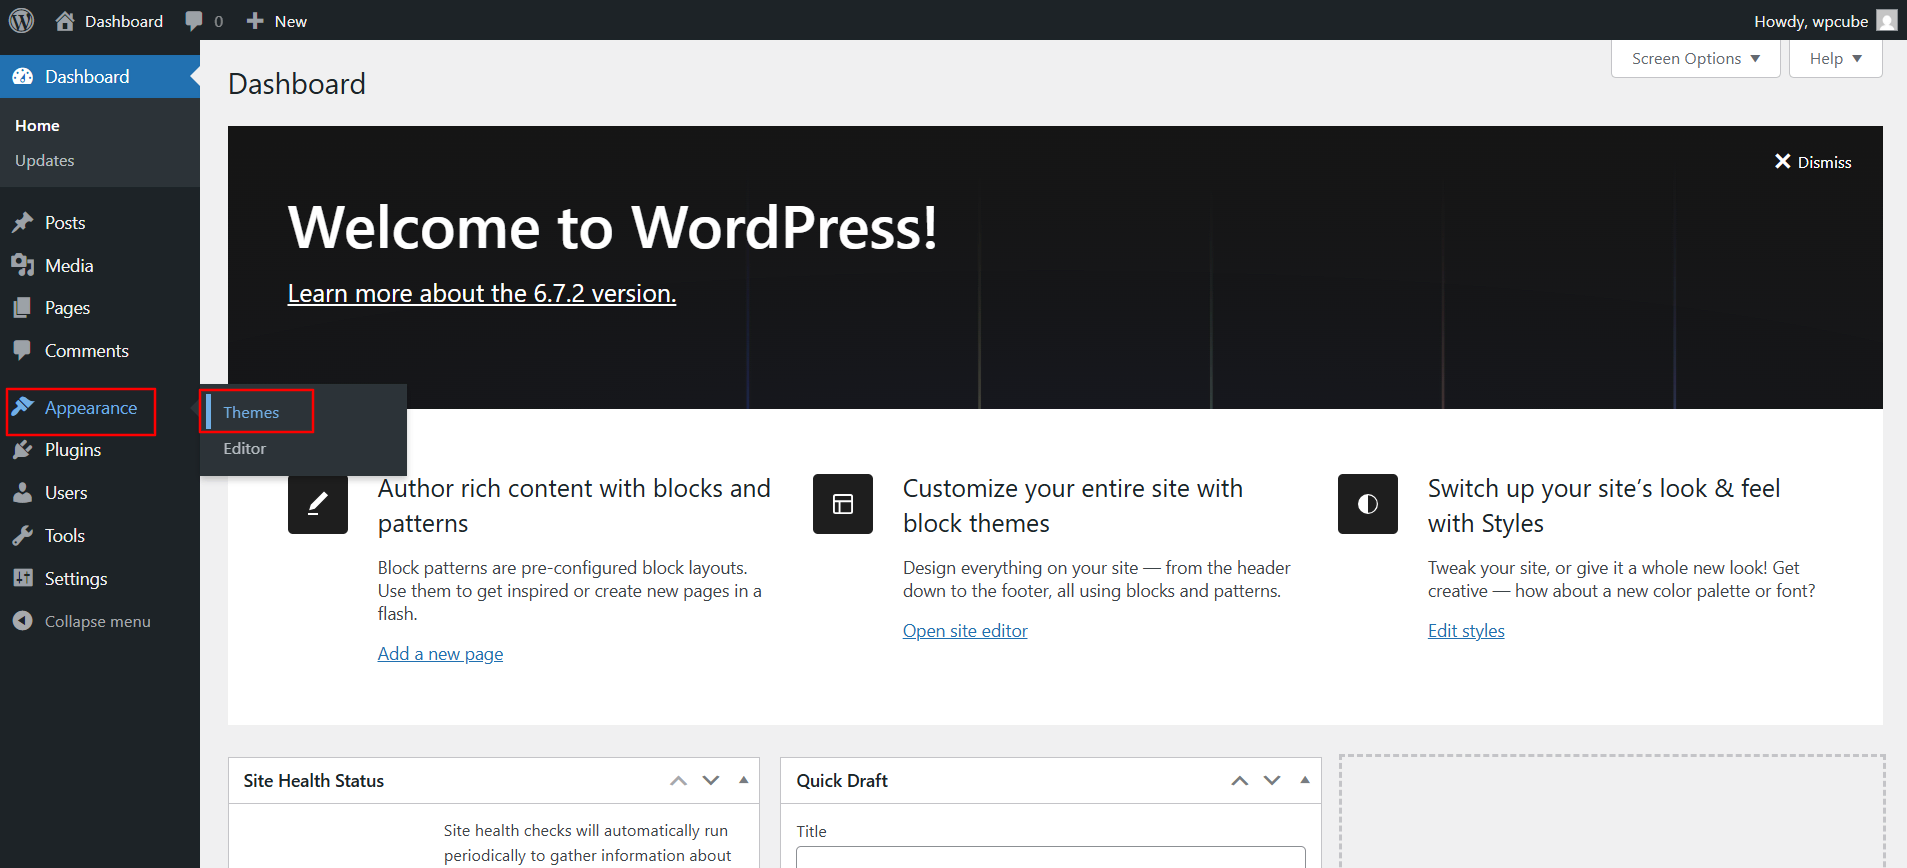
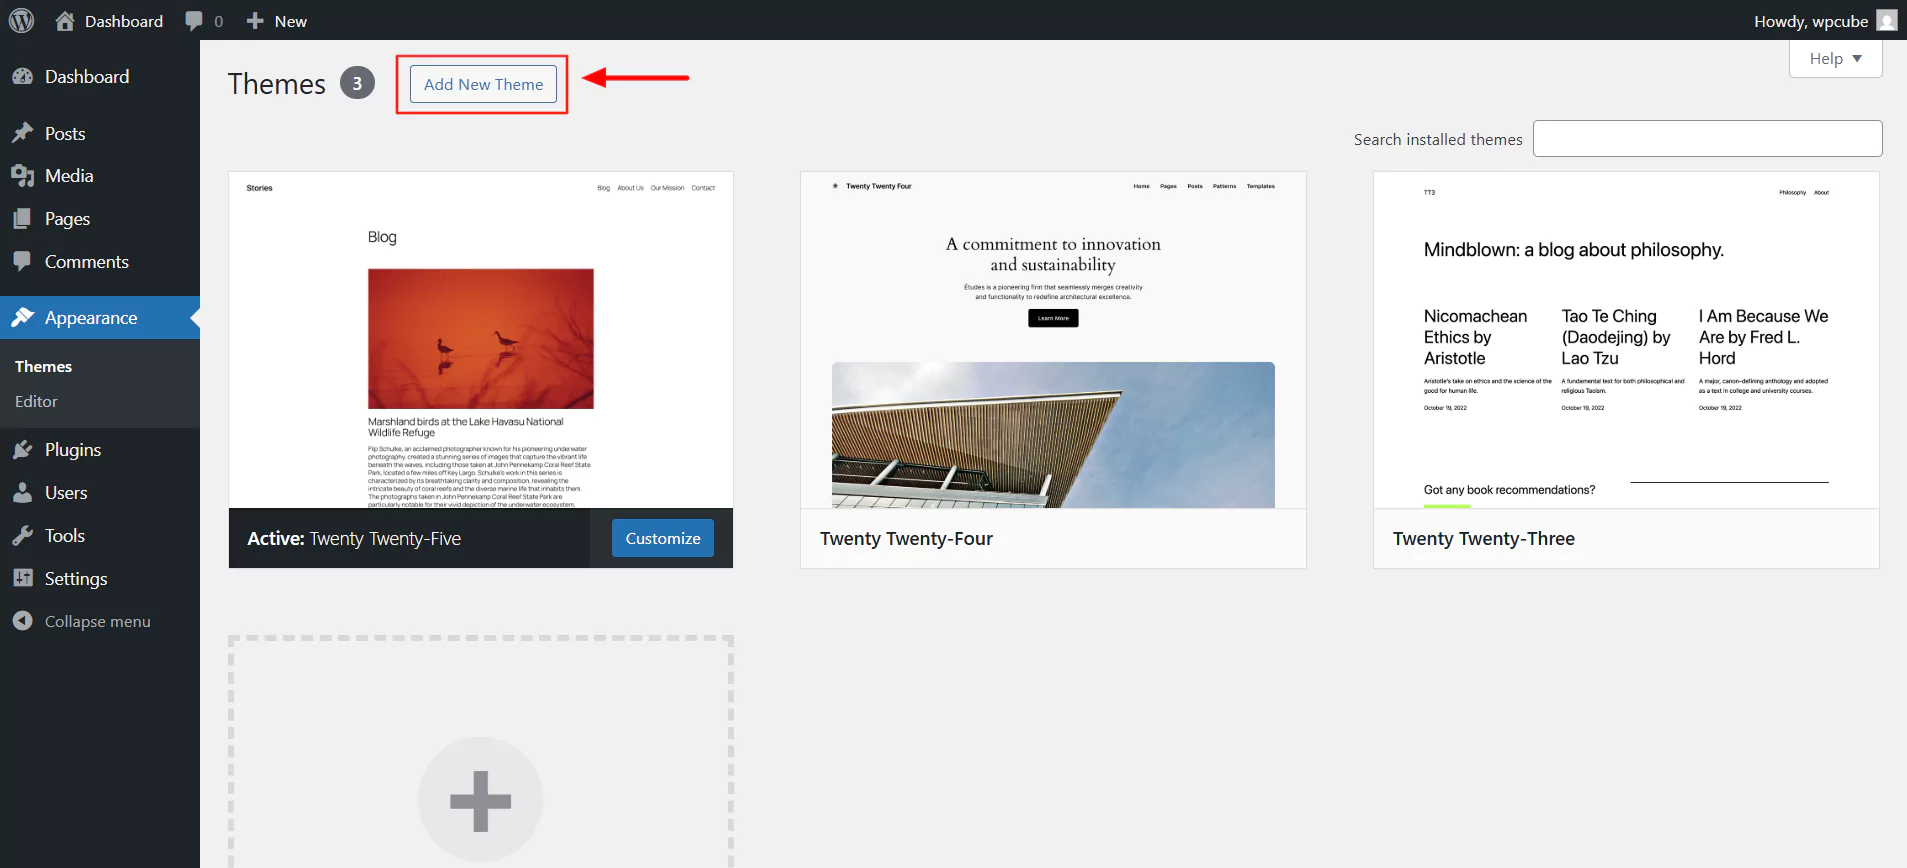
From your admin dashboard, navigate to Appearance > Themes.
Click the Add New Theme button at the top.
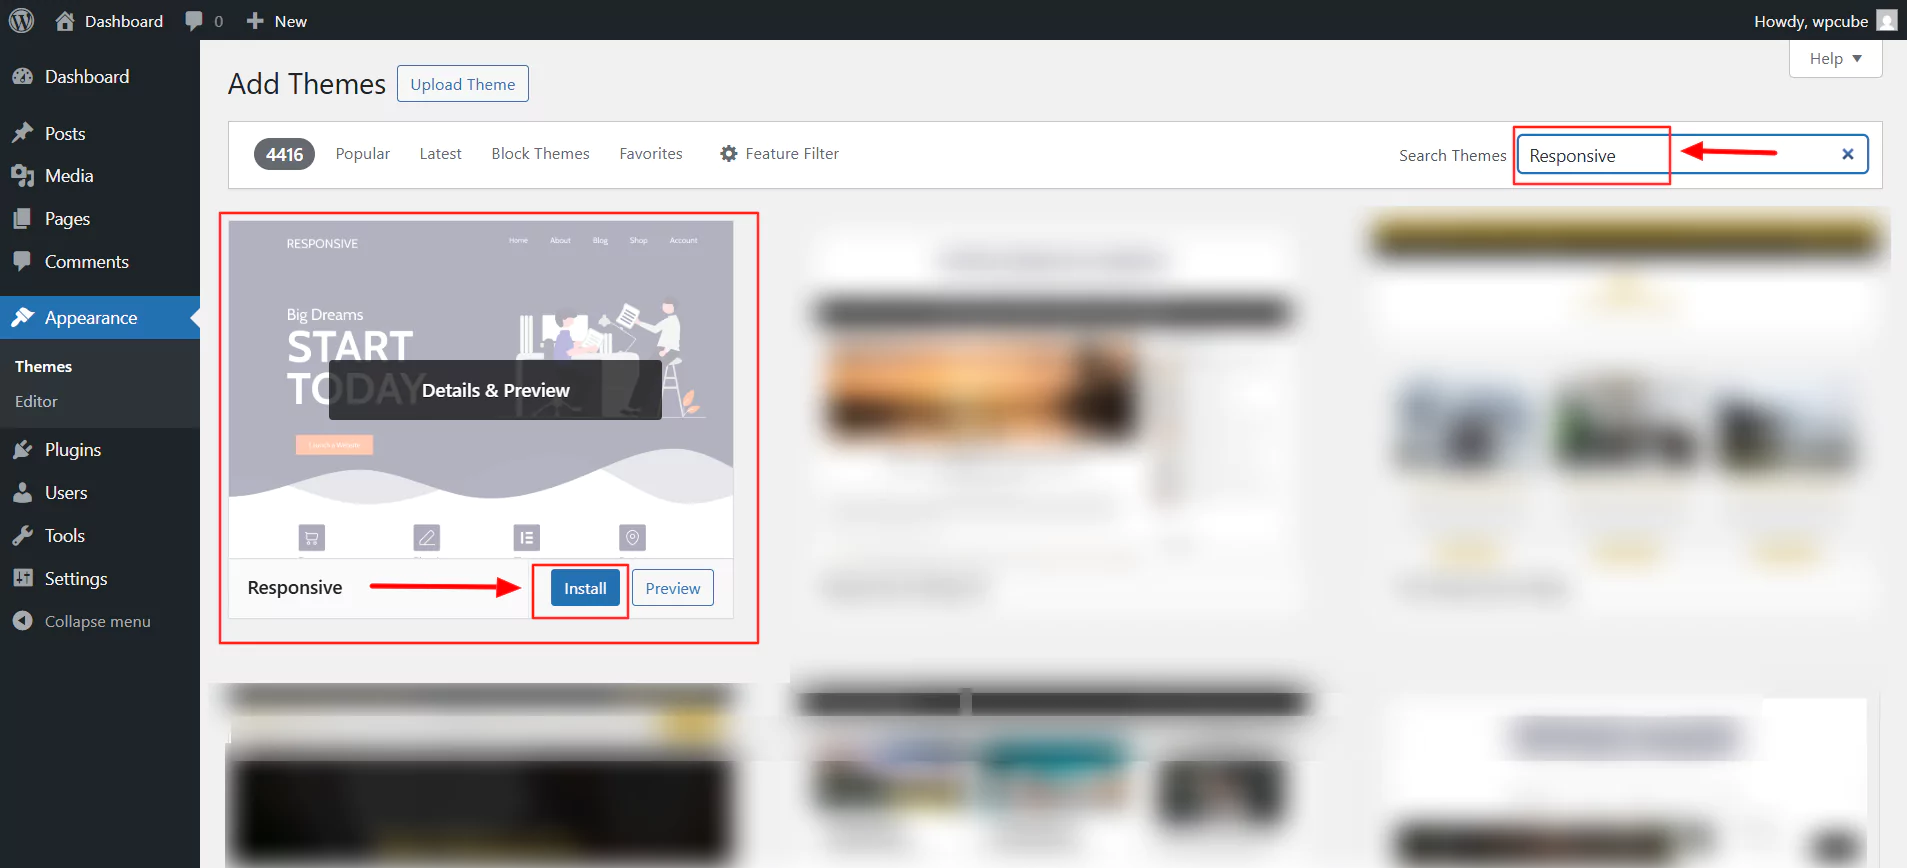
In the search bar, type Responsive and click on Install.
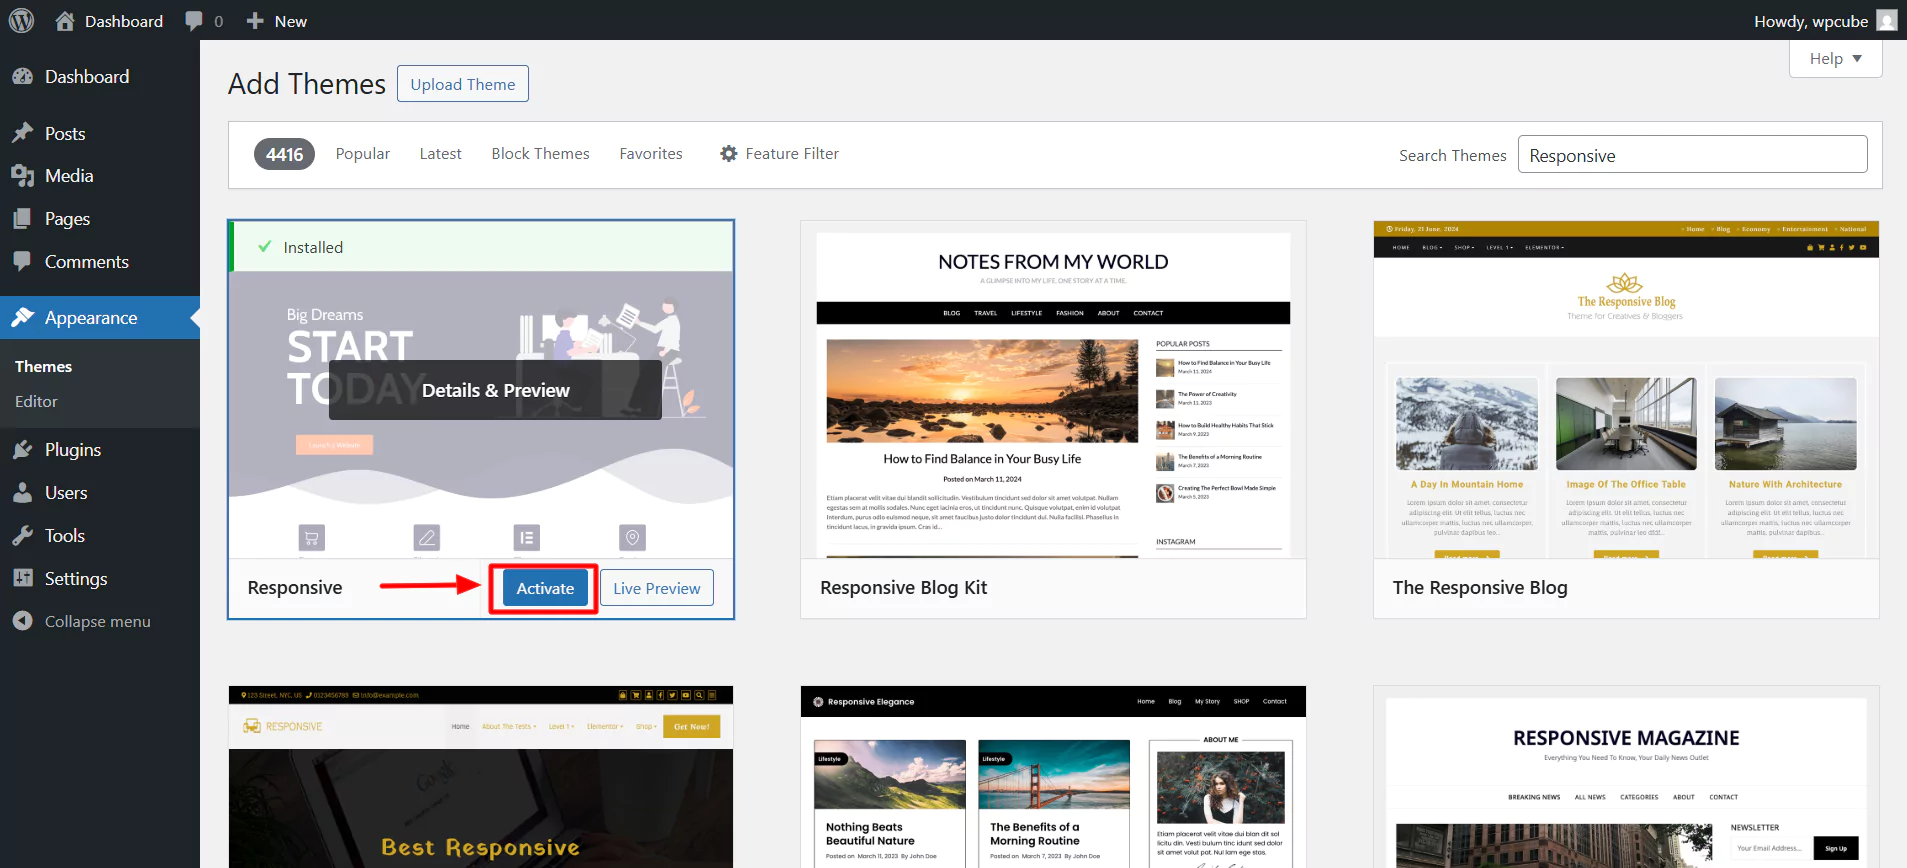
Next, click on Activate.
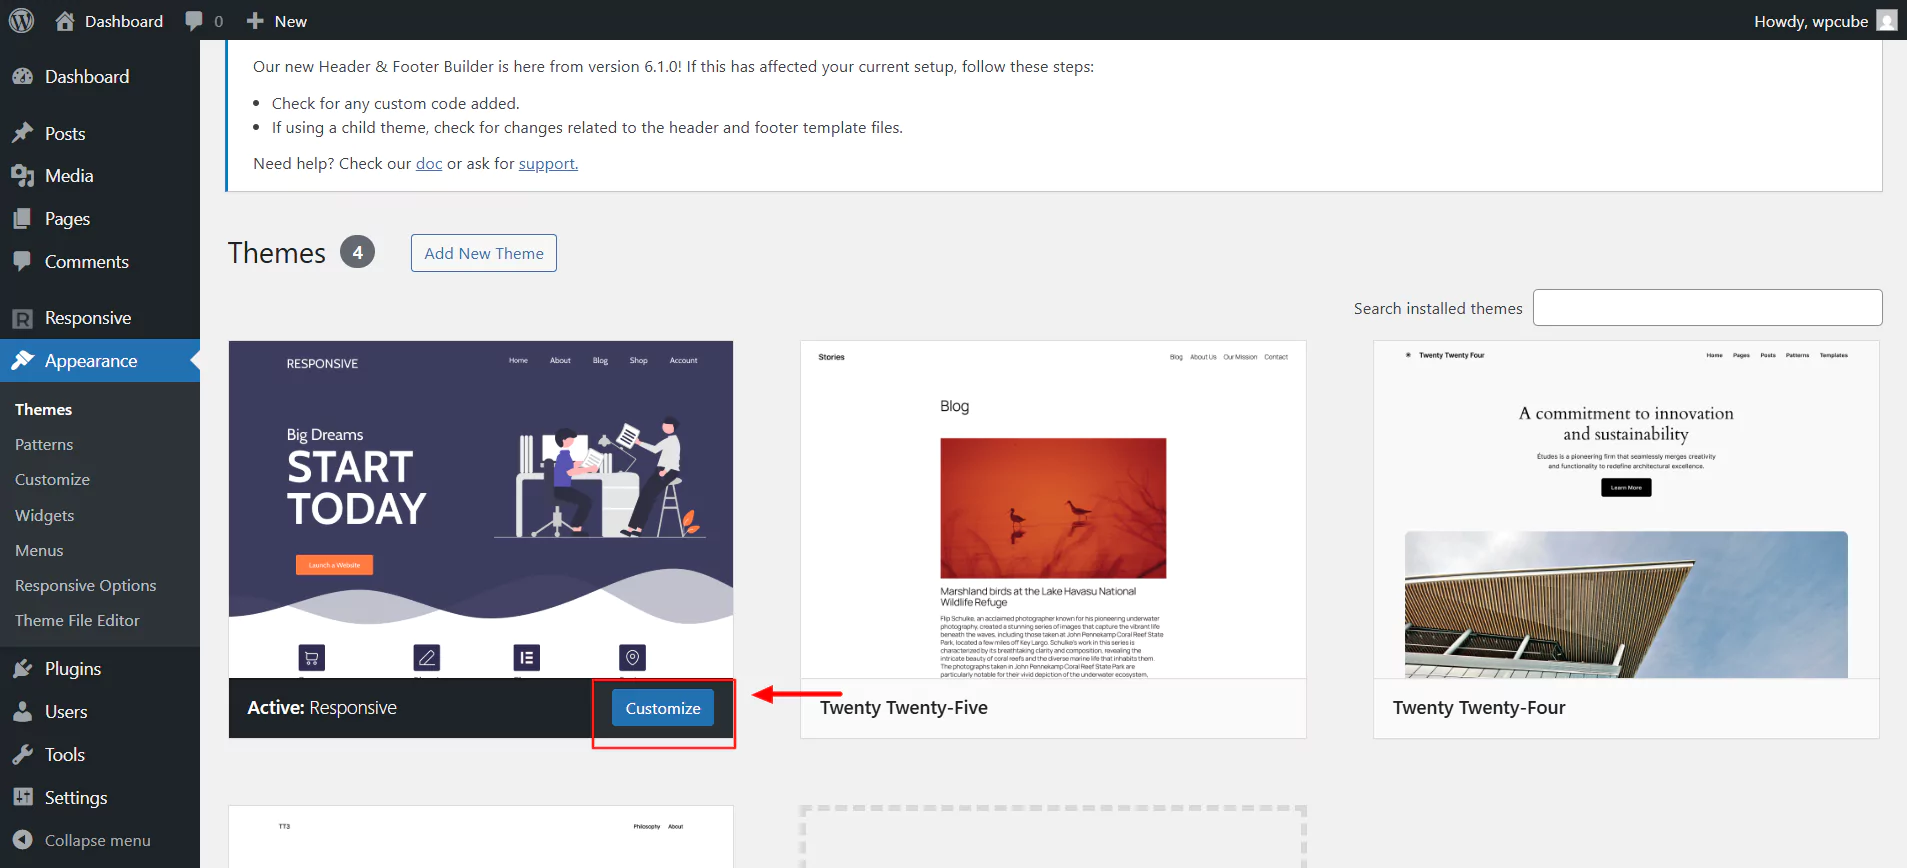
Click on Appearance > Customize.
4. Installing the Responsive Plus – Starter Templates Plugin
To import an accounting website, all we need is a plugin called the Responsive Plus – Starter Templates plugin.
Follow these steps to install the Responsive Plus – Starter Templates plugin.
Select plugins and click on the “Add Plugin” button.
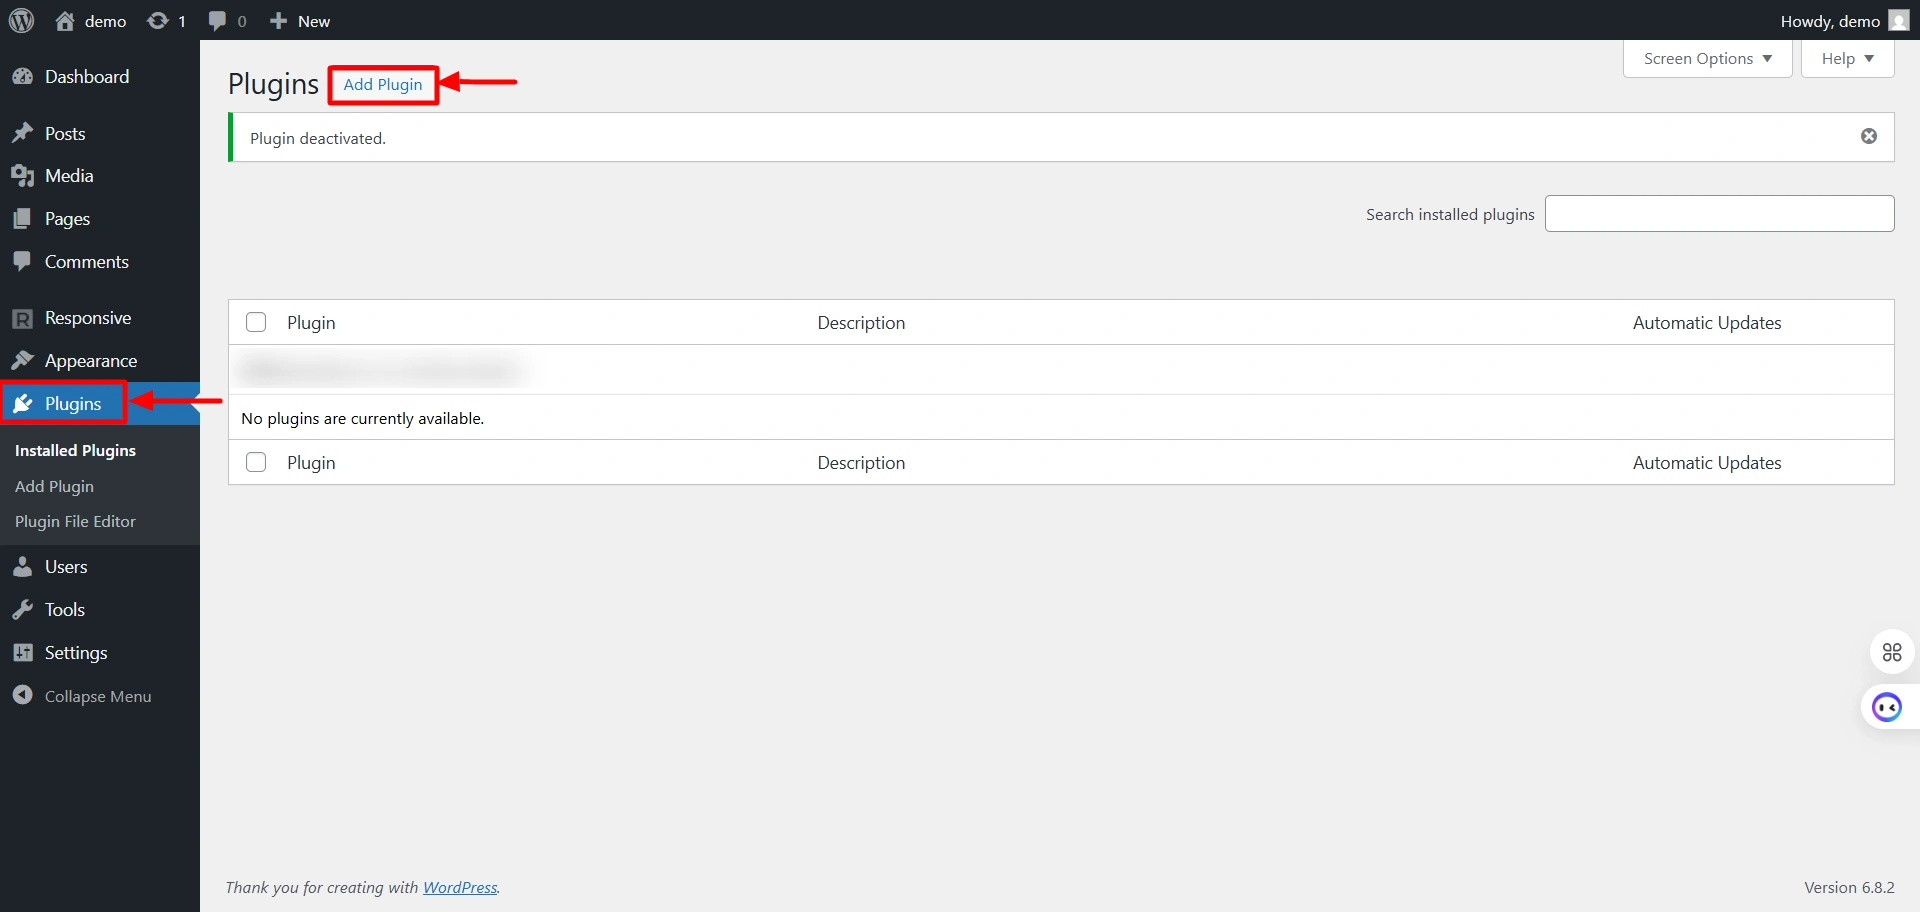
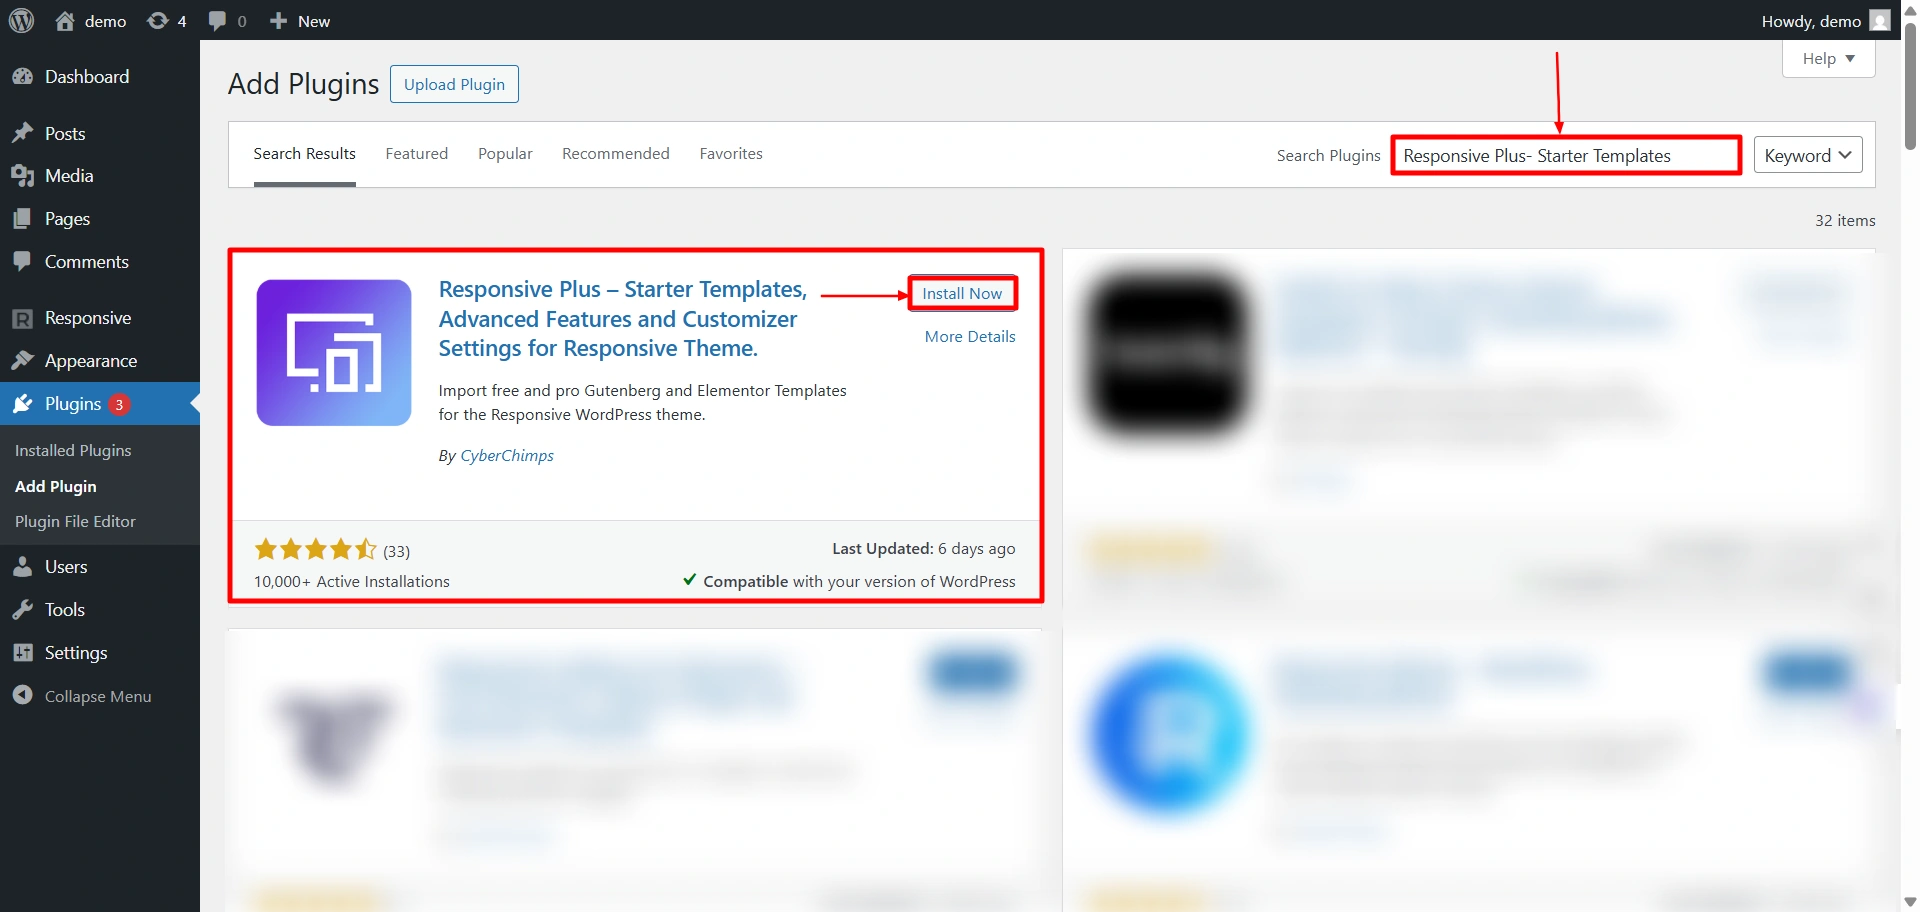
Search for “Responsive Starter Templates” in the search bar option and click on the “Install Now” button to install the plugin.
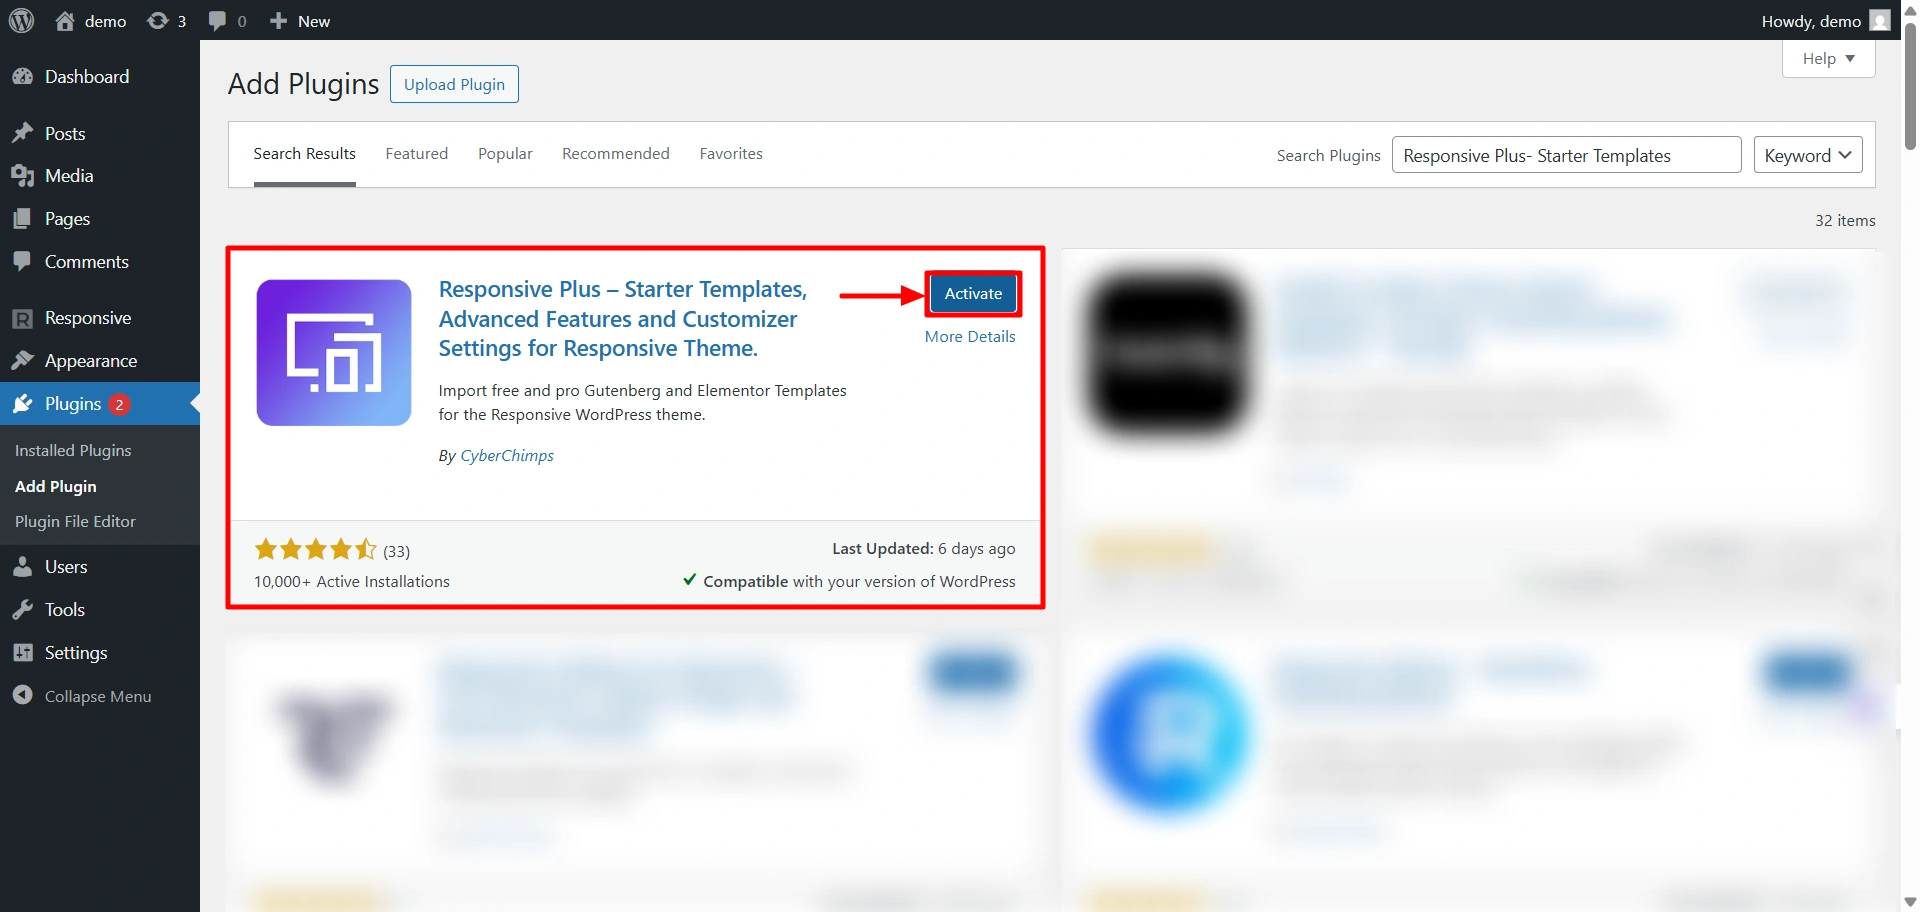
Next step is to activate the plugin. To do so, click on the “Activate” button.
5. Importing the “Accountant ” Template
The next step in the process is to import the Accountant template from the plugin. Steps to follow to import the Accountant template:
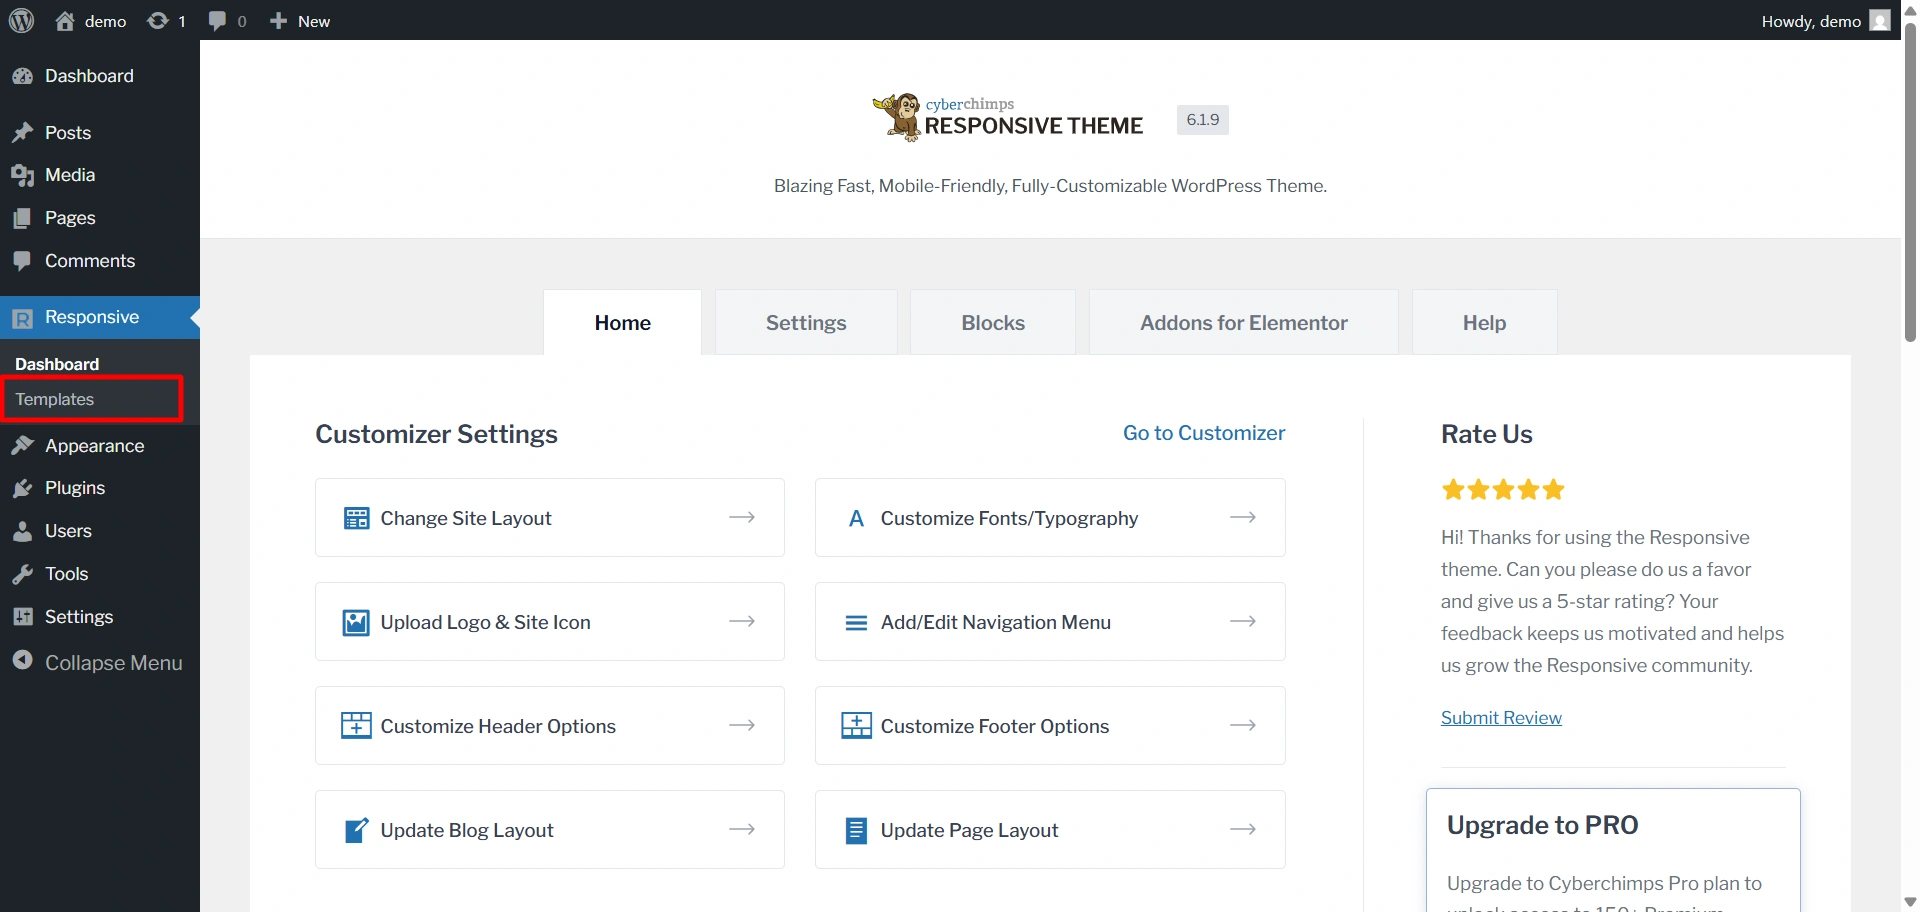
Hover on Responsive and click on the “Templates” button.
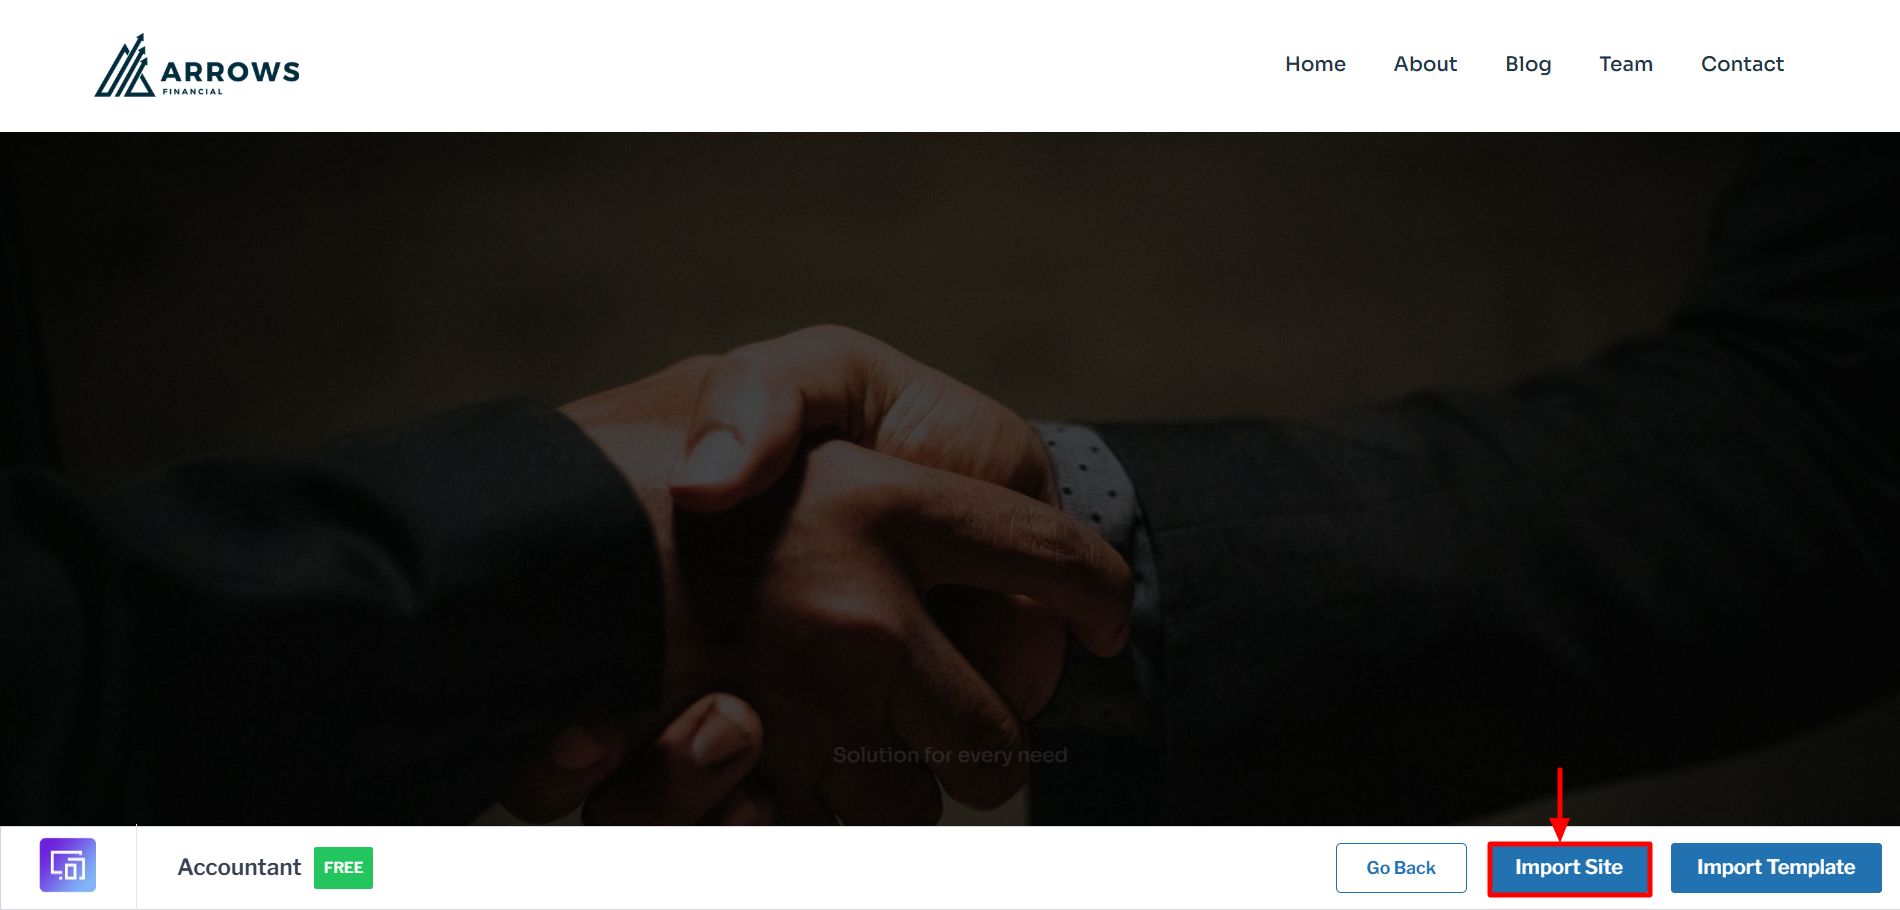
Search for the Accountant template and click on it.

Click on Import Site to start importing your site.
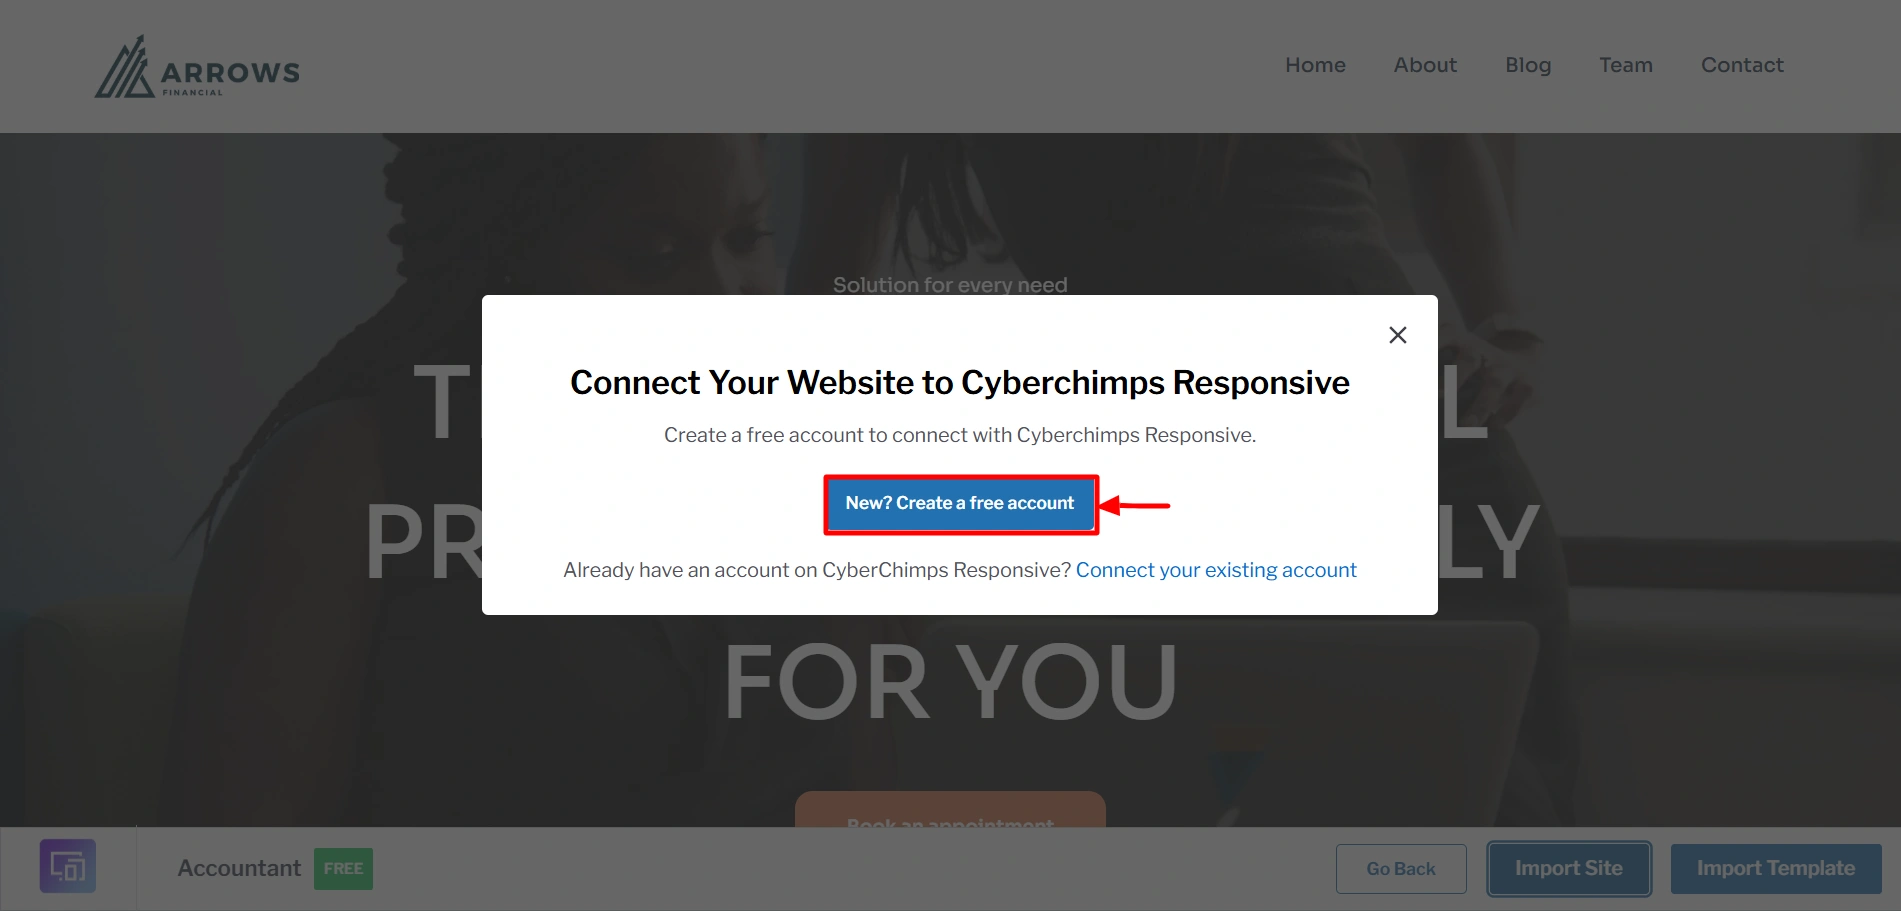
You will be asked to connect your website to the Responsive theme. So, click on Create a free account if you don’t already have an account or else click on Connect your existing account.
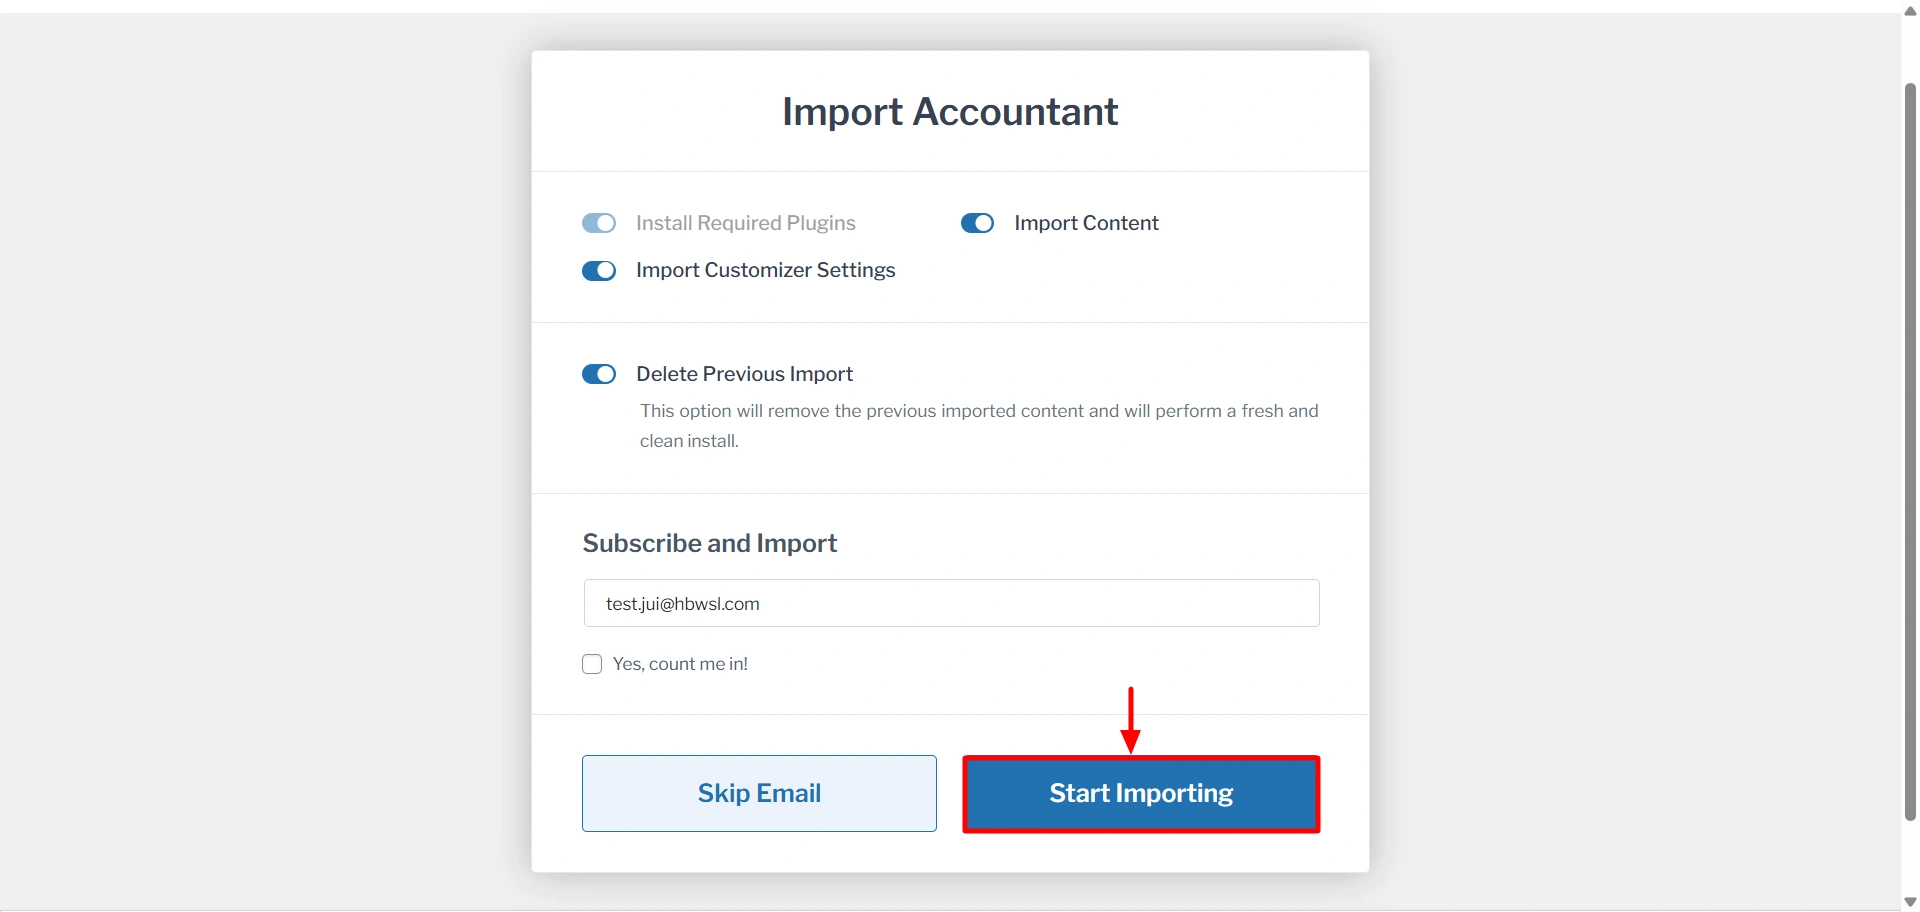
Once you connect your site to the theme, you can import the template. Click on Start Importing to import.
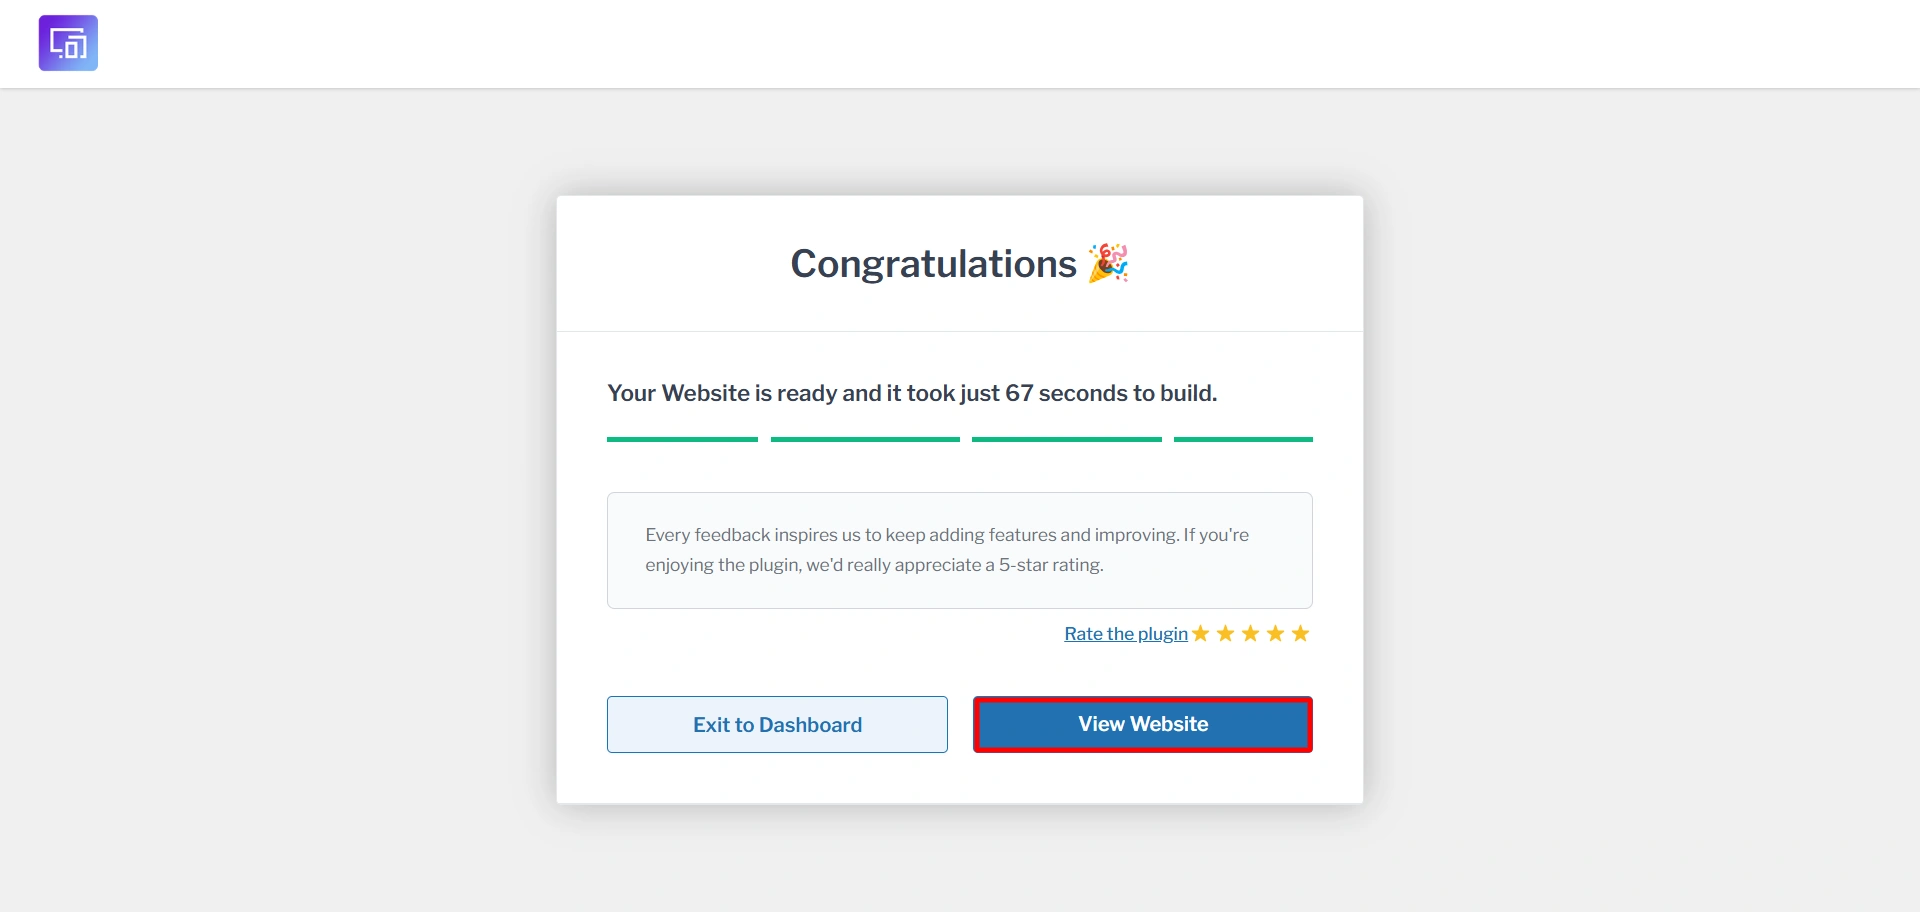
It might take a few seconds to fully import. And once its done, you can click on View Website.
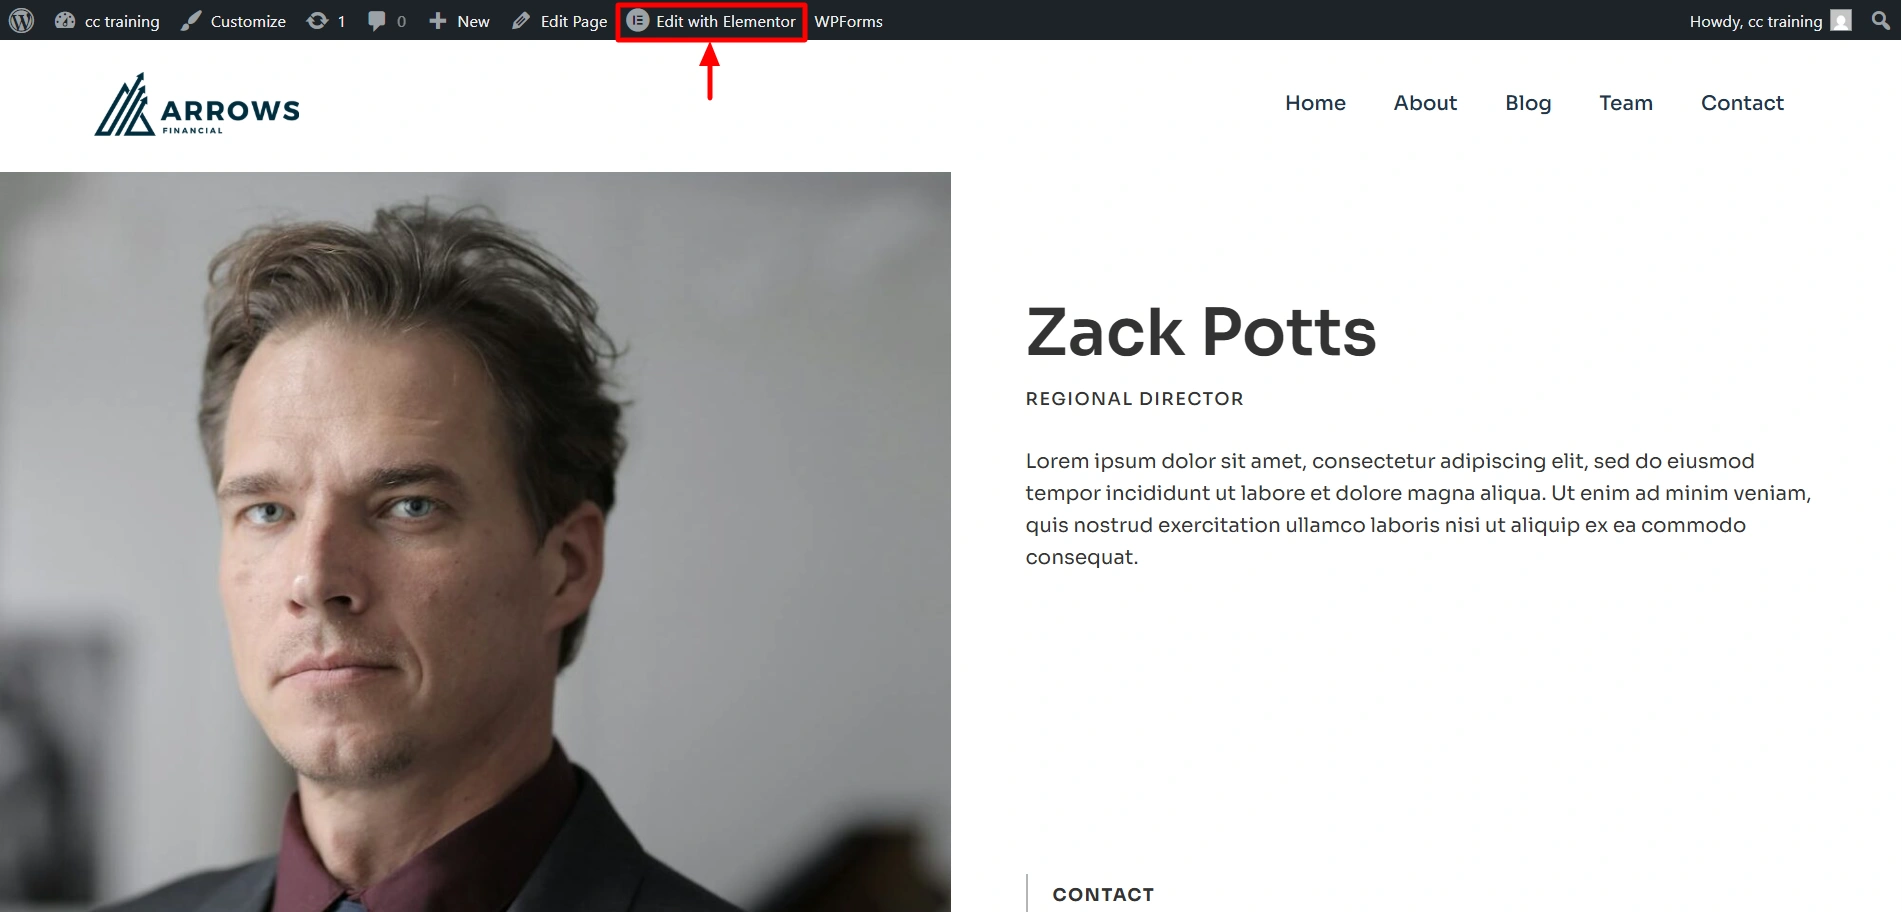
Once you have launched, your accounting website will look like this and you can edit the site if you want by clicking on Edit Page.

5. How to Edit Your Website Using Elementor?
Now, it’s time to edit the main content of your website. You need to install and activate the Elementor plugin. To do this, all you have to do is follow these steps.
- Click on “ Edit with Elementor. “
- You get plenty of customization options for your website, like the typography settings, images, videos, buttons, and much more.
Scroll down and find the Responsive Addons for Elementor widgets. For that you can install the responsive Addons for Elementor Plugin and activate it.
Here, lets take the Testimonial Slider from the Responsive Addons for Elementor widgets. Click on it.
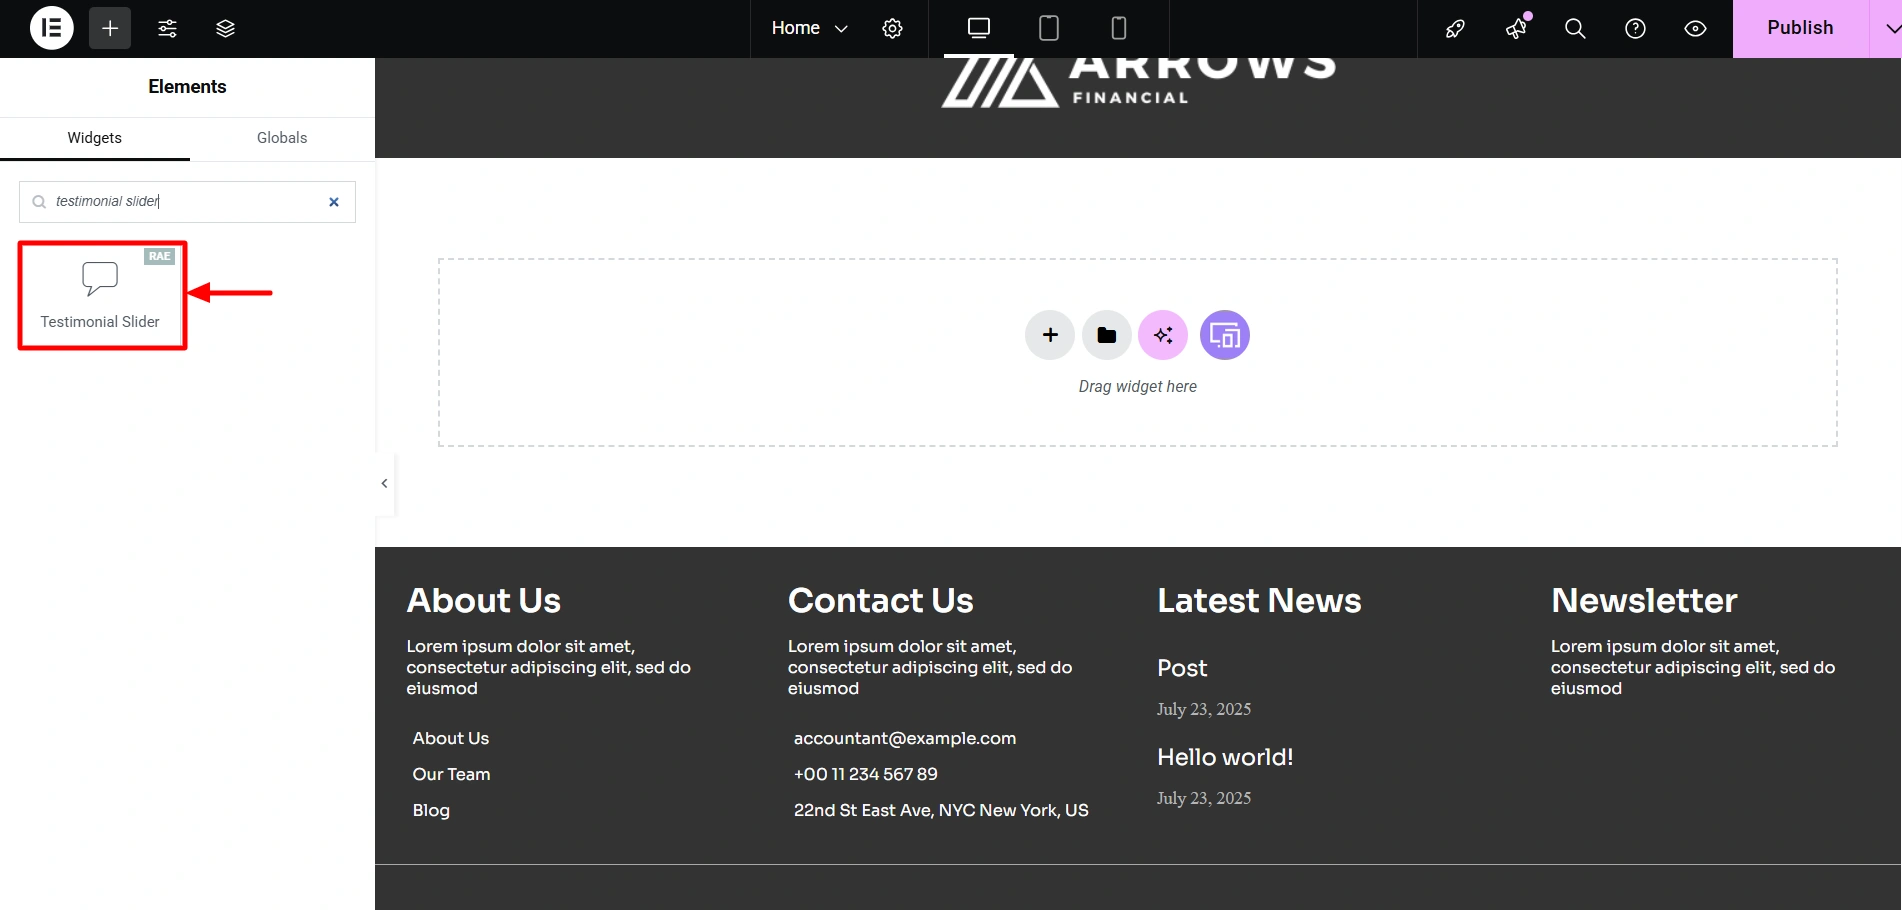
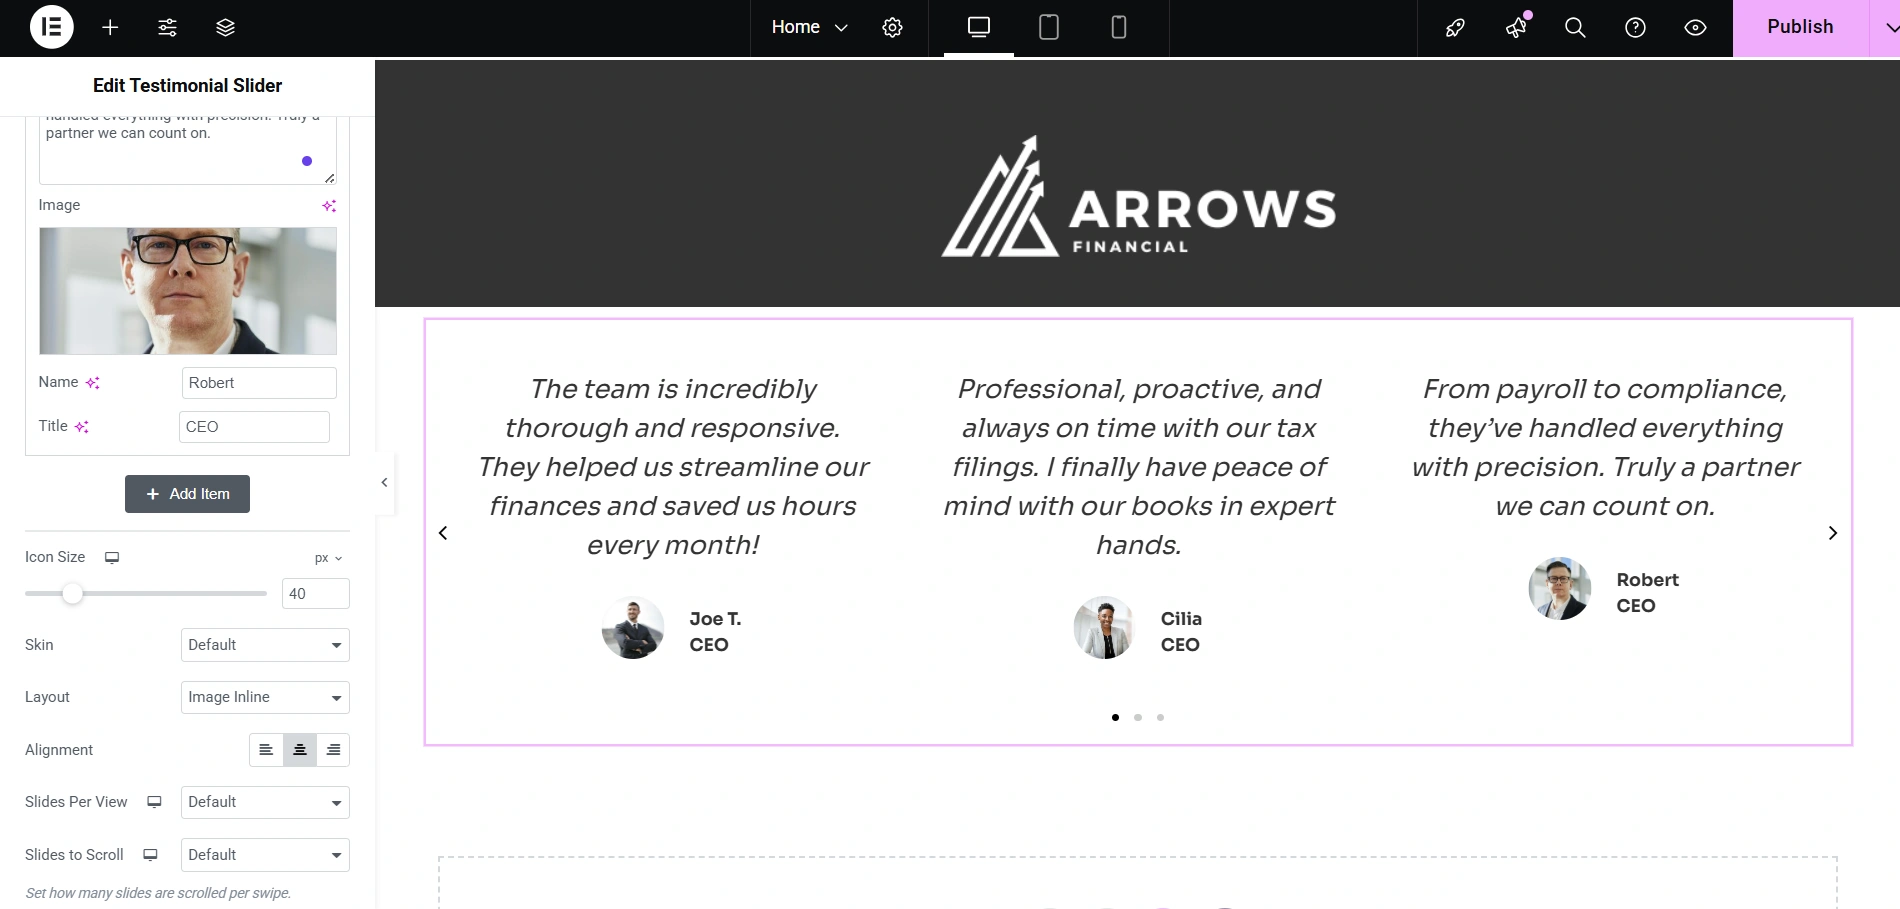
Drag and drop the widget wherever you want to place it and you can start editing using the panel on the left.

I have edited the widget in this way. you can do so however you want.
Congratulations! You’ve successfully set up a website for your accounting business!
FAQ
Not at all! You do not need any coding or technical skills to create your own accounting website using the Responsive theme by Cyberchimps. It is user-friendly and has drag and drop builders which help you build a profession looking website without writing a single line of code.
An accounting website must have pages like a Home Page, About Us, Testimonials, Blog, Contact Page, and a Privacy Policy page.
Yes, the Responsive theme works well with popular appointment booking plugins such as WP Simple Booking Calendar and many others, which makes scheduling appointments easier for you and your clients.
Conclusion
Creating your own accounting website might seem super challenging at first but with the correct tools and guidance, its totally doable. From choosing a domain to editing your pages, our guide mentions everything.
When it comes to choosing a theme, we recommend the Responsive Theme by Cyberchimps. It is beginner friendly, works well with popular page builders and easily customisable. Additionally, it is fully responsive which means it works great on every device.
So go ahead and take your very first step towards building an online presence for your firm!
Hope you enjoyed reading this article. Do read our other similar articles:
- How to Create an Entrepreneur Website
- 19 Best Barber Shop WordPress Themes for 2025
- Best SEO WordPress Themes
Are you already planning on creating a accounting website? Grab Responsive now!


