Do you want to add a content switcher to your Elementor website?
Creating an interesting and interactive website is crucial to maintain visitors’ interest and improve the user experience.
You can easily enhance your website’s functionality and attractiveness by including versatile tools.
The content switcher widget in Elementor is a powerful tool that greatly improves your website’s functionality and appeal.
This widget lets you showcase multiple pieces of content in the same area, allowing users to switch between views or information seamlessly.
This article covers how you can add a free content switcher, making your website more interactive and user-friendly. This will ultimately increase engagement and satisfaction.
What is Content Switcher Widget?
The Elementor content switcher widget offers excellent flexibility for creating dynamic website content displays.
This widget allows for smooth transitioning between various content types within a specific page section, such as text, images, and videos.
Users can effortlessly customize the switcher’s appearance, including its layout, colors, and typography, to ensure it harmonizes with their website’s design.
This widget is handy for presenting product features, FAQs, or any information that would benefit from an organized and interactive display.
It boosts user engagement and enhances the overall browsing experience.
Why You Should Add Content Switcher to WordPress Website
Integrating a content switcher widget can enhance website functionality and aesthetics, improving user satisfaction and potentially increasing engagement.
Adding a content switcher widget into your website provides numerous advantages, such as:
1. Enhanced User Experience: Enables visitors to seamlessly switch between different types of content, resulting in a more intuitive and immersive navigation experience.
2. Space Efficiency: By consolidating multiple content sections into a single area, the content switcher saves space on the page and ensures a neat and well-organized layout.
3. Improved Engagement: Interactive elements like content switchers can captivate users’ attention and motivate them to explore more of your site, potentially increasing the time spent on the page.
4. Visually Appealing Content Display: Allows you to display various content types, such as images, text, and videos, offering valuable flexibility for showcasing product features, FAQs, or tutorials.
5. Customizable Design: Easily customizable to align with your website’s branding, resulting in a consistent and harmonious visual identity.
Things You’ll Need for Adding Free Content Switcher in Elementor
Here are the primary plugins you’ll need for adding a content switcher to your website.
1. Elementor Page Builder

Elementor is a robust page builder designed for WordPress, enabling individuals to craft impressive, professional websites without coding expertise.
Its user-friendly drag-and-drop interface allows for effortless creation and customization of layouts utilizing a diverse selection of ready-made templates and widgets.
Elementor stands as an excellent solution for both novices and seasoned developers seeking to elevate their website development capabilities.
2. Responsive Addons for Elementor
The Responsive Addons for Elementor plugin amplifies the functionalities of the Elementor page builder through a diverse range of extra widgets and features. It offers 80+ Elementor widgets and 250+ Elementor website templates, which enhance the capabilities of the Elementor page builder.
These enhancements are geared towards refining adaptability and customization, enabling individuals to design visually striking and mobile-responsive websites effortlessly.
The plugin empowers designers to create compelling user experiences by integrating elements such as advanced sliders, dynamic content, and distinct design layouts.
Its user-friendly interface and compatibility with Elementor facilitate seamless integration, providing enhanced functionality without requiring coding knowledge.
This plugin is an excellent option for those seeking to enhance their web design endeavors.
How to Add Content Switcher To Your Elementor Site
[Note: To add a content switcher widget, your website must have Elementor plugin activated]
Cyberchimps offers 250+ Elementor templates you can use to build your website instantly.
Enhance your website design capabilities with the Responsive Addons for Elementor plugin. These add-ons provide a variety of advanced and customizable widgets that integrate seamlessly with Elementor.
Follow the below steps to easily add a content switcher widget to your website.
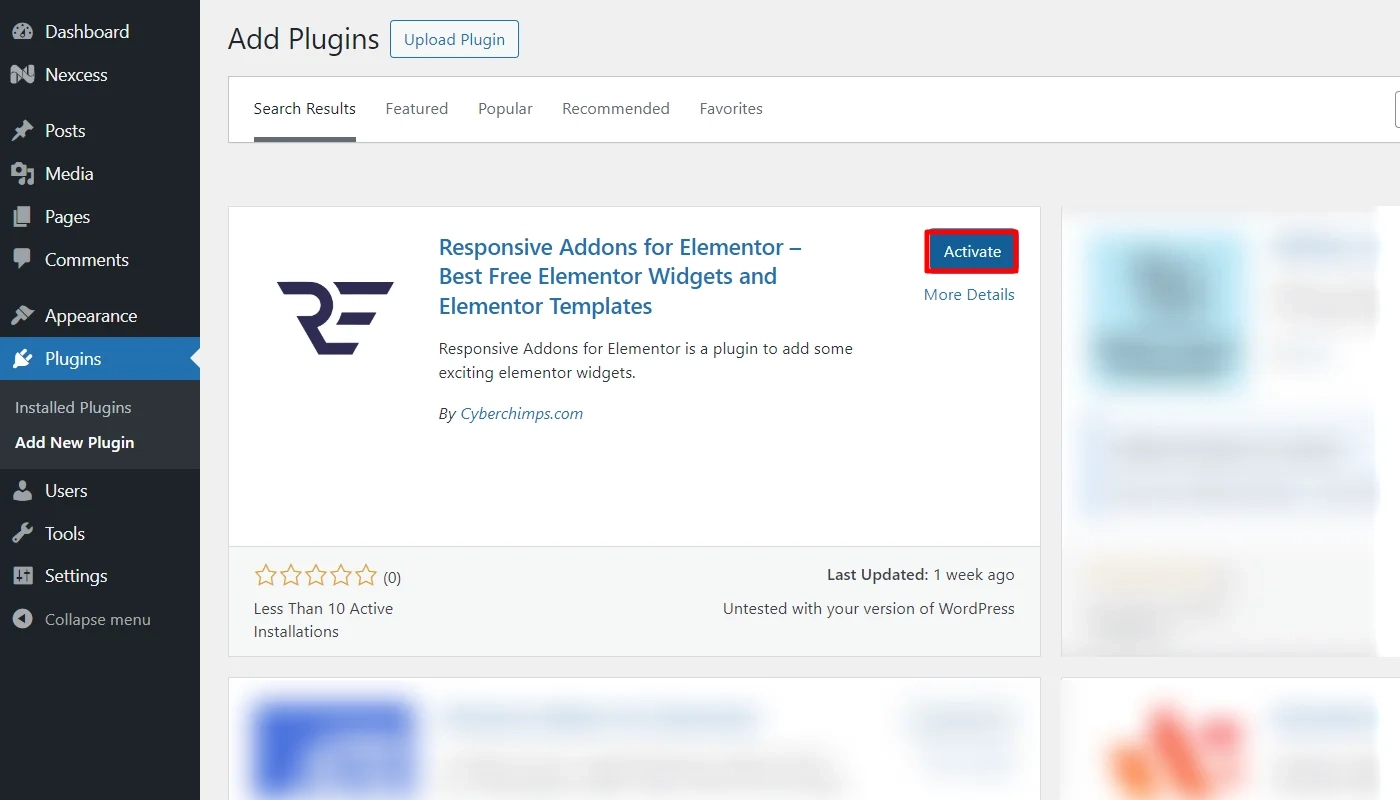
Step 1: Install and Activate Responsive Addons for Elementor
Go to the bottom left of the dashboard and click on Plugins > Add New Plugin.

In the search bar, look for Responsive Addons for Elementor plugin and then click on Install Now button.
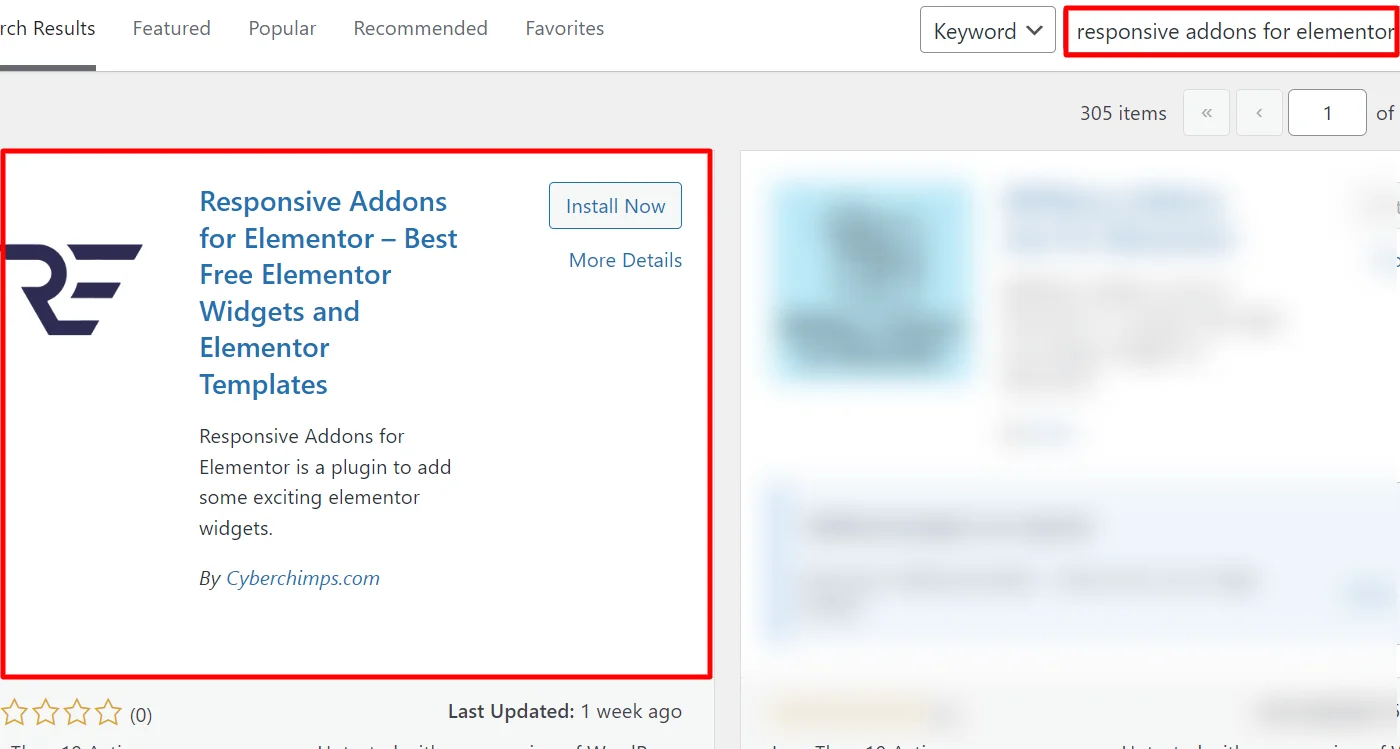
Once installed, click on Activate button.
Step 2: Adding the Widget to the Page
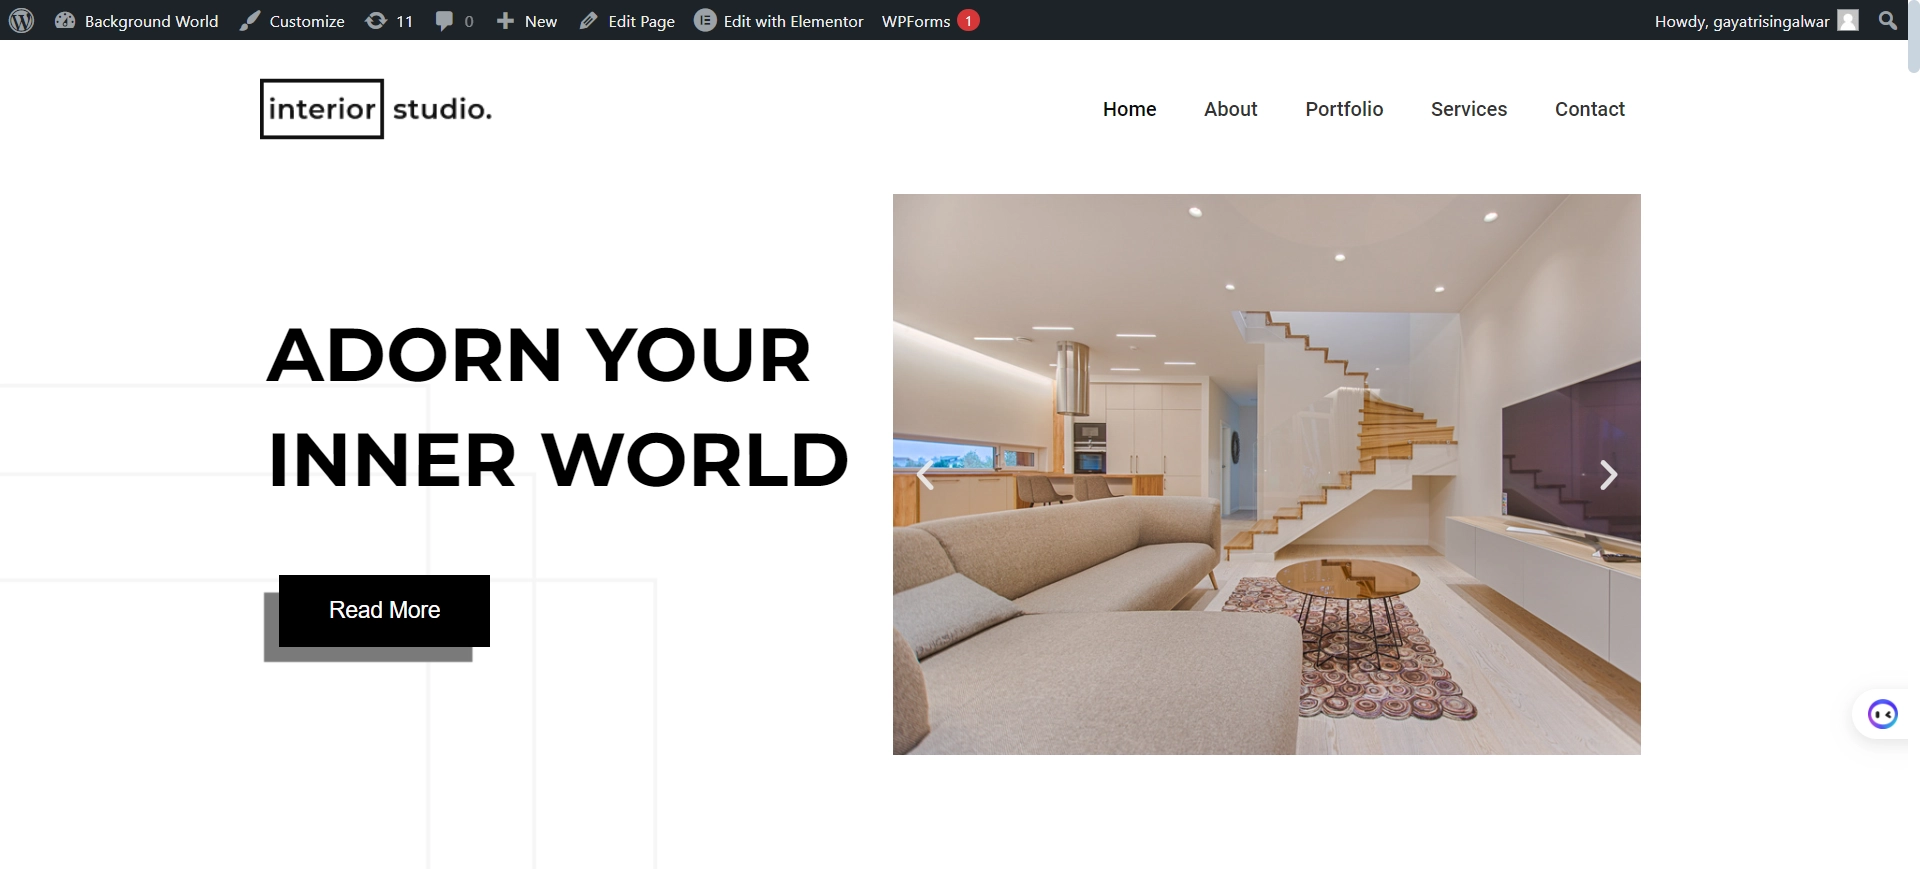
Let’s explore how to easily add a content switcher to your Elementor website using a pre-designed Interior Design template.
If you’re in need of a website template, feel free to choose from the various free WordPress templates from the Responsive Plus collection.
After landing on the page, click on Edit with Elementor.

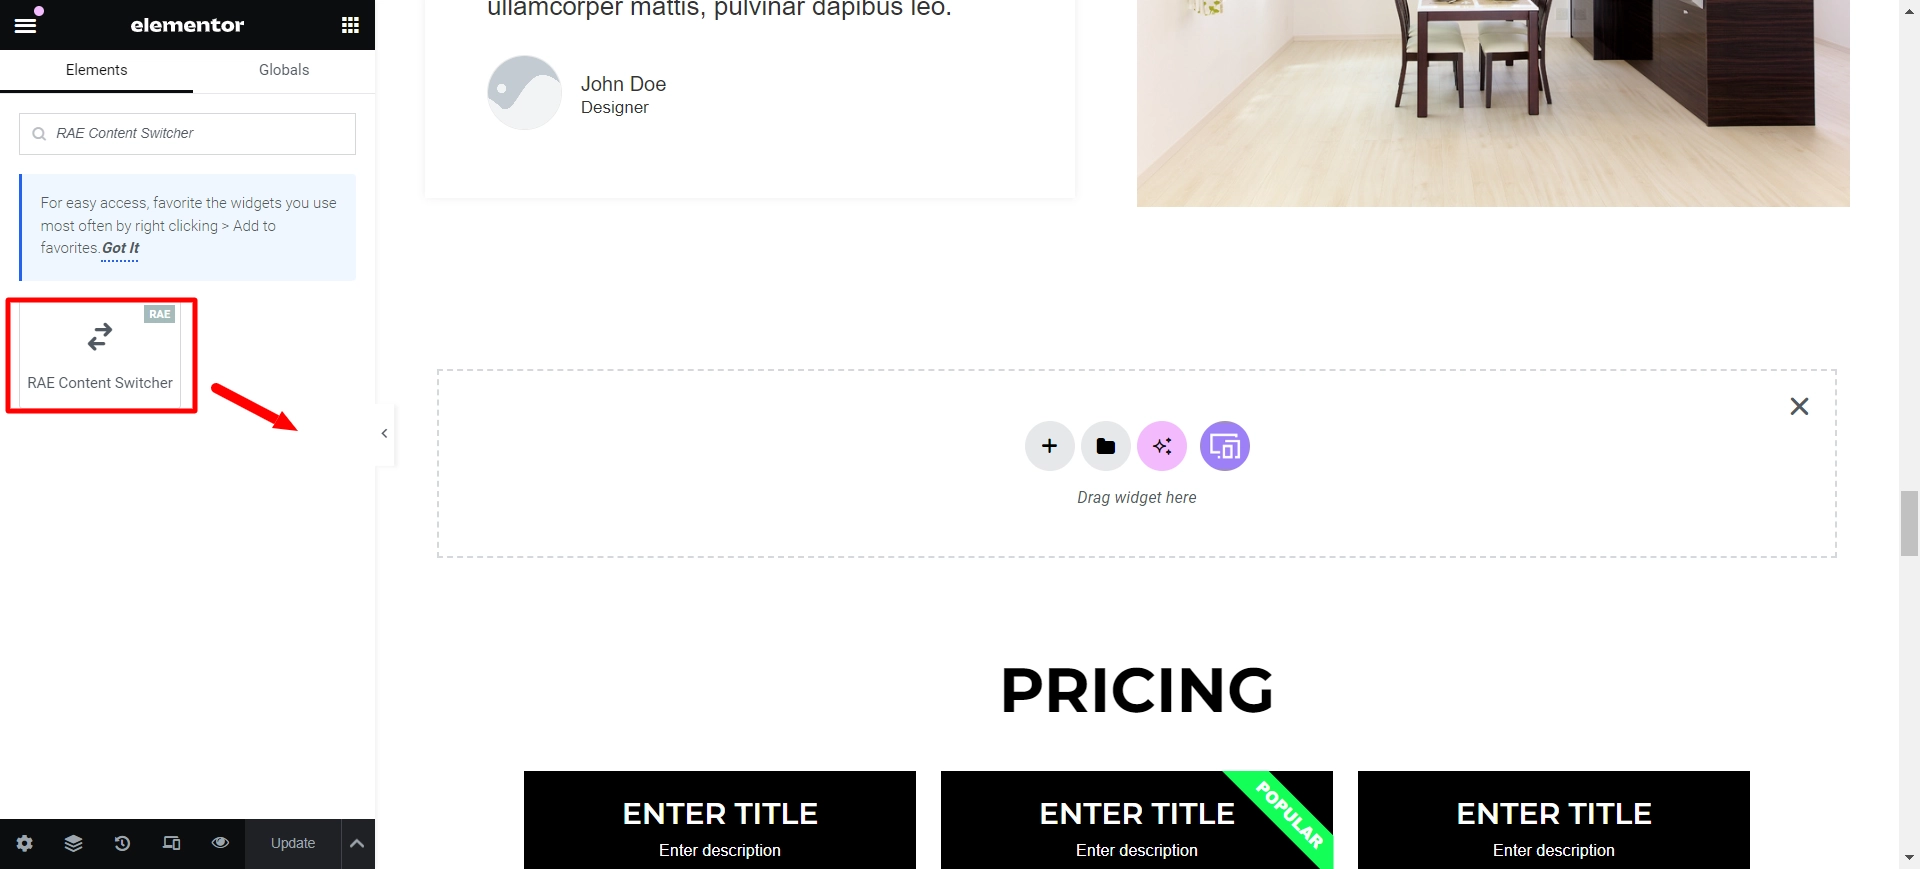
Next, head to the widget search bar, and search for RAE Content Switcher.

Drag and drop the widget onto your page for seamless integration.
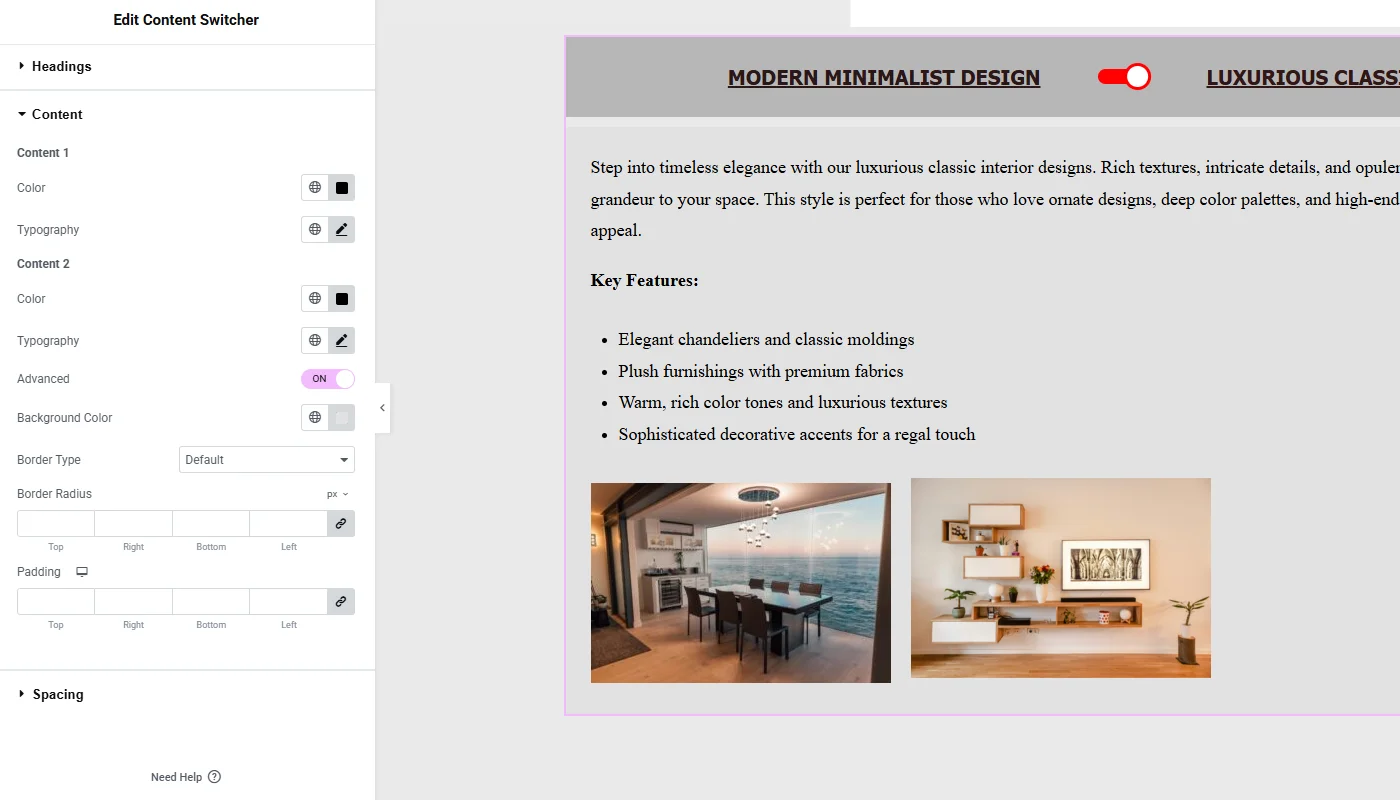
Step 3: Customizing the Content Switcher Widget
To enhance the website’s overall look, consider customizing the widget to align with the website’s theme. This will ensure a more appealing and cohesive appearance, providing a seamless user experience.
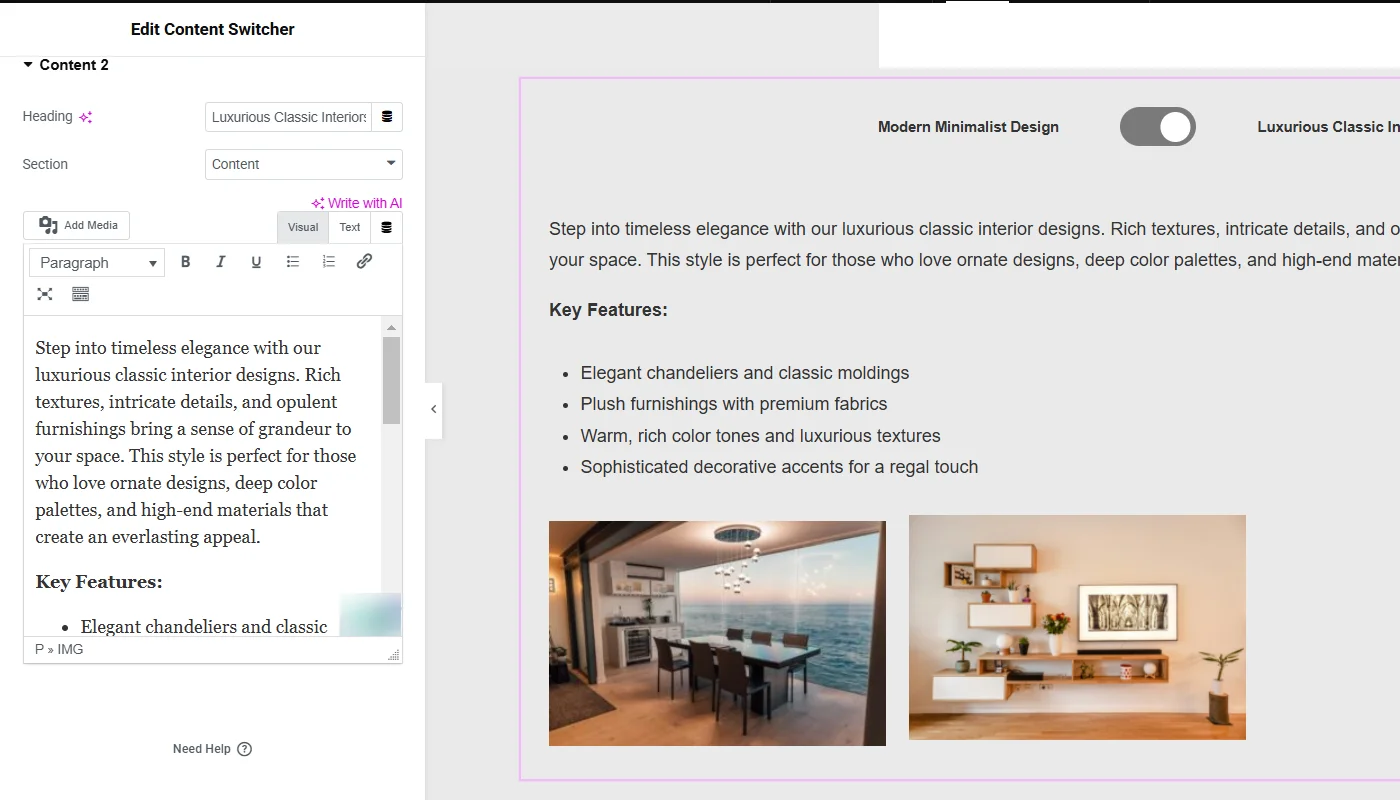
Now, let’s dive into the Content section to further explore its features and capabilities.
Content
The content features for both the displayed content are the same.
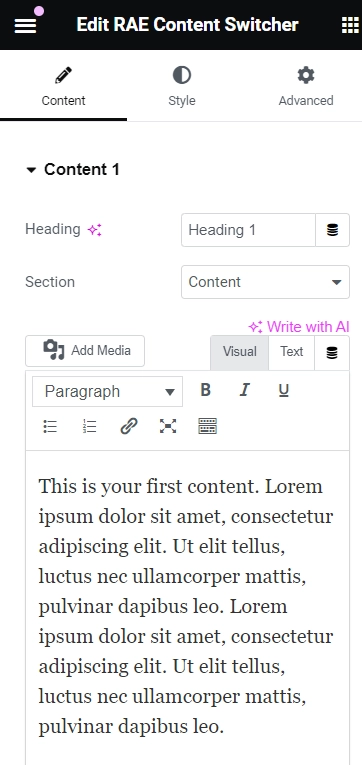
Content Features
- Heading: This option enables you to include a heading for the initial content.
- Section: Use this to choose the type of content/section to be displayed for the first content. The available options are Content, Saved Section, and Saved Page.
- Content: You can utilize this feature to add content using the provided text editor.
- Select Section: This option allows you to pick a section from the saved sections. Please note that this option is only available if the Section setting is selected as Saved Section.
- Select Page: This feature lets you choose a page from the available saved pages. This setting is only available if the Section setting is selected as Saved Page.
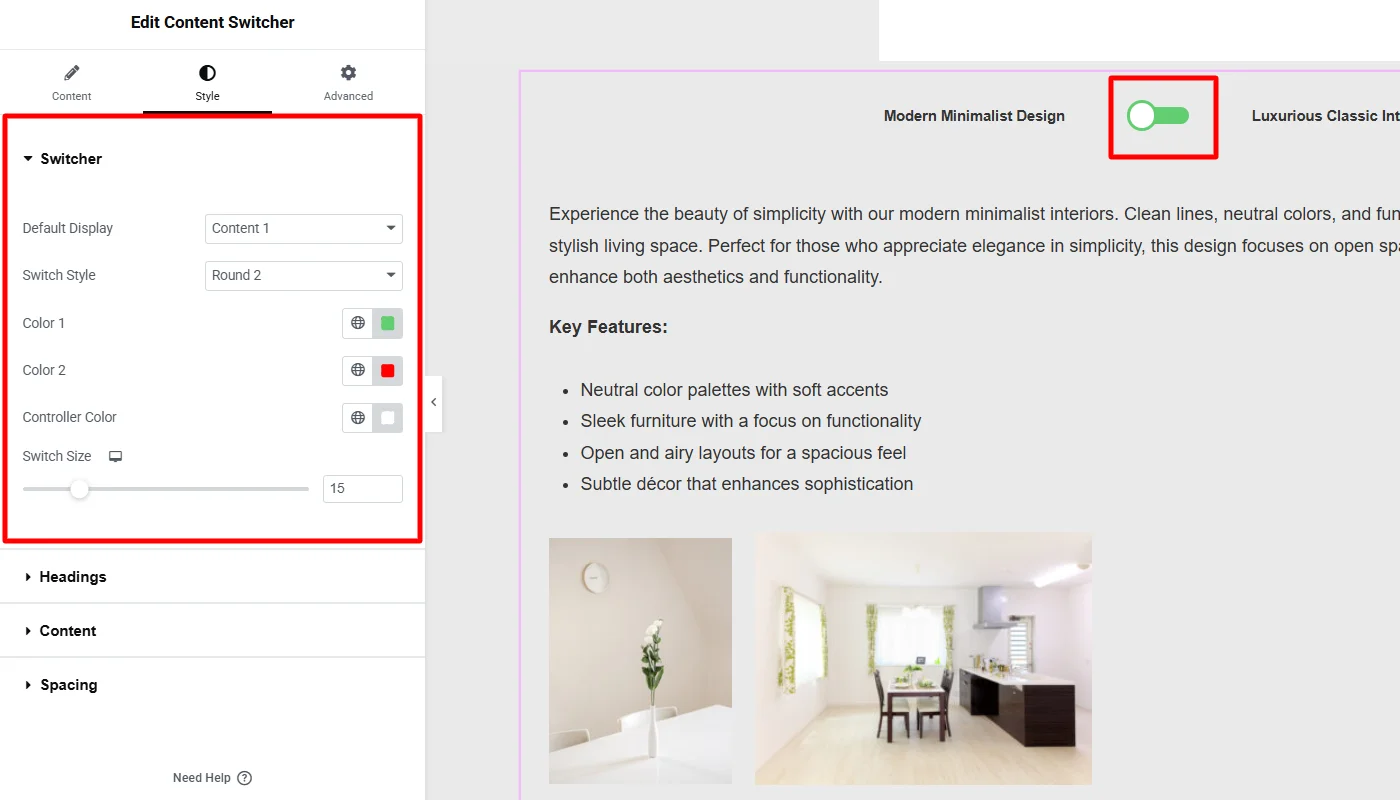
Step 4: Styling the Content Switcher Widget
Let’s learn more about the widget’s styling features.
Switcher
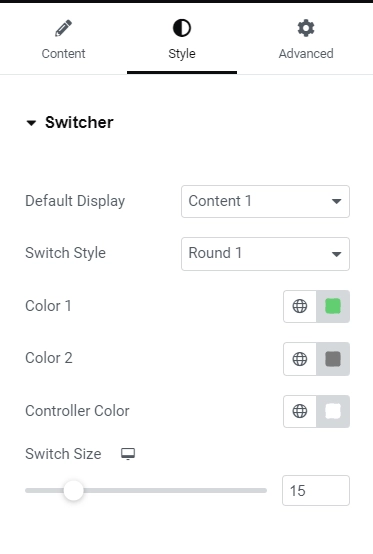
Switcher Features
- Default Display: Select which content to display by default (content 1 or content 2).
- Switch Style: For the switcher style, choose from Round 1, Round 2, Rectangle, or Label Box.
- Color 1: Set the switcher’s background color for the first content based on the Default Display setting value.
- Color 2: Set the switcher’s background color for the second content based on the Default Display setting value.
- Controller Color: Adjust the switcher’s inner controller color.
- Switch Size: Set the switch size responsively for different devices.
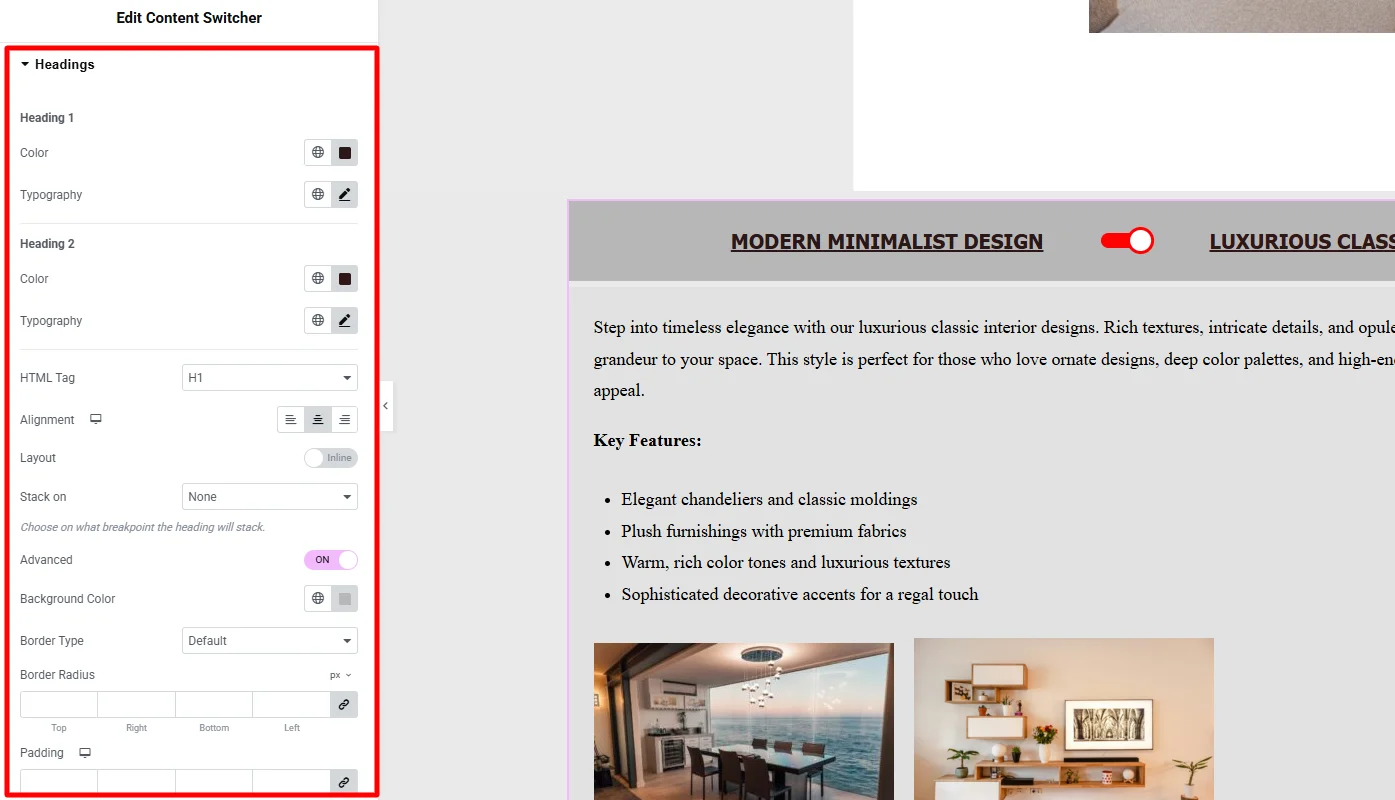
Heading
The Heading settings for both the displayed content are the same.
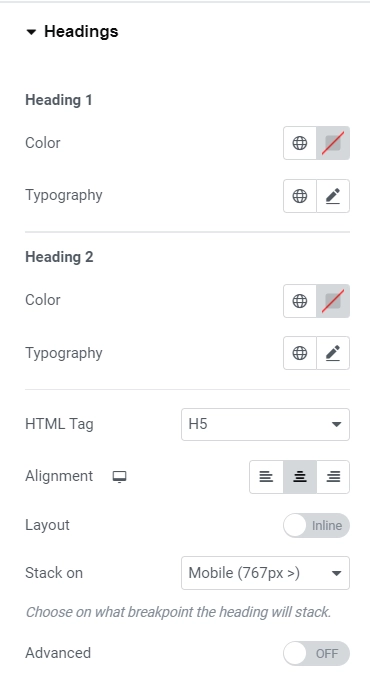
Heading Features
- Color: This option enables users to specify the color of the heading for the first content.
- Typography: This option enables users to specify the typography of the heading for the first content.
- Advanced: This option allows users to toggle advanced settings for the content headings. When turned on, various additional settings will become available.
- Background Color: This option enables users to set the background color for the content headings.
- Border Type: Users can select the border type of the content headings.
- Width: This responsive control lets users set the border width for the content headings. This setting is only available if the Border Type is something other than None.
- Color: Users can specify the border color for the content headings. This setting is only available if the Border Type is not None.
- Border Radius: Users can set the border-radius of the content headings.
- Padding: This responsive control enables users to set the padding for the content headings.
Content
The Content settings for both the displayed content are the same.
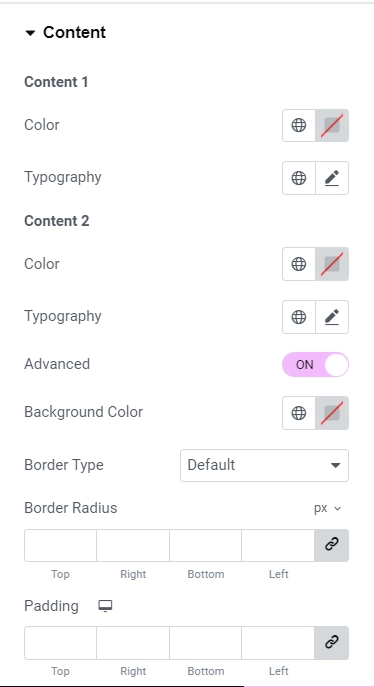
Content Features
- Color: Choose the text color for the second content.
- Typography: Set the typography for the text in the second content.
- Advanced: Toggle advanced settings for the content text on/off. When turned on, the following settings will be available:
- Background Color: Set the background color for the content text.
- Border Type: Select the border type of the content text
- Width: Responsively adjust the border width for the content text (available when Border Type is not None).
- Color: Set the border color for the content text (only available when Border Type is not None).
- Border Radius: Define the border radius of the content text.
- Padding: Responsively set the padding for the content text.
Spacing
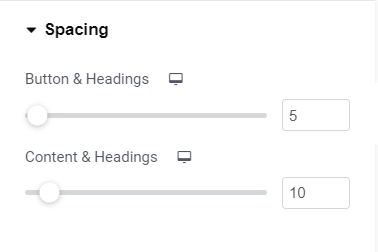
Spacing Features
- Button & Headings: Responsively adjust the spacing between the switcher button and content headings for various devices.
- Content & Headings: Responsively adjust the spacing between the switcher button and content headings for various devices.
How To Use Content Switcher Widget On Your Website?
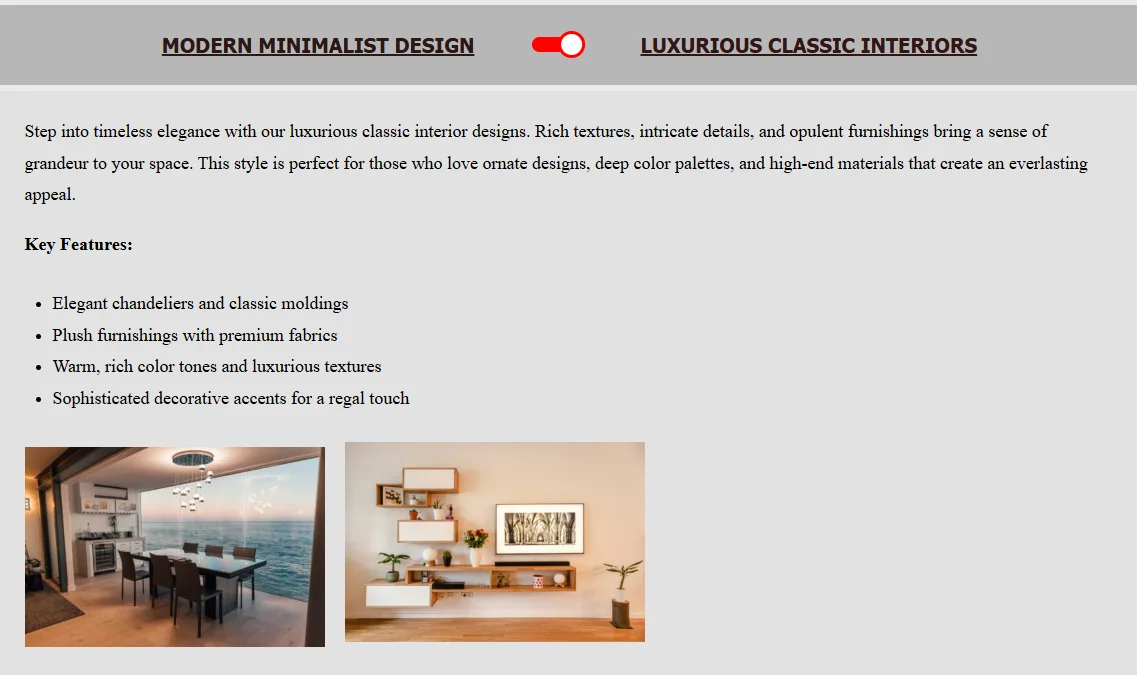
Let’s now learn how we used a content switcher to add an interactive feature to our website.
So, basically, when you drag and drop the widget in a section, it appears black and appears like this.
To start with, the widget customizer has an easy interface control that requires you to add the content for both headings in your content switcher.
Here, I have added the content under a demo content first header. While I have added content, you can also show a different section or a saved page here, choosing from the section edit.
(The paragraph section also allows you to add media files in the content to make it look more appealing.)

Similarly, I have added a demo section for the second heading. Let’s now see how we can style it further.
For styling, I began by changing the visuals of the switcher (toggle button).
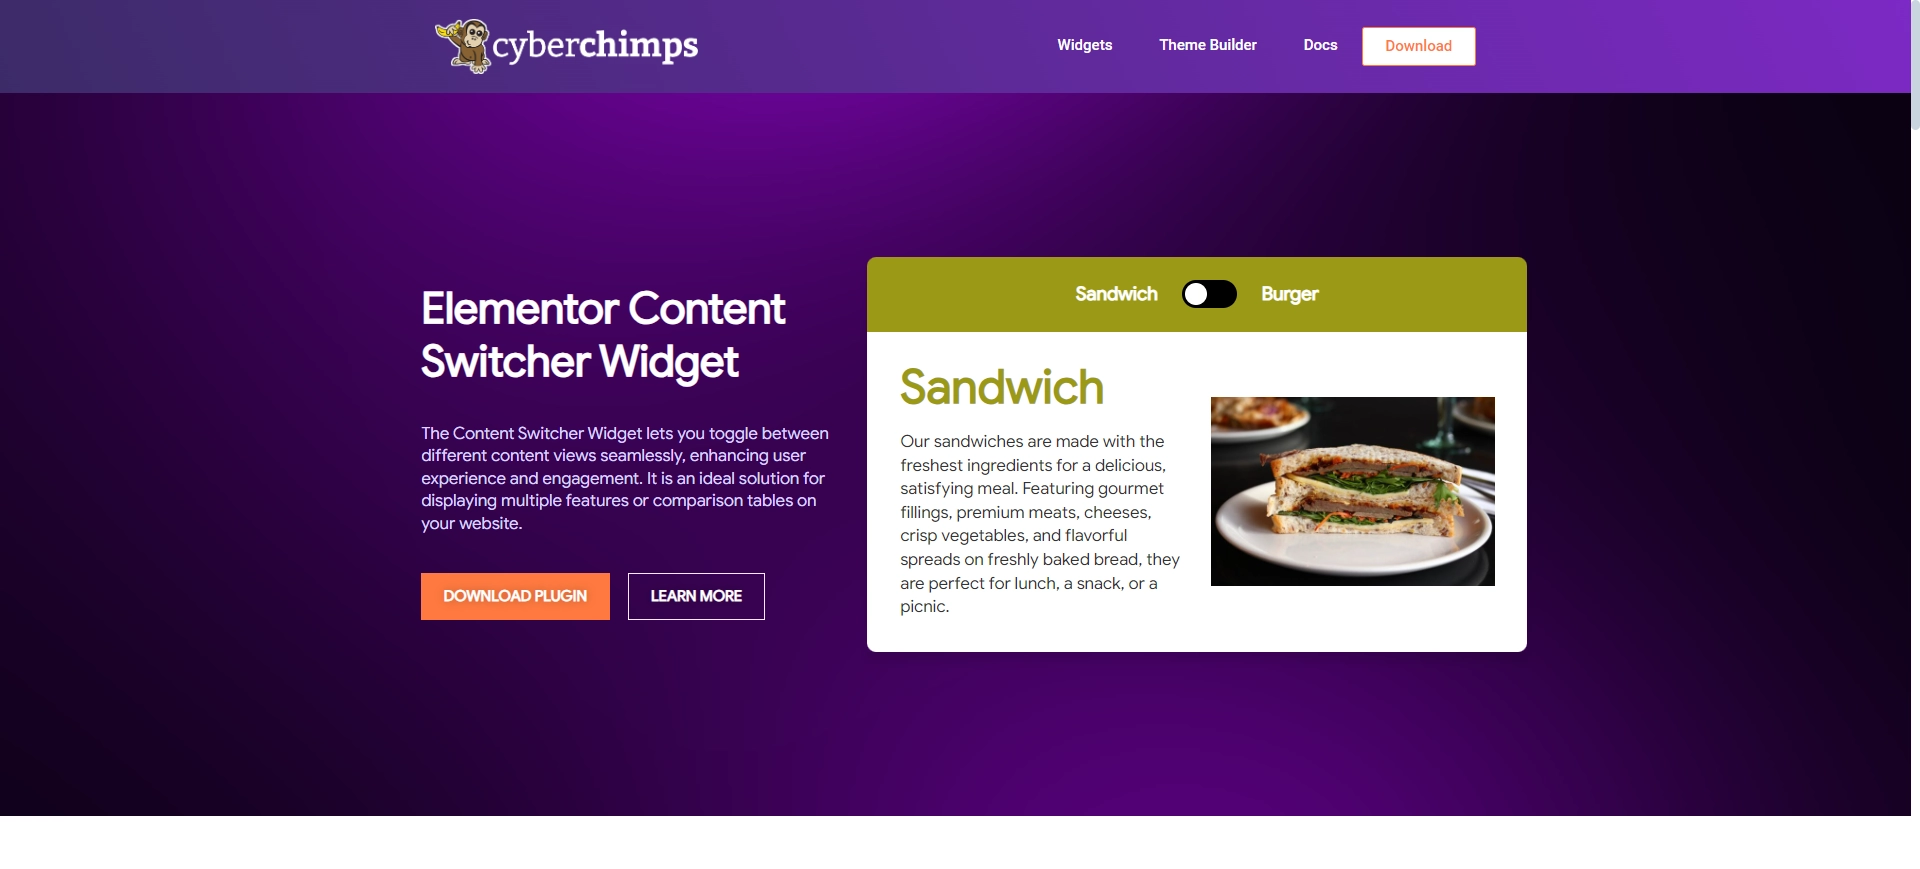
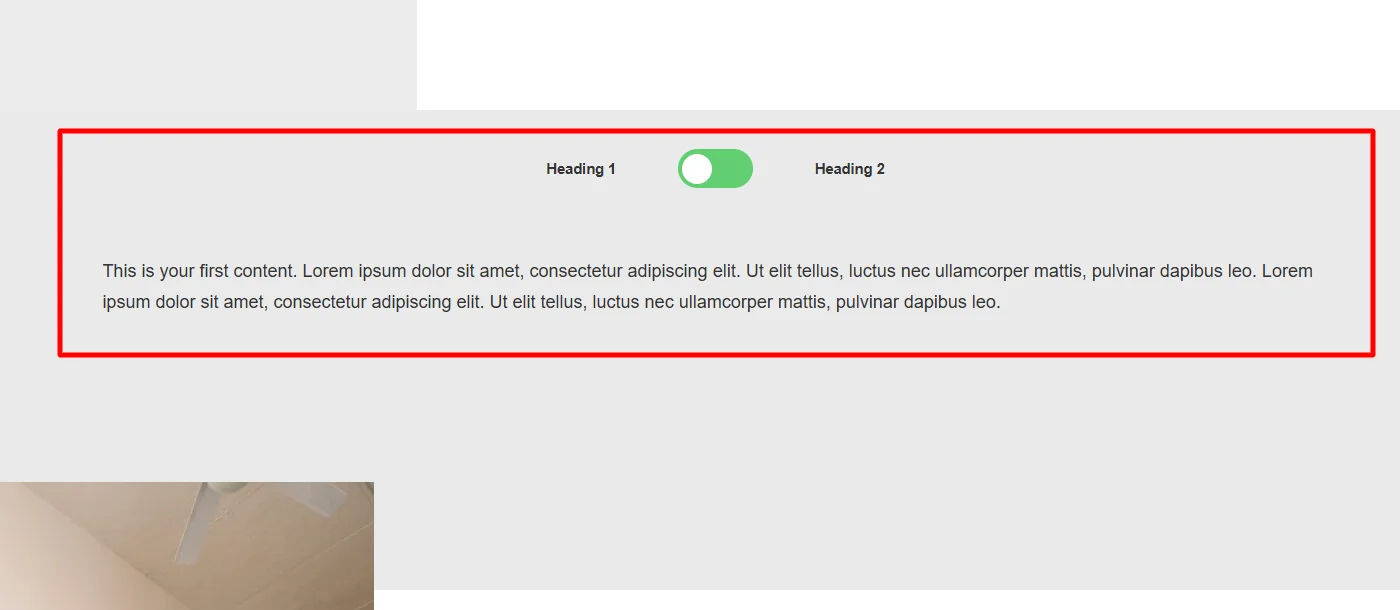
Here is the final look at our content switcher. For the default display content, I have used the first content screen; the switcher style can also be changed where I used the “Round 2” style and changed the switch size to 15.
I made a few changes to style the headings of the content switcher, like changing the typography and styling the font. Furthermore, I switched on the advanced option, which allowed me to edit the background of the heading.
Similar to the styling of the heading, I made minimal changes, improved the font and typography a bit, and added a light background color.
Moreover, while there is an option to style the spacing, the default spacing settings looked fine, so I did not change them.
Final Appearance
After all the edits, that’s how the content switcher for my site looked.
That’s it! You have effortlessly incorporated the content switcher widget in just a few clicks.
FAQ
To add a content switcher follow these steps:
1. Install and Activate Responsive Addons for Elementor
2. Open the page where you want to add content switcher (Elementor built page)
3. Click on Edit with Elementor
4. Search for the content switcher widget
5. Drag and drop the widget to the page
6. Customize and style the widget
The Responsive Addons for Elementor’s content switcher widget lets users switch between two contents with a simple click, allowing them to toggle between the two.
Absolutely! Responsive Addons for Elementor plugin allows you to easily add a Content Switcher widget to your Elementor website for free.
Conclusion
Adding a content switcher widget into your Elementor website is a straightforward yet highly effective way to enhance user experience and engagement. Following the steps outlined in this guide, you can effortlessly add and customize this versatile widget.
You can confidently enhance your website’s content by using the Responsive Addons For Elementor plugin to design, personalize and integrate a content switcher widget into your Elementor-powered website. This powerful plugin significantly improves user experience and communication.
If you found this article helpful, be sure to explore other similar articles:
- How To Add Menu Cart To Your Elementor Website
- How To Add Breadcrumbs To Elementor Website
- How to Add Table Of Contents To Your Elementor Website
To add a Content Switcher to your website, get the Responsive Addons for Elementor now! Additionally, consider the Responsive theme, a versatile WordPress theme designed to streamline your website creation process.


