
Are you looking to add progress bar to your Elementor website?
A progress bar is a simple yet effective design element that helps you improve engagement on your website. Typically it’s displayed as a horizontal or vertical bar, that indicates the completion status of a task or process.
While adding this interactive element to your site can be complicated, but using an Elementor progress bar widget can make the process simple.
This article will walk you through the technicalities and provide you a step-by-step guide to help you add a progress bar to your website.
Let’s get started!
What is a Progress Bar Widget?
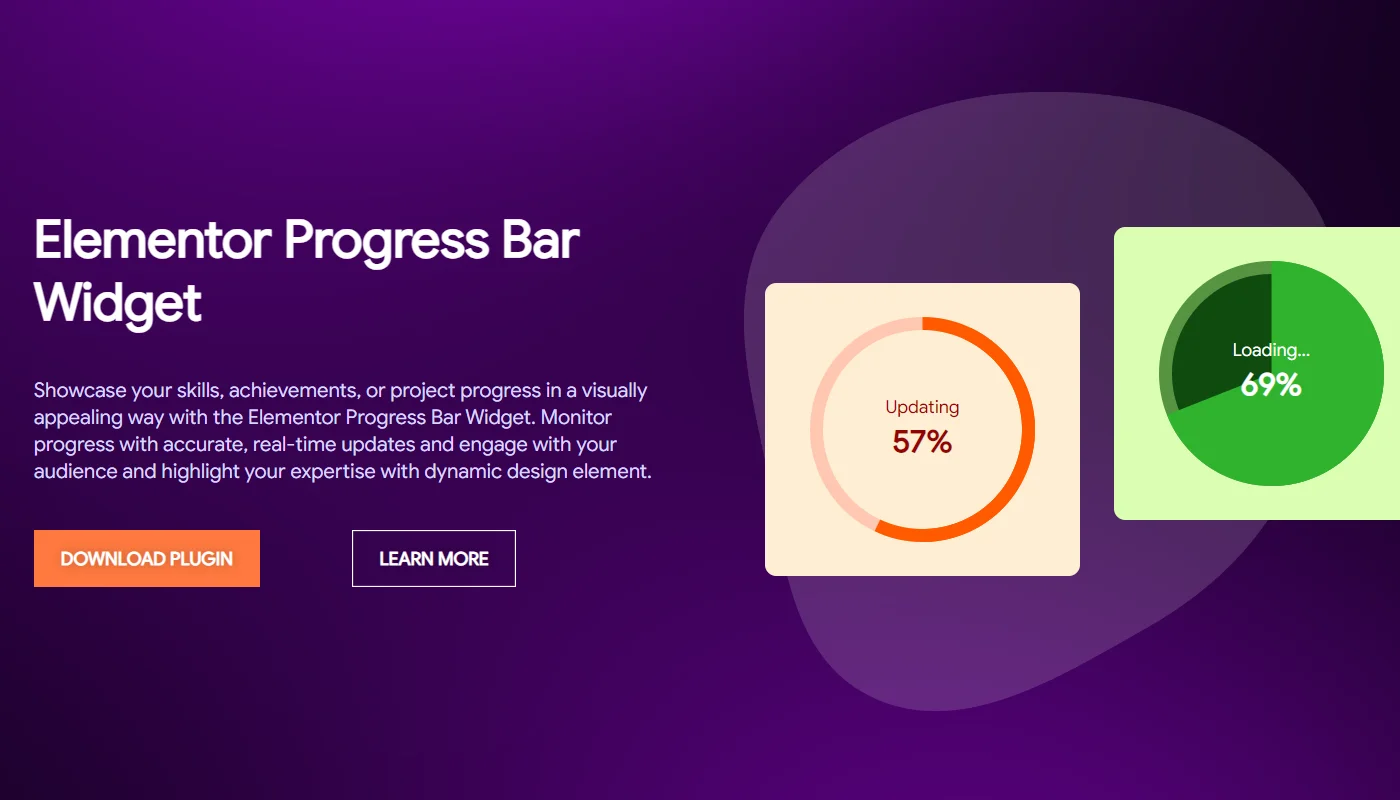
Basically, a progress bar widget is a user-friendly tool that allows you to visually display the completion of tasks or processes on your website.
Integrated within Elementor, this widget enables you to customize the progress bar’s appearance, colors, and animations, making it easy to align with your website’s design.
This allows your website users to see real-time updates as they interact with your website, enhancing their overall experience. Furthermore, with its straightforward setup, the progress bar widget effectively keeps visitors engaged.
Why You Should Add Progress Bar to WordPress Website
Incorporating a progress bar into your WordPress website offers several benefits. Firstly, it enhances user experience by providing clear visual feedback, which can reduce frustration during lengthy processes.
Additionally, a progress bar can increase user engagement by gamifying user activities to complete actions. It further helps you improve conversion rates, especially in scenarios like multi-step forms or checkout processes, where users may abandon tasks if they feel uncertain about their progress.
Things You’ll Need for Adding Free Progress Bar in Elementor
Before you add a progress bar to your Elementor website, you’ll need a few essential items to ensure a smooth process.
In the first place, you will need the Elementor Page Builder plugin. Elementor is a popular WordPress page builder that allows users to create visually stunning websites without coding.
It offers a seamless drag-and-drop interface making it easy to customize layouts, add widgets, and design responsive pages. Elementor also offers a huge library of widgets that you add to your website to make it more interactive which also includes the progress bar widget.
However, the widgets offered by the Elementor widget library either offer limited customization features or are paid. If you are looking for a free alternative to add you might consider using a third-party free Elementor Addons plugin.
Responsive addons for Elementor is one such free third-party add-on plugin that offers over 80 Elementor widgets and 250+ ready-to-use website templates that help you enhance the functionality of your Elementor website.
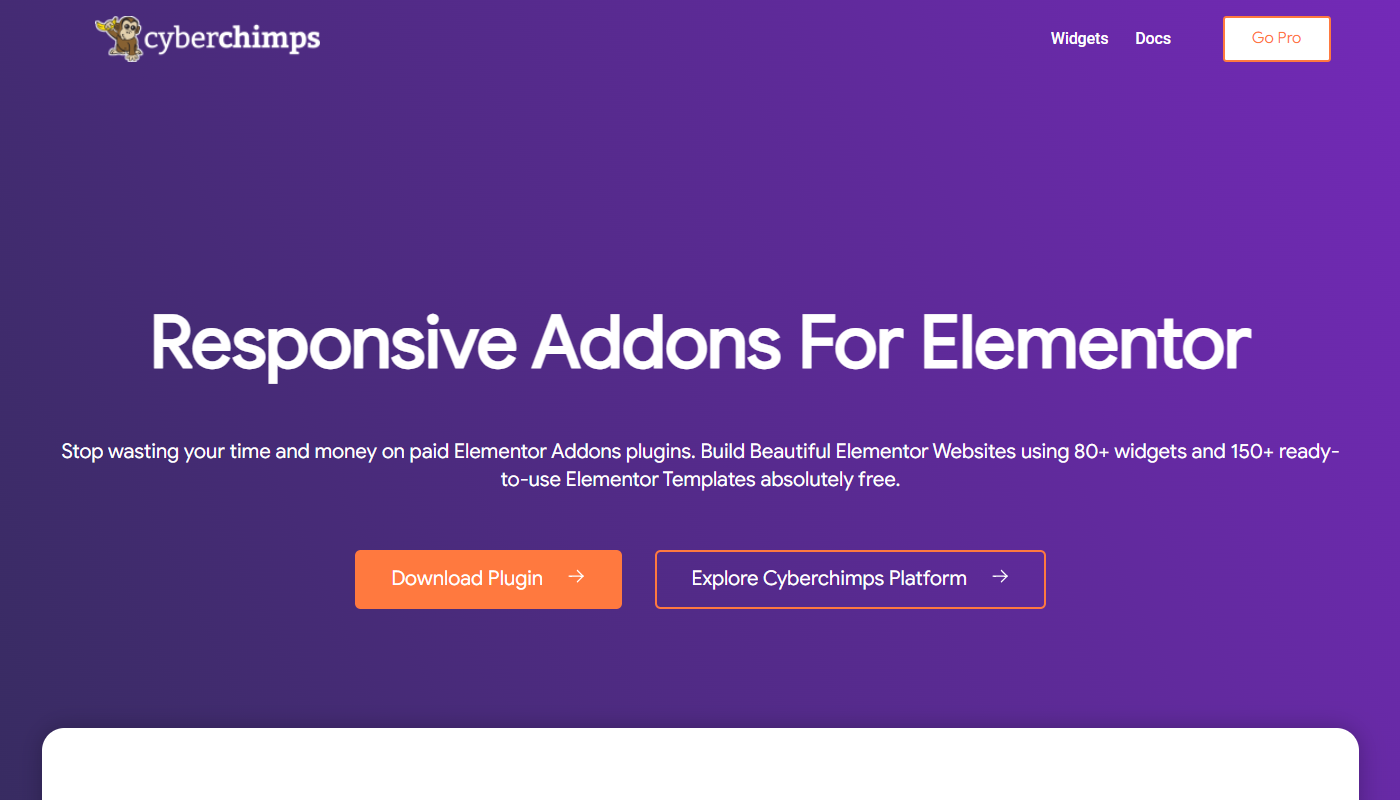
Among all other widgets, the responsive addons for Elementor also offer a progress bar a fully customizable progress widget.
Let’s now learn how can you add and customize this widget on your website.
How to Add Progress Bar To Your Elementor Website
To add the progress bar widget to your website using the Responsive Addons for Elementor plugin follow the following steps:
[Note: To use the Elementor progress bar widget, you must have a website template built with the Elementor page builder].
Cyberchimps offers 250+ WordPress Website templates that you might consider using to build your website instantly.
Step 1: Install and Activate Responsive Addons for Elementor
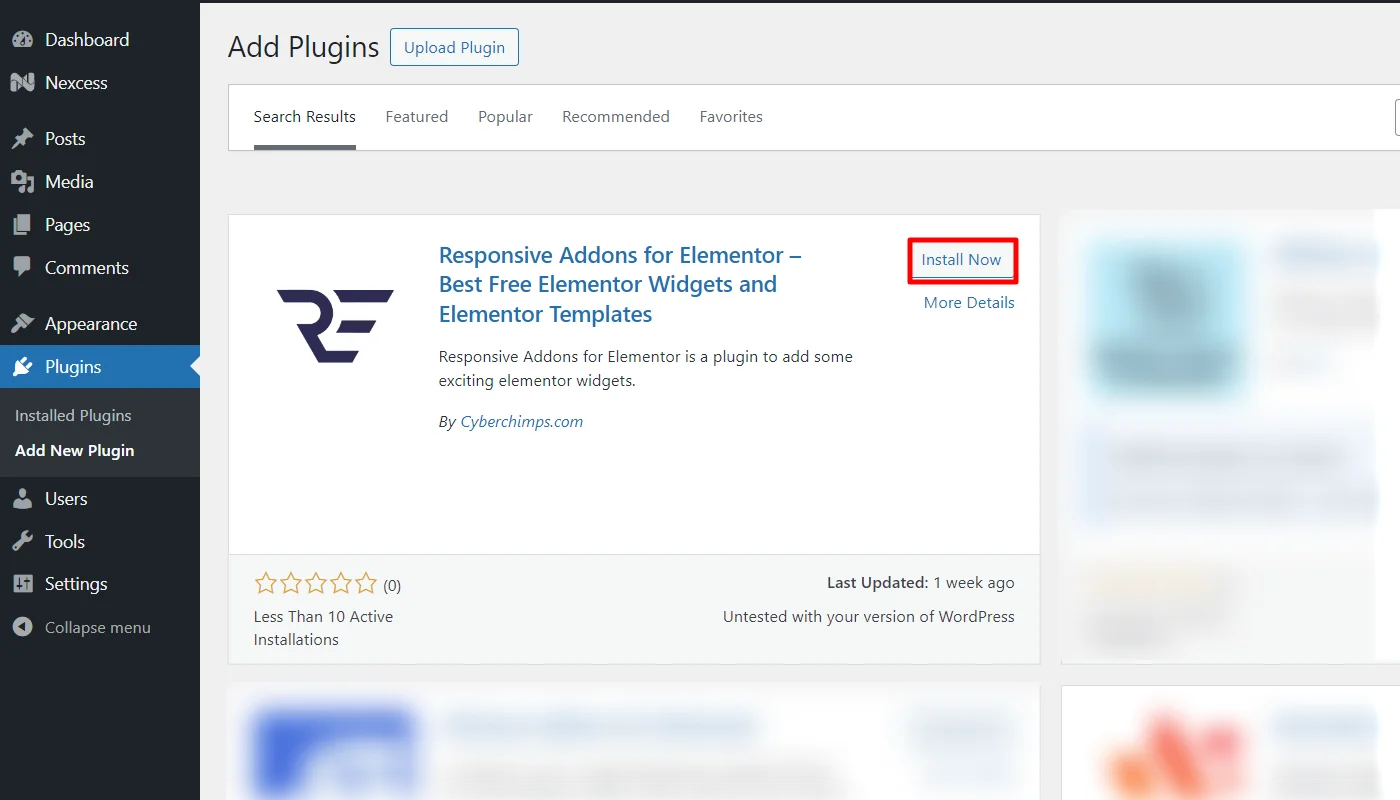
Navigate through your WordPress Admin dashboard and go to Plugins > Add New Plugin.
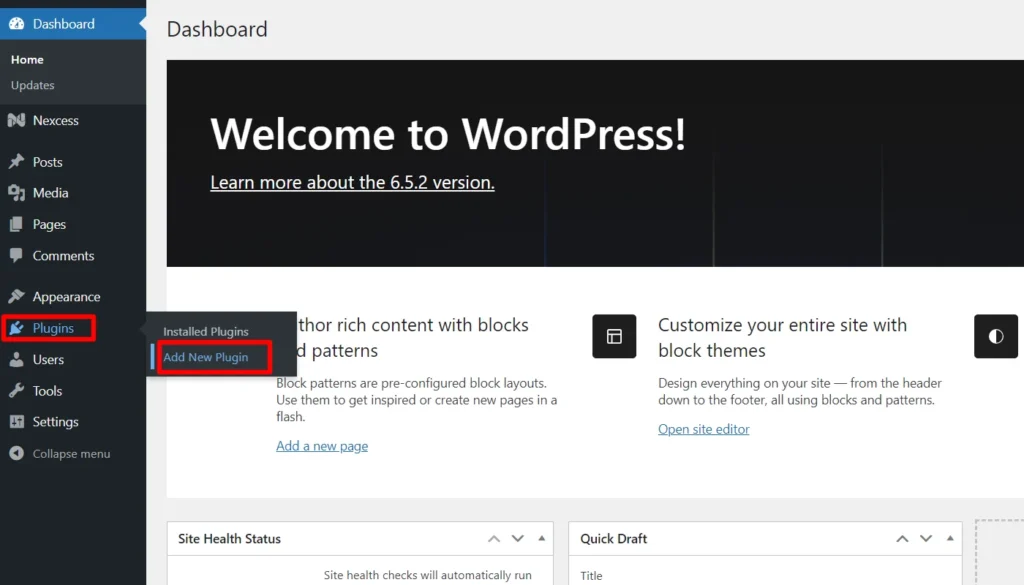
Go to the search bar above and search for responsive addons for elementor.
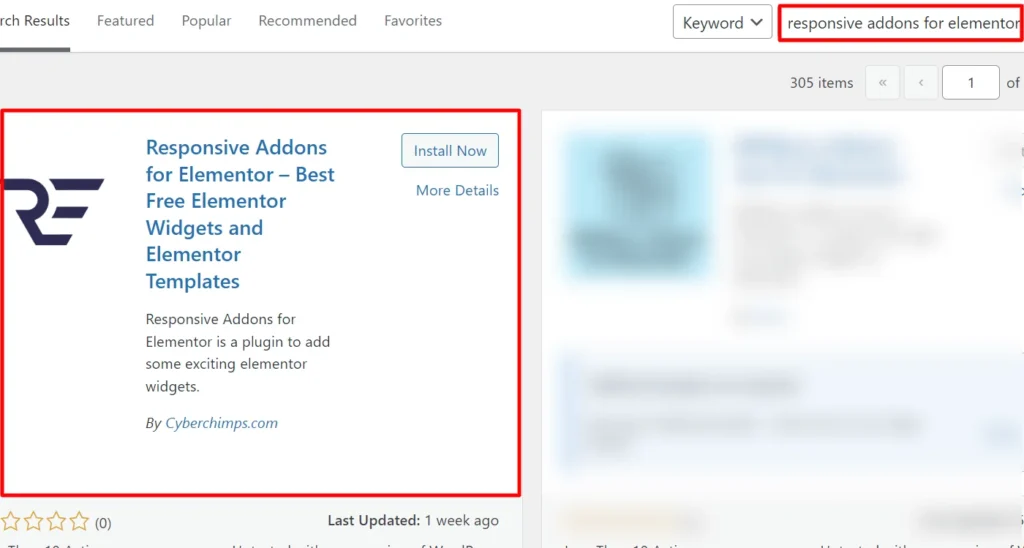
Next, click Install Now to download the Responsive Addons for Elementor plugin.
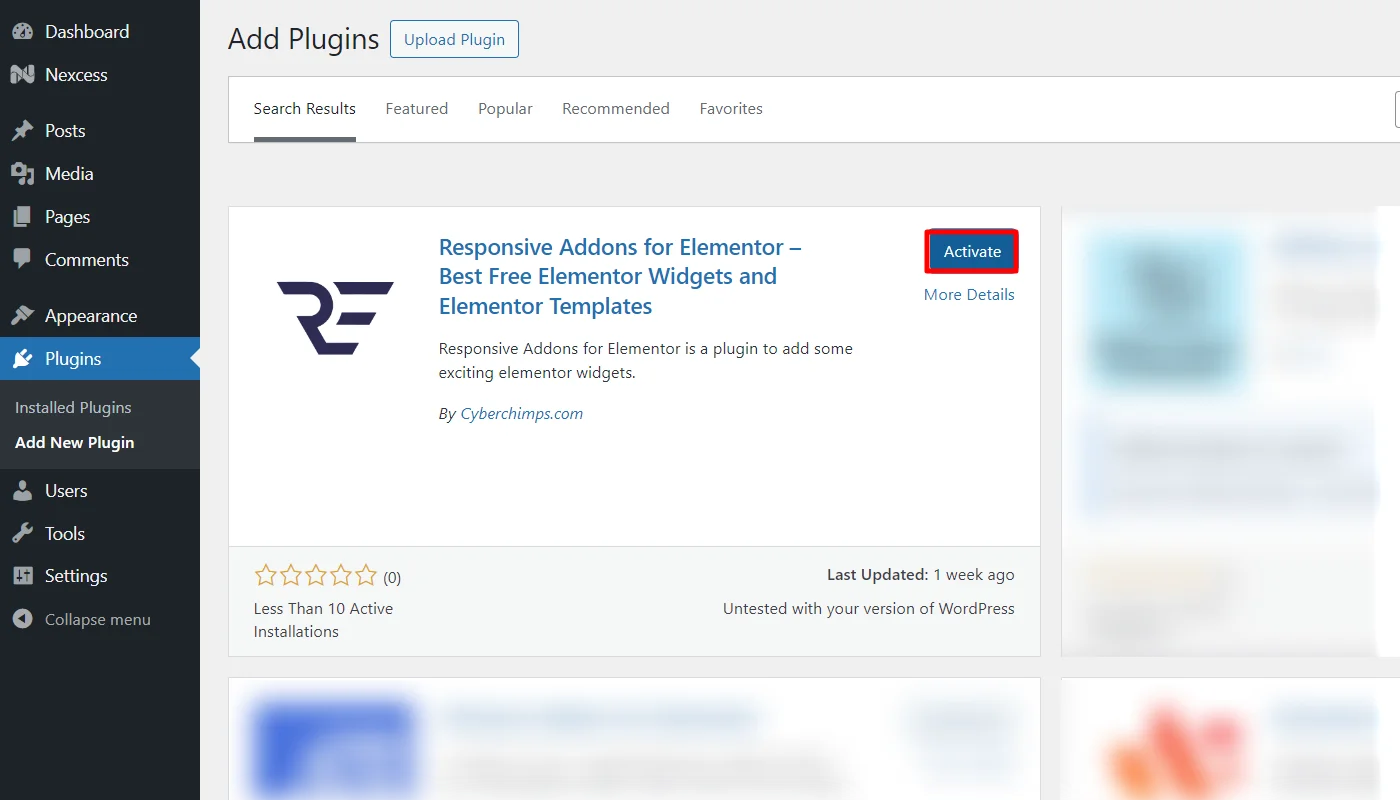
Click on the Activate button to activate the plugin.
Step 2: Adding The Progress Bar Widget
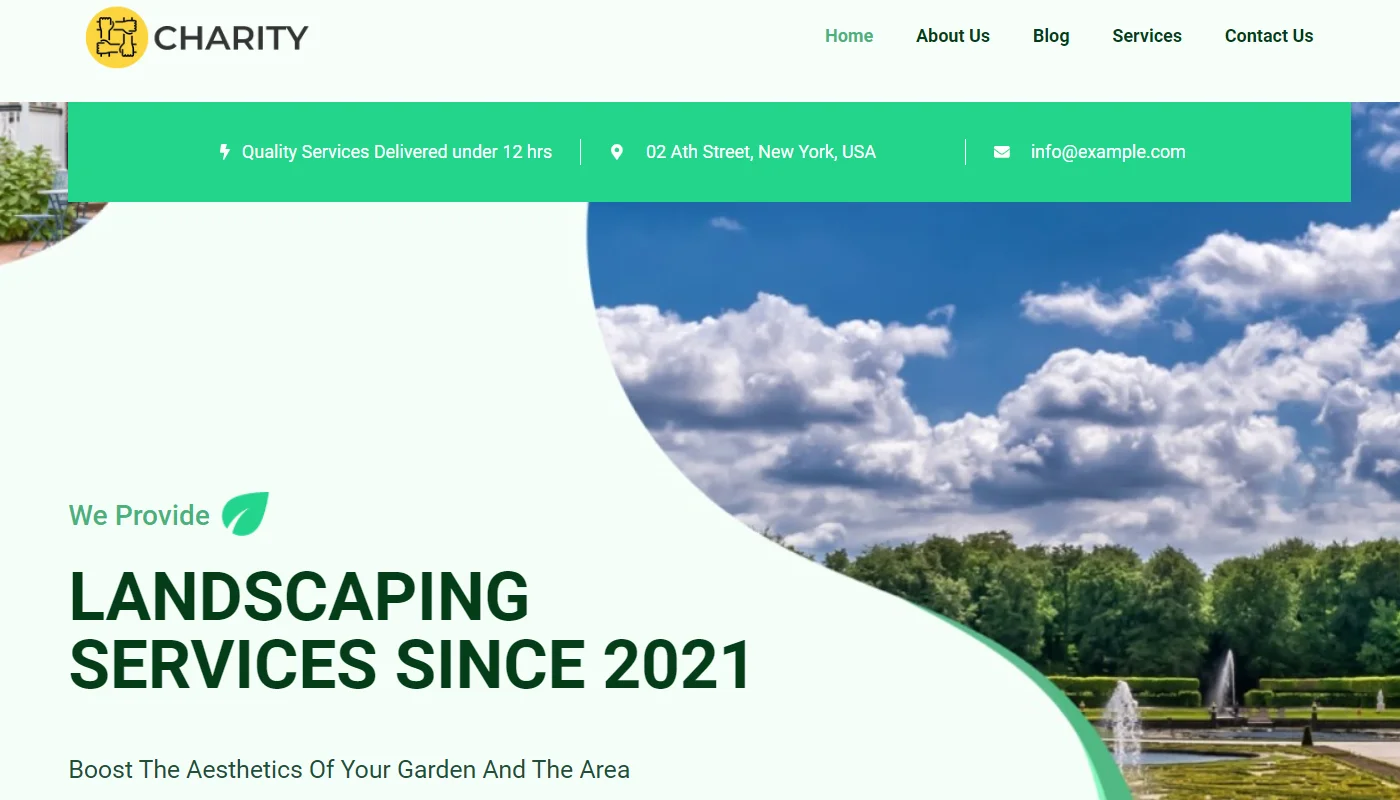
Once you activate the plugin, open the page where you want to add the progress bar widget. For this tutorial, we’ll use the Landscaping WordPress Website Template.
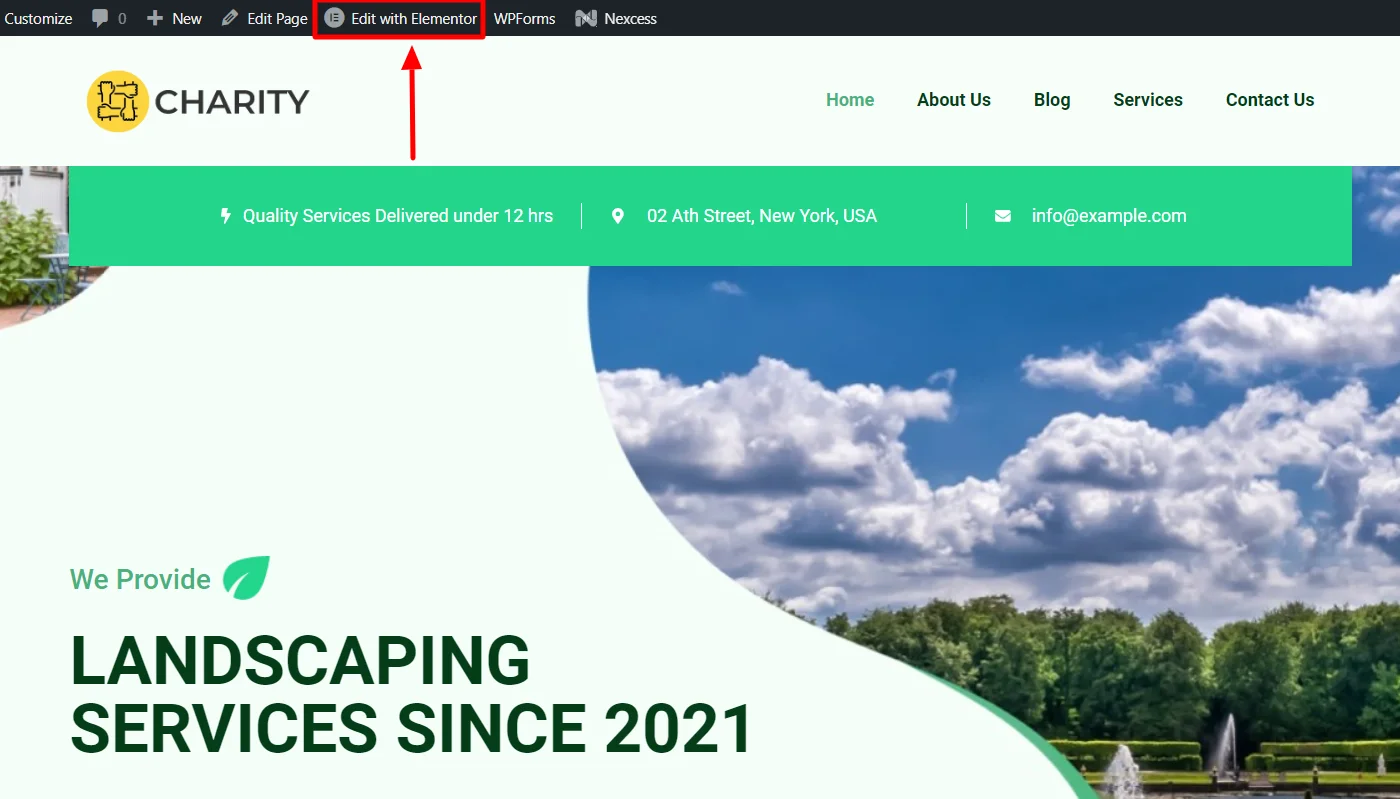
Click on Edit With Elementor on the page you want to edit.
Next, on the left sidebar, search for Progress Bar and the RAE Progress Bar appears.
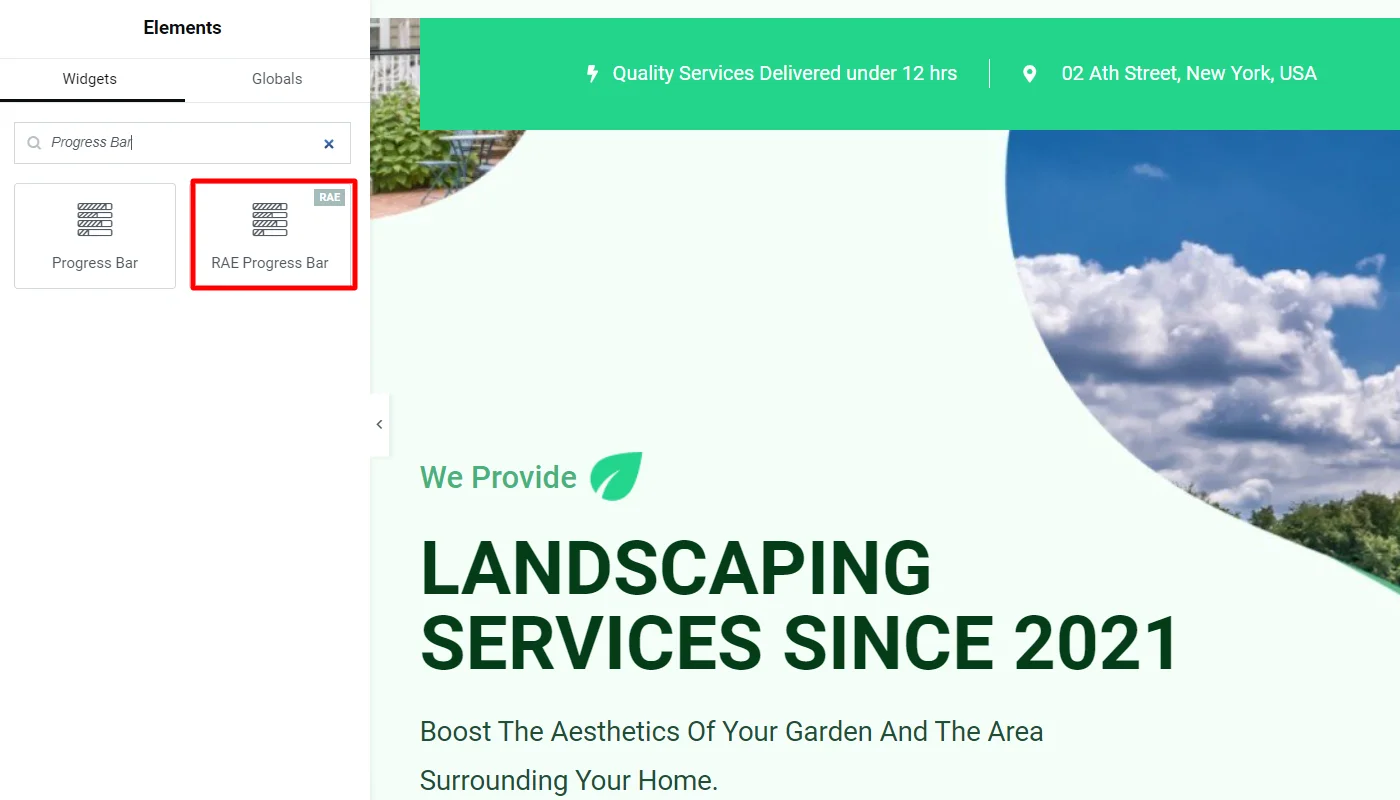
Drag and drop the RAE Progress Bar Widget in the section where you want to add it.
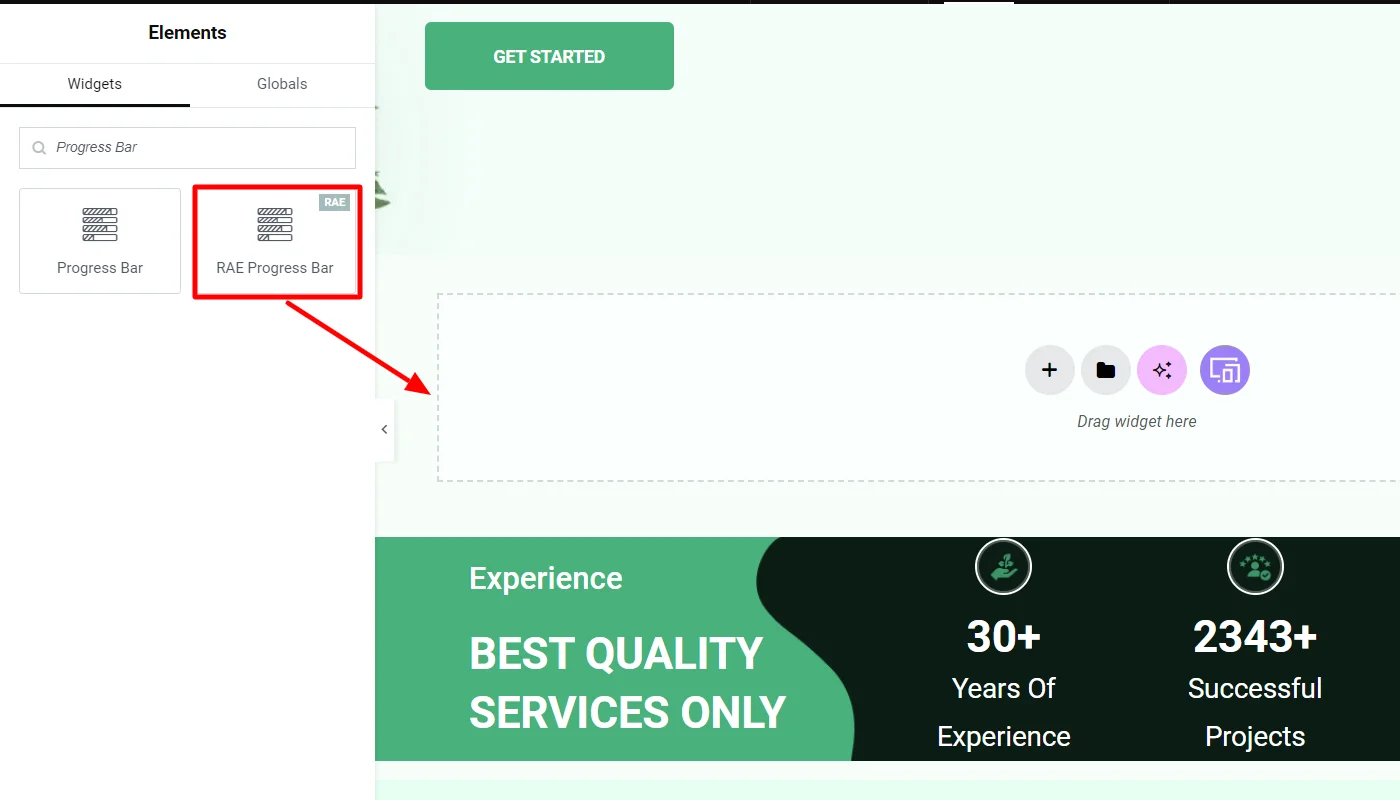
You have successfully added the progress bar widget. Now, let’s understand how to customize it.
Step 3: Customizing The Progress Bar Widget
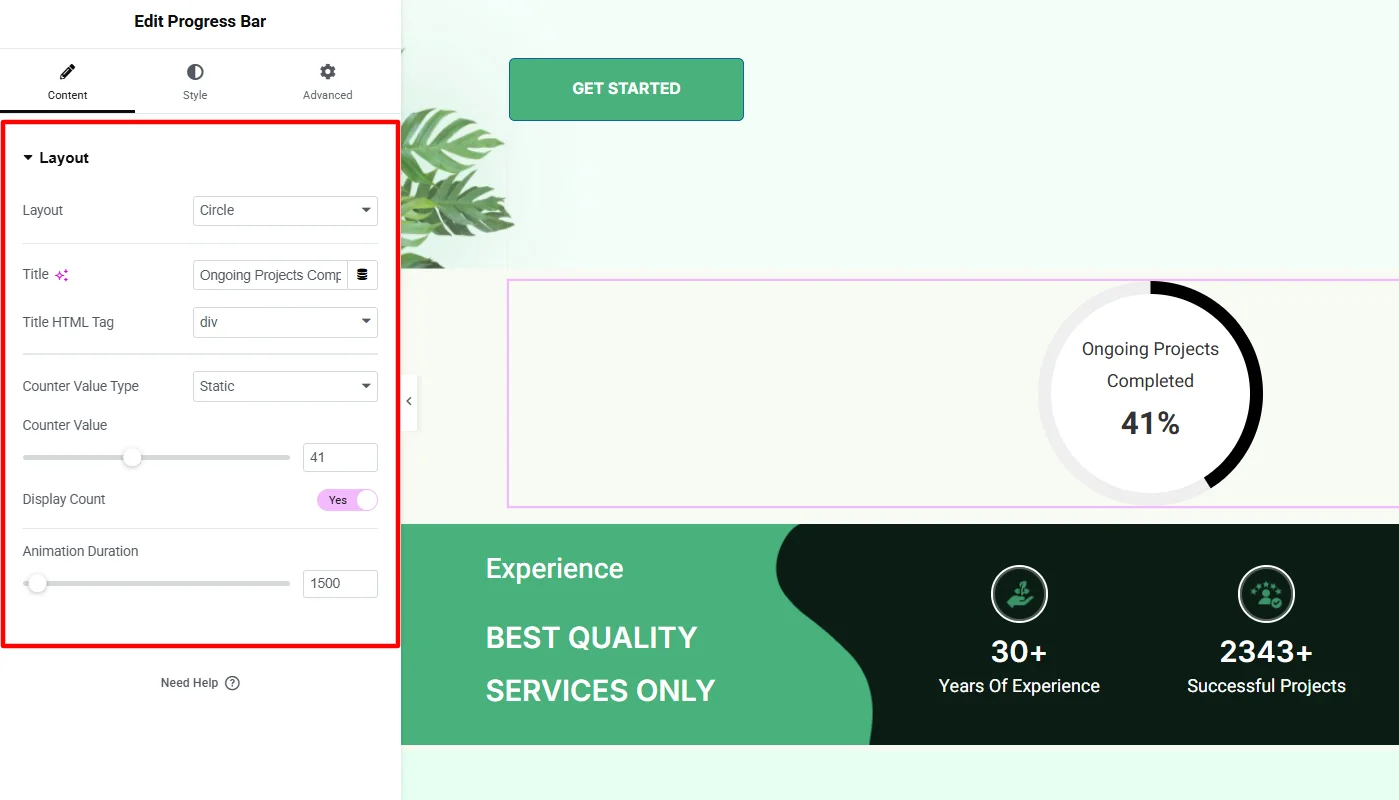
The widget offers various features to customize the content
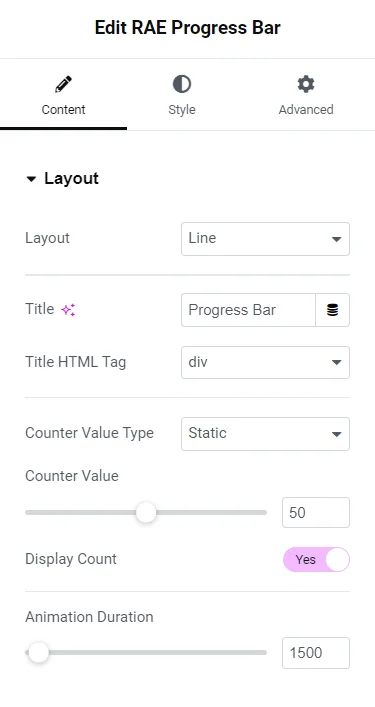
- Layout – This option allows you to select different layout styles for the progress bar. You can choose between line, circle, half-circle, and Box.
- Title – This option allows you to add a title to the progress bar.
- Title HTML Tag – This allows you to select HTML tag for title.
- Counter Value Type – You can set the country value as static or dynamic.
- Display Count – This option allows you to show/hide the count.
- Animation Duration – This option allows you to set the duration of the animation in ms.
Step 4: Styling The Progress Bar Widget
The widget also provides you with various features to style:
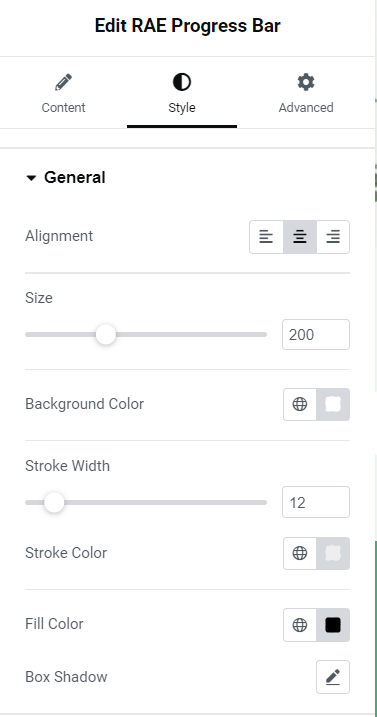
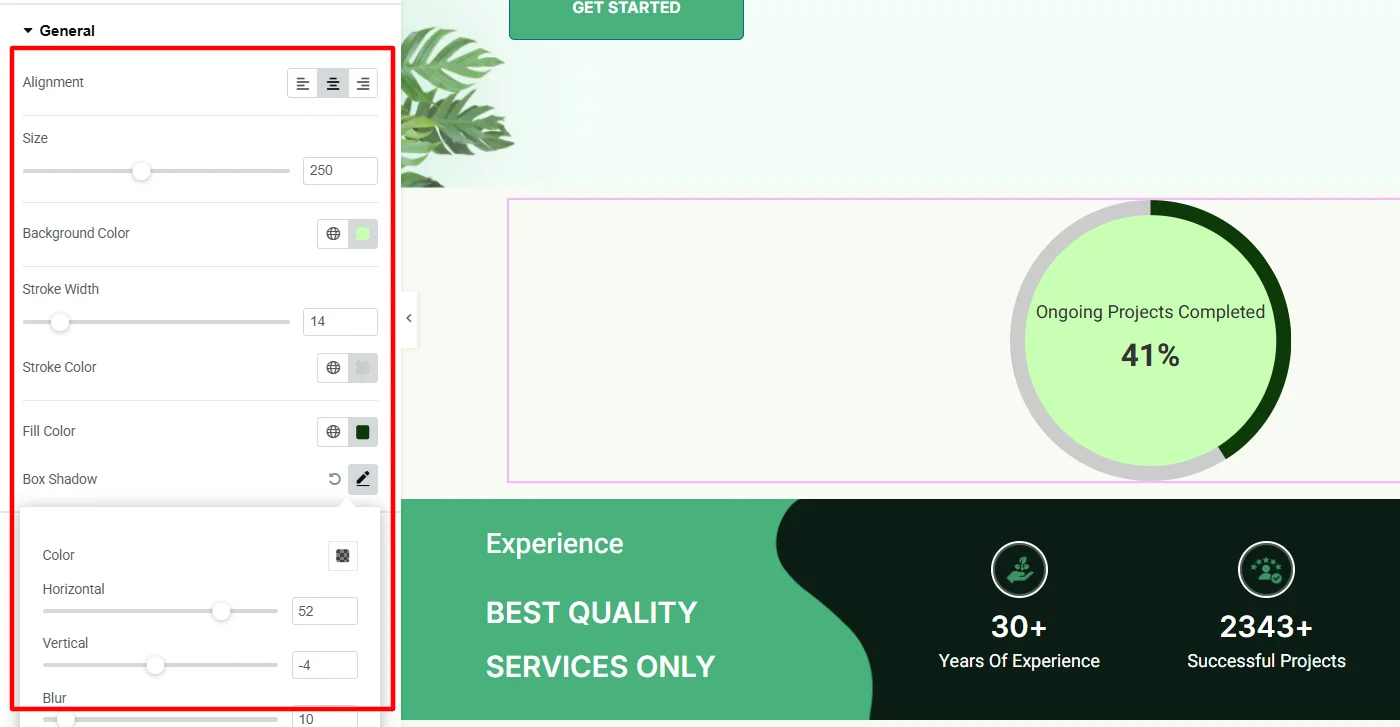
General Styling
- Alignment – You can set the alignment for the progress bar to left, right and center.
- Size – Set he overall size of the bar.
- Width – Change the width of the bar.
- Height – Change the height of the bar.
- Stroke Width – Add a stroke to the bar by changing the width from 0 or null.
- Stroke Color – Change the color of the stroke.
- Fill Color – Change the bar fill color.
- Box Shadow – Apply a box shadow to the bar.
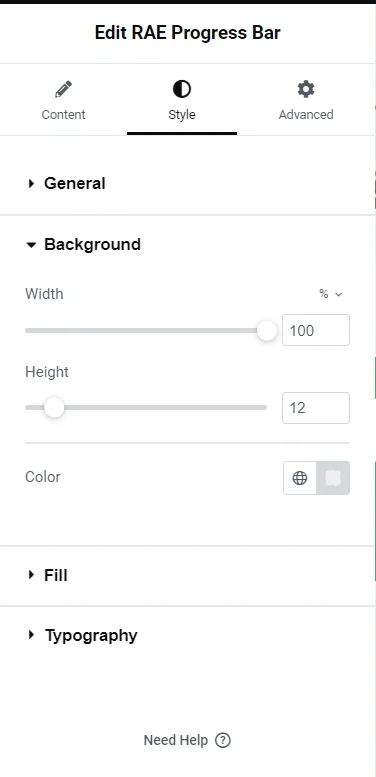
Background Styling
- Width – Set the width of the progress bar.
- Height – Set the height of the progress bar.
- Color – Set the background color of the bar.
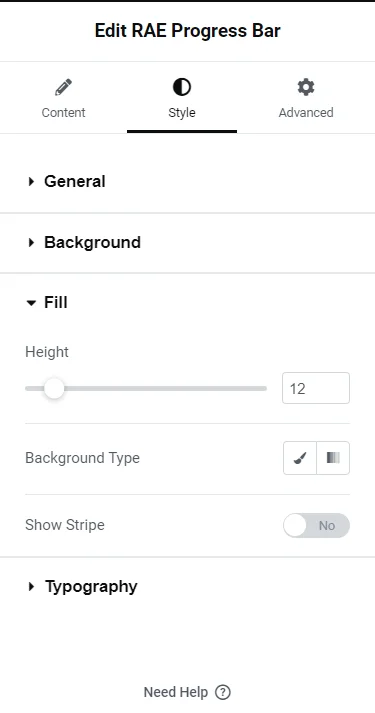
Styling Fill
- Height – This option allows you to set the height of the filled progress bar.
- Background – You can set the background color to the filled progress bar.
- Show Stripe – You can show stripe to the background color.
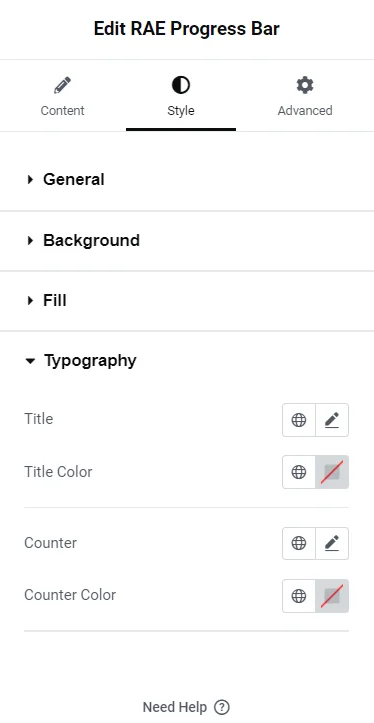
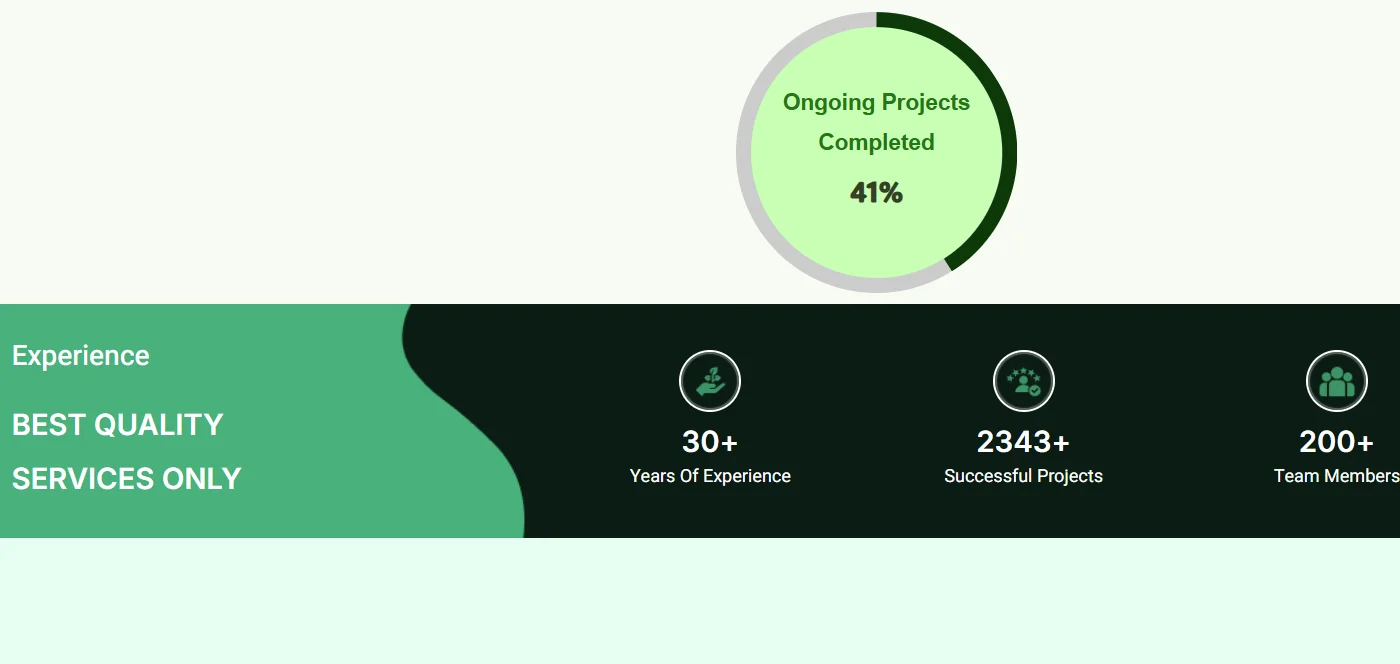
Styling Typography
- Title – You can set the typography and color to the title.
- Counter – You can set the typography and color to the counter.
How To Use Elementor Progress Bar Widget?
Now that we understand the settings offered by the Elementor Progress bar widget let’s examine how I created an interactive section for my website.
Upon dropping the widget, it appeared to be a basic blank appearance.
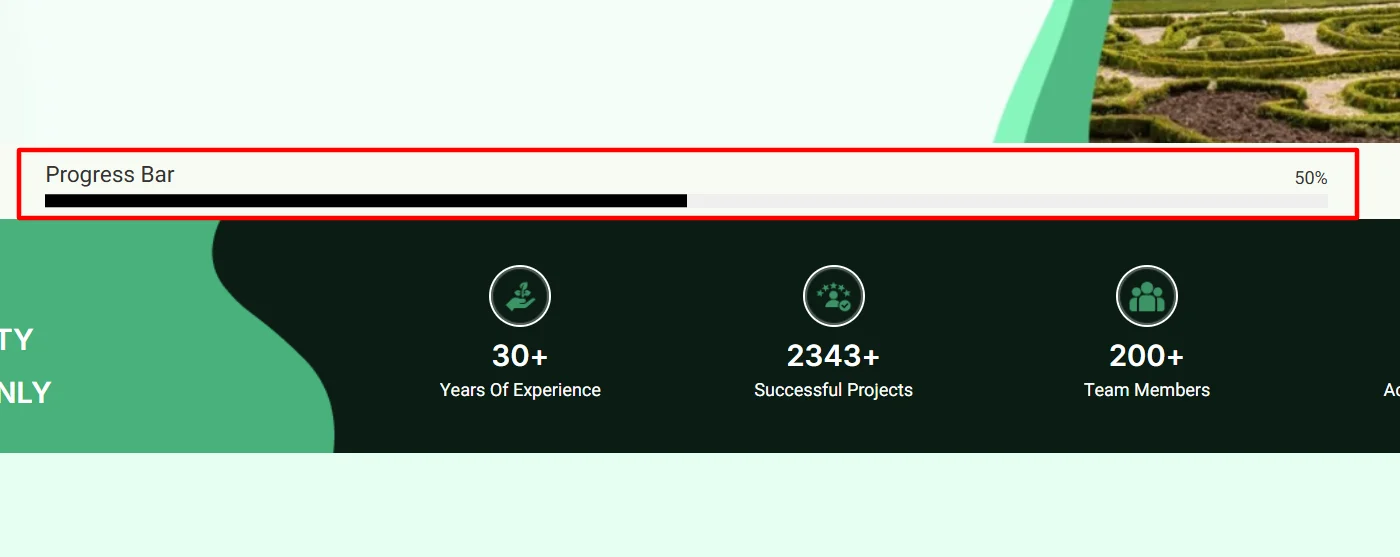
This line progress bar did not add much meaning to the website, so I customized the layout to include a “Circle” progress bar. In addition, I also changed the title to showcase the completion rate of ongoing projects.
I didn’t make other changes; I kept the counter value type dynamic, with a random value of 41%. You can change it to suit your needs.
Once the layout was set, I moved into styling the widget. For the general styling, I kept the widget centrally aligned and increased the default widget size to 250.
Furthermore, I made minor changes to the width, stroke color, and fill color to match the website’s aesthetics better.
Moreover, to style the typography for the widget, I changed the font and color of both title and counter value. I made these changes as I found them more appealing to the website’s look, you can experiment and create something for your site.

Once we made all the changes, our widget looked like this.
FAQ
To add a progress bar to your Elementor website install and activate the Responsive Addons for Elementor plugin. Next, you will be able to edit your page with Elementor, search for the Progress Bar widget, drag it into your section, and then customize it as needed.
A Progress Bar Widget is a tool in Elementor that visually displays task or process completion. It allows customization of appearance, colors, and animations, enhancing user engagement by providing clear visual feedback.
Yes, you can add a Progress Bar for free using the Responsive Addons for Elementor plugin, which provides a customizable progress bar widget without requiring a paid Elementor subscription.
Conclusion
Adding a progress bar to your Elementor website is a straightforward way to enhance user experience and engagement.
Using the Responsive Addons for Elementor plugin, you can easily integrate a customizable progress bar widget into your site without any cost. This tool not only helps keep users informed about their progress but also reduces frustration during lengthy processes.
Further, if you liked the article you can also consider reading:
- How to Add Slider To Your Elementor Website
- How To Add FAQ To Your Elementor Website
- How to Add Table Of Contents To Your Elementor Website
Also, check out the Cyberchimps Responsive Theme and create a multipurpose website with ease.


