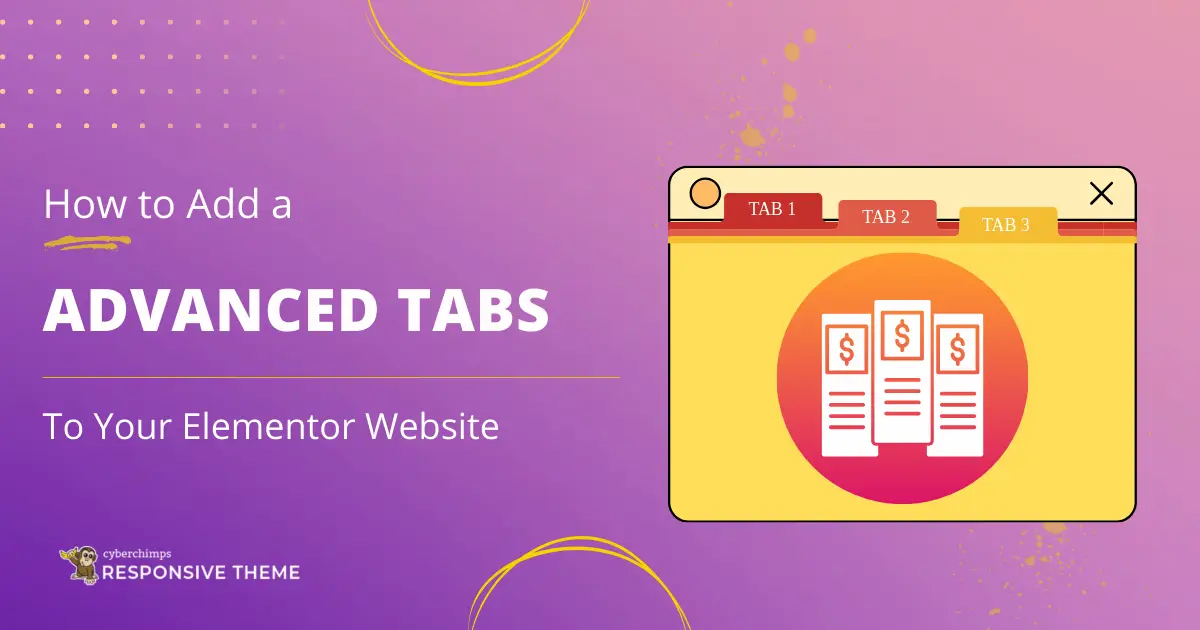
Are you looking to add advanced tabs to your Elementor website?
Visitors experience satisfaction when they can easily find what they need without navigating numerous pages or continuously scrolling down.
Integrating responsive design components allows content consolidation, making it visually appealing and easily understandable.
Multiple methods exist to engage users, including using advanced tabs to present information in an interactive and well-organized manner.
This guide is a detailed tutorial demonstrating how to add Elementor advanced tabs to your website, ensuring no details are overlooked. By the end, your website will be informative and more engaging for users, greatly enhancing their experience.
What is Elementor Advanced Tabs Widget?
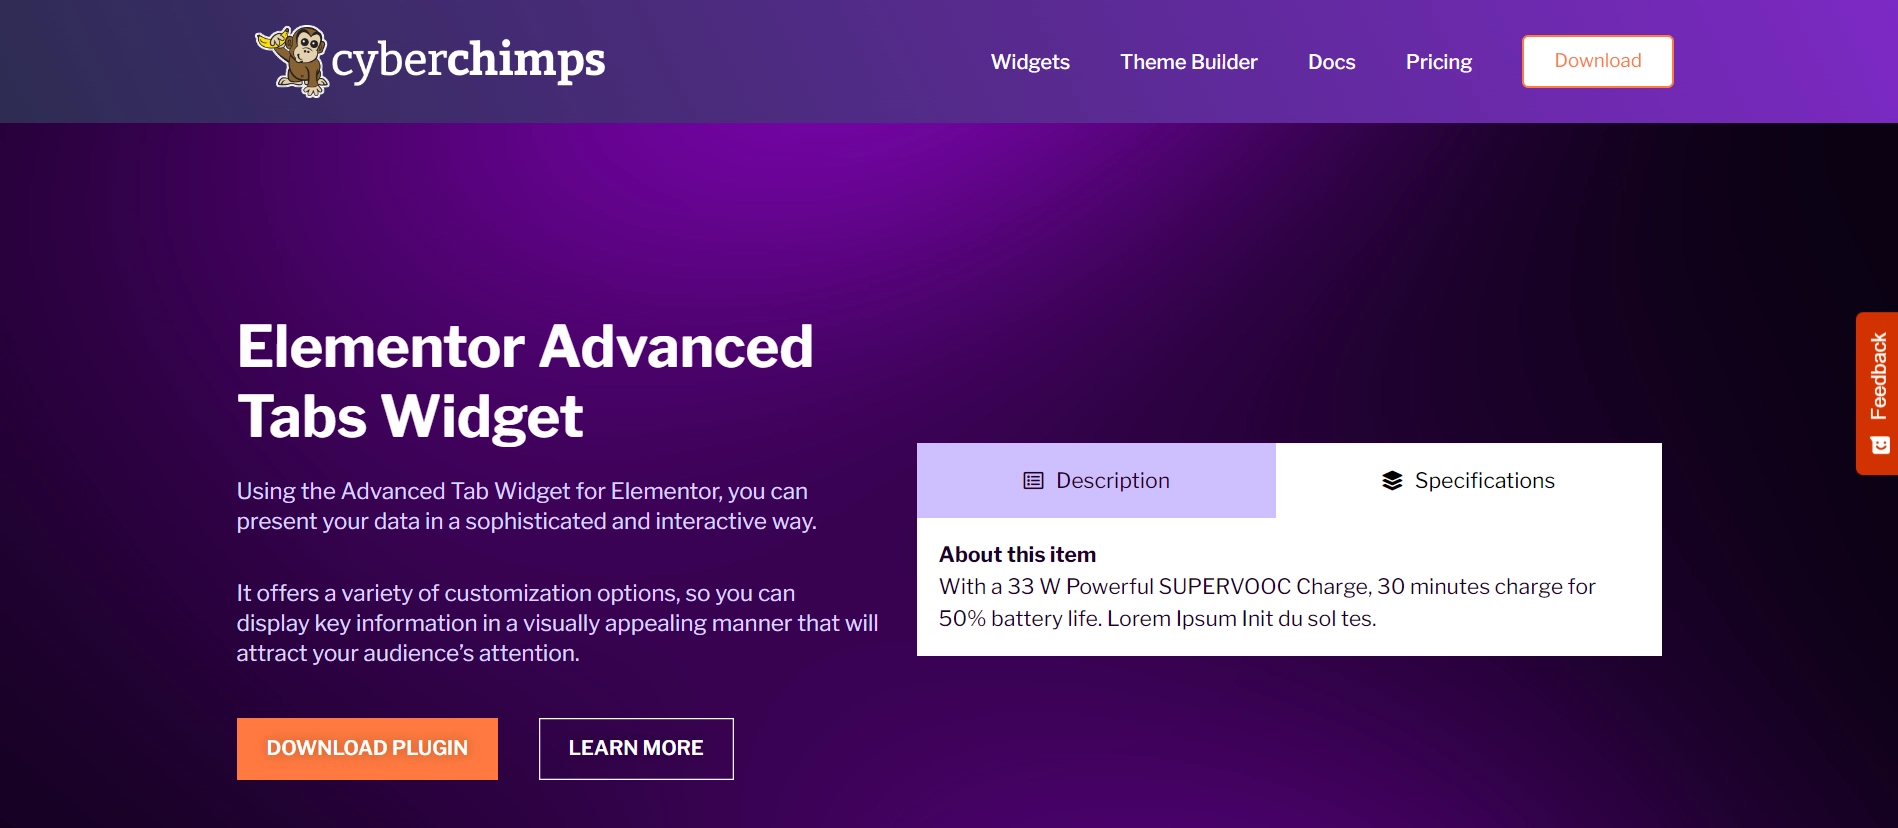
The Advanced Tabs widget is a powerful tool for showcasing information in a tidy and efficient manner.
This widget can be used to present several portions of content in an organized design, with a set of tabs allowing users to access sections.
It is perfect for pointing at content like product descriptions, frequently asked questions, service descriptions, etc., so visitors won’t get overwhelmed.
Its responsive design guarantees that your tabs look fabulous no matter what device you use to access your site —a computer, a tablet, or a mobile phone.
The Advanced Tabs widget is versatile and easy to use. The drag–and–drop system fits well into Elementor, and adding elegant tabs will not be challenging even for those who have no prior experience in web development.
Things You’ll Need for Adding Advanced Tabs in Elementor
To seamlessly add a free advanced tab widget to your Elementor website, you will need the following essential resources:
Elementor
Elementor is a well-known WordPress page builder plugin that allows website development and customization without coding.
With its drag-and-drop interface, users can easily rearrange different elements and widgets as required, enabling the visual creation and modification of web pages.
Elementor lets you quickly and easily create a professional-looking website with extensive functionality and a polished design.
Responsive Addons for Elementor
Another essential plugin is Responsive Addons For Elementor, which provides over 80 advanced widgets and over 250 ready-to-use templates for free.
Additionally, it offers advanced customization options, including responsive controls, widget adjustments, and design elements tailored for desktop, mobile, and tablet displays.
Responsive Addons for Elementor significantly improve user experience and interaction, making it particularly valuable for developers and designers aiming to create professional, dynamic, and mobile-friendly websites quickly and easily.
How to Add Advanced Tabs in Elementor
The following steps will guide you in adding and customizing the advanced tabs widget.
[Note: To add an advanced tabs widget, the website must be built with the Elementor page builder].
Cyberchimps offers 250+ Elementor templates you can use to build your website instantly.
The Responsive Addons for the Elementor plugin can significantly boost your website design capabilities. It provides a wide range of advanced and customizable widgets that integrate seamlessly with Elementor.
Now, let’s look at how to add the advanced tabs in Elementor.
Step 1: Installing and Activating Responsive Addons for Elementor
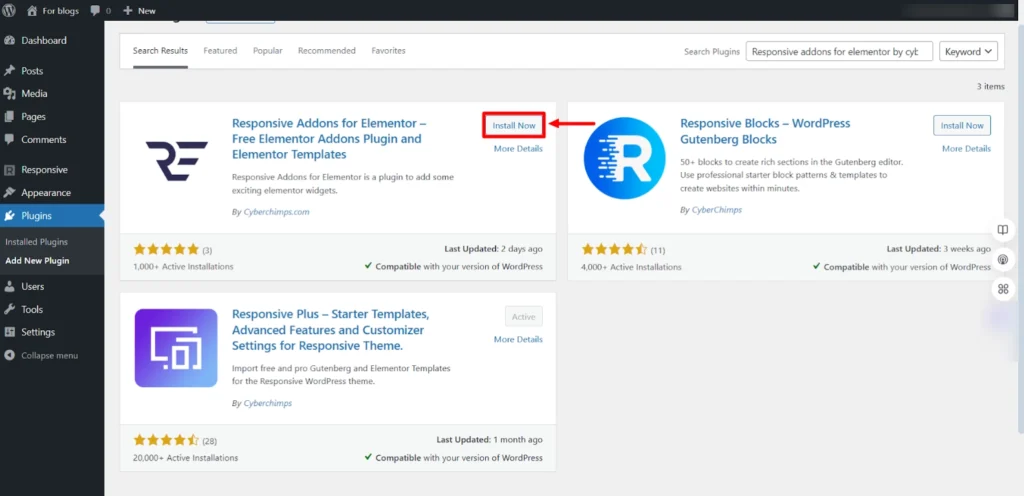
Go to the WordPress dashboard and click Plugins > Add New from the menu.

Search for Responsive Addons for Elementor in the search bar. Then, click on Install Now.
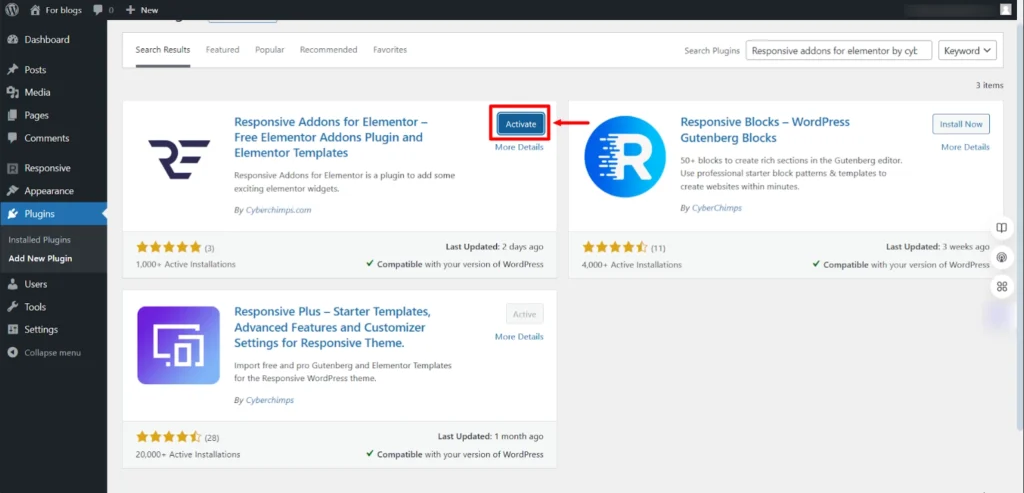
Once the download is complete, click on Activate to activate the plugin.
That’s it! You’ve successfully added the Responsive Addons for the Elementor plugin.
Step 2: Adding Advanced Tabs Widget to the Page
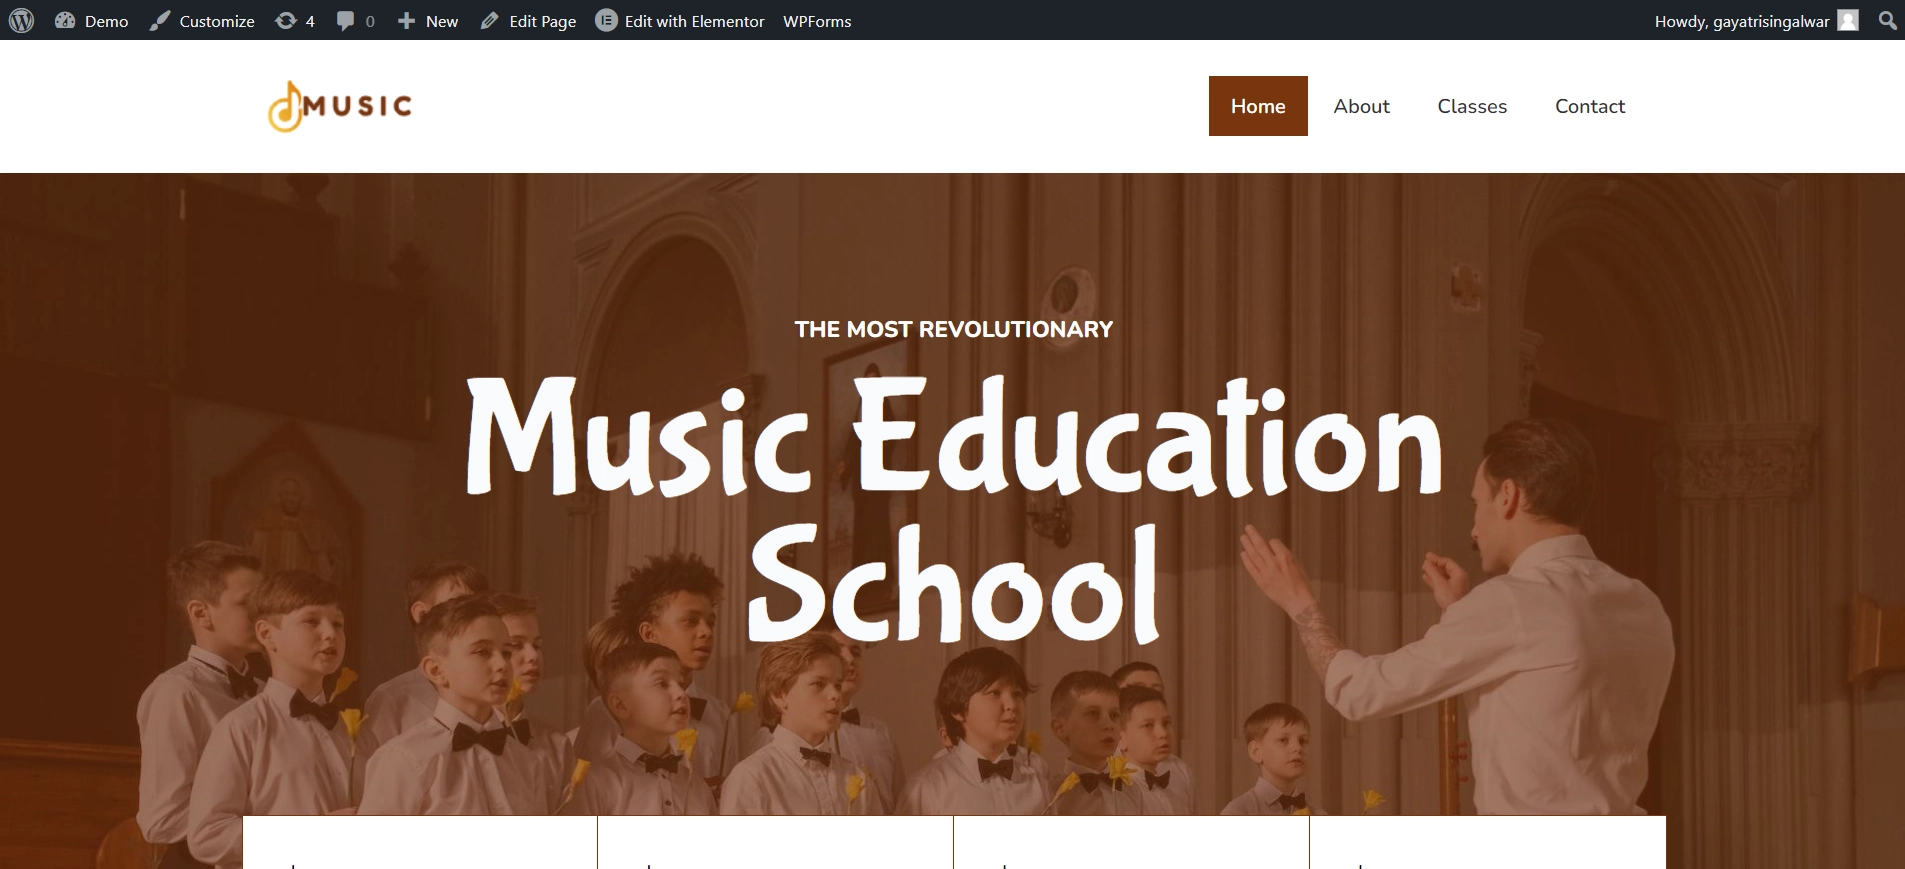
We will use a pre-designed Music School WordPress Template to add advanced tabs to WordPress.
You can access a variety of templates from the Responsive Plus collection of free WordPress templates.
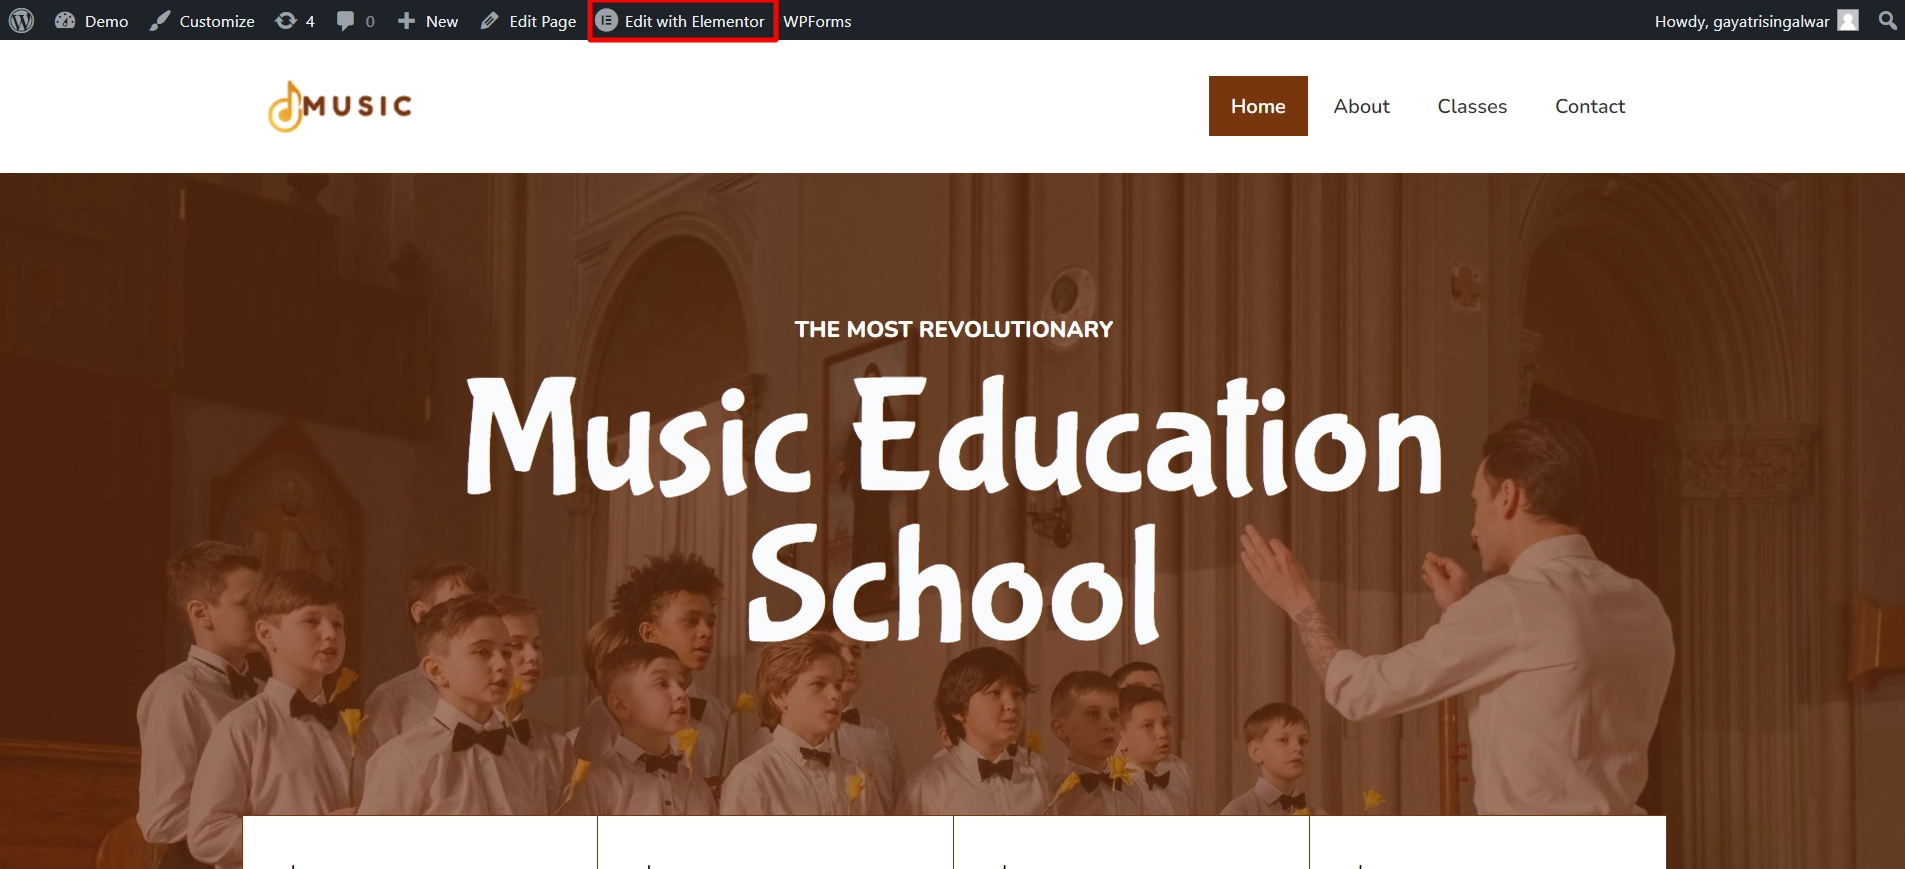
Next, navigate to the relevant page and select Edit with Elementor.
In the search bar, type RAE Advanced Tabs.
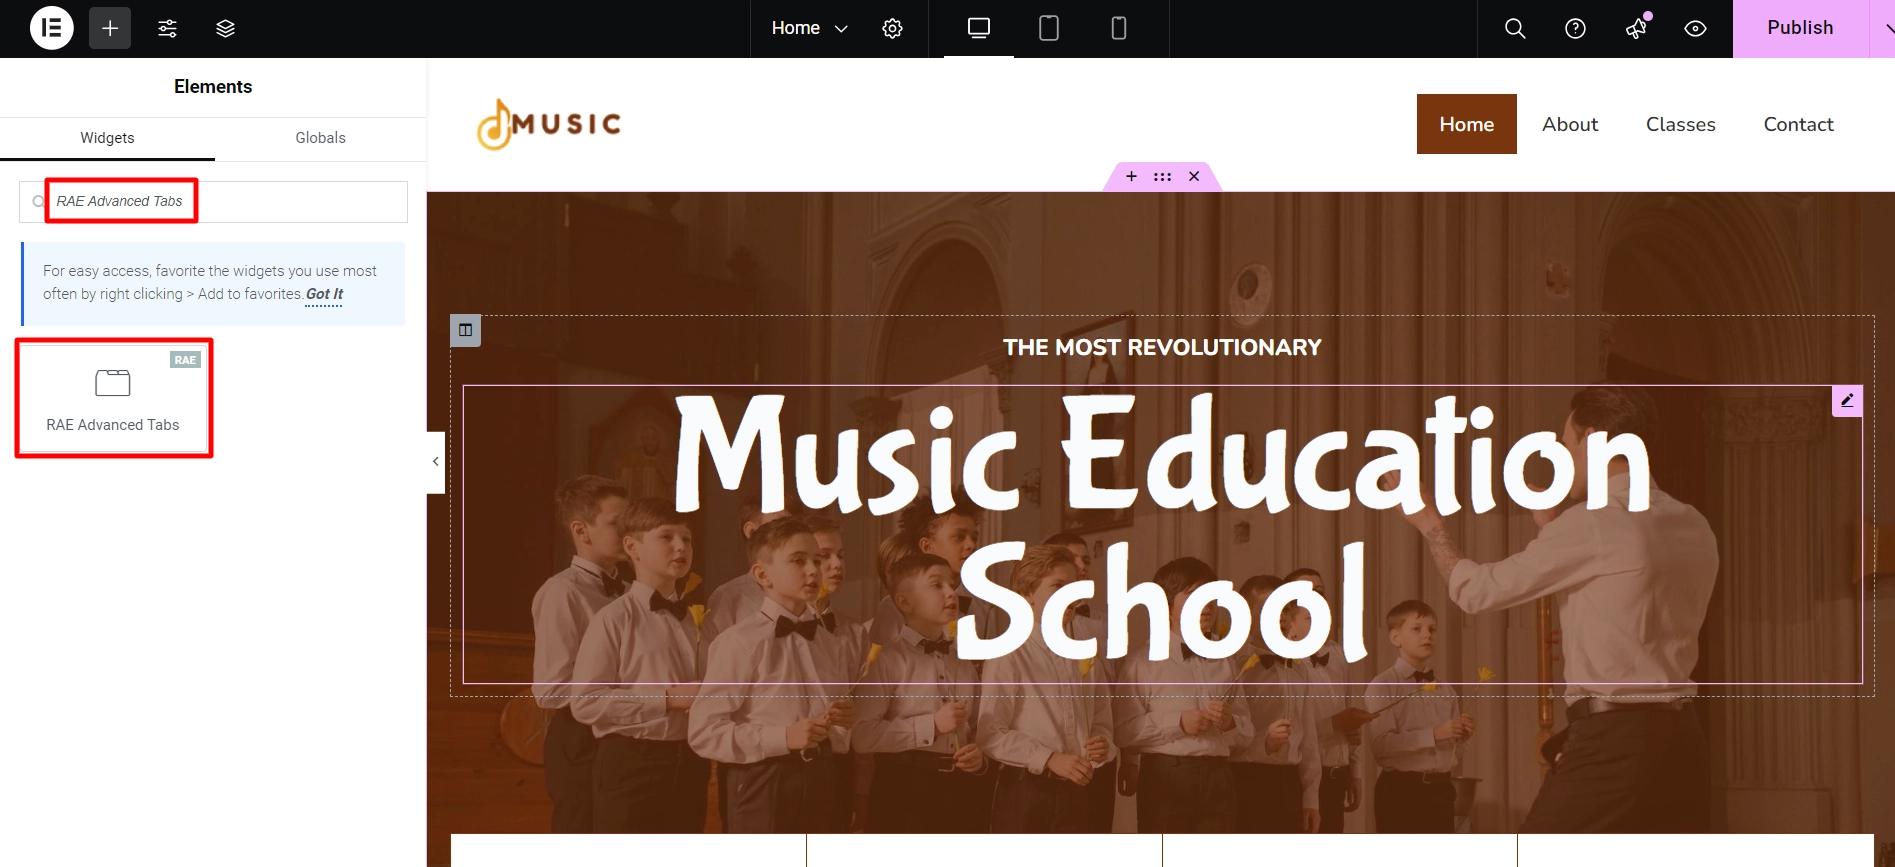
Then, drag and drop the widget onto the page to seamlessly integrate it into your design.
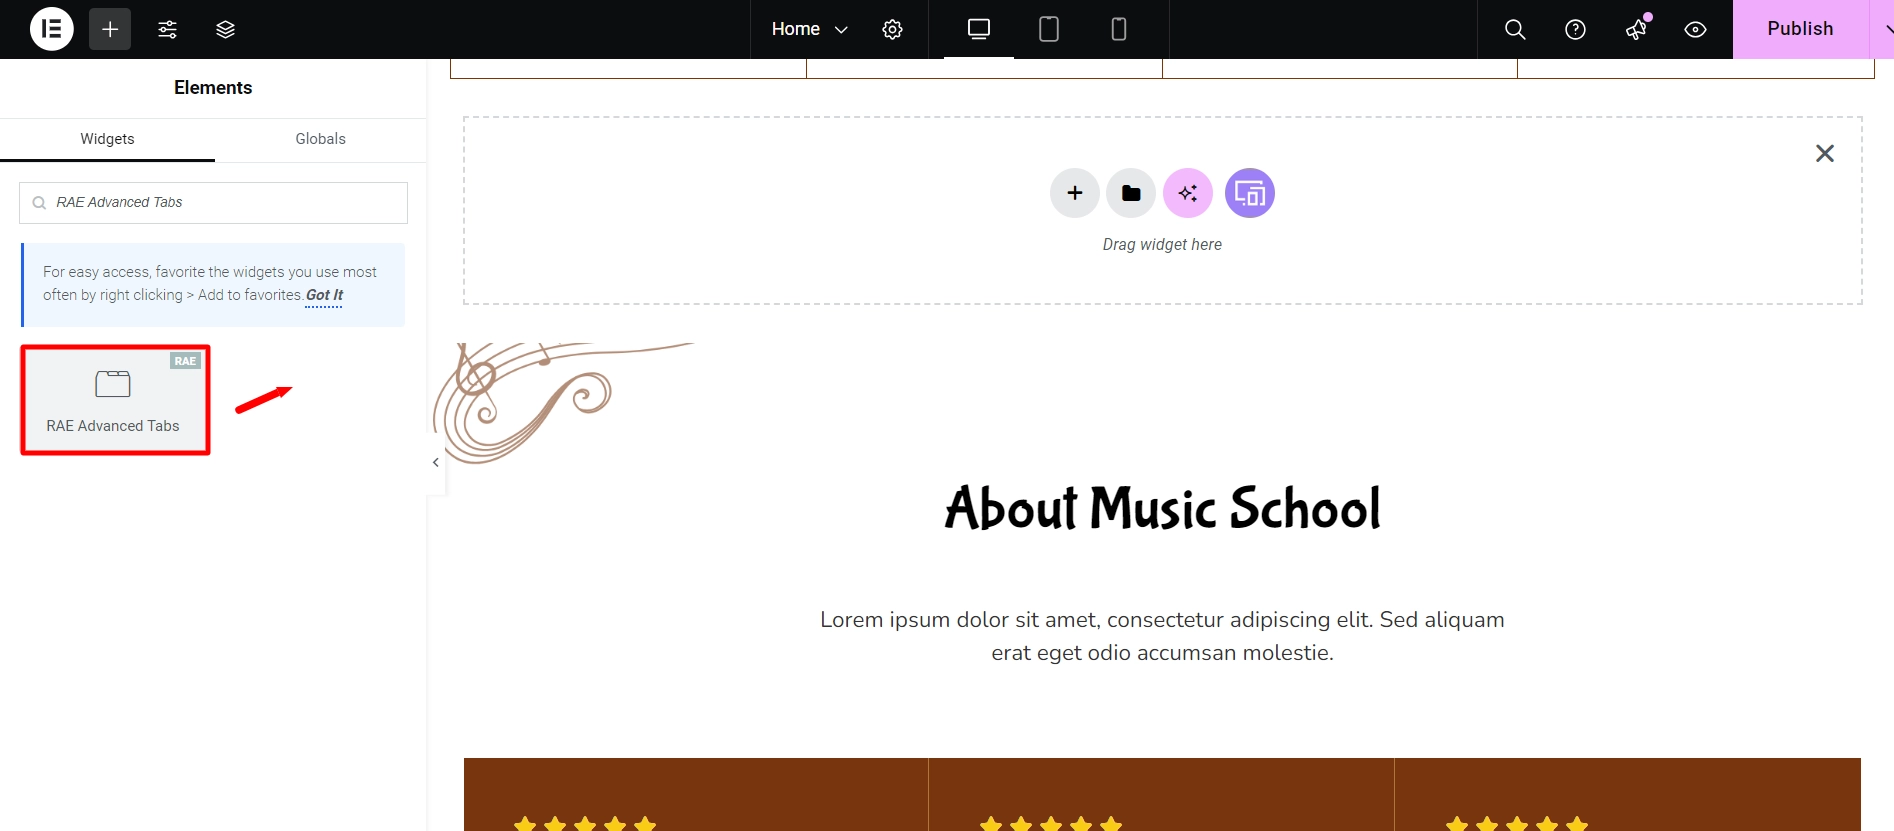
Once you place it on the desired page, you’ll see how it looks by default.
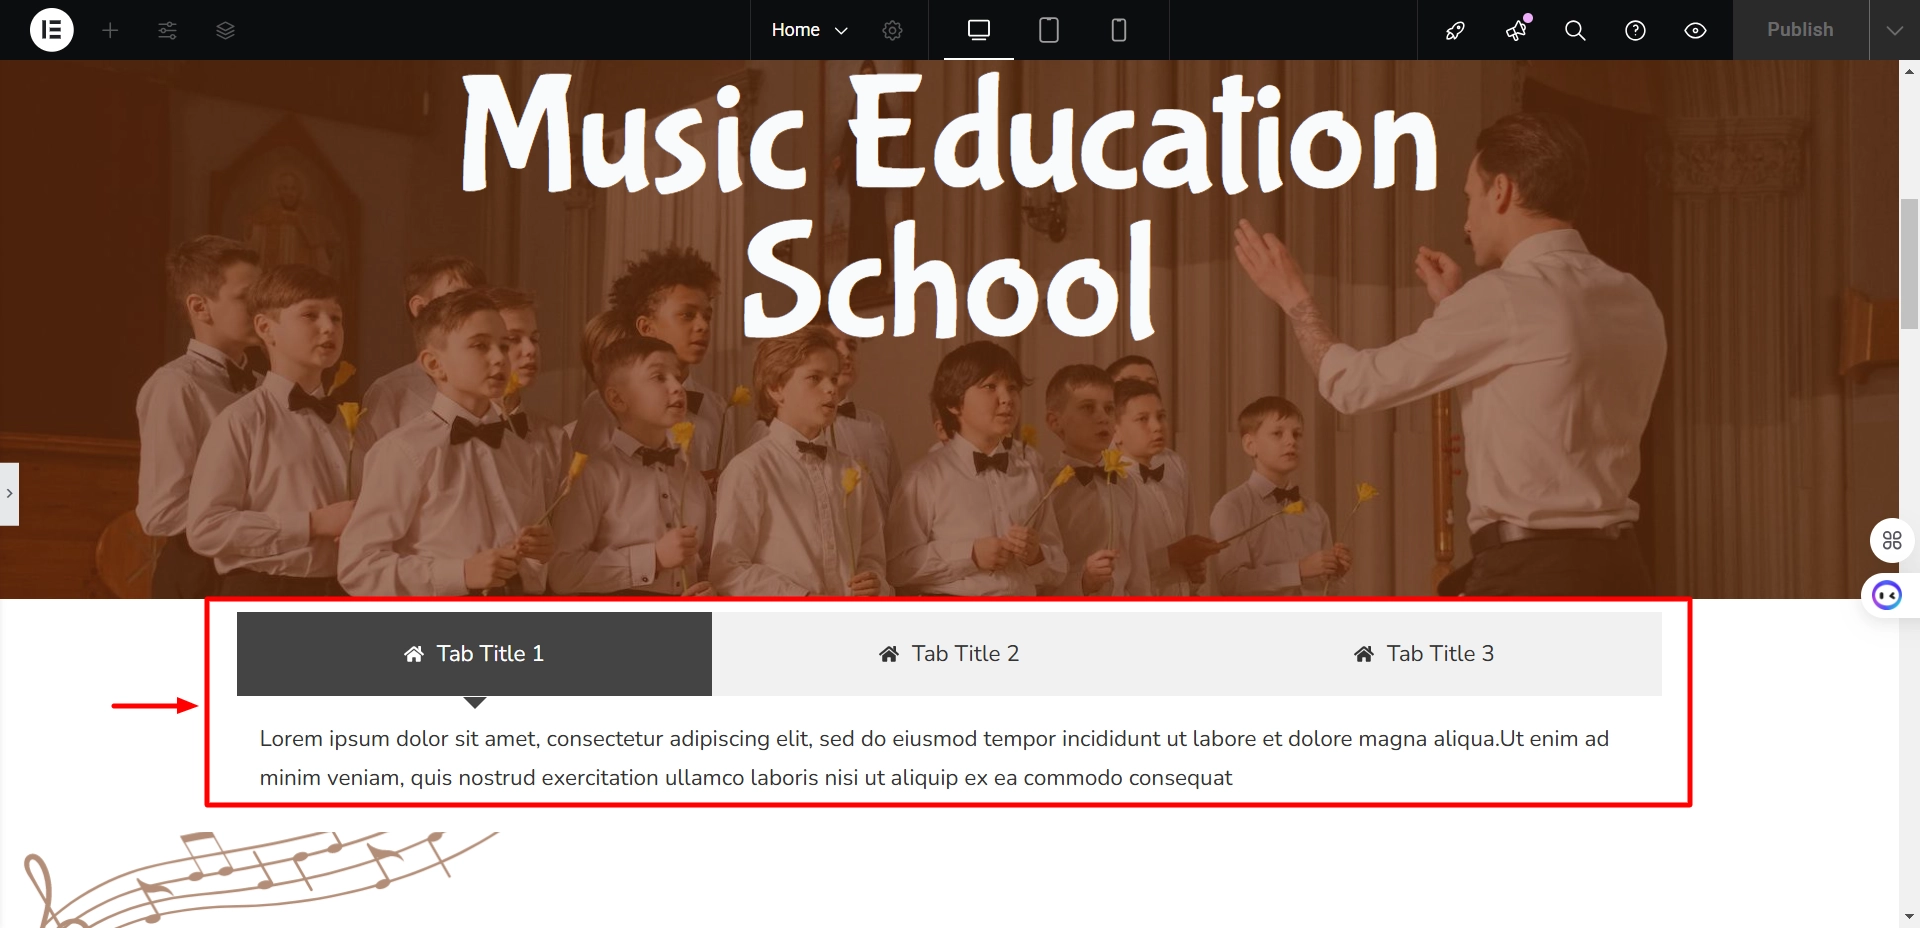
You have just added the free WordPress advanced tabs widget, allowing you to customize it according to your preferences.
Step 3: Customizing the Elementor Advanced Tabs Widget
Customizing your widget can be done in multiple ways.
Next, we will explore the Content section.
General Settings
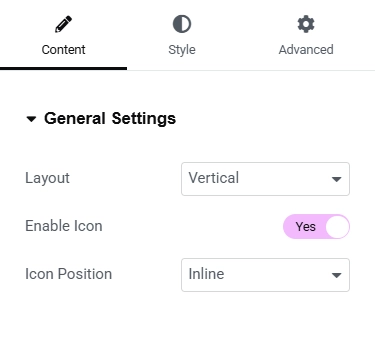
General Settings
- Layout: Choose the layout that best suits the display of your content.
- Enable Icon: Tick this box to show icons alongside the tab title.
- Icon Position: Choose “Inline” to display the icon on the same line as the title or “Stacked” to show them on separate lines.
Following are the changes we made to make our website visually appealing:`
We selected the Vertical Layout for a sleek and organized display. This arrangement allows the tabs to stack neatly on the side, making it easier for users to navigate through the content.
We enabled icons alongside the tab titles to enhance the visual appeal. This addition adds a touch of design and helps users identify tab categories quickly.
For better alignment, we chose the Inline position, which displays the icons on the same line as the tab titles. This keeps the layout compact and ensures a polished look.
Content
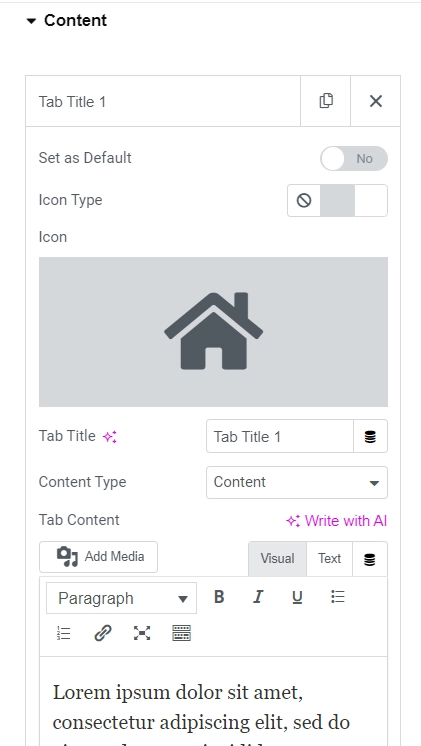
Content Settings
- Set as Default: Use this option to set a specific tab as the default tab displayed when the page is loaded.
- Icon Type: You can choose to display no icon, an icon, or an image for the tab.
- Tab Title: Modify the title of the tab easily from this section.
- Content Type: Select “Content” to add your custom content or “Saved Templates” to choose from existing templates.
- Choose Template: If you opt for “Saved Templates,” you can choose the template whose content you want to display.
elementorChanges made by us for our website template:
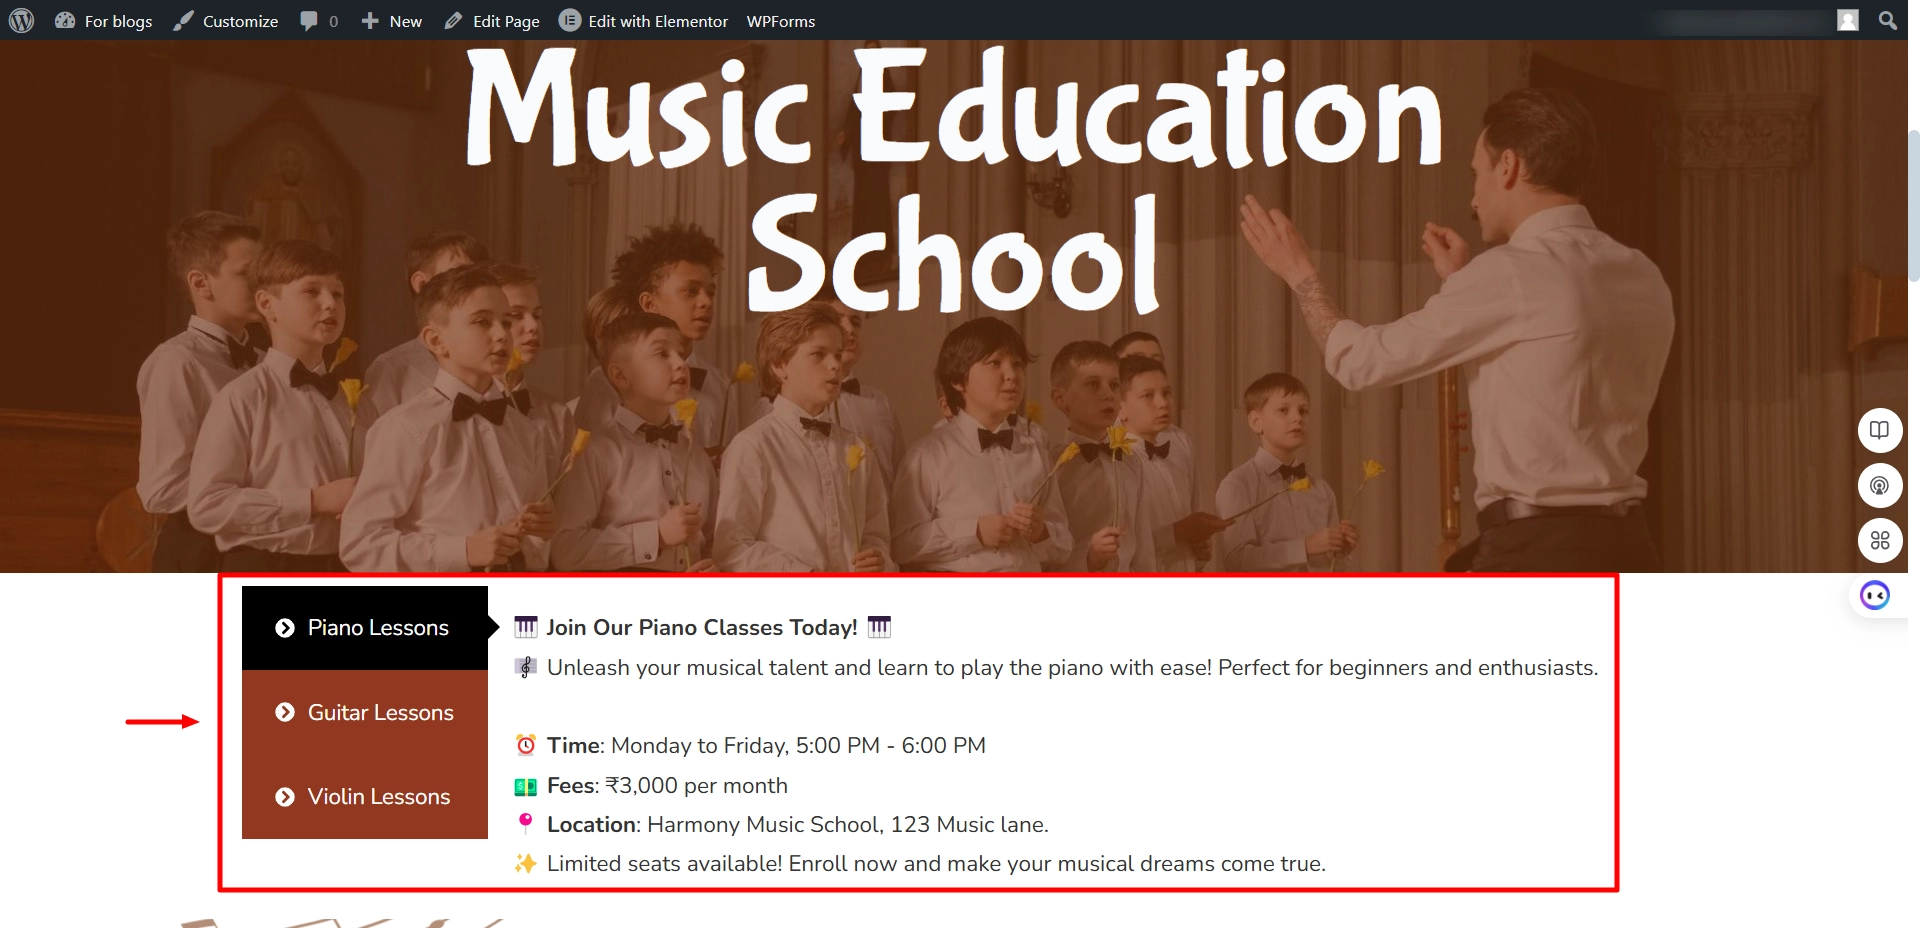
We opted to include an icon to make the tabs more visually engaging. From the icon library, we selected the “chevron circle right” icon, which perfectly complements the modern look of the website and makes navigation intuitive for users.
Clear and relevant titles are crucial for user experience. We customized the three tab titles to reflect the services offered on our website:
- Piano Lessons
- Guitar Lessons
- Violin Lessons
To provide detailed information about each class, we chose the “Content” option instead of using pre-saved templates. This allowed us to add specific class details directly, ensuring the information was tailored and up-to-date.
Step 4: Styling the Elementor Advanced Tabs Widget
Let’s move towards styling our widget now.
Image
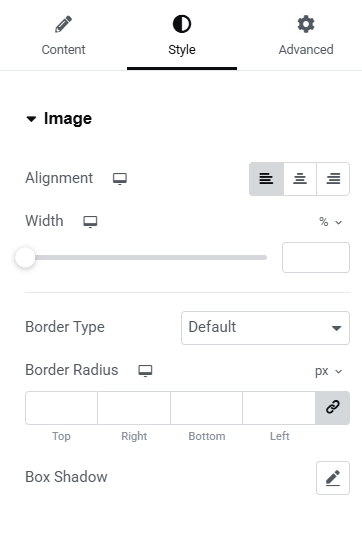
Image Settings
- Alignment: You can set the image’s alignment.
- Width: This slider allows you to set the width.
- Border Type: Select the border type from the drop-down menu.
- Border Radius: Allow you to set the border roundness.
- Box Shadow: Let you add a box shadow to the image.
The default settings look perfect for our example website, and we felt no need to adjust them further.
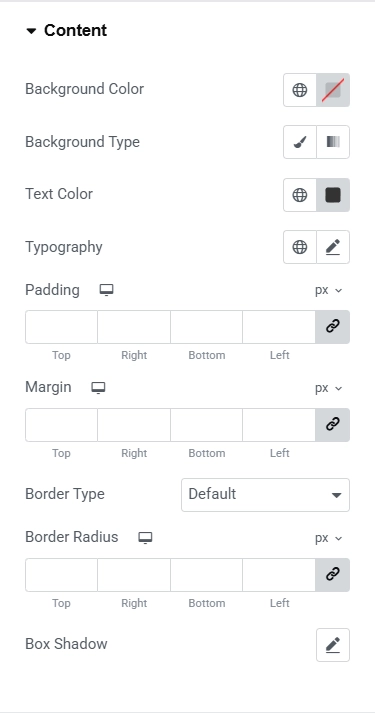
General
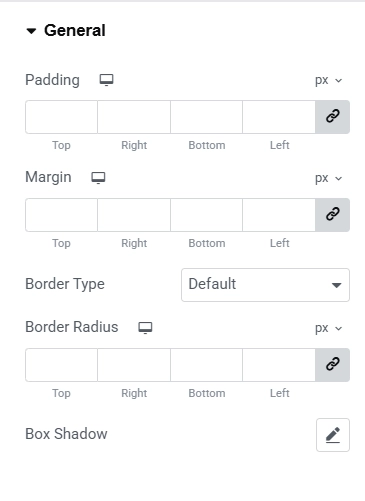
General Settings
- Padding: You can set the padding here.
- Margin: This option will let you set the margin.
- Border Type: You can set any border from the drop-down menu.
- Border Radius: This lets you set the border roundness.
- Box Shadow: Allows you to set the box shadow.
In this section, we have decided to leave the settings as they are, without making any changes. The default settings of the Advanced Tabs widget already look perfect for our example website, so there’s no need for adjustments in padding, margin, border type, border radius, or box shadow.
Tab Title
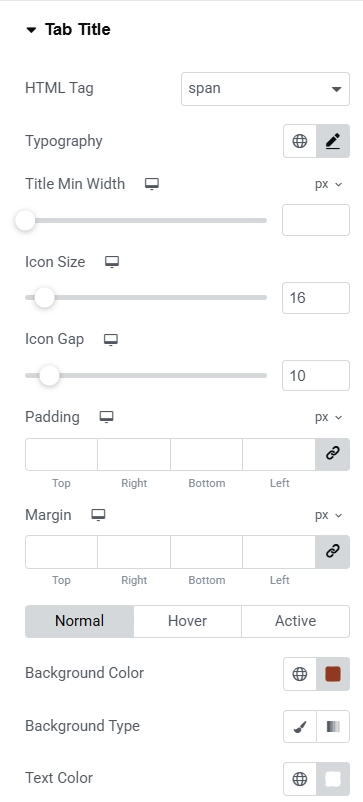
Tab Title Settings
- HTML Tag: You can add an HTML tag to the tab title.
- Typography: Defines the typography for the tab title.
- Title Min Width: Sets minimum width for the same.
- Icon Size: Adjust the size of the icon.
- Icon Gap: This lets you set the gap between text and icon.
- Padding: Adjust the padding for the tab title.
- Margin: Adjust the margin for the tab title.
- Background Color: Set the background color for the tab.
- Background Type: You can select the background type for the tab.
- Text Color: Set the text color for the title.
- Border Type: Select the border type from the drop-down menu.
- Border Radius: Set the border-radius for border roundness.
Breakdown of the changes we implemented for our example website:
We selected the span tag for the tab title. This ensures clean HTML structure while keeping the design simple and easy to style.
We set the icon size to 16px, ensuring the icon is appropriately sized with the text and doesn’t overpower the tab title.
For the spacing between the text and the icon, we set the icon gap to 10px.
We chose a brown color (#913920) for the tab’s background. This warm tone adds a touch of elegance and complements the website’s overall design.
We selected the gradient background type to add some depth. This creates a subtle, smooth transition between colors that enhances the visual appeal of the tabs.
The text color for the tab titles is set to white, ensuring good contrast and readability. I also set the icon color to white, keeping the design uniform and cohesive.
Content
Content Settings
- Background Color: You can set the background color for the content.
- Background Type: Set the background type for the content.
- Text Color: This allows you to set the text color of the content.
- Typography: Let you set the typography.
- Padding: Define the padding for the content.
- Margin: Define the margin for the content.
- Border Type: Select the border type from the drop-down menu.
- Border Radius: Set the border-radius for border roundness.
- Box Shadow: Enables the box shadow for the content.
Below are the changes we implemented to ensure the content looks clear and professional:
We selected a gradient background for a sleek, modern look. This adds a subtle visual appeal while keeping the content readable.
The text color has been set to black, making the content easy to read and ensuring high contrast against the background.
Caret
Caret Settings
- Show Caret on Active Tab: If enabled, display the tiny arrow next to the active tab.
- Size & Color: Adjust the caret’s size and color if you display it.
For this example website, I made a few adjustments to the Advanced Tabs Widget settings to enhance the tab navigation experience:
We enabled this setting to display a small arrow next to the active tab. This arrow helps users quickly identify the active tab, improving the overall navigation.
For the caret’s appearance, we set the size to 10px and the color to black (#000000).
Responsive Controls
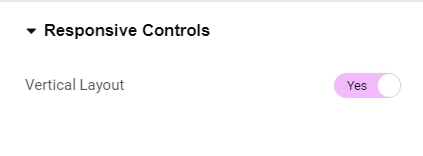
Responsive Controls Settings
- If checked, the horizontal layout will automatically switch to a vertical layout for smaller screen sizes. This ensures that the tabs are displayed without any issues or awkward appearance.
The Final Output
This is what our final result will look like.
FAQ
Install and Activate Responsive Addons for Elementor
Open the page where you want to add advanced tabs (Use an Elementor template)
Edit with Elementor
Search for the widget
Drag and drop the widget
Customize the widget
Publish the page
Using Responsive Addons for Elementor (RAE) ‘s Advanced Tabs widget, you can present a large volume of information in a visually appealing and structured manner within separate tabs.
You can add advanced tabs for free using the Responsive Addons for Elementor plugin by Cyberchimps.
Conclusion
Using the Advanced Tabs widget from Responsive Addons for Elementor allows you to display crucial information in an organized and interactive manner without overwhelming your site visitors.
With its extensive range of customization features, you can guarantee that the tabs seamlessly blend with your website’s design and functionality, providing easy navigation across all devices.
By following this detailed tutorial, you can seamlessly set up and personalize advanced tabs, thereby improving your website’s overall professionalism and interaction.
If you found this article helpful, you may also want to check out:
- How To Add Multi Buttons To Your Elementor Website
- How To Add Back To Top Button In Elementor
- How to Add Audio Player To Your Elementor Website
If you wish to include an advanced tabs widget on your site, get the Responsive Addons for Elementor today! You might also want to install the Responsive theme, a versatile website theme that can streamline your website creation process.


