Do you want to build a WordPress site with Elementor?
You need an attractive and fully functional website to make a good first impression on your audience!
If you lack the technical skills, creating a website from the ground up using WordPress can feel overwhelming.
Lucky for you, you won’t have to hire a developer or take coding classes. In fact, with WordPress and the Elementor page builder, you have all you need to create a stunning website for your business without any coding.
WordPress is a content management system (CMS) that you can use to schedule and build websites quickly.
With its library of useful plugins, ready-made themes, and drag-and-drop Elementor page builder, you can create powerful, optimized websites as easily as ever.
This is the ultimate guide with all the details on how to create a WordPress website using Elementor.
So, let’s get started!
Essential Requirements for Building a WordPress Website
To successfully create a WordPress website, you will need the following essentials:
1. Setting Up Domain and Hosting
Choose a suitable domain name and web hosting to create a professional WordPress site.
Domain names help you find your site and store your site files. If you are building personal sites, using your name as the domain can help a great deal with your brand in search results. If you are a business, enter your business name as the domain.
Good web hosting is important because it affects your site’s speed, performance, and security. A site that loads faster will rank higher in Google and show a better user experience.
You need a suitable one, from budget-shared plans to pricier dedicated servers.
If you want to find hosting services for your WordPress website, these are the options to consider:
Hostinger

Hostinger is a well-known web hosting company that has a lot of features at an affordable price, it is reliable and easy to use. Shared hosting is sold at budget prices, doing well for personal sites or small and mid-size companies. They also offer VPS and cloud hosting for high-traffic sites.
Cloudways
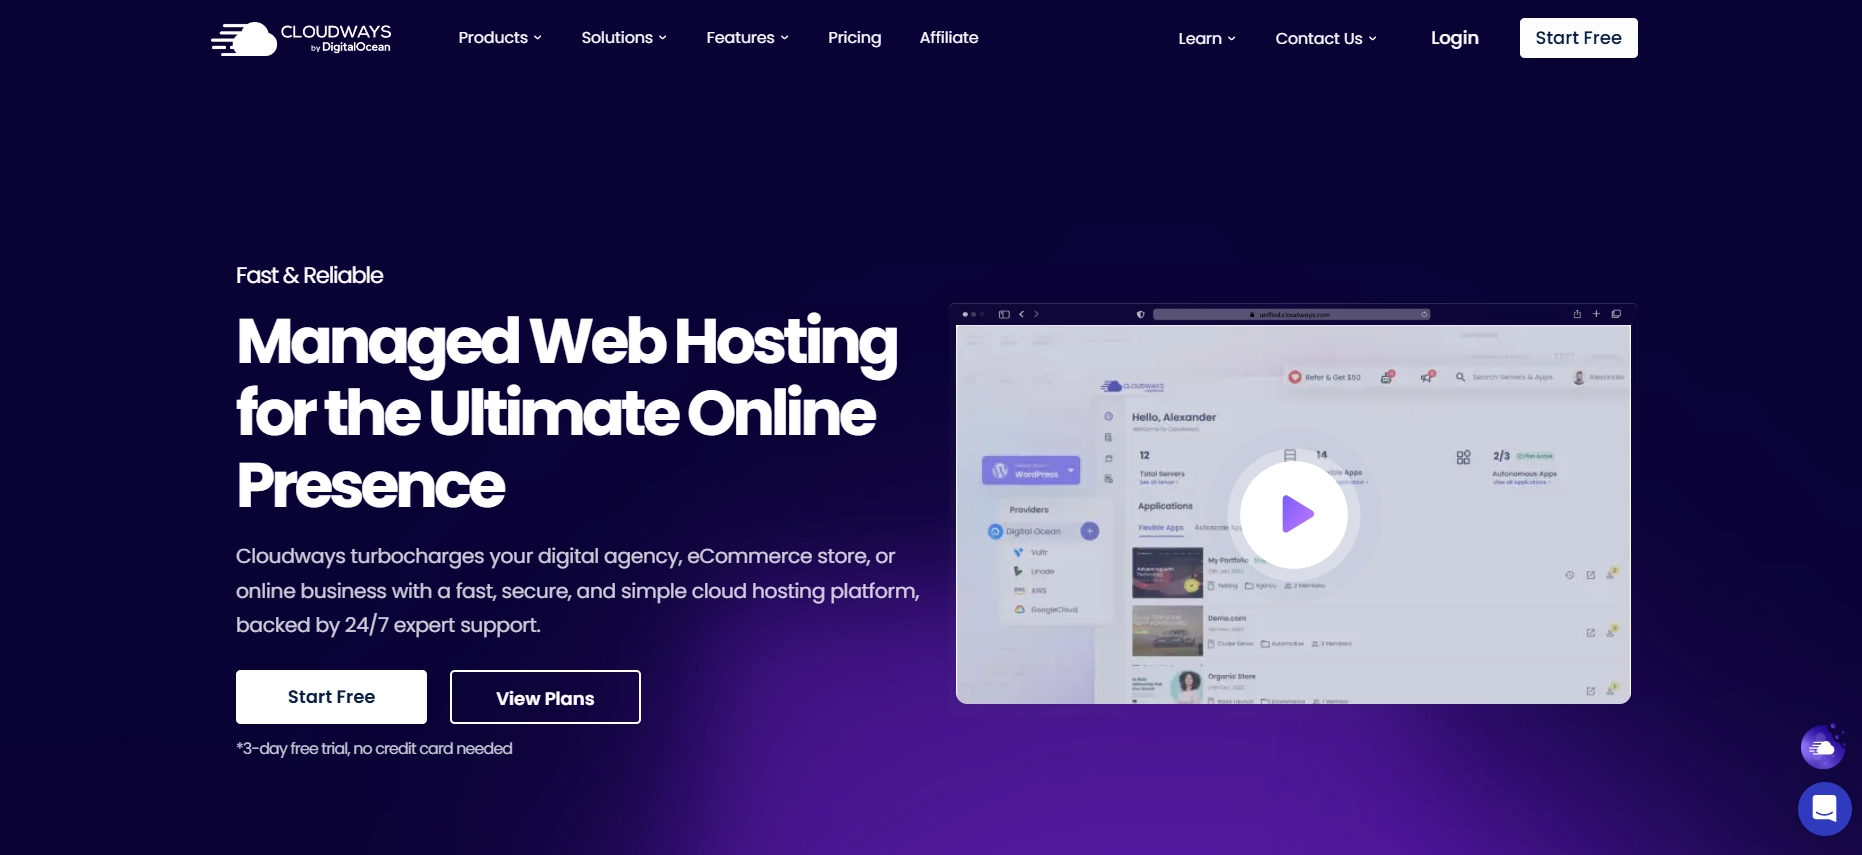
Cloudways Cloudways provides good hosting and website performance. They have excellent security and 24/7 chat support whenever you require assistance.
Kinsta

Kinsta is a managed WordPress hosting provider, so all server setup is done for you. Kinsta enforces caching options that help them optimize their performance and loading times, such as using cloud-based servers.
With external hosting, you need to install the WordPress CMS yourself. But if you use managed WordPress hosting like Kinsta, WordPress is ready to go for you.
2. Setting Up WordPress CMS
Next, you need to install and set up your WordPress CMS. And for that, knowing the difference between WordPress.org and WordPress.com is essential.
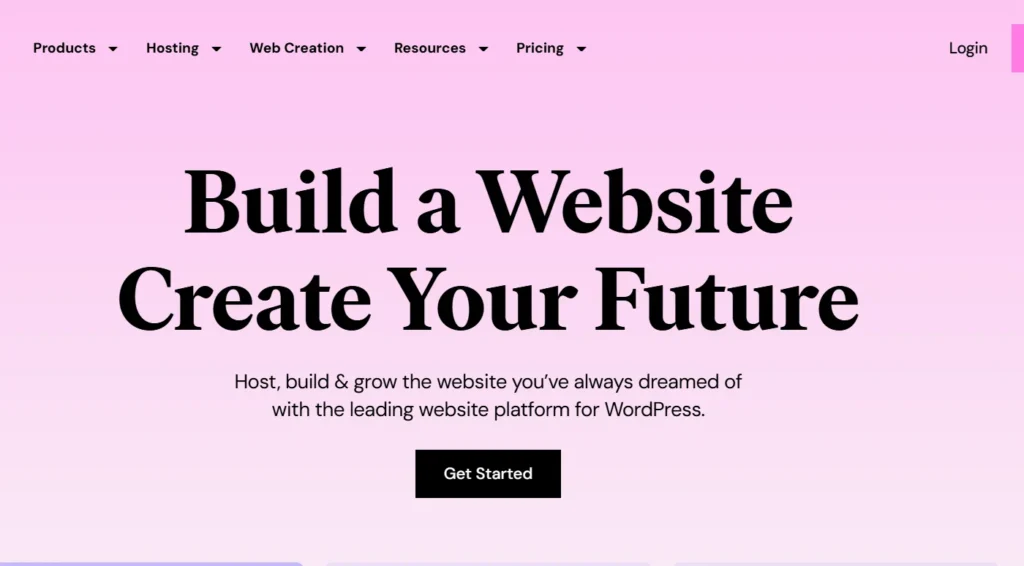
WordPress.org allows you to host your site with a third-party provider. The platform is open-source and free, but you need to download the software and buy a domain name.
WordPress.com offers paid hosting services, so you don’t need a third party or worry about your server. It does everything for you.
WordPress is a powerful and free content management tool that allows you to quickly develop high-quality websites — from simple personal blogs and small business websites to large corporate websites and applications.
We recommend using WordPress.org, as it’s highly flexible and allows you to tailor every aspect of your website design.
3. Choosing the Perfect Theme
The design of your website is crucial and is determined by the WordPress theme you select.
WordPress applies a default theme automatically but may not have the specific customizations required to look good.
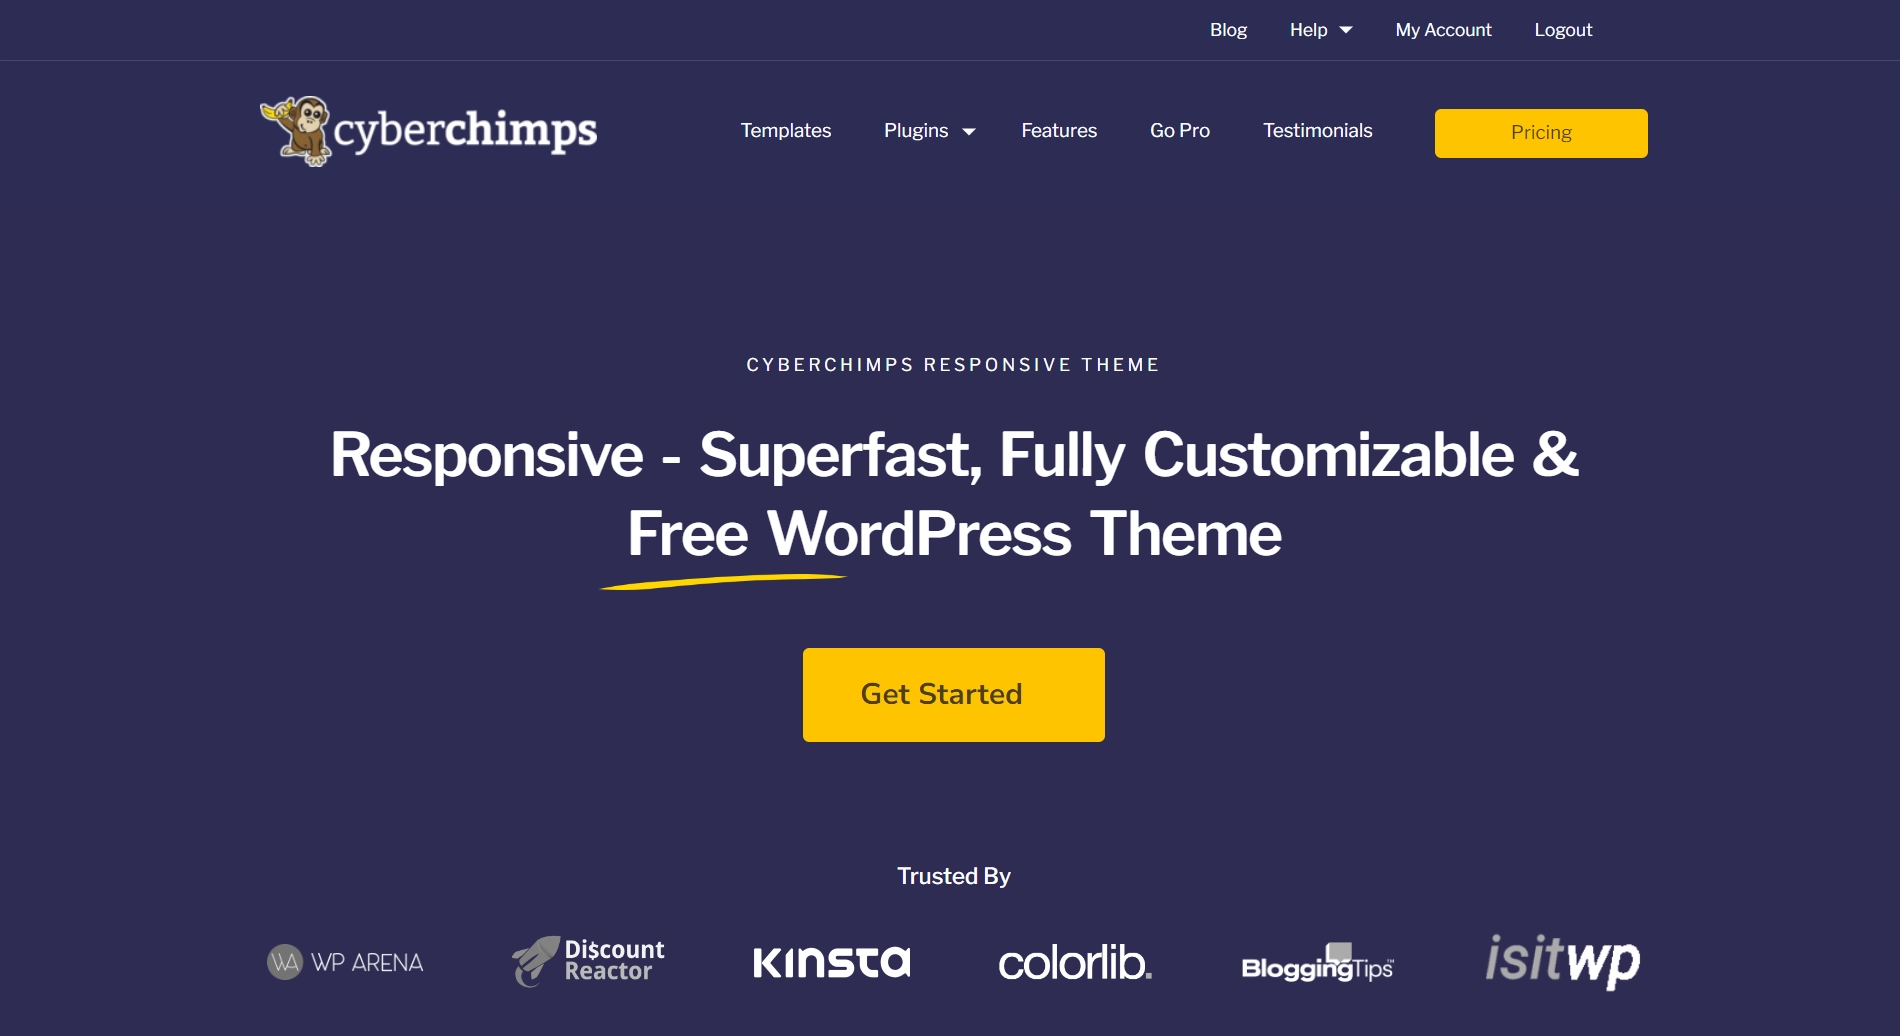
The Cyberchimps Responsive Theme is a good place to start. It’s lightweight, fully responsive, and customizable, featuring essential elements, a header and footer builder, and 24/7 support.
It’s also Beaver Builder compatible for quick, interactive website building.
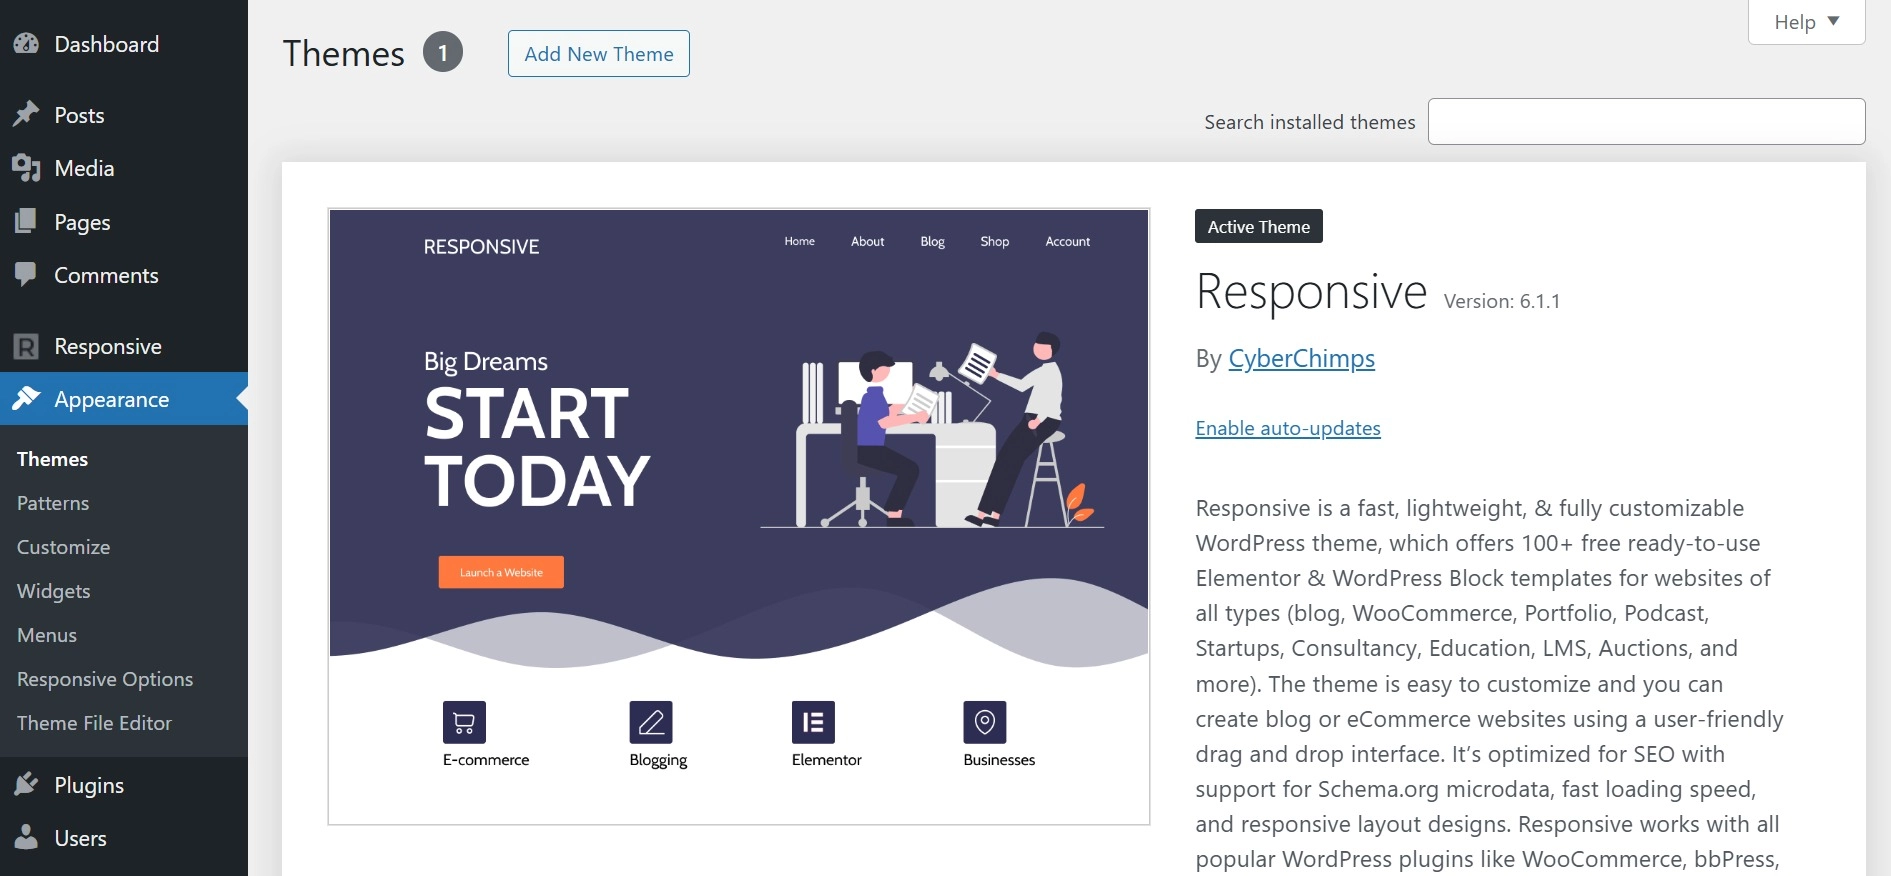
To install the Responsive theme, navigate to your WordPress dashboard and go to Appearance > Themes.

To install, search for Responsive theme by cyberchimps on the search bar and click on Install Now. Next, click on Activate to activate the theme.
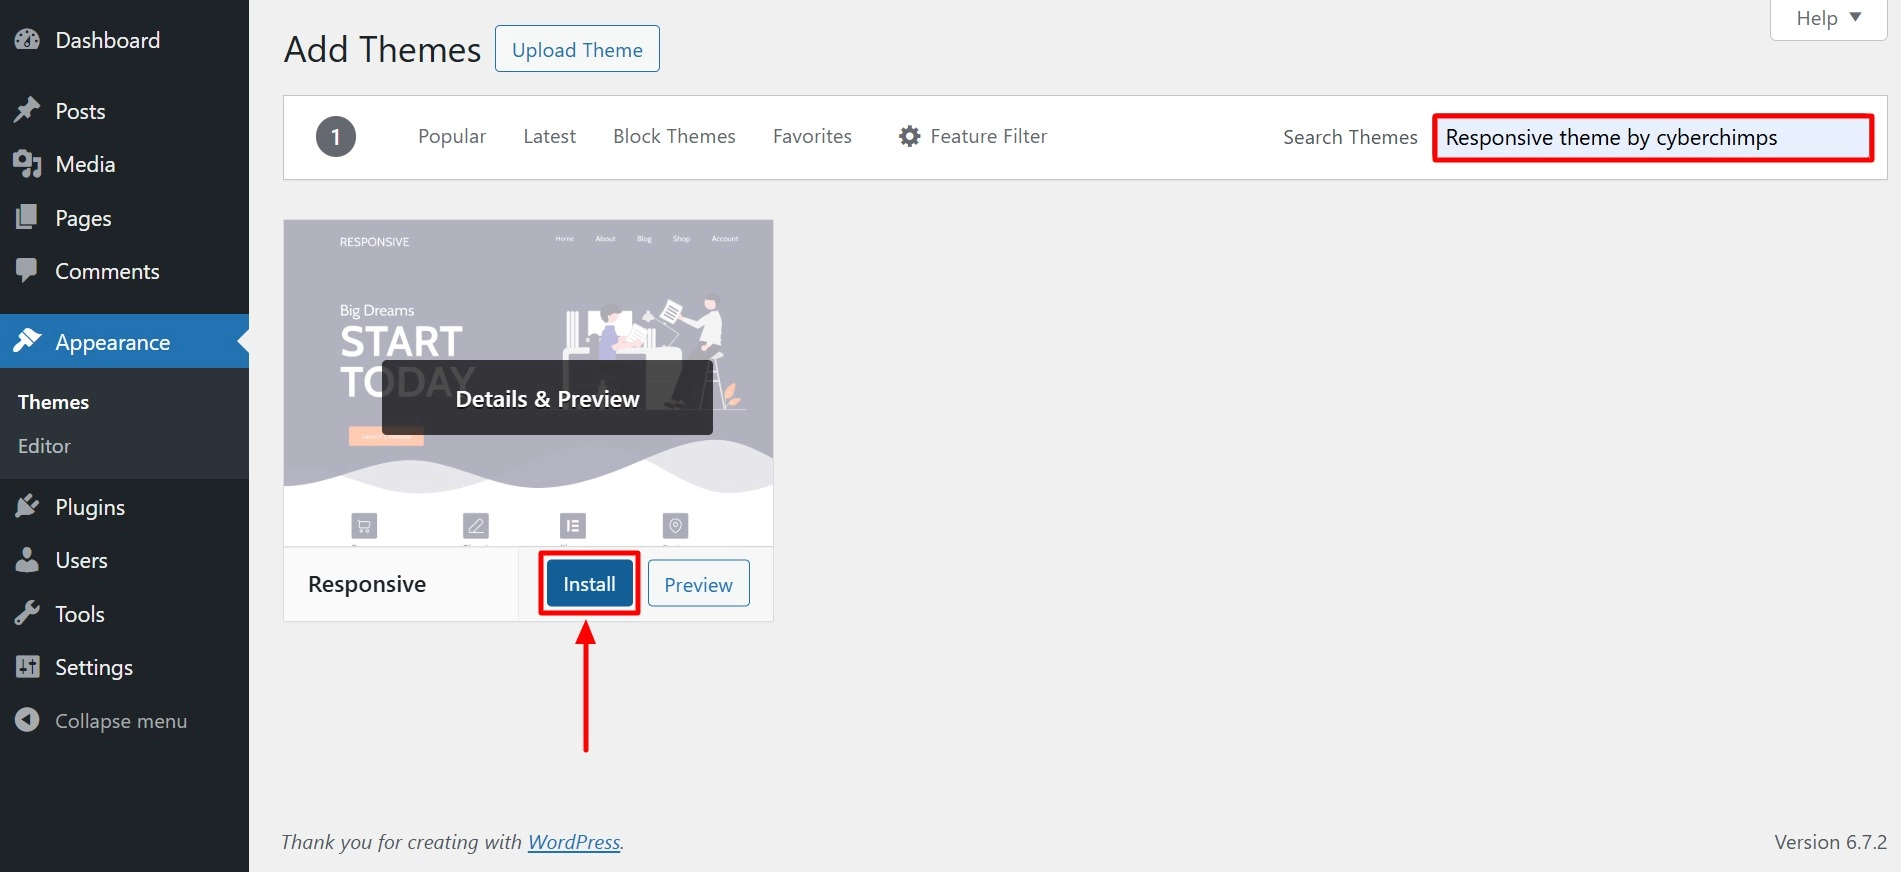
And you have successfully activated the theme.
Now, let’s look at Elementor, a crucial plugin to make our website.
What is Elementor?
Elementor is a WordPress page builder that uses the drag-and-drop method to make stunning pages with a visual editor.
It helps you to develop dynamic websites more easily and with less code. The complete WordPress plugin lets you customize your website’s entire design in one place.
Why You Should Use Elementor
Elementor caters to all types of professionals on your team. If you’re not tech-savvy, the visual editor allows you to drag and drop any of the 80+ widgets to create engaging content, such as buttons, star ratings, and progress bars.
Elementor remains a top choice for WordPress developers due to its script optimization, customizable attributes, and rollback versions.
What Can You Create With Elementor
With Elementor, you can build virtually anything. This includes customizing entire websites, creating specific landing pages, designing sales pages, promotional pages, and even custom forms. This platform can bring your ideas to life if you can envision them.
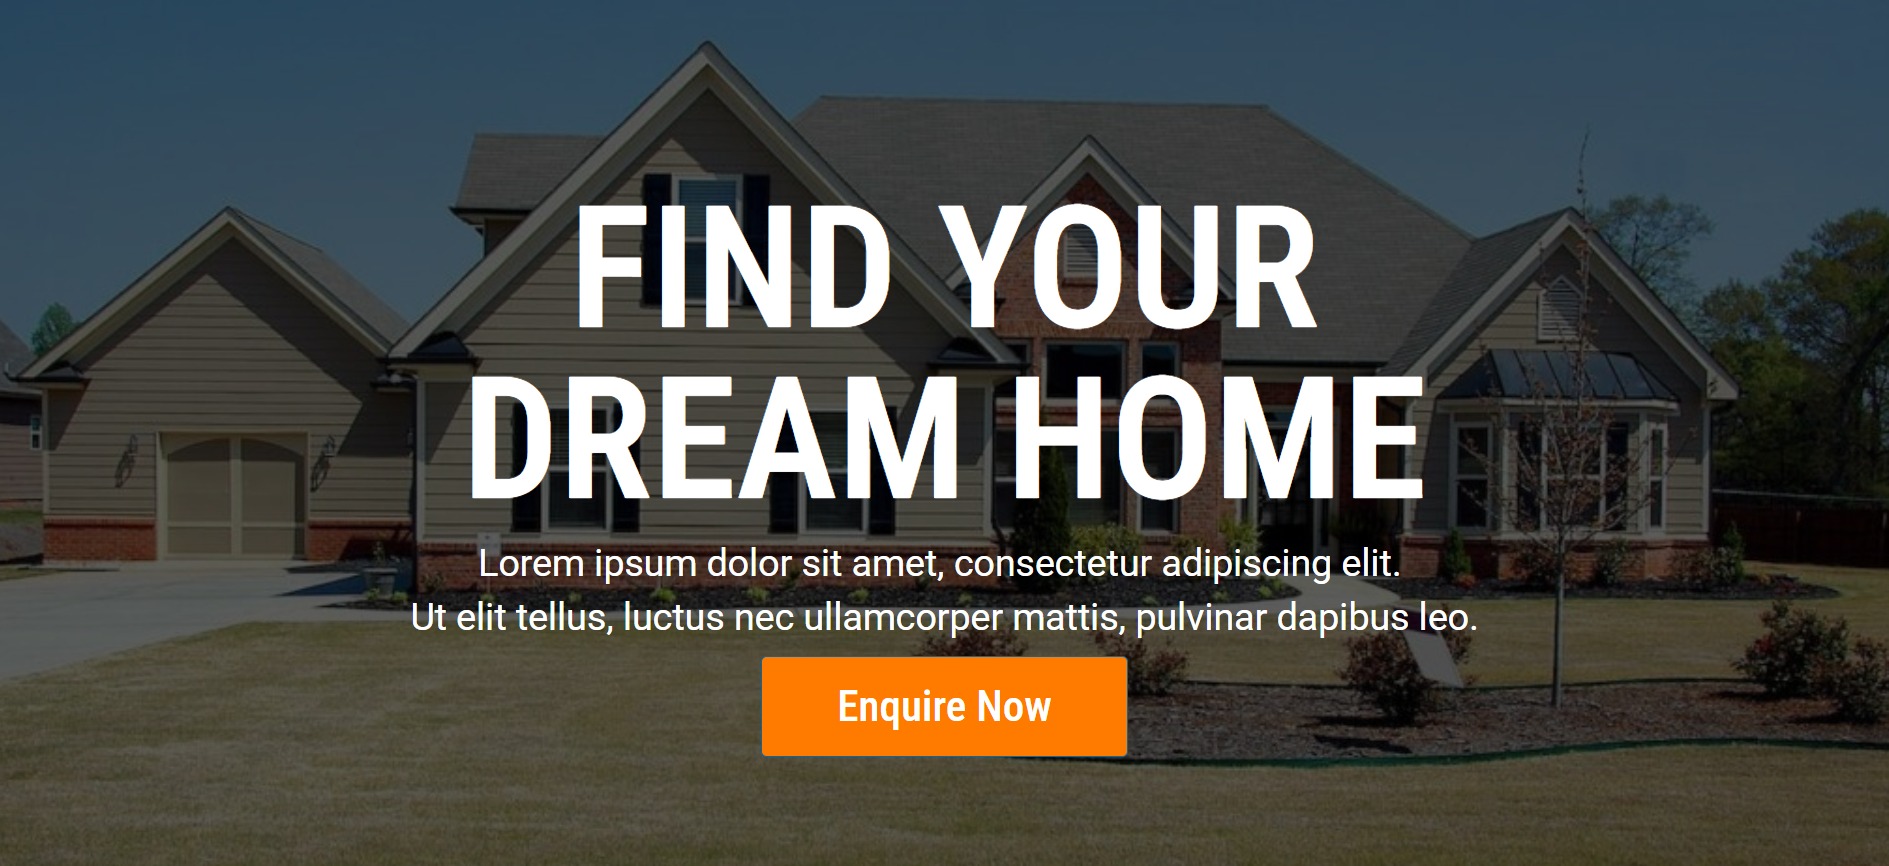
Check out a restaurant website built with Elementor, featuring two splash images, a two-column layout, and cursive text.
Is Elementor Free?
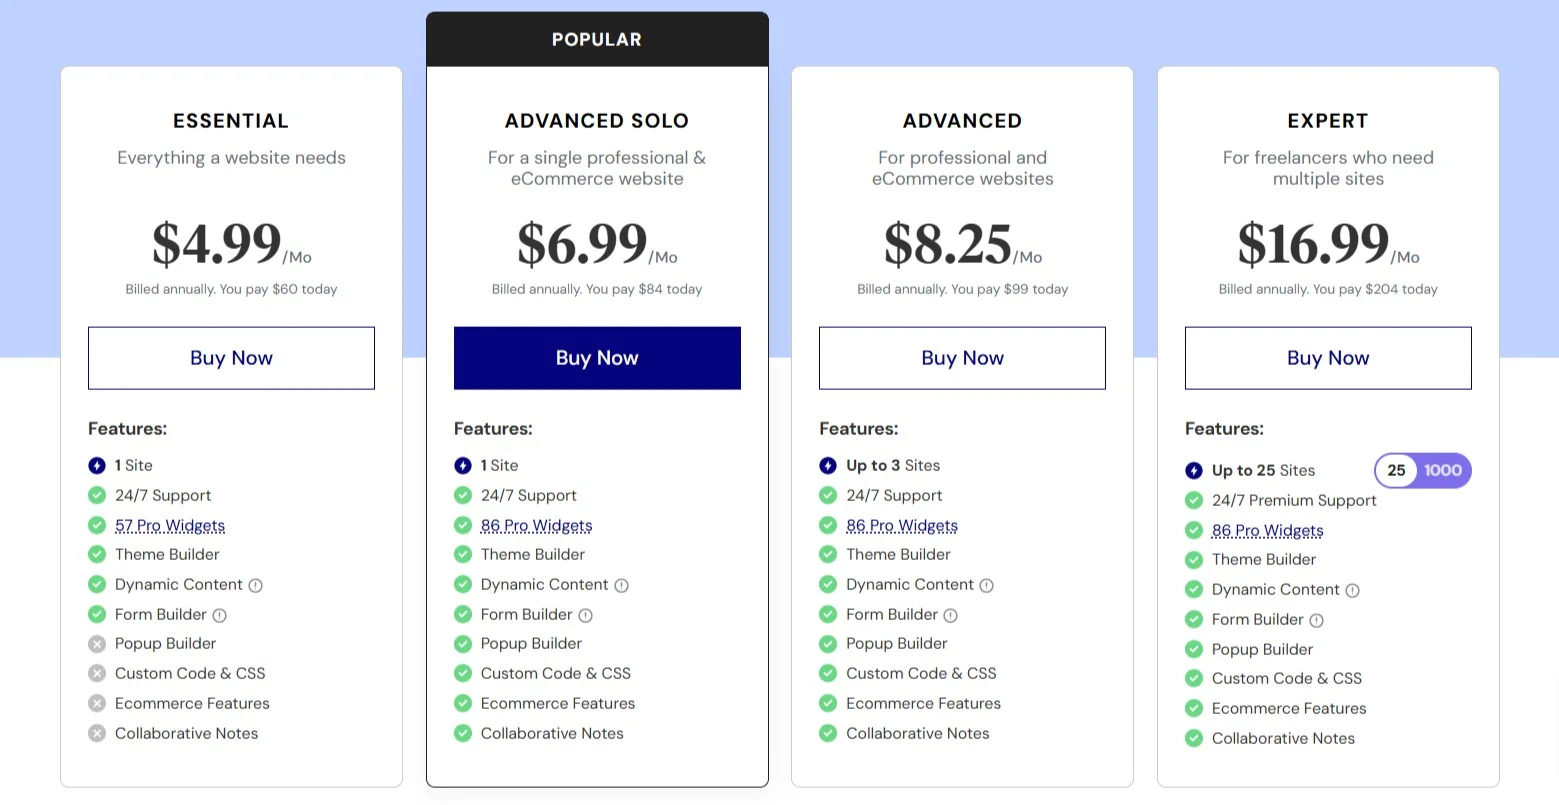
Elementor offers both a free plan and multiple paid subscription plans. The free version includes all the essential features needed to create a strong user experience, such as a drag-and-drop editor, 40+ basic widgets, and 30+ templates.
You can upgrade to the pro version if you want more advanced functionality, like adding forms and custom CSS. Elementor’s pricing is tiered as follows:
- $59 per year for one site.
- $99 per year for three sites.
- $199 per year for 25 sites.
- $399 per year for 1,000 sites.
If unsure, Elementor provides a detailed, easy-to-scan comparison of pro versus free features.
How To Install Elementor
From your dashboard, click on Plugins and then select Add New.
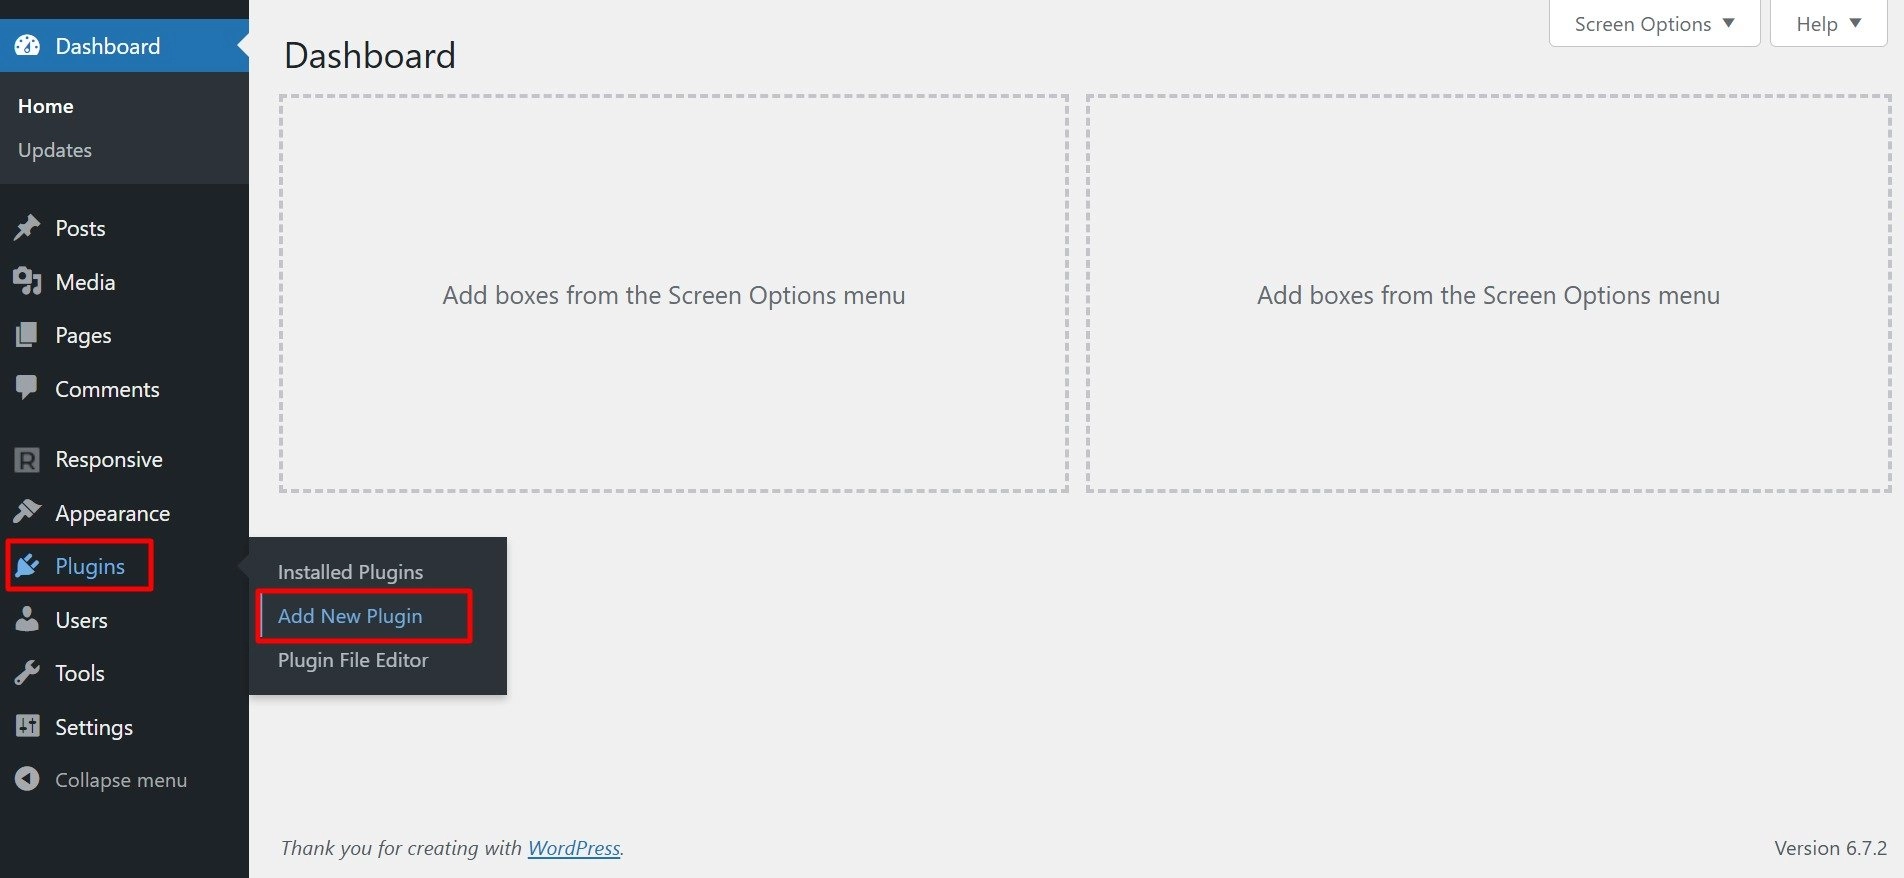
Type Elementor to find the Elementor Website Builder in the search field.
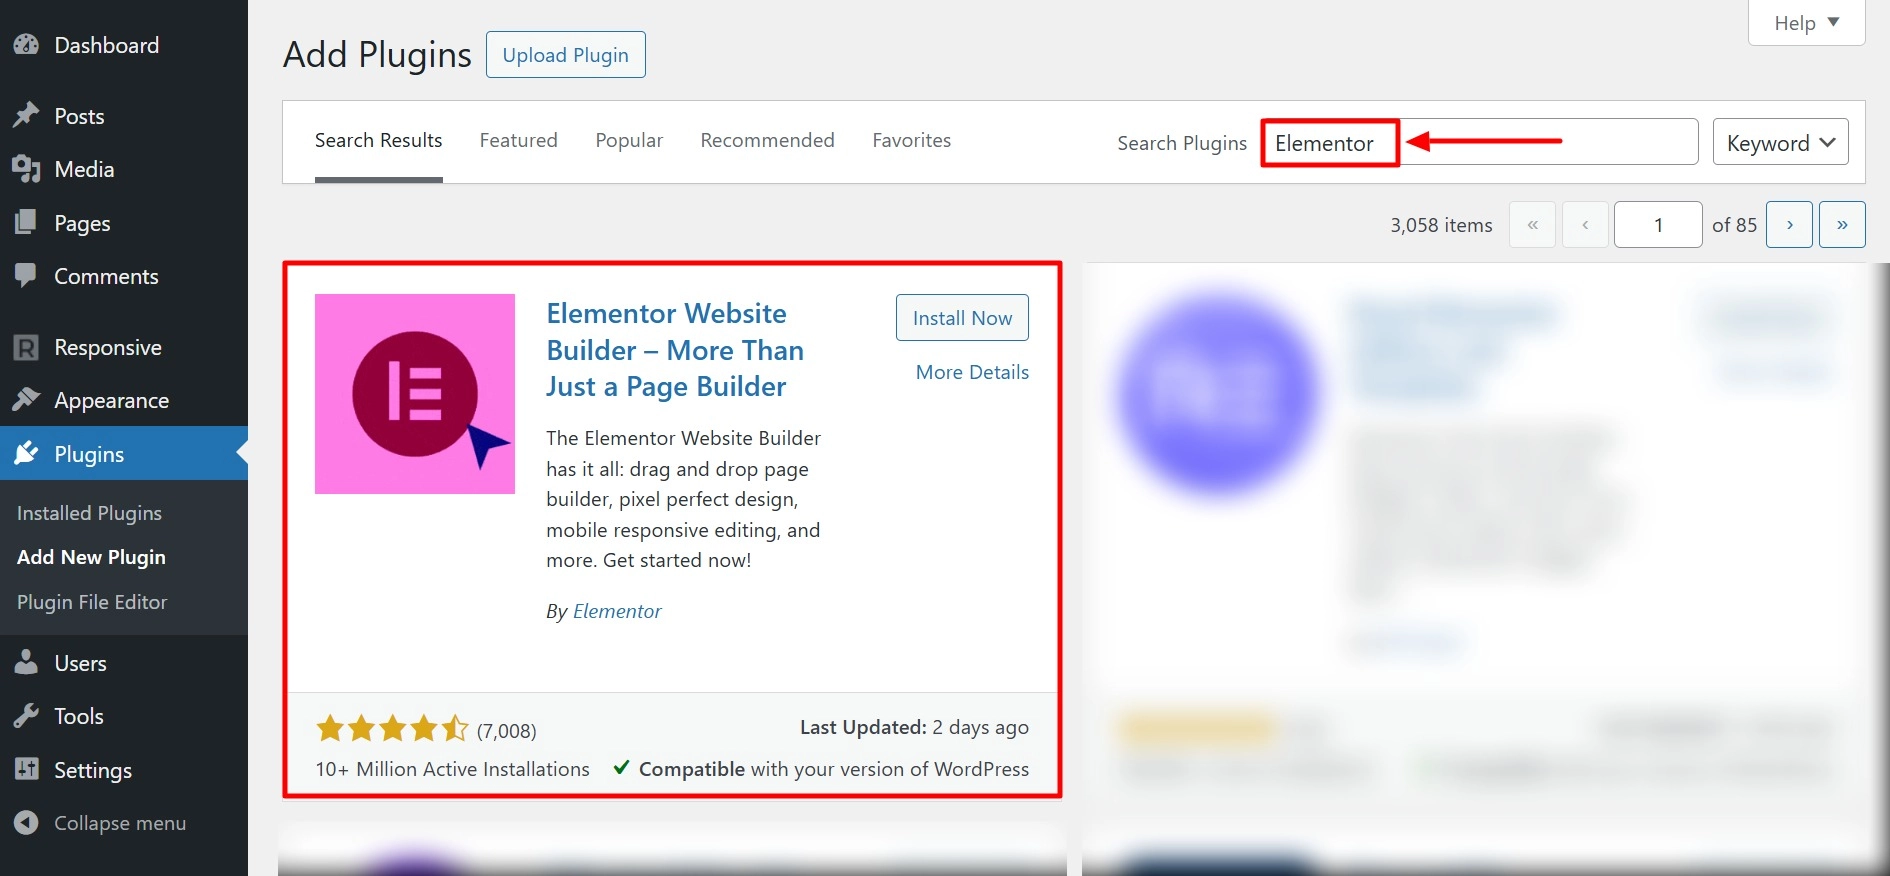
Click on Install Now. Once the installation is complete, click on Activate.
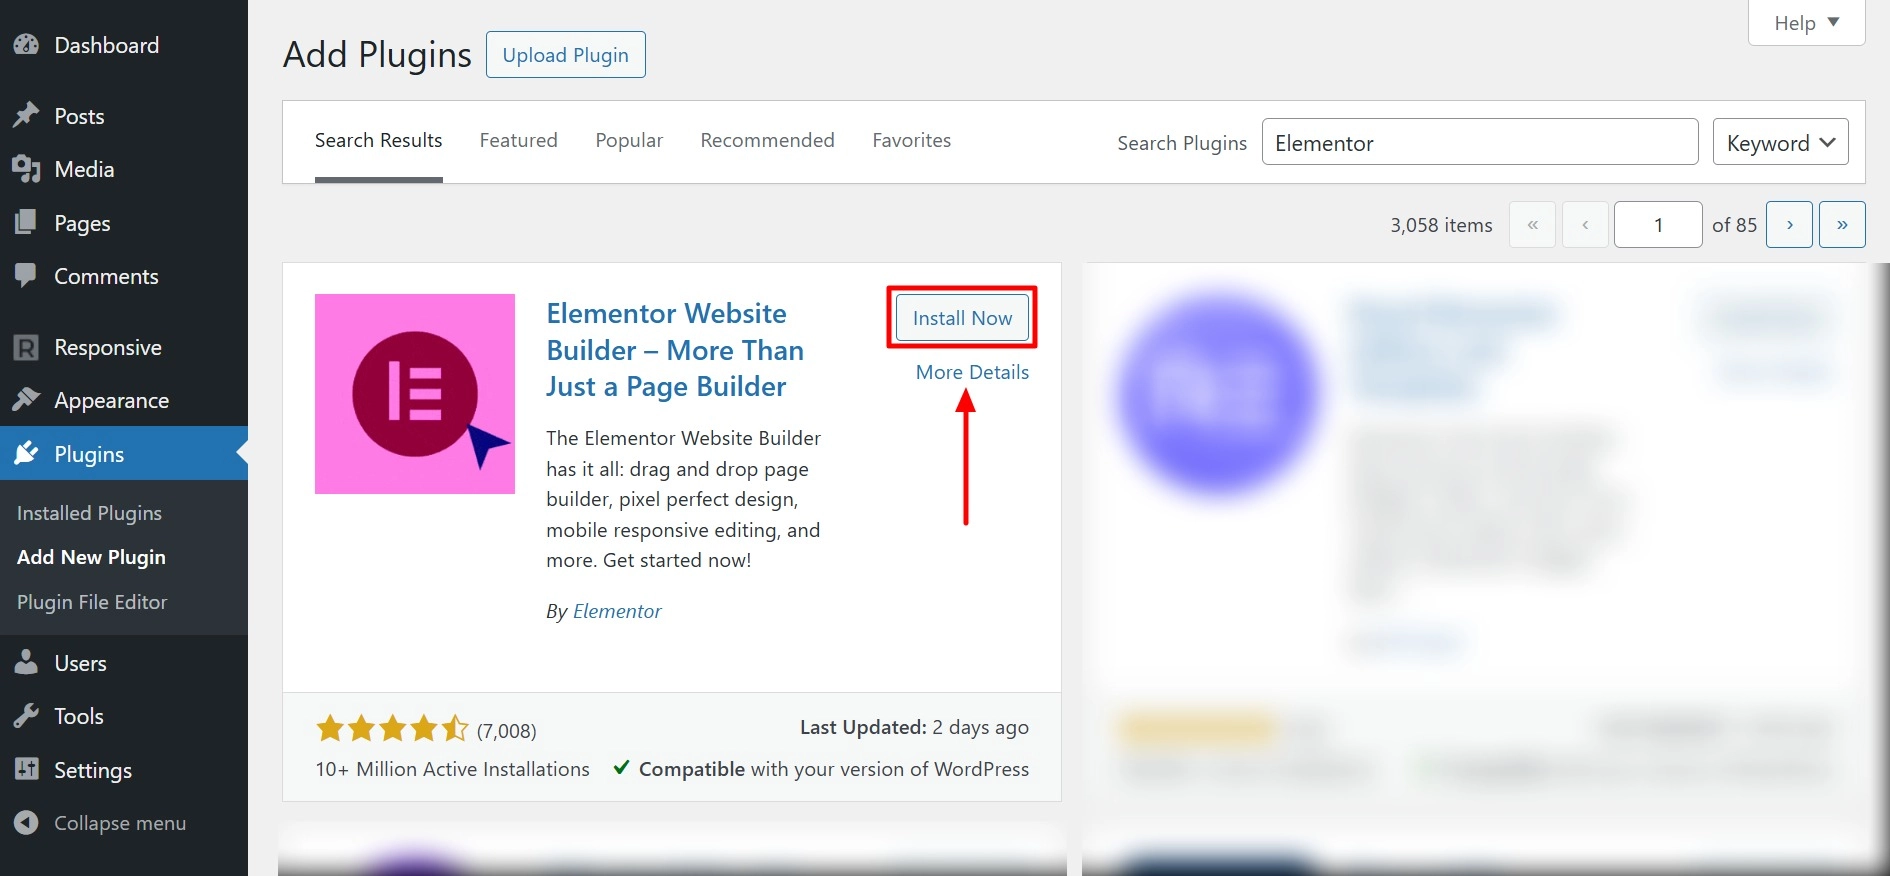
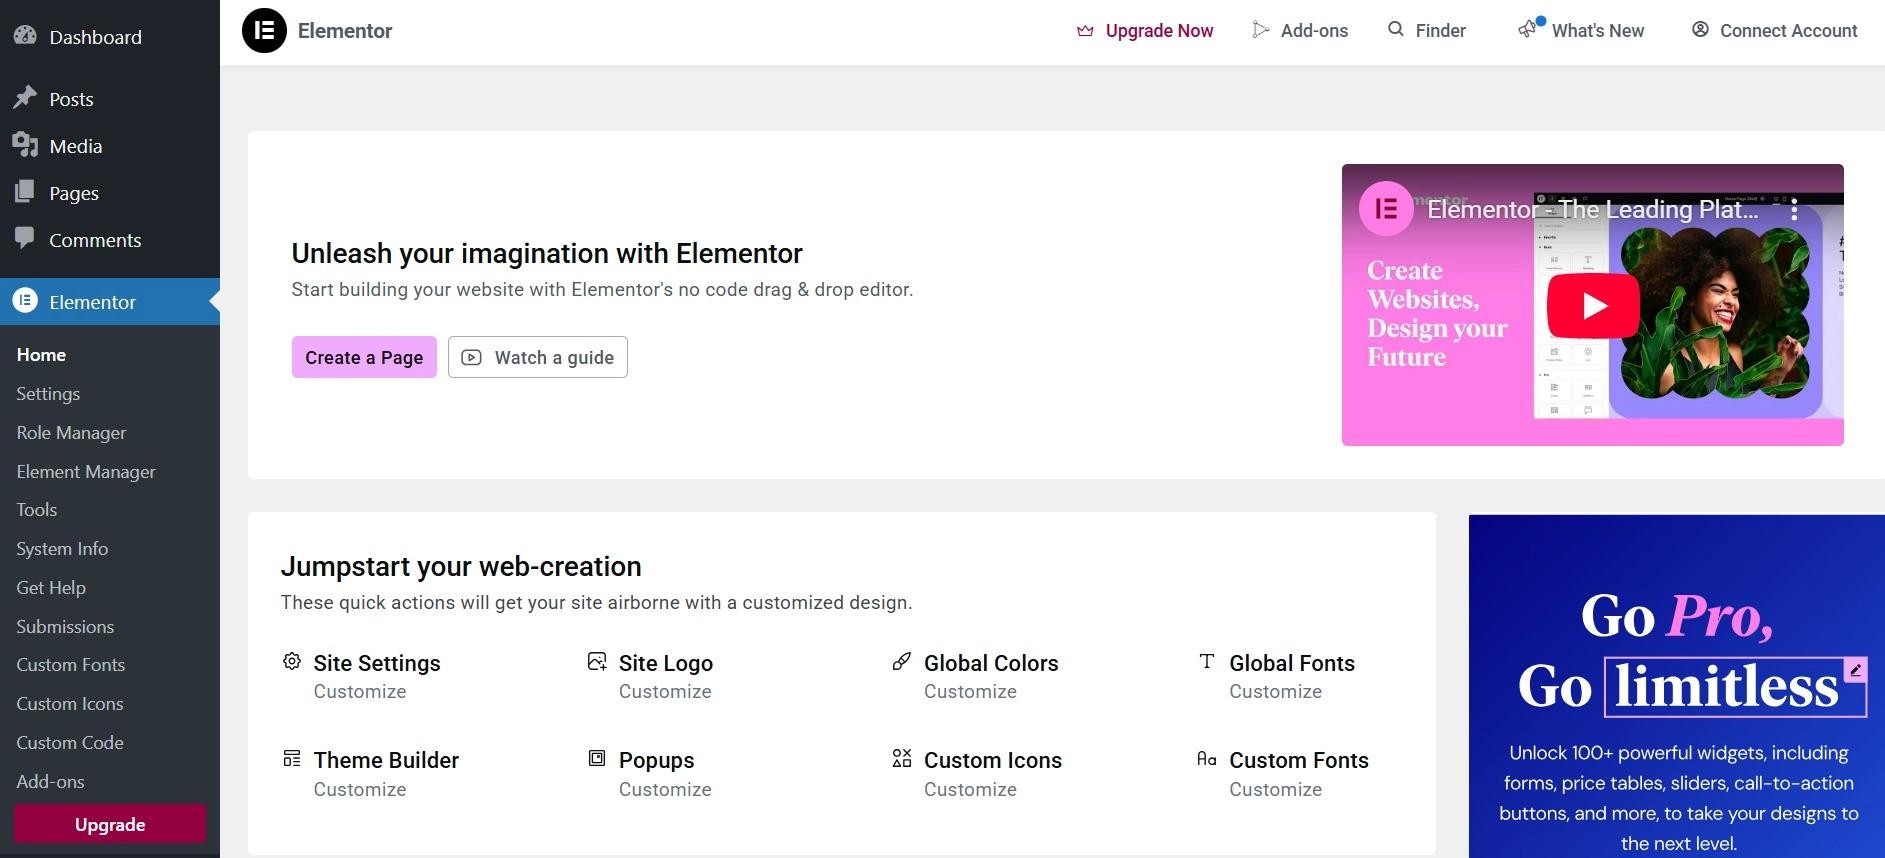
After activation, the page builder will be added to the Elementalor sidebar. Please note that this sidebar menu item is used only to access Elementor’s settings in the backend and not to edit your pages.
How to Build Your First Page in Elementor
Now that you have activated the plugin let’s go ahead and see how you can build your first page.
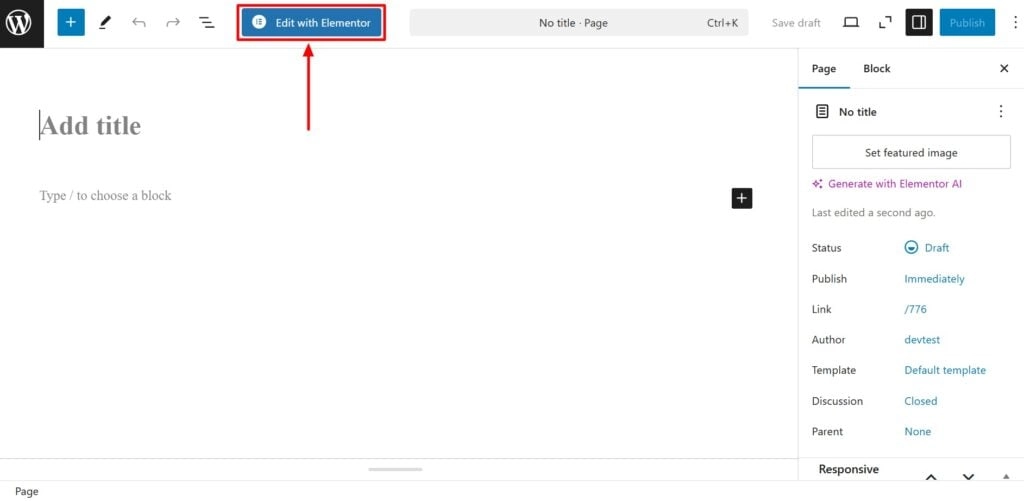
Go to your WordPress dashboard. Click on Pages, then select Add New Page.

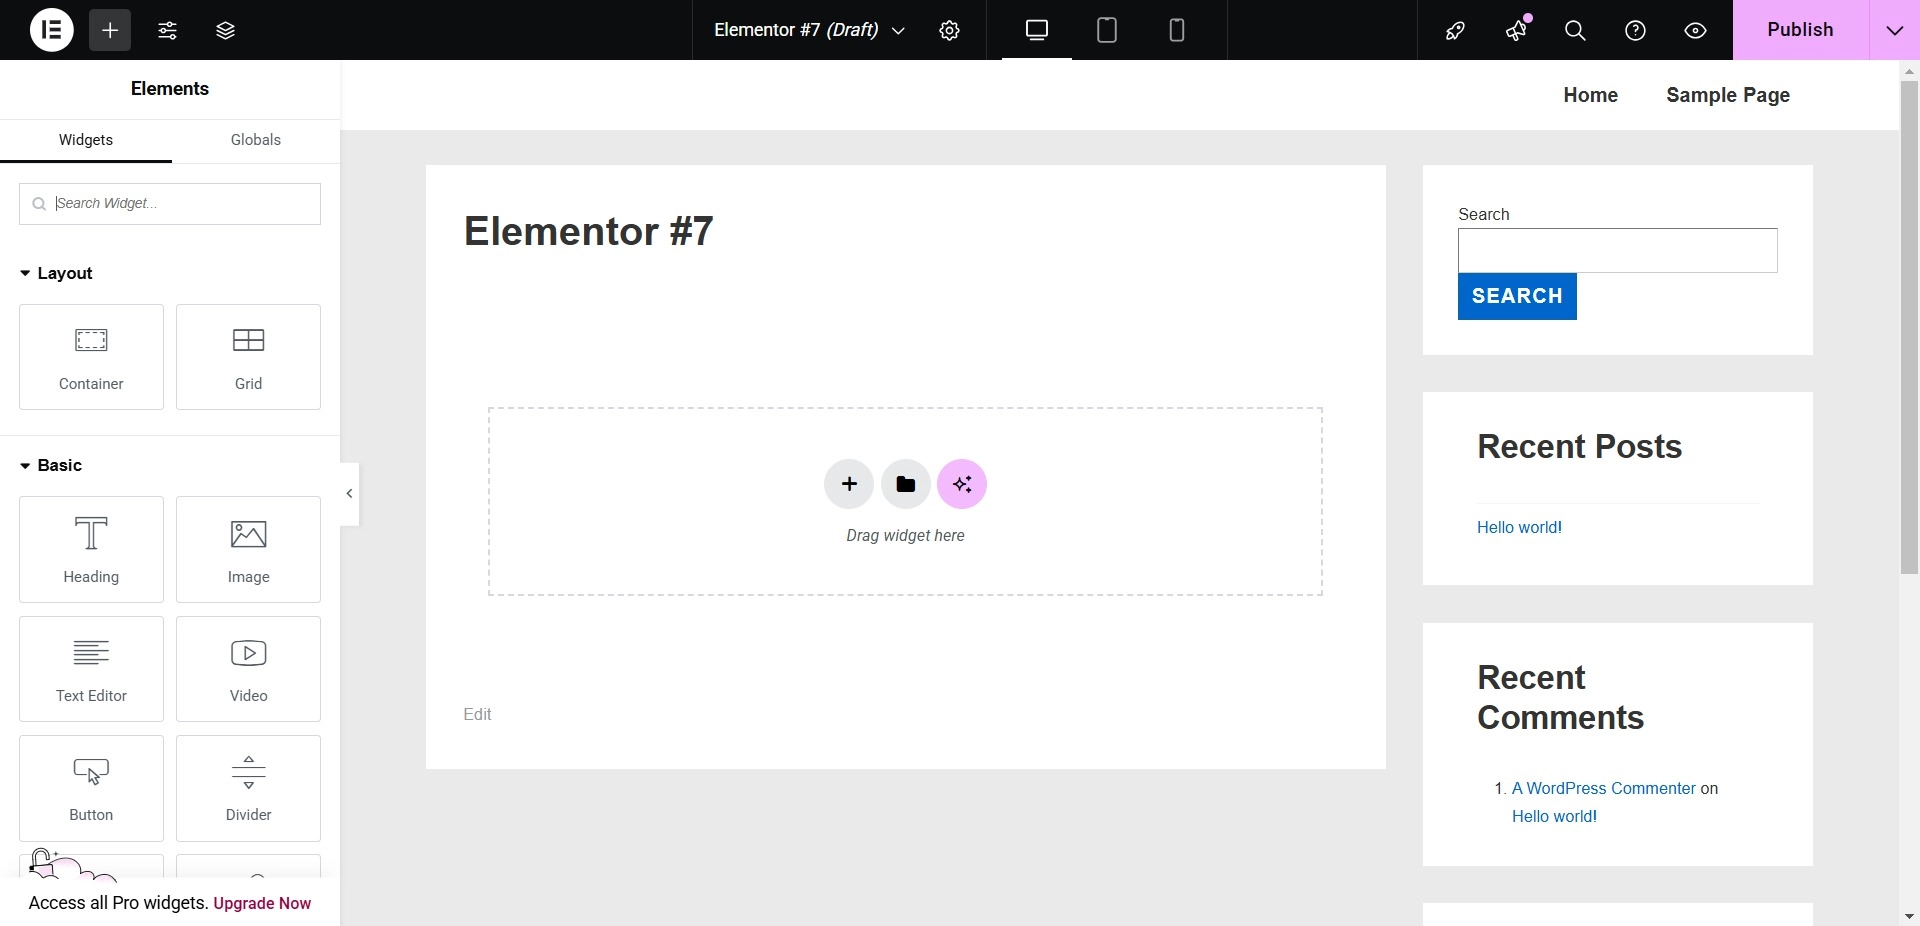
Click on Edit with Elementor. This action will transport you into the intuitive Elementor page builder interface for seamless drag-and-drop editing.
Once Elementor loads, you’ll see this interface ready for design:
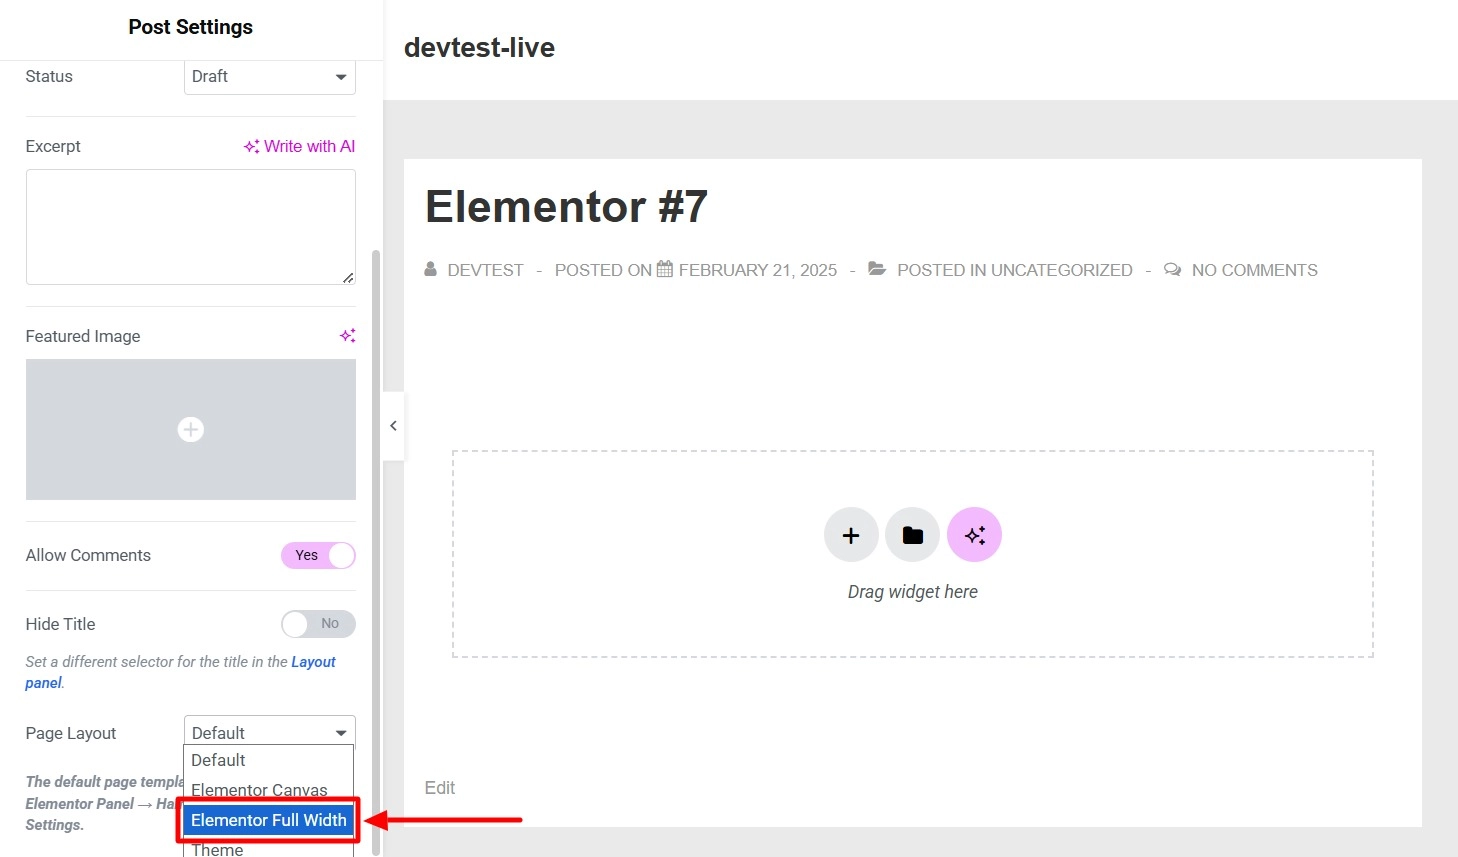
Firstly, click on the settings icon on the top bar.
Navigate to the Page Layout settings and select Elementor Full Width to ensure your design utilizes the entire width of the screen.
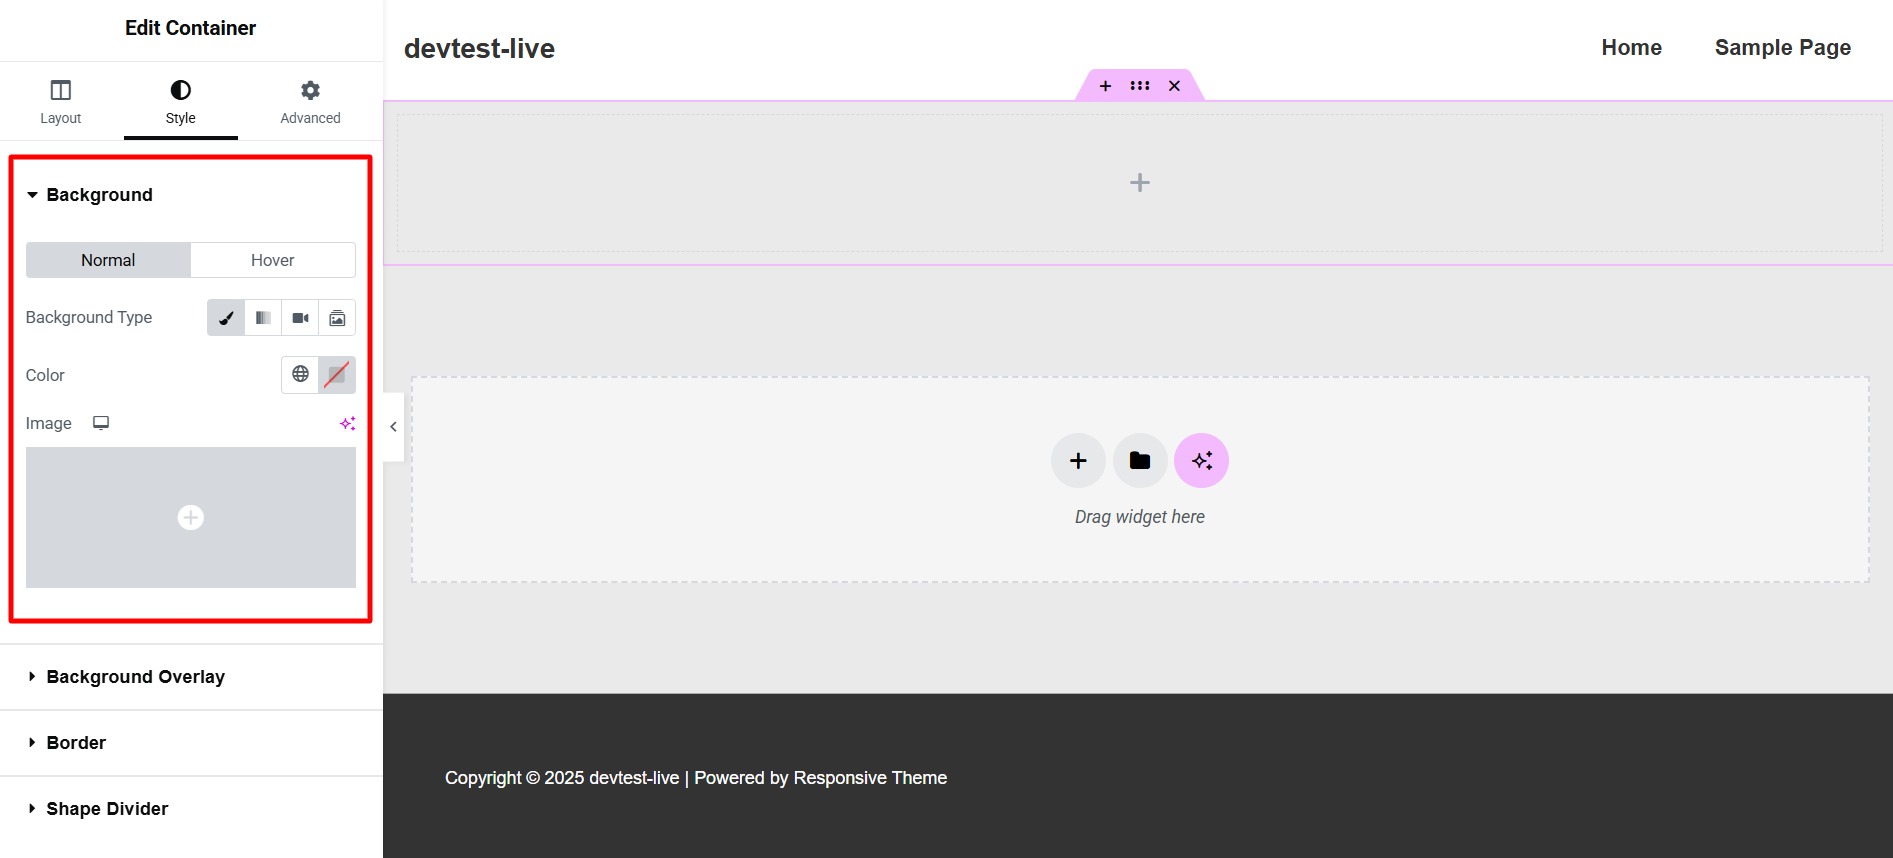
Add a Container to your blank canvas. This acts as the foundational element to hold and style your content effectively.

Customizing the Widgets
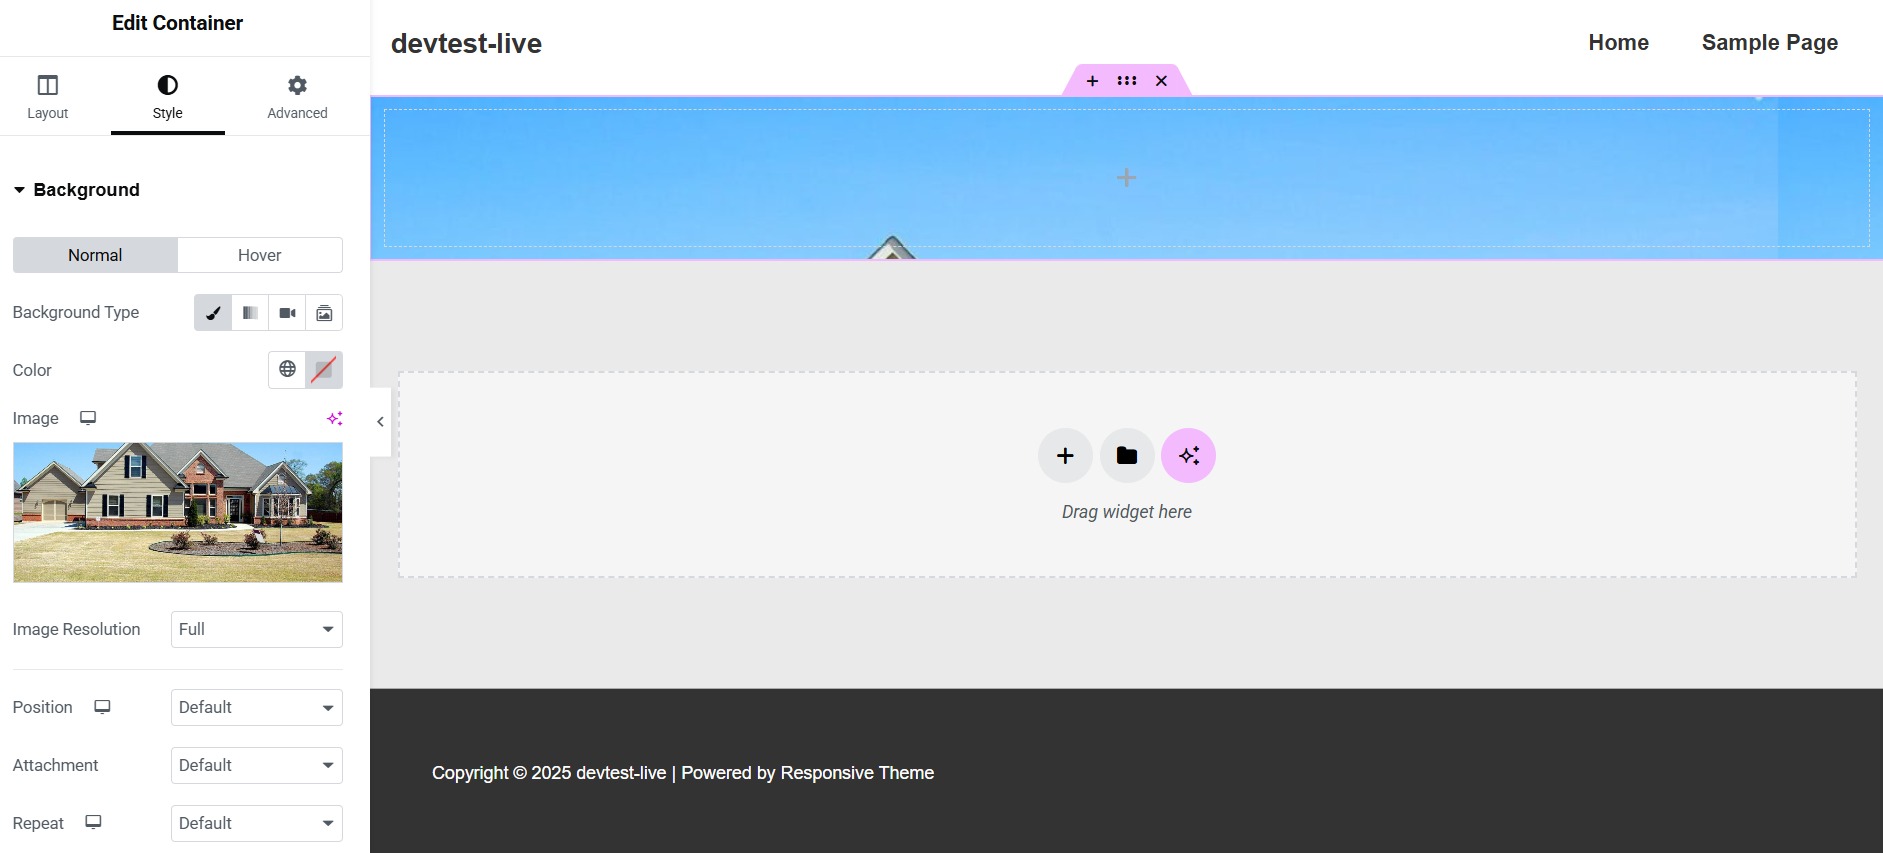
Click on the Style tab, and under Background Type, select Classic and click Image.
Choose an image from your media library and then select the Select button.
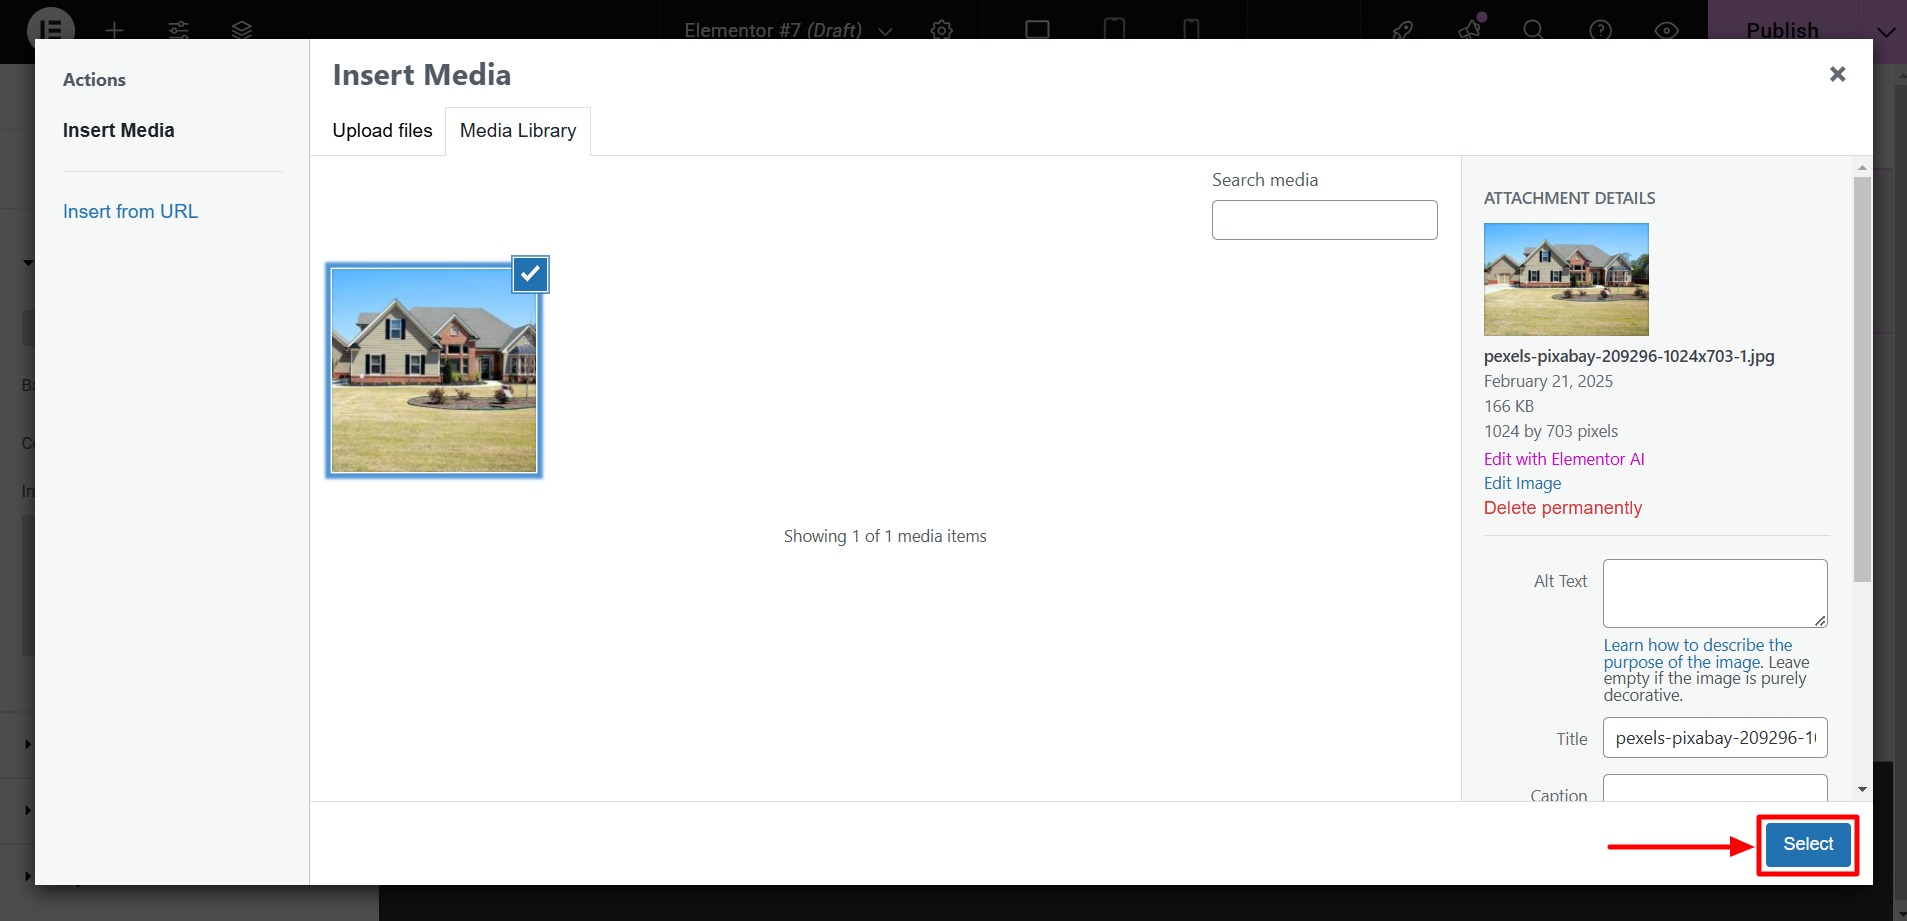
And just like that, you have now added a background image to your container.
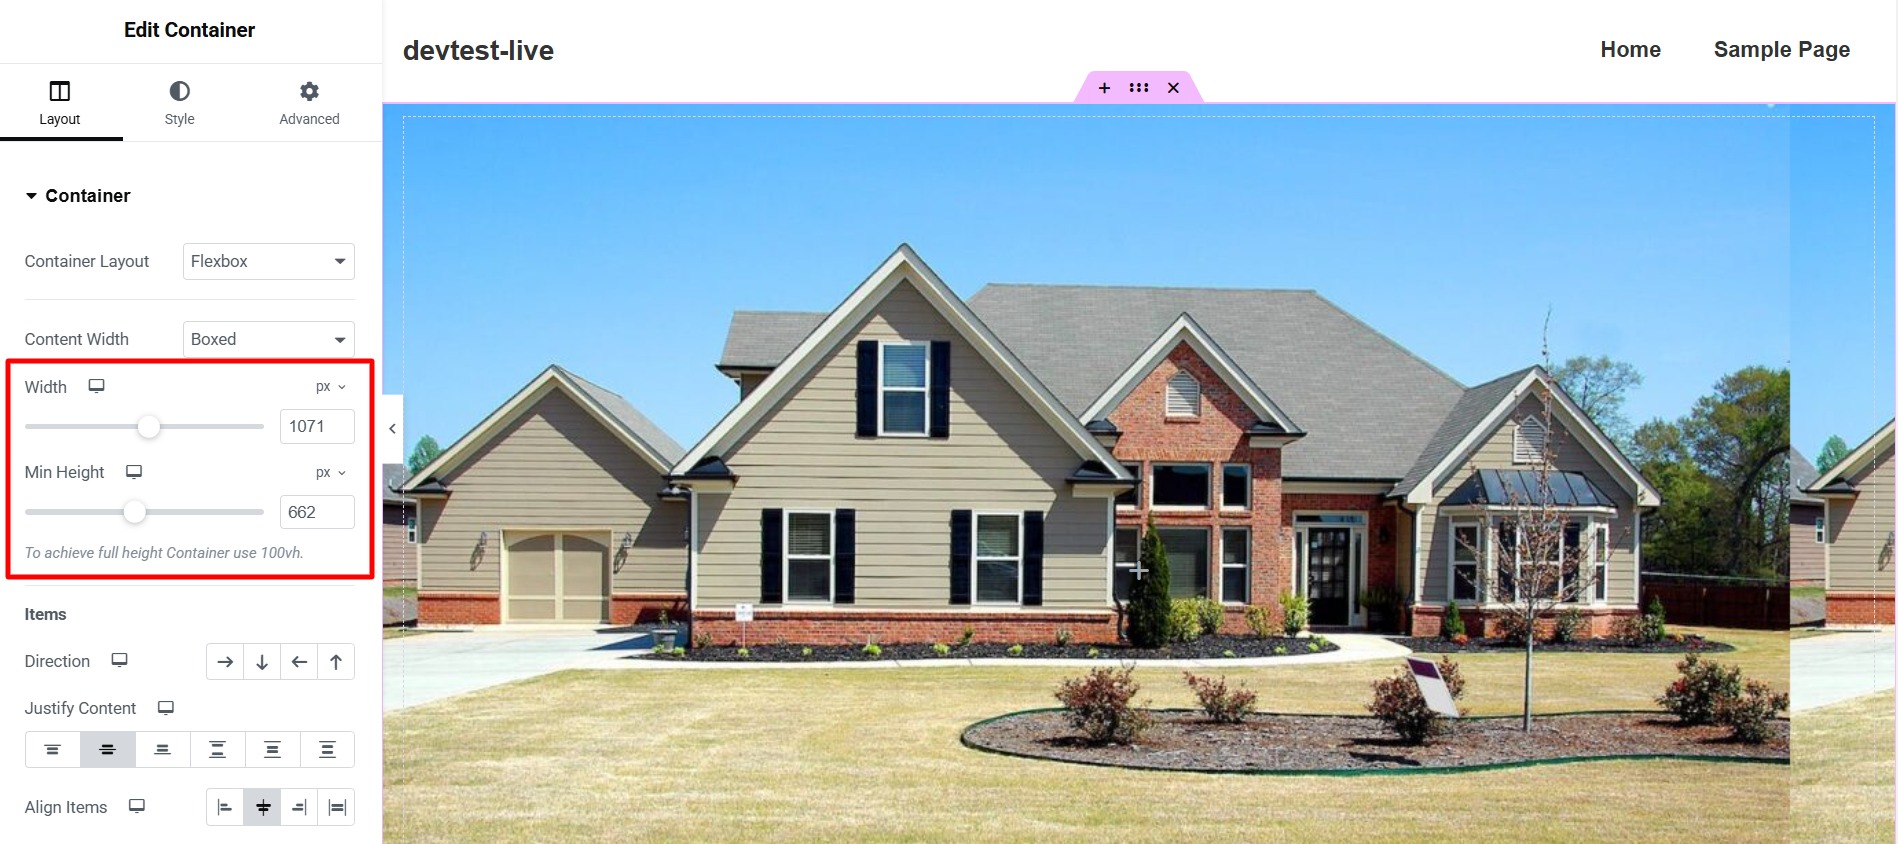
Go to the Layout options to adjust the Width and Min Height of the container so that your image is as sharp as it can be and fits nicely in your design.
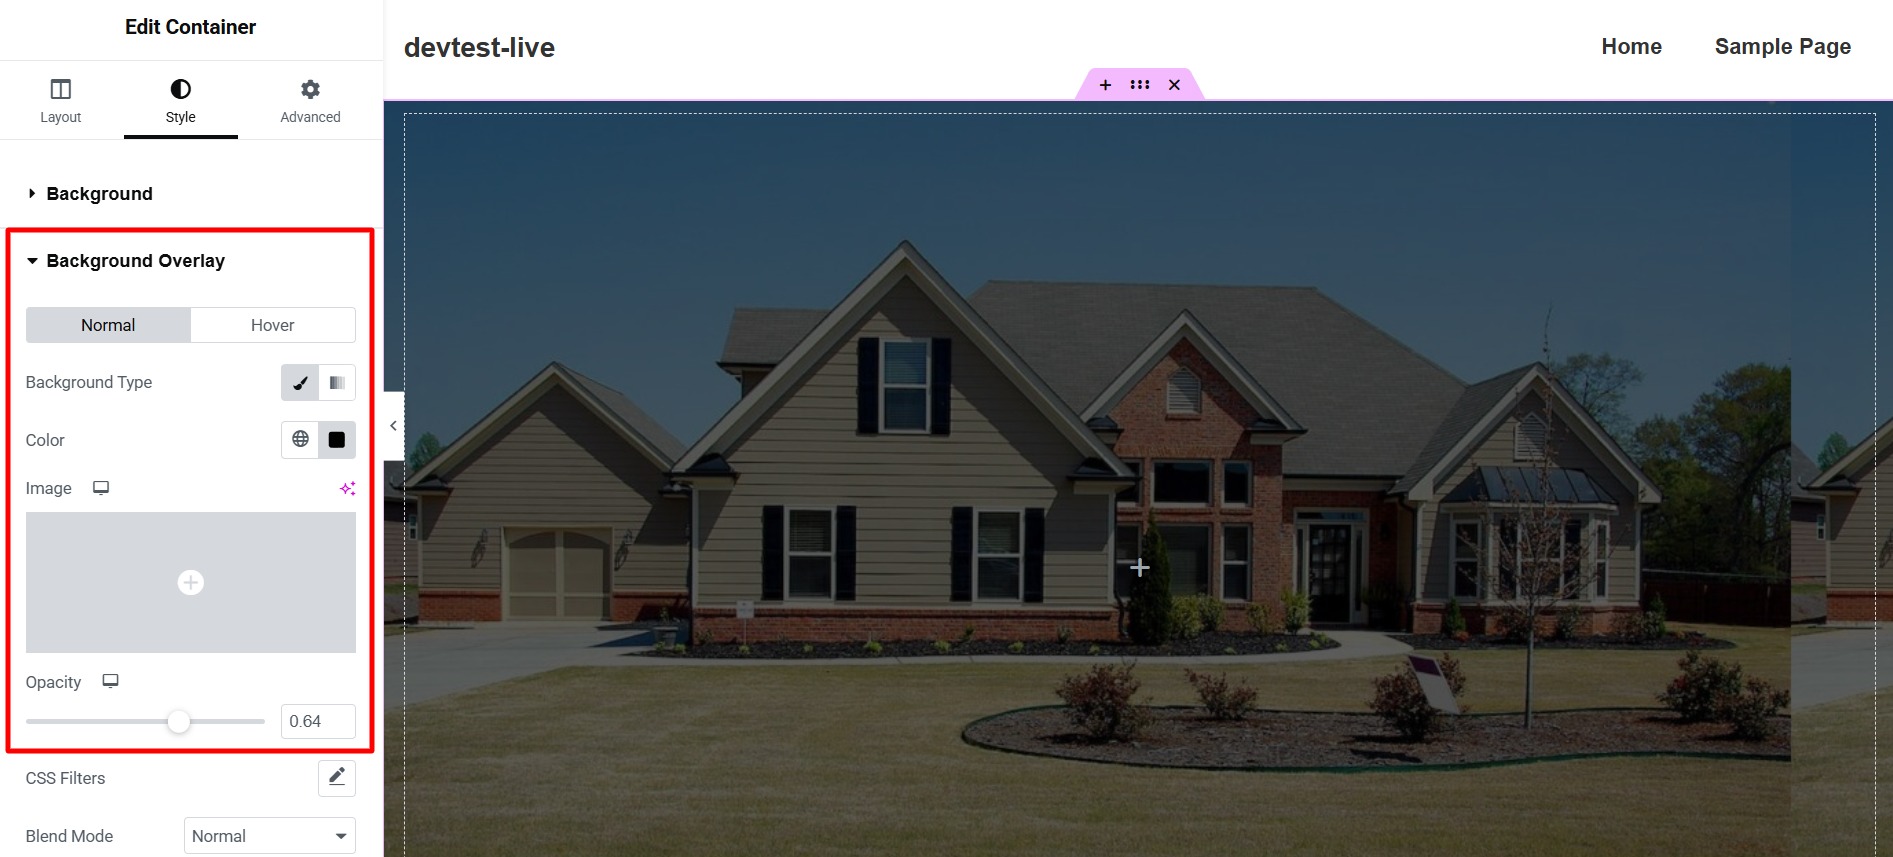
On the Style tab, scroll down and find Background Overlay. You can select the overlay color and even change the opacity here, finding the sweet spot to ensure your text pops out from the background.
Use the Heading widget to catch your visitors’ eyes. And this is how the default view of the heading widget would look like:

Get out the Typography settings in the Style tab to suit your desired aesthetic.

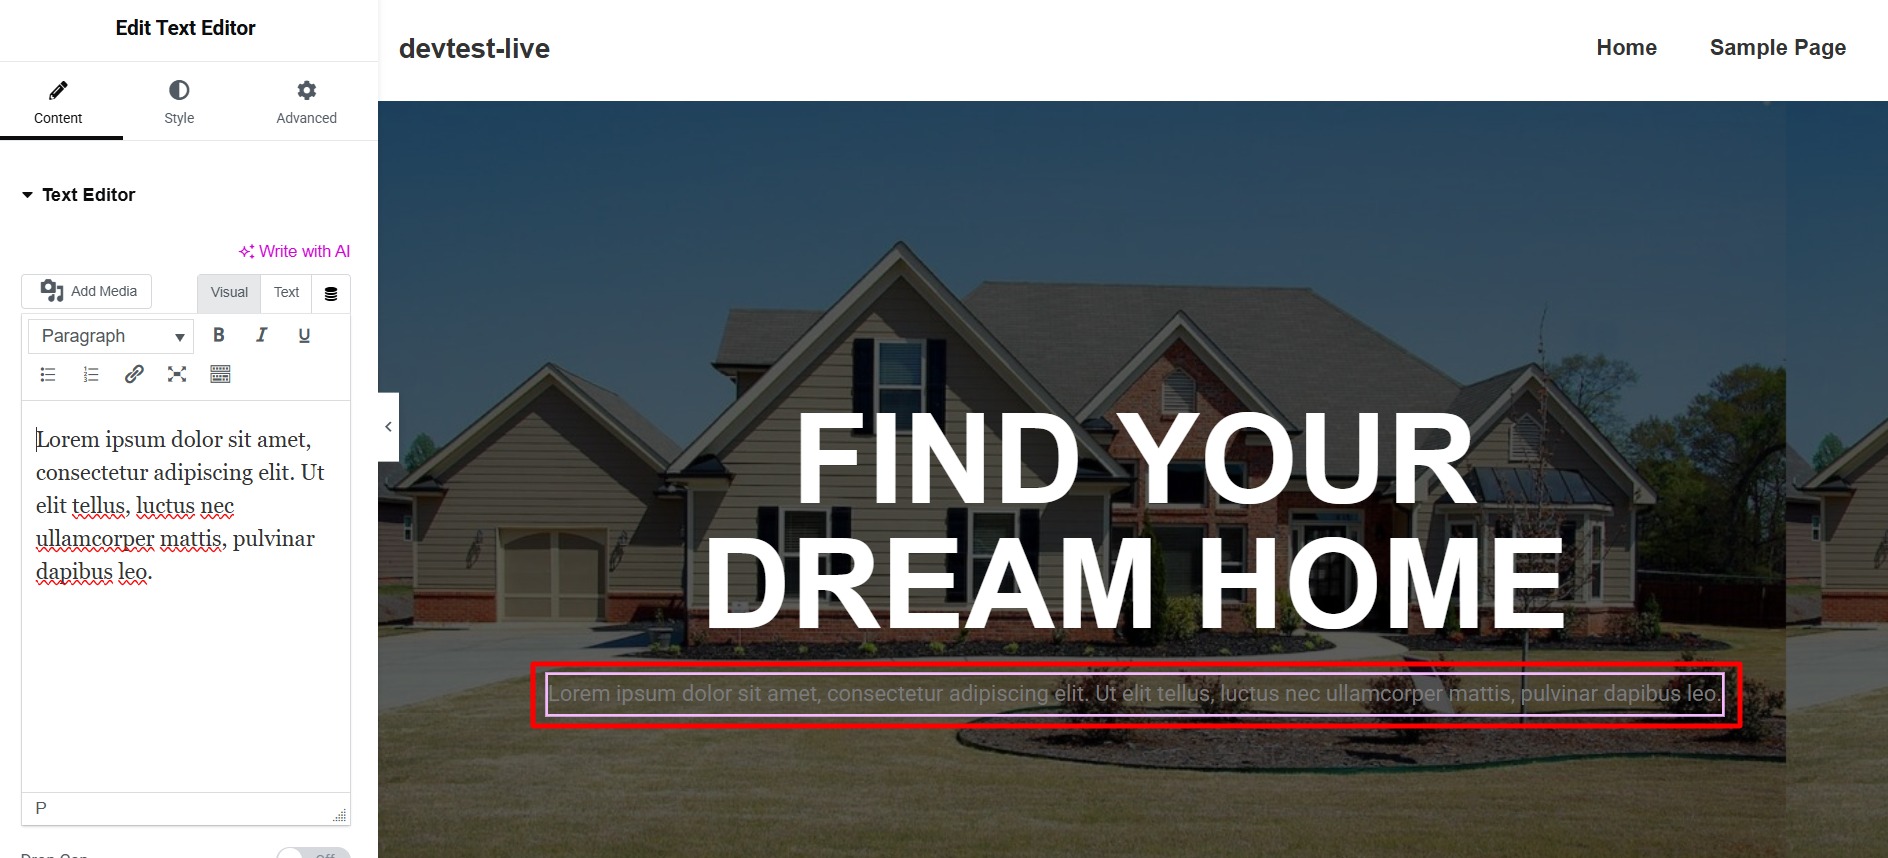
Next, add a Text Editor widget to elaborate on your message, providing context and information to your readers.
Enhance your page with a Button widget. This interactive element can guide users towards actions like linking to another page or making a purchase.
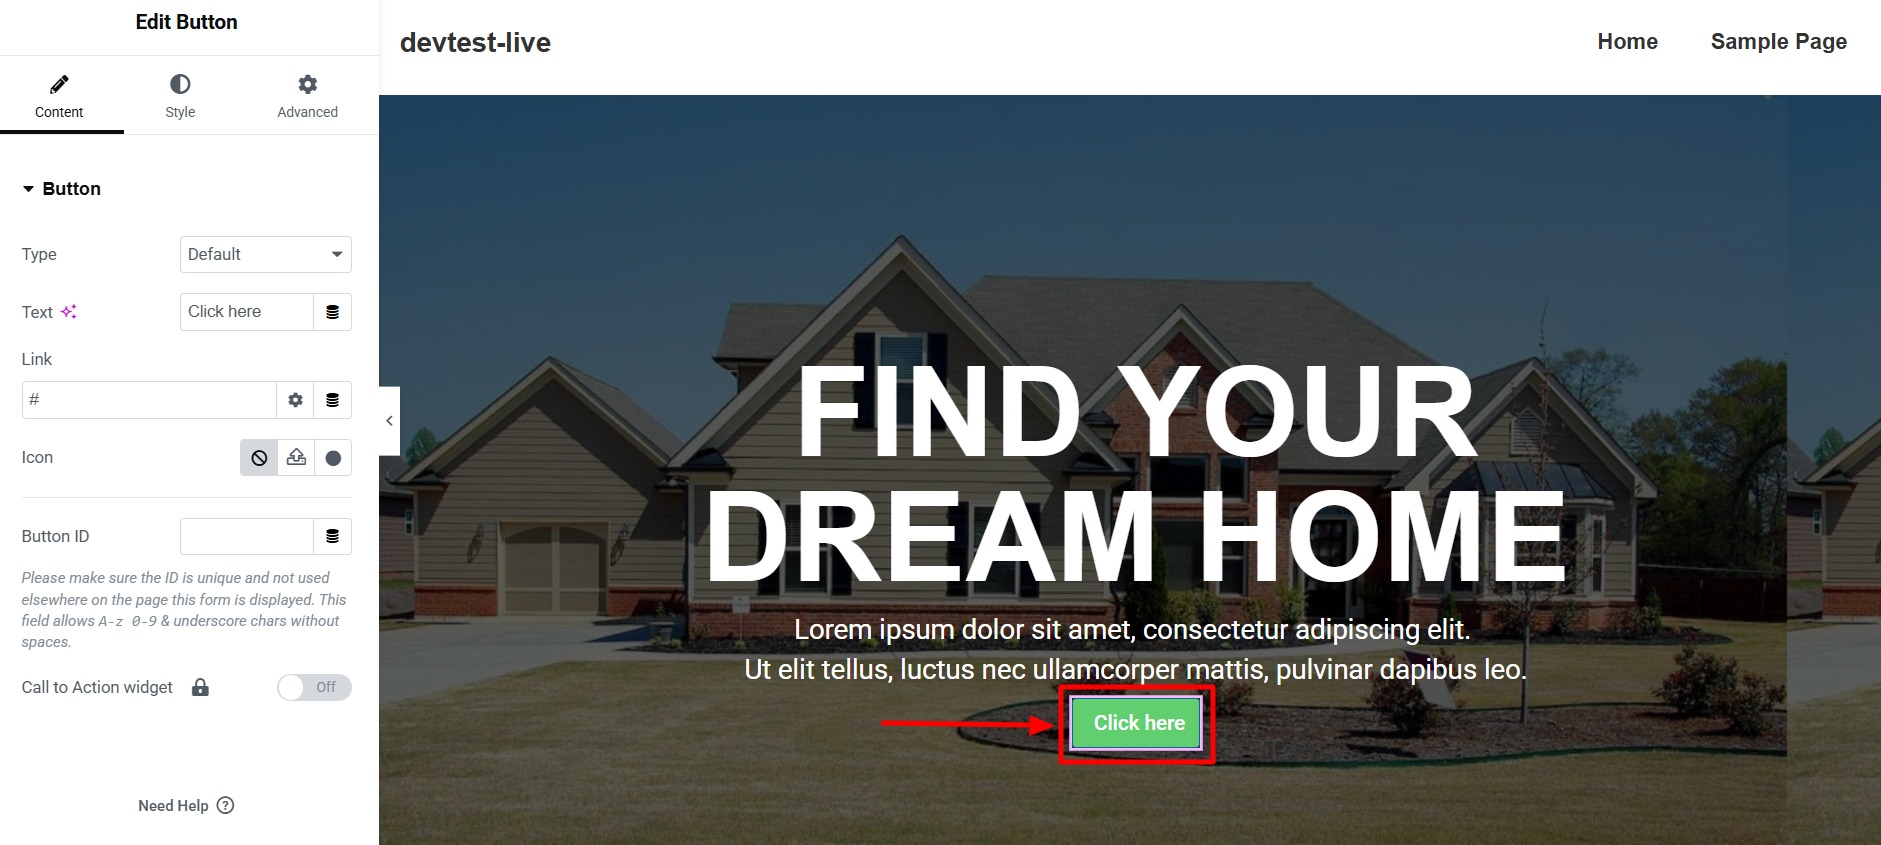
In the Content section, change the Text for the button and a relevant Link to direct users where you want them to go.
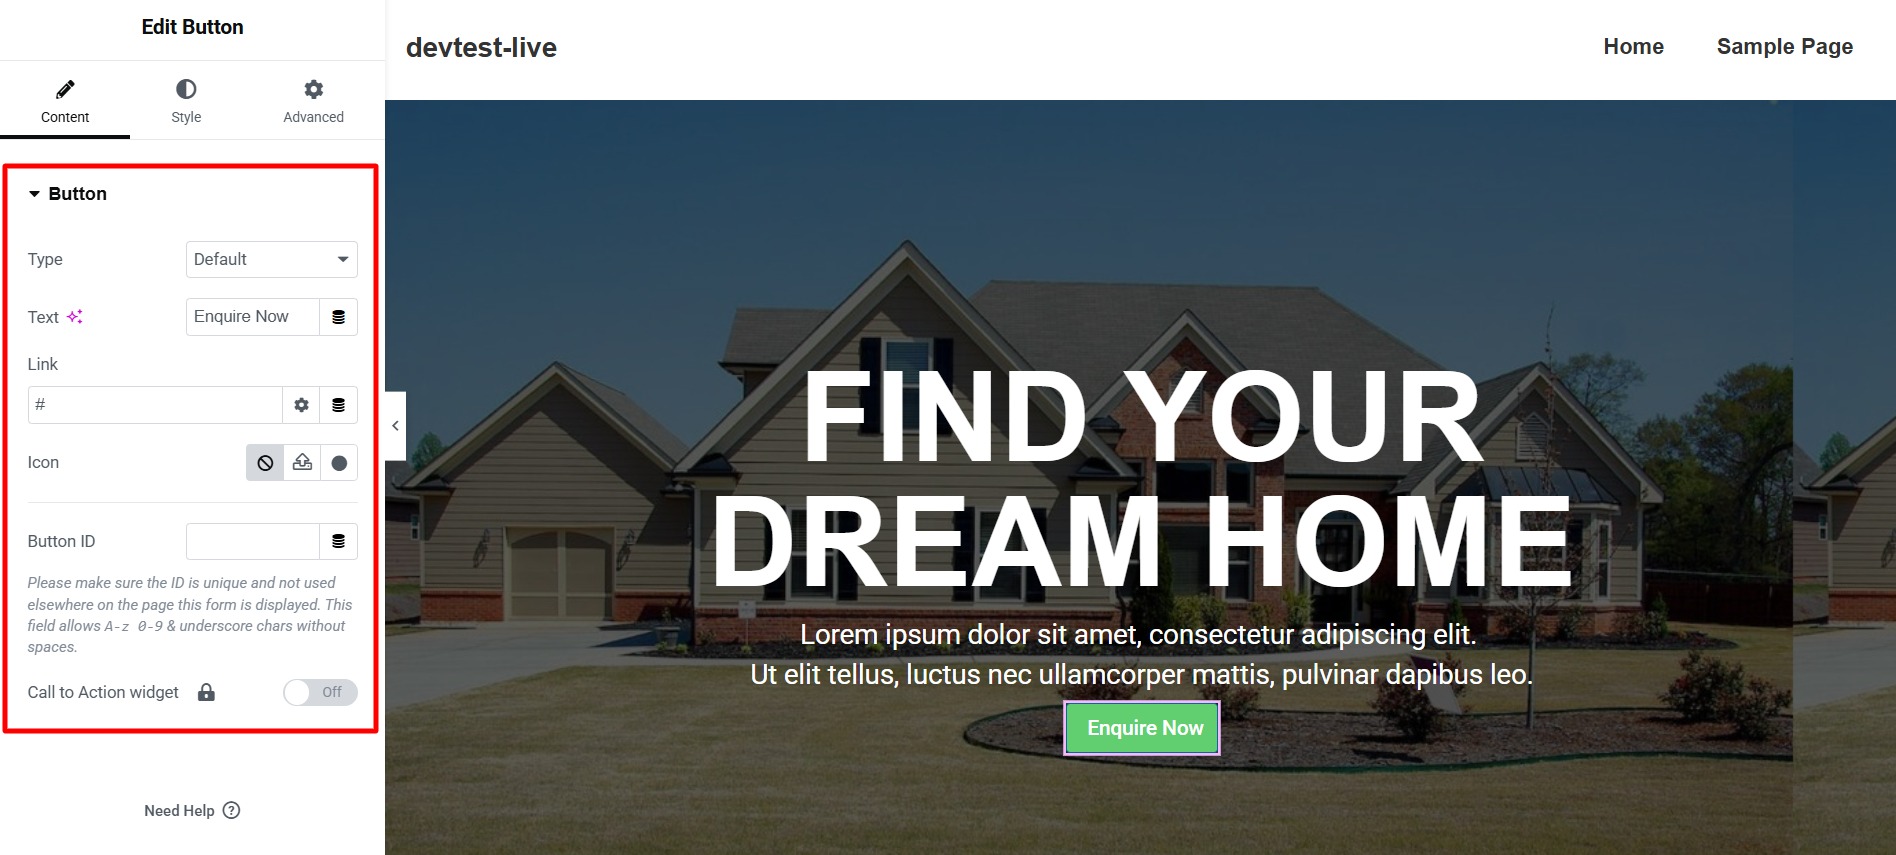
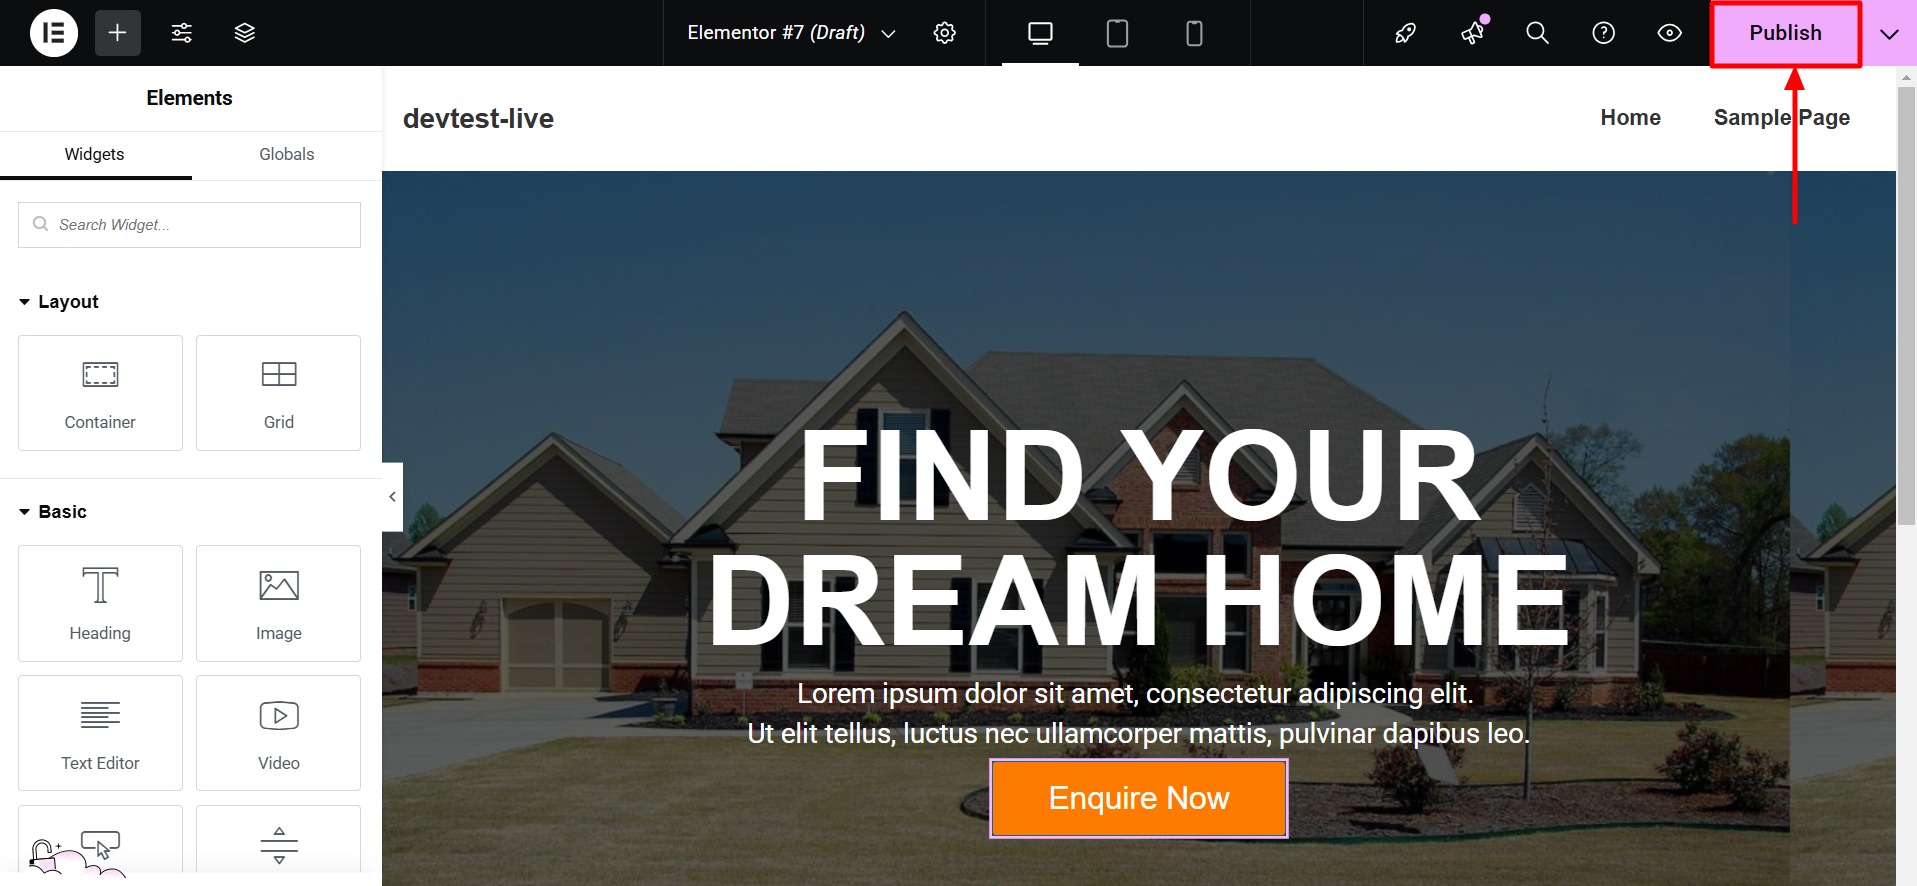
Switch to the Style tab to edit the button’s color, typography, and position. This customization ensures that your call to action stands out and fits seamlessly with the overall design.

Publishing the Page
Once satisfied with your design, click on Publish to make your page live.
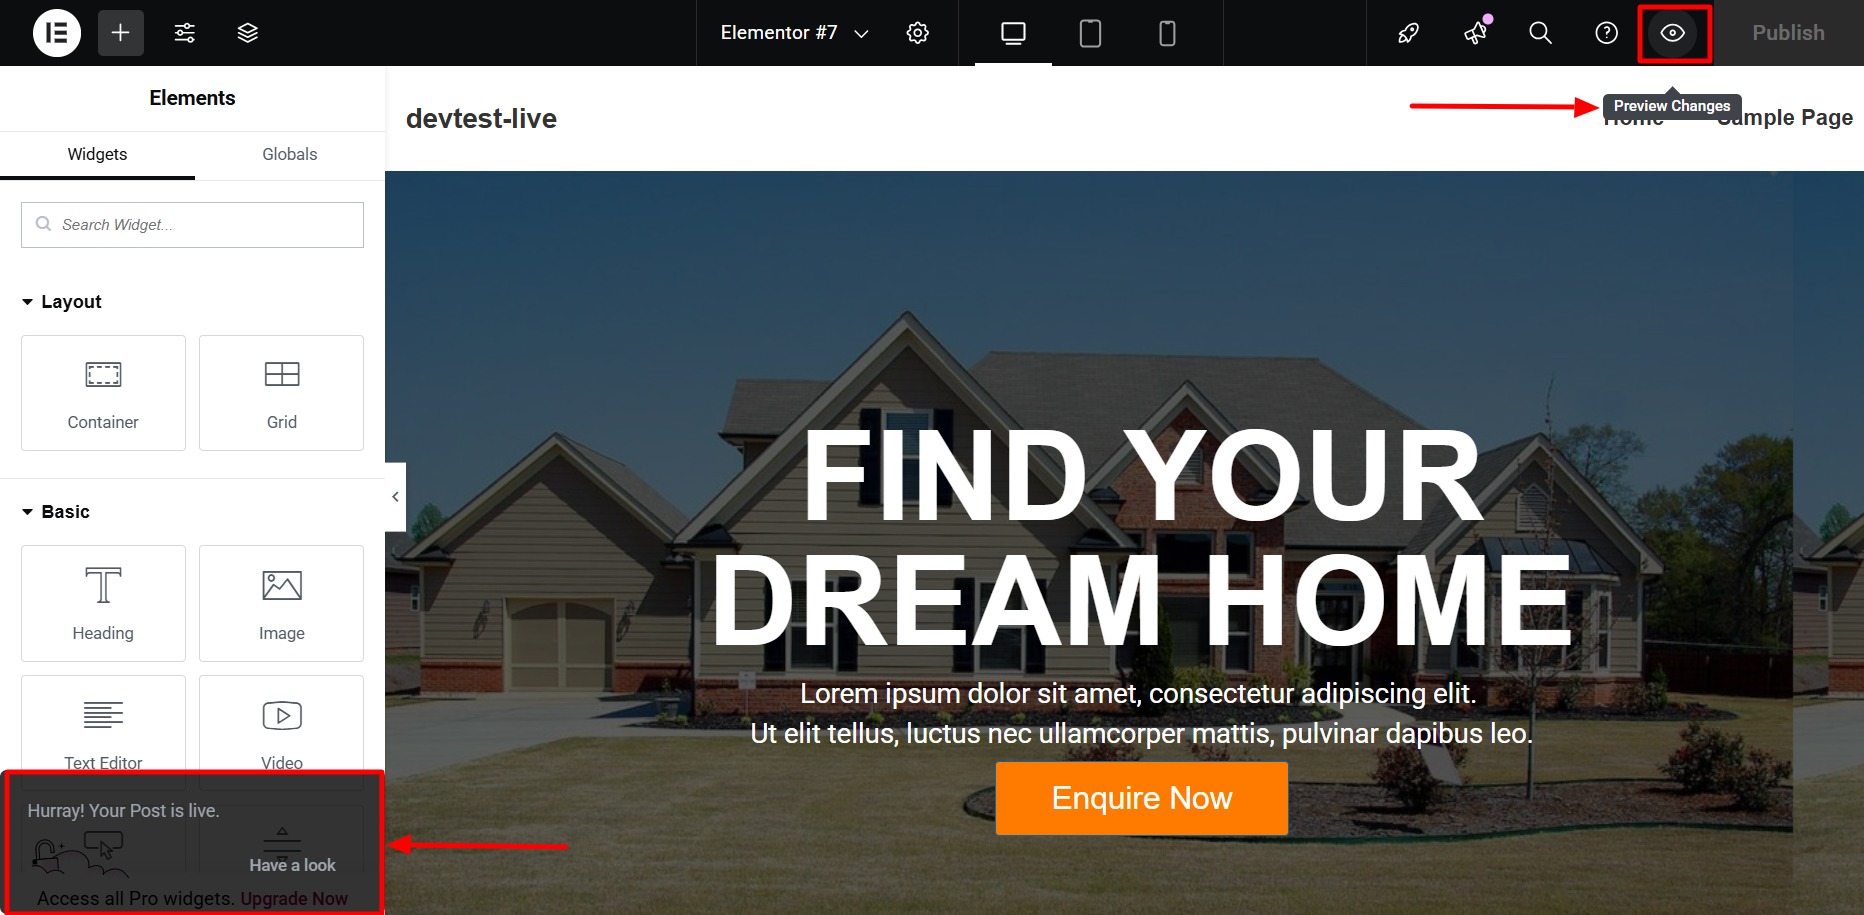
Click Preview Changes to see how your beautifully crafted page looks on the front end. You can also see a popup on the bottom stating that your page is live.
Congratulations! You’ve successfully built your first page using Elementor.
Building Website Using Responsive Starter Templates
If you don’t want to build a page from scratch, check out the Responsive WordPress Starter templates offered by Cyberchimps.
These templates are user-friendly and responsive, so you can easily create optimal templates without deep coding knowledge.
From design to layout and everything in between, there is a template that will suit your vision and take your website to the next level!
Here’s what you have to do:
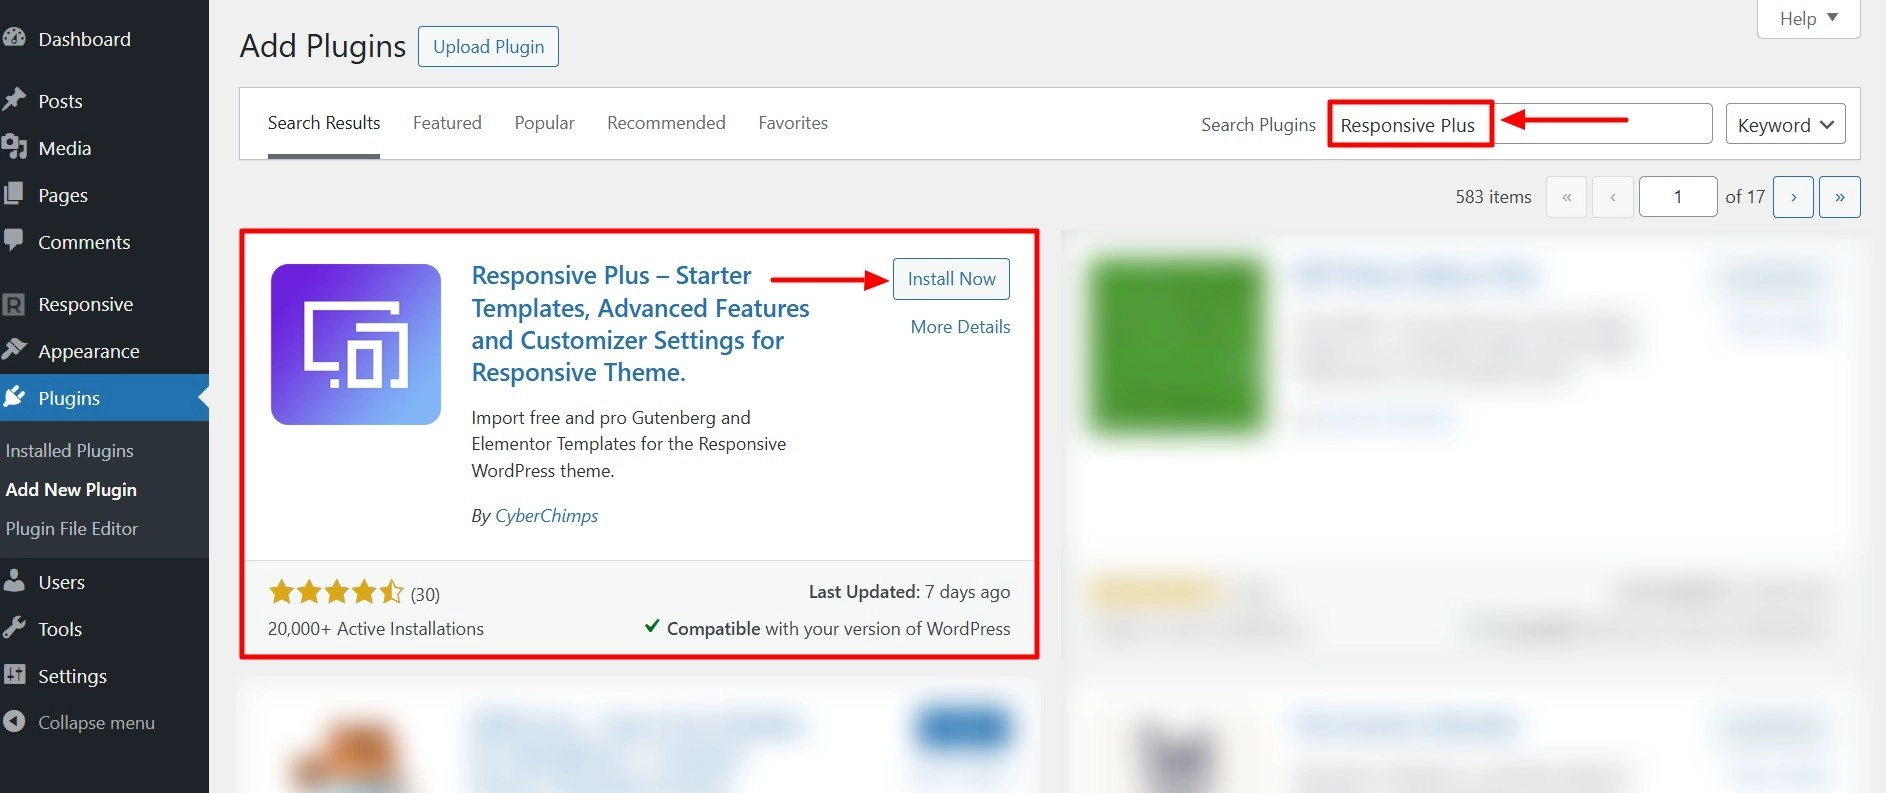
For starters, visit your WordPress admin dashboard and navigate to Plugins > Add New Plugin.
Now, search for Responsive Plus and hit Install Now.
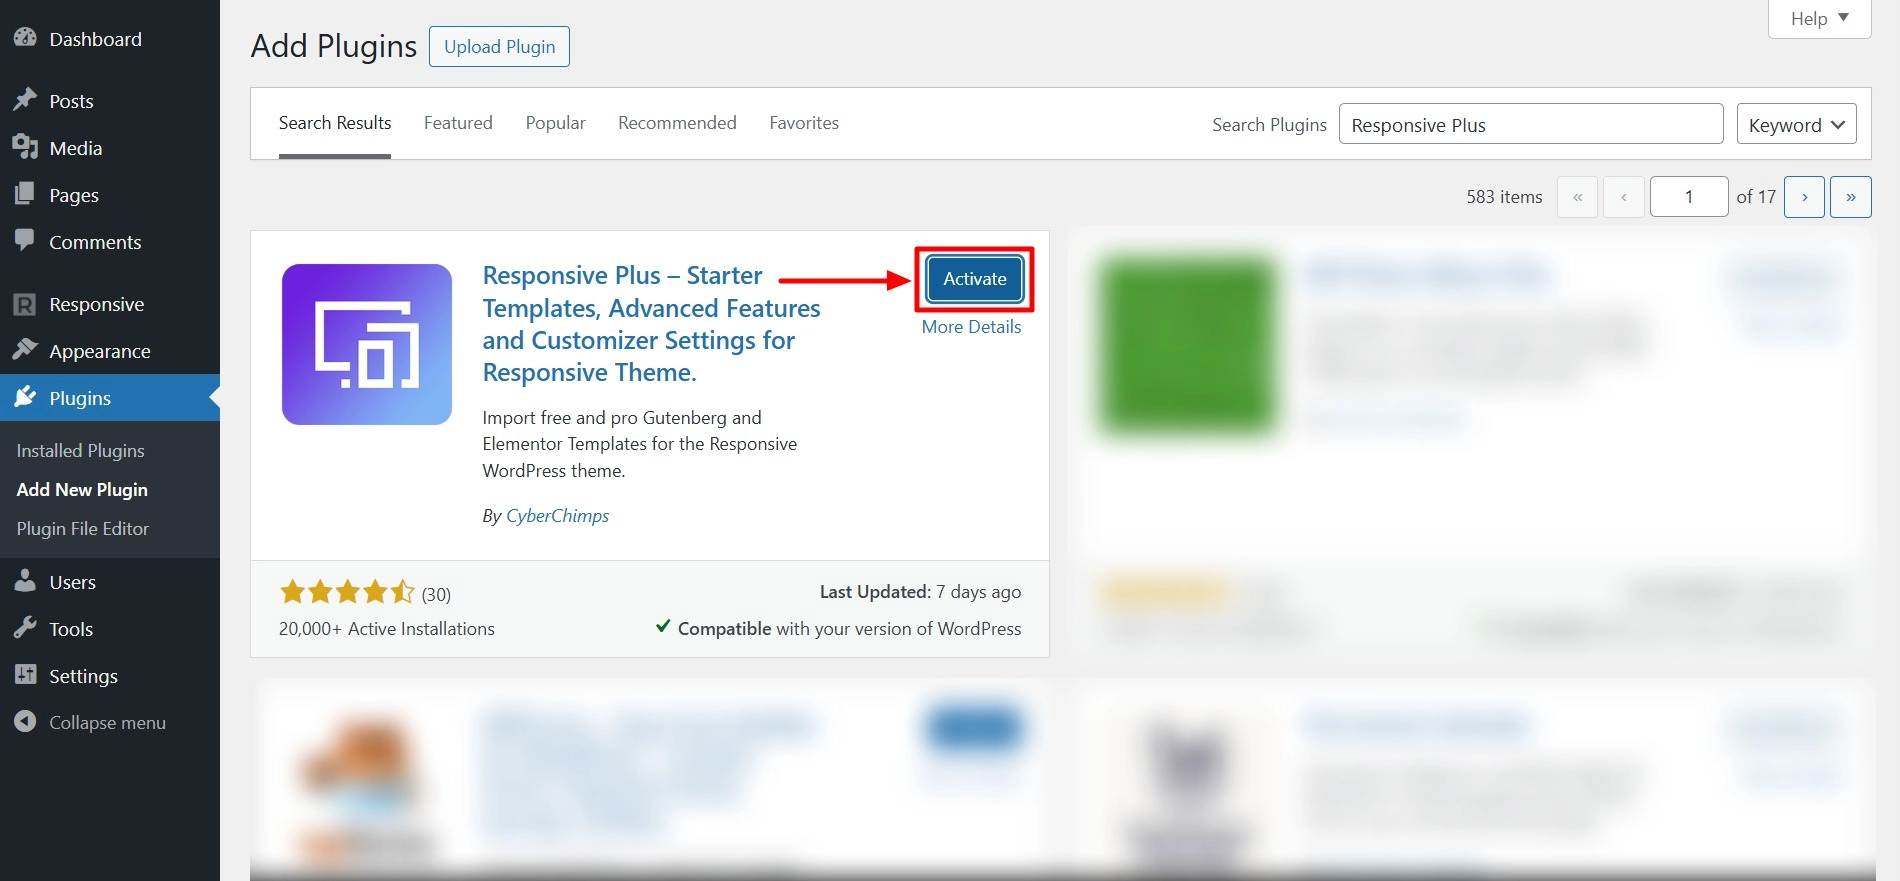
Once the installation is done, click on Activate to activate the plugin.
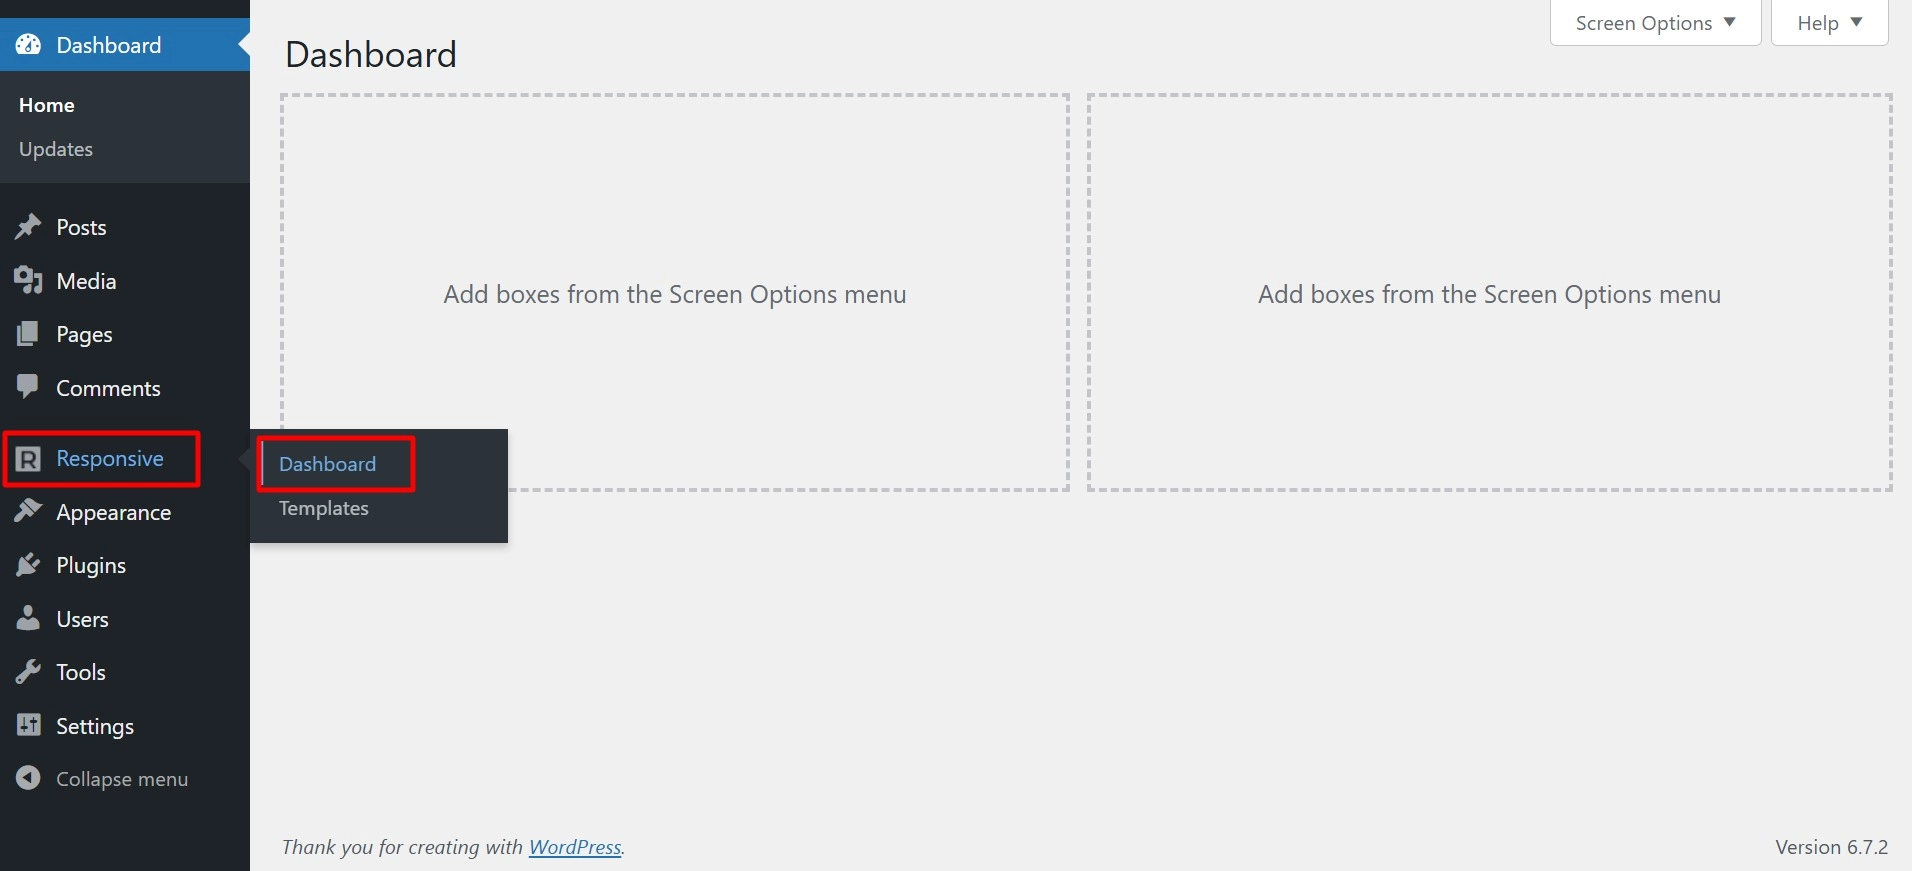
Next in the menu, go to Responsive > Dashboard.
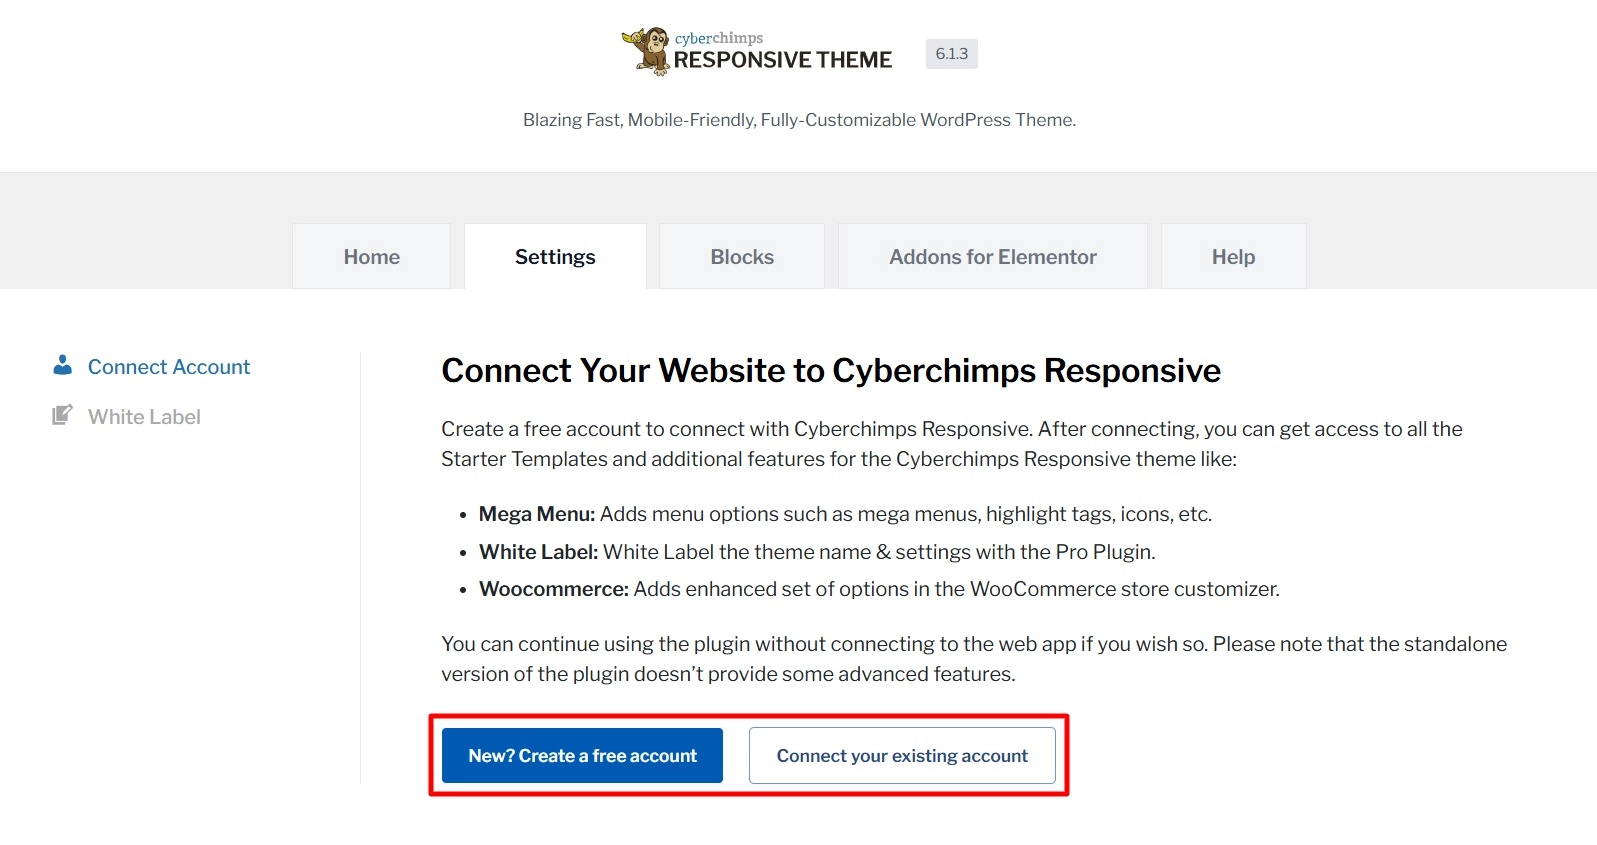
To connect with Cyberchimps, go to Settings. If you are a new user, click on New? Create an Account. If you already have an account, select Connect an existing account.
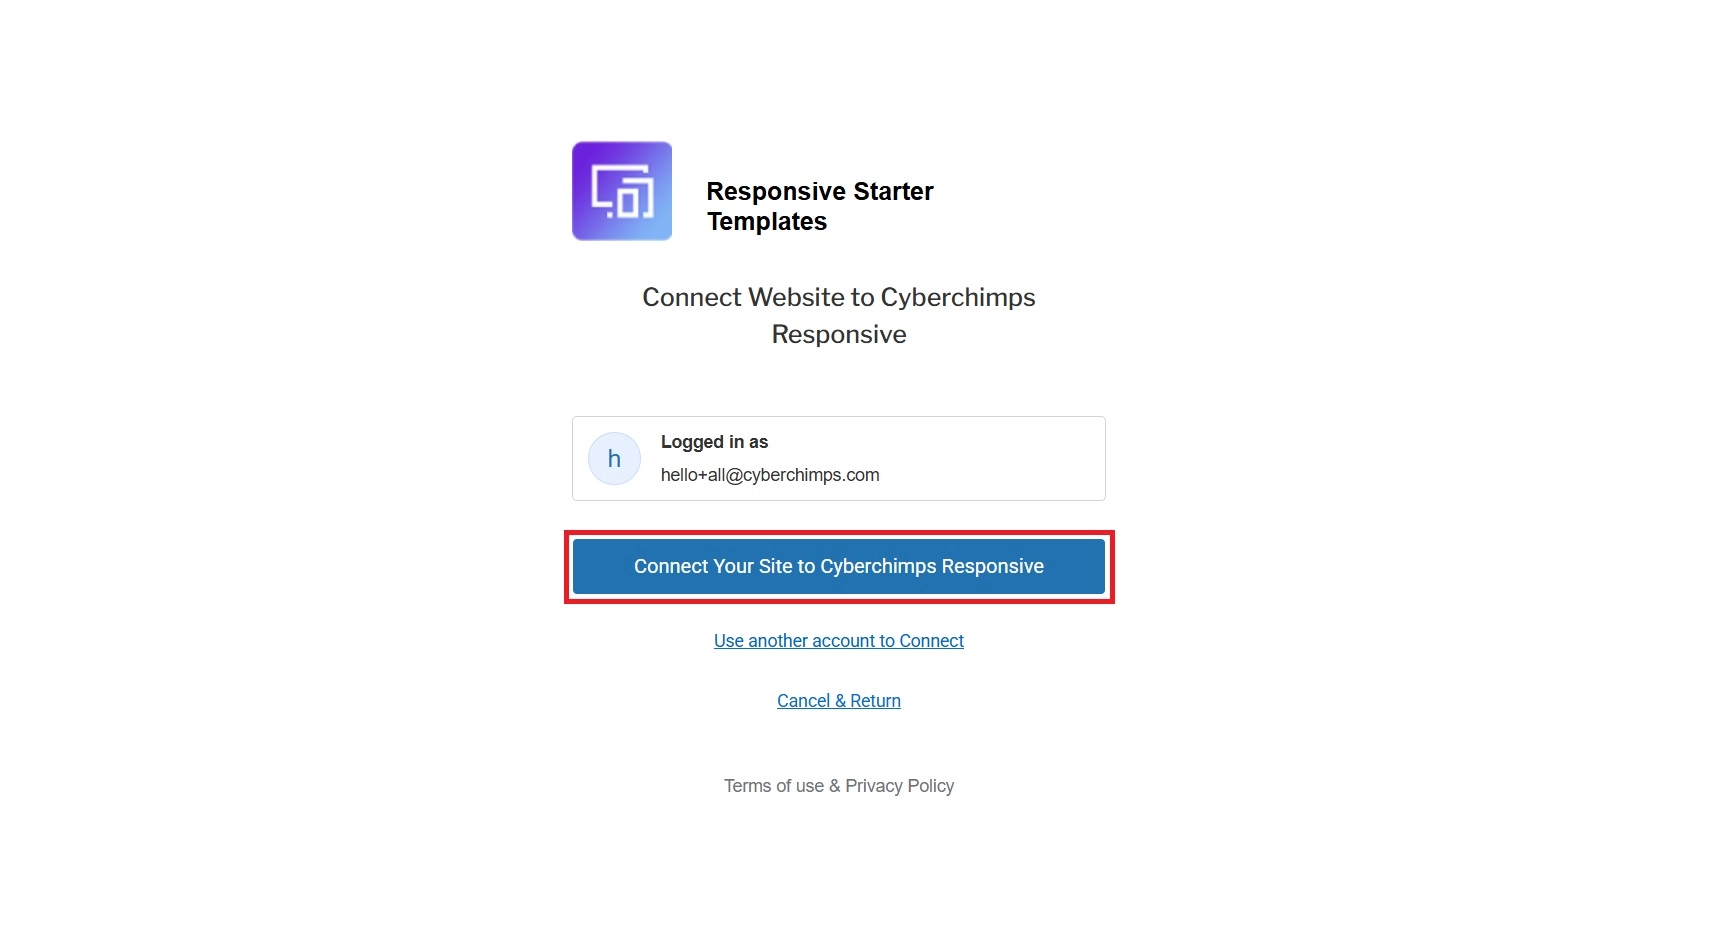
As I already have an account, I will click Connect to your existing account. Now, click on Connect your site to Cyberchimps Responsive.
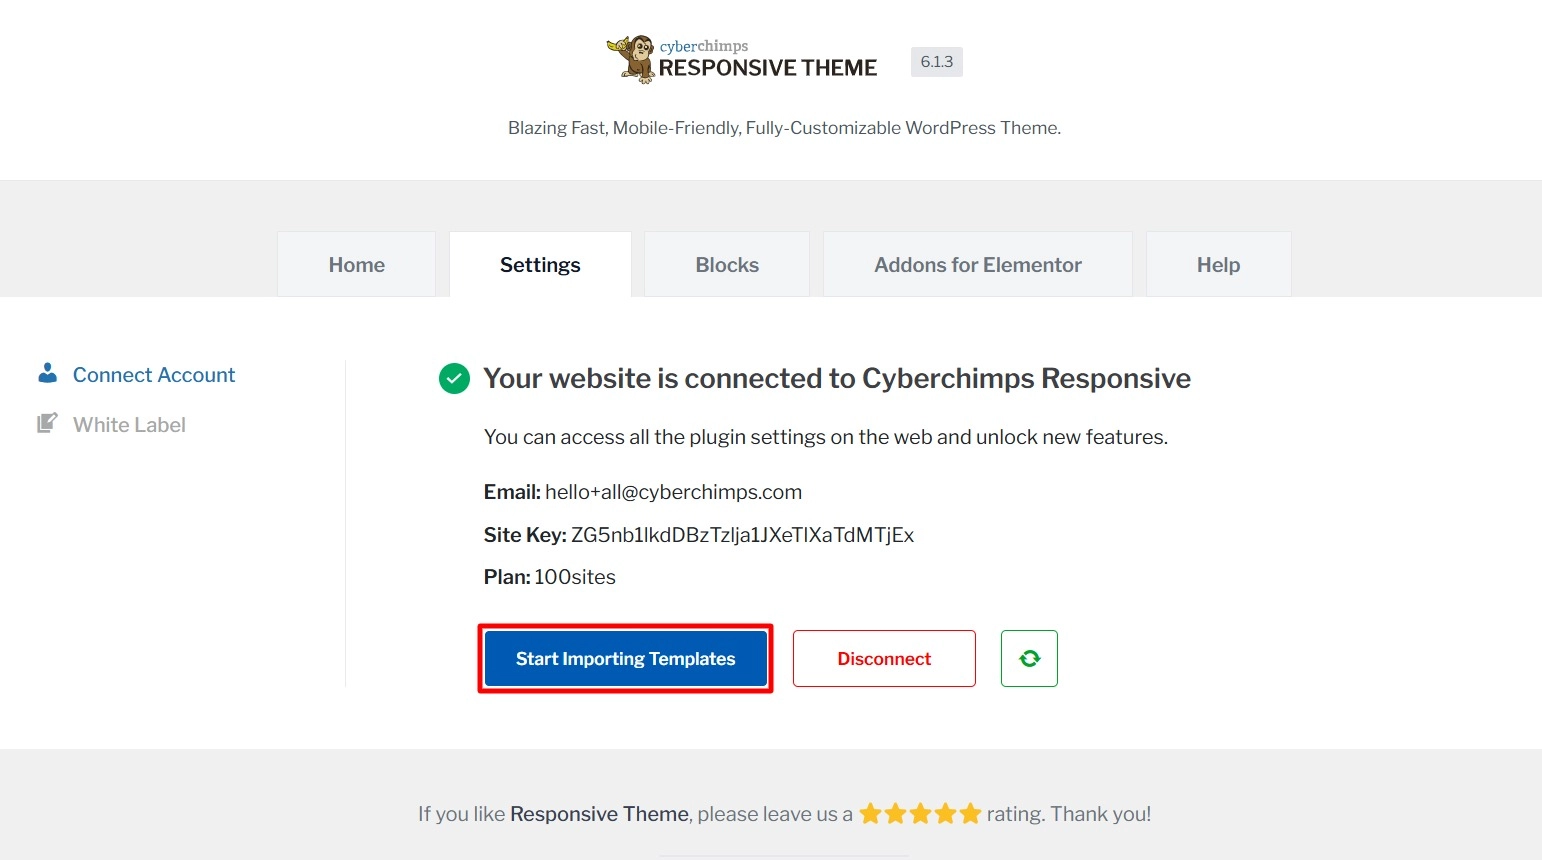
You will be taken back to the dashboard. Now, click on Start Importing Templates.
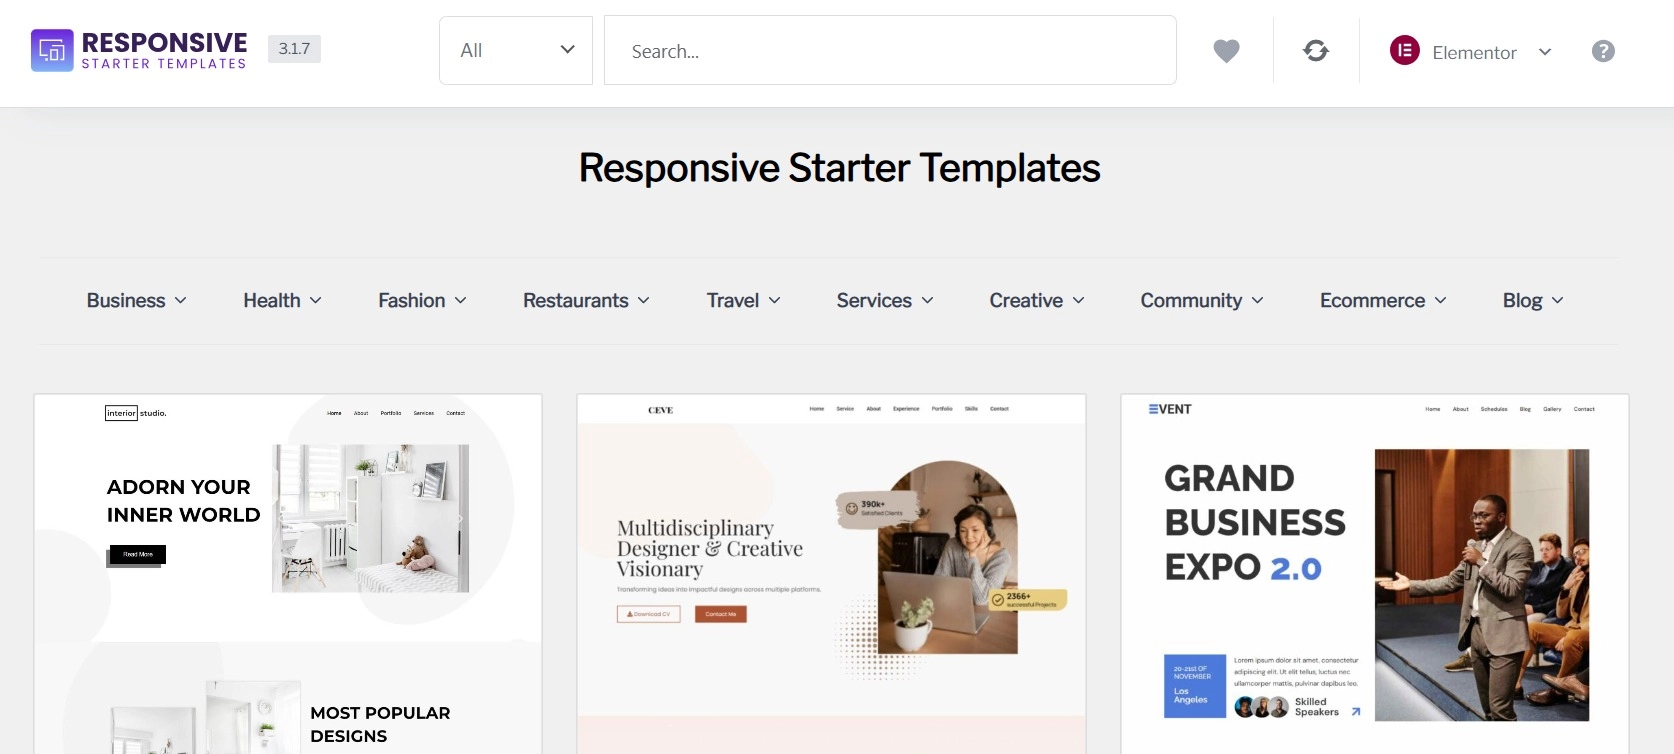
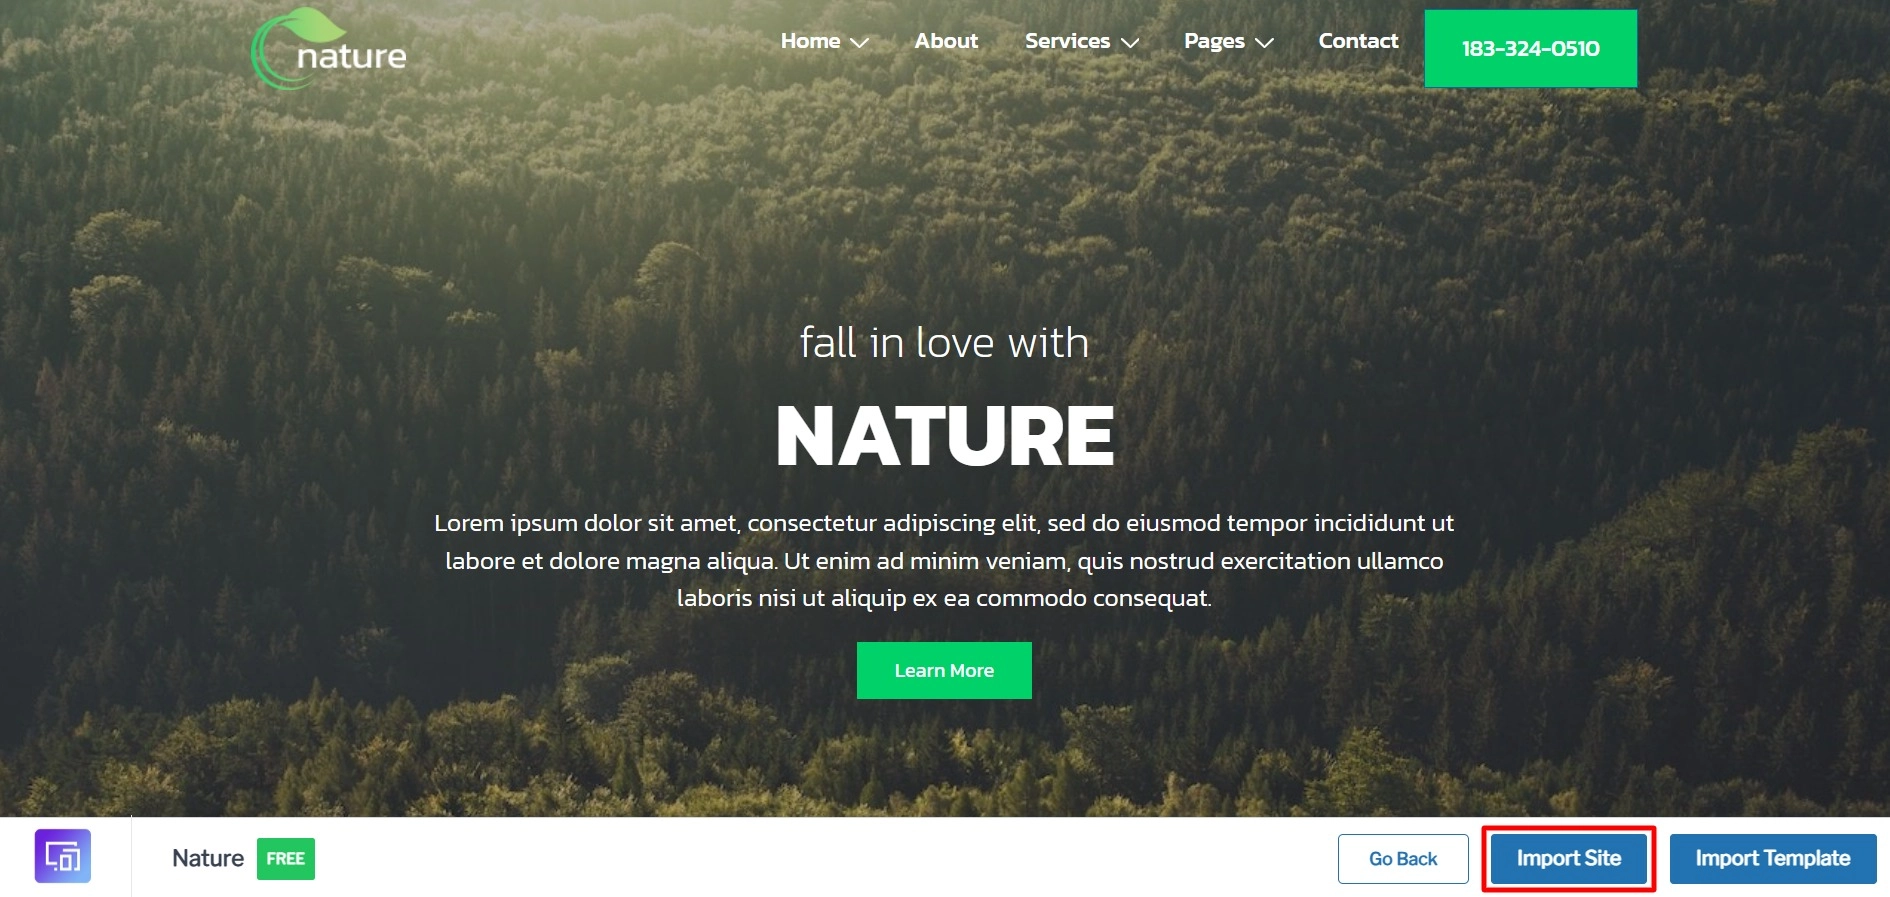
Here, you will find over 250+ starter templates. Search for the template you wish to import and click on it.
Then, click on Import Site.
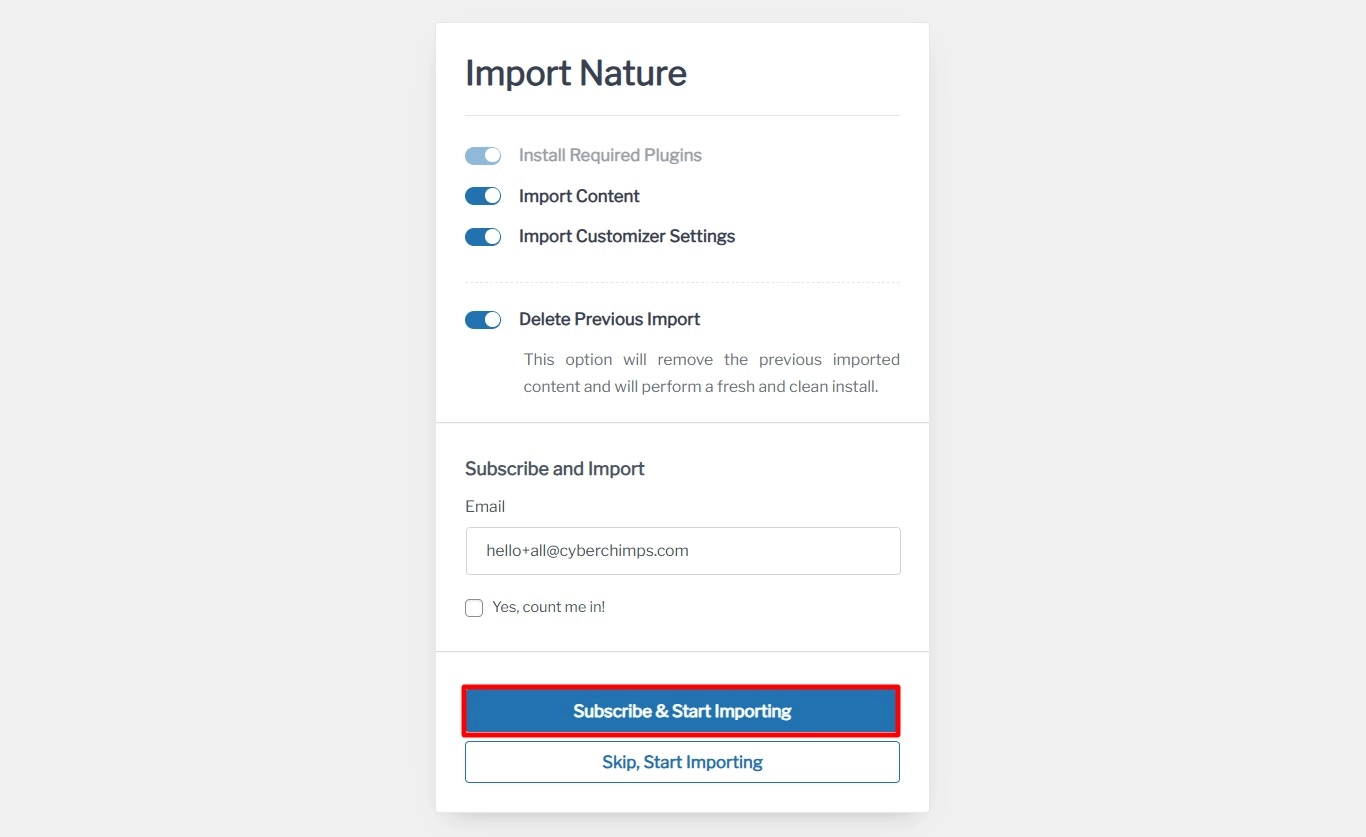
Next, select Subscribe & Start Importing.
Finally, click on View Website.
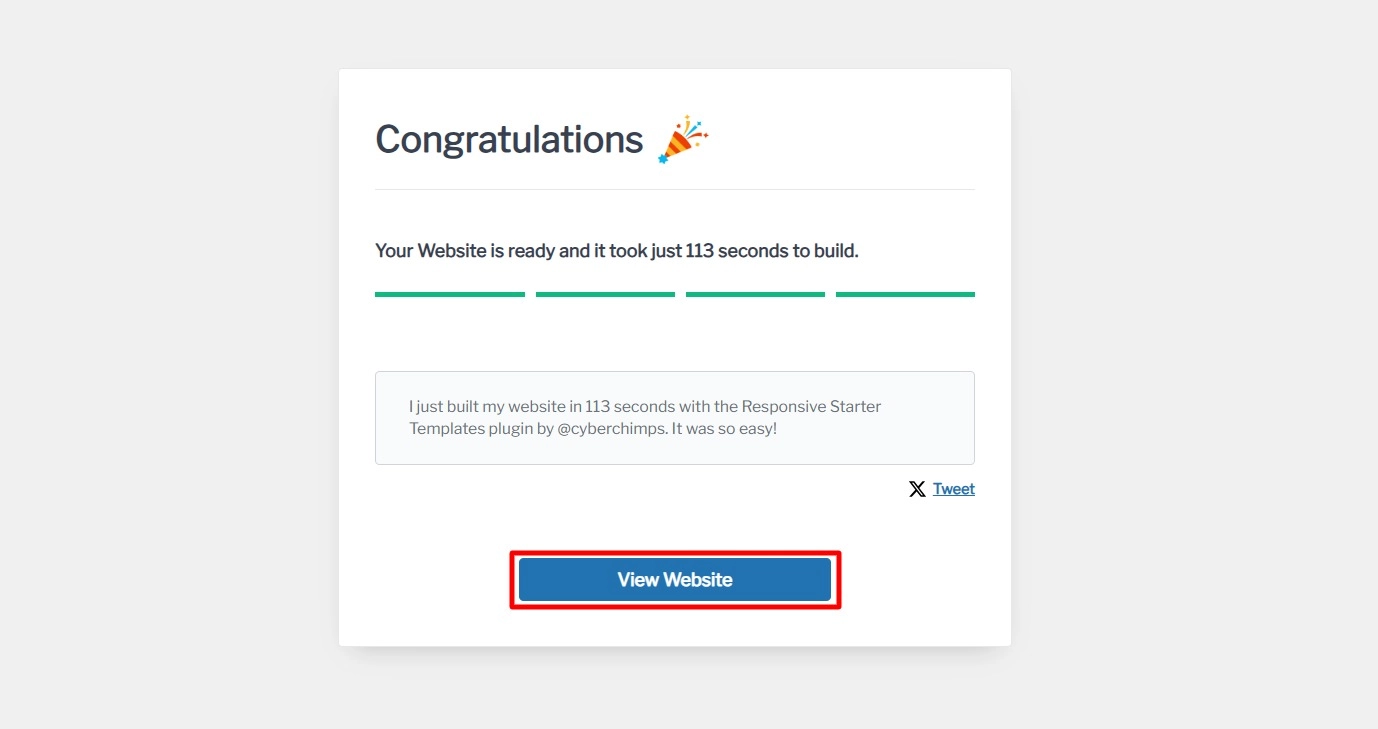
Congratulations, you have successfully created your website!
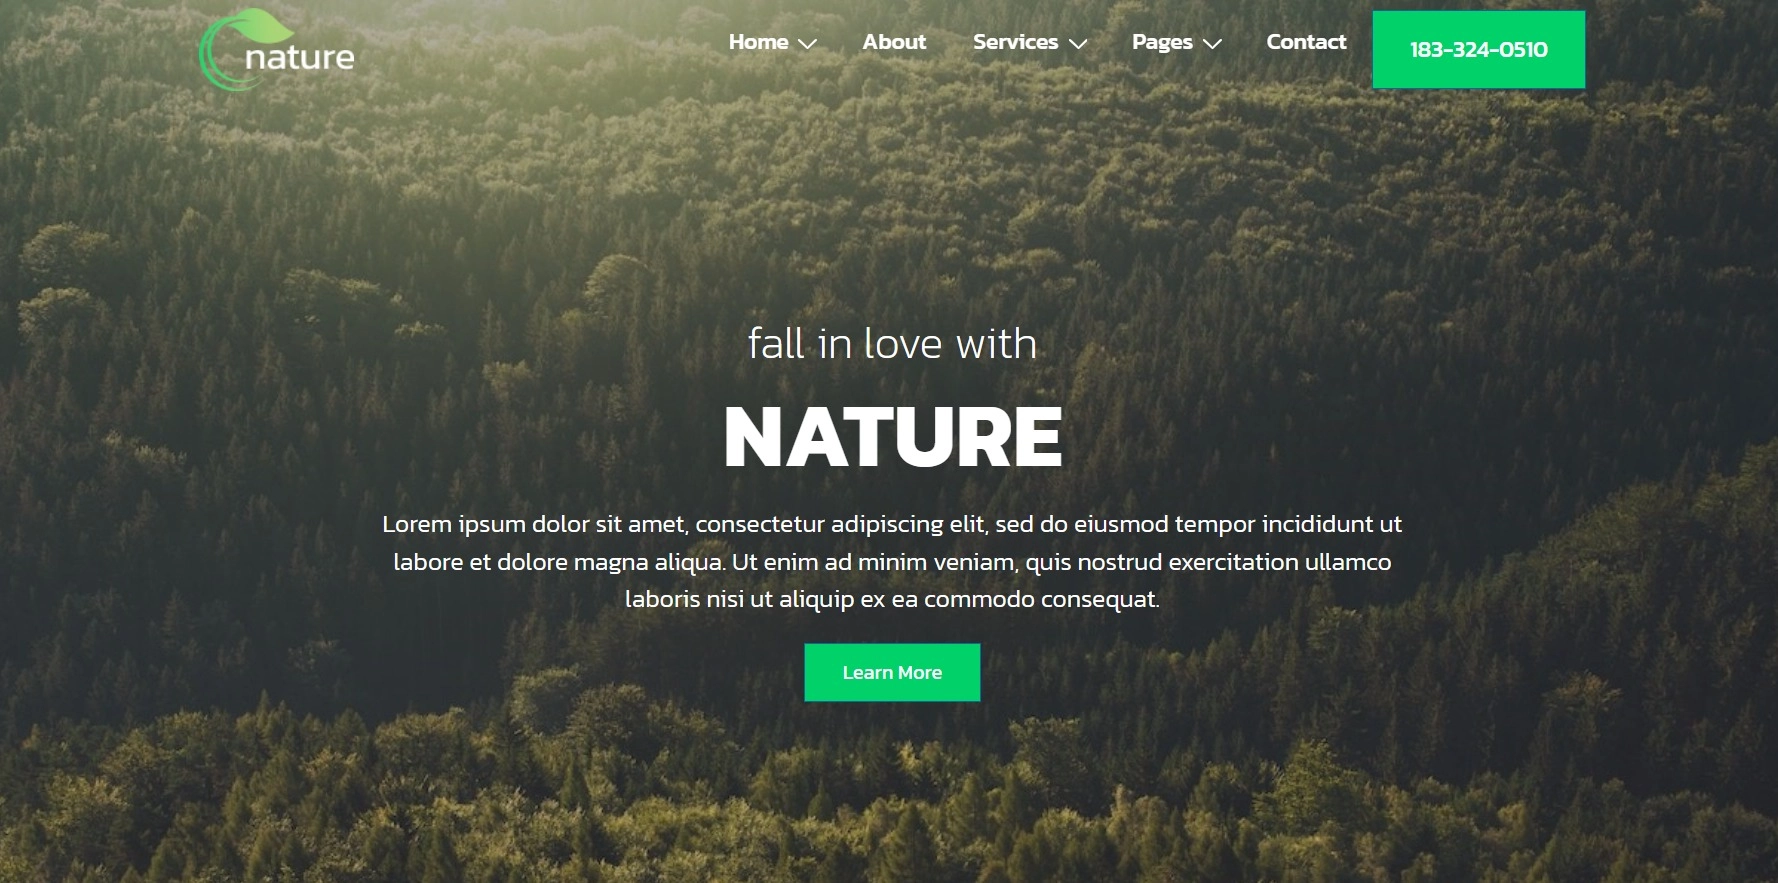
Now, you can go ahead and start customizing it to meet your needs.
FAQ
Yes, Elementor is an entirely free page builder for your WordPress website. It features an intuitive drag-and-drop interface, making creating, editing, and customizing your site easy. However, if you want access to additional features, you can upgrade to Elementor Pro.
Elementor provides an extensive library of free templates to enhance the website creation. This library includes a variety of designs and page layouts to help you create attractive web pages.
Elementor is a user-friendly page builder for WordPress that allows you to design customizable websites while ensuring functionality. It offers high-quality design elements, custom layout options, pre-designed website templates, and more, enabling you to create stunning websites.
Conclusion
Building a WordPress site can be difficult, especially if you have no website design or development background.
Luckily, the Elementor page builder makes creating your website an easy task.
You can design and create any post or page you want, whether in its free or premium version.
Its easy drag-and-drop functionality adds the best elements and designs your site according to your preferences.
To further enhance your website’s engagement, consider exploring Responsive Addons for Elementor.
If you liked this article, you can also consider reading:
- What is Elementor? Ultimate Guide for Beginners
- Best WordPress Themes With Pre-Built Elementor Templates
- Best WordPress Website Examples
Want to create a Wedding website with WordPress? Grab the Responsive Theme now!


