A well-designed footer is a crucial element of any website. Similar to the header, it appears on most pages and posts but is located at the bottom, making it the last section visitors see before leaving your site.
Many overlook its significance, but an effective footer can enhance user engagement, improve conversions, boost subscriptions, and conveniently provide essential information
Visitors often expect to find key details in the footer, such as:
- Company information
- Contact details
- Social media links
- Navigation links to important pages
- Call-to-action buttons
A well-structured footer allows users to explore additional content and easily navigate your site, reducing the need to scroll back to the top.
Implementing a Footer Using the Cyberchimps Responsive Theme #
This guide will walk you through creating and customizing a footer using the Cyberchimps Responsive Theme in WordPress.
Prerequisites #
Before proceeding, ensure you have installed and activated the Cyberchimps Responsive Theme. If you need guidance on installation, refer to this documentation on how to install the Responsive theme.
Accessing the Footer Customization Options #
To begin customizing your footer, follow these steps:
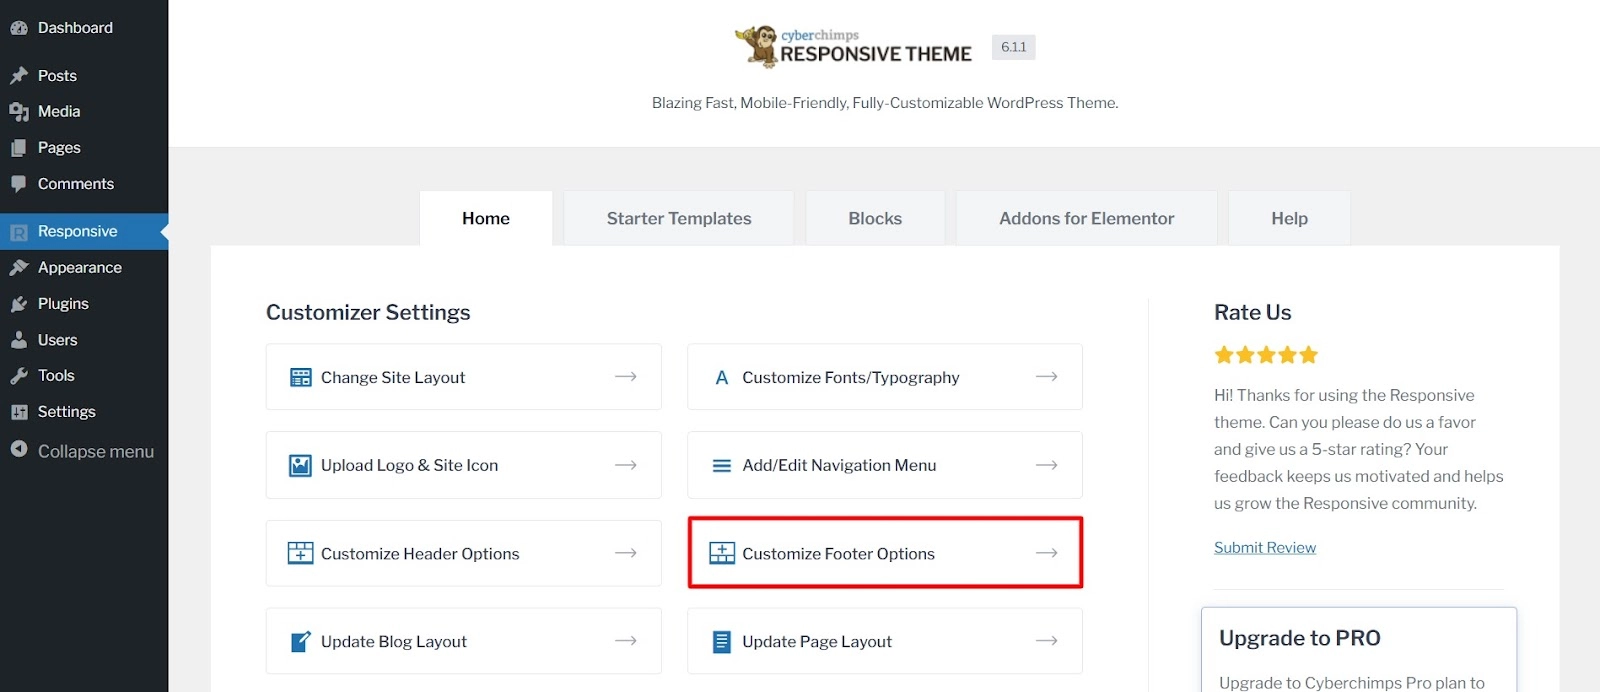
- Navigate to your WordPress dashboard. Click on Responsive from the left panel and select Customize Footer Option. Alternatively, hover over Appearance and click on Customize.
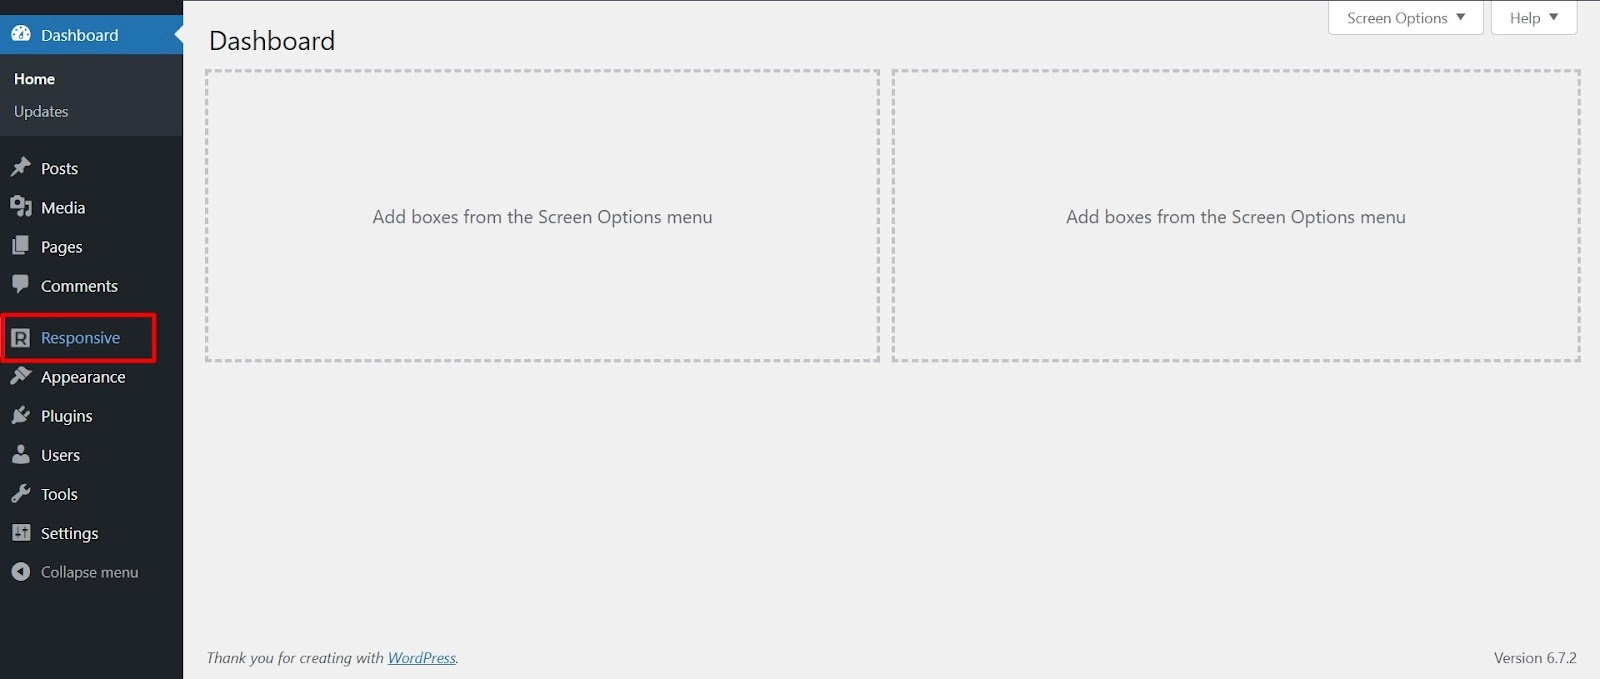
- Select Customize Footer Options to open the footer settings.
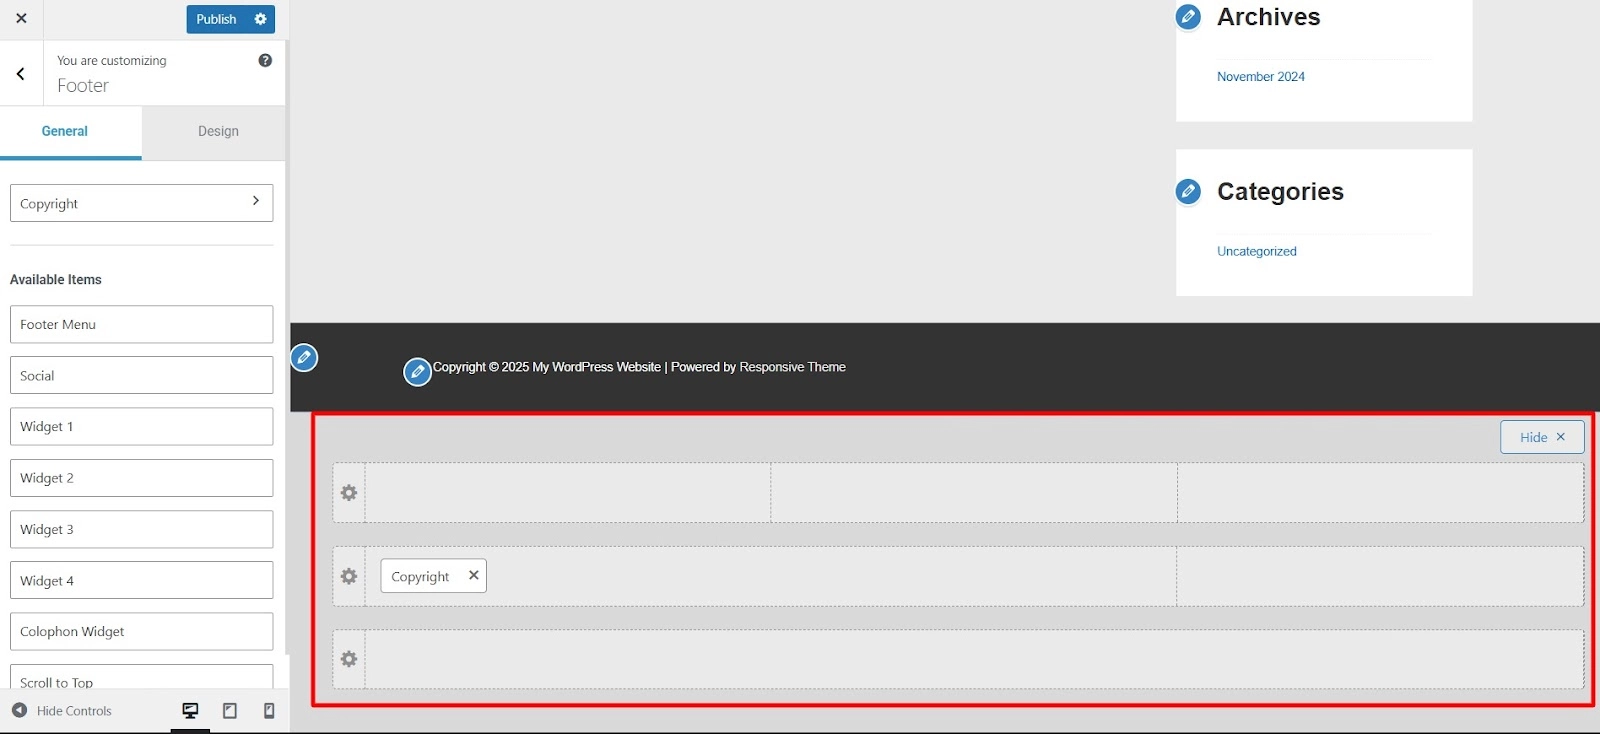
Understanding the Footer Builder #
Once inside the Footer Builder, you will see two main sections:
- Left Sidebar: Displays a list of all active footer elements. The panel is divided into two parts: General tab and design tab.
- Live Preview: This shows how your footer elements appear in real-time.
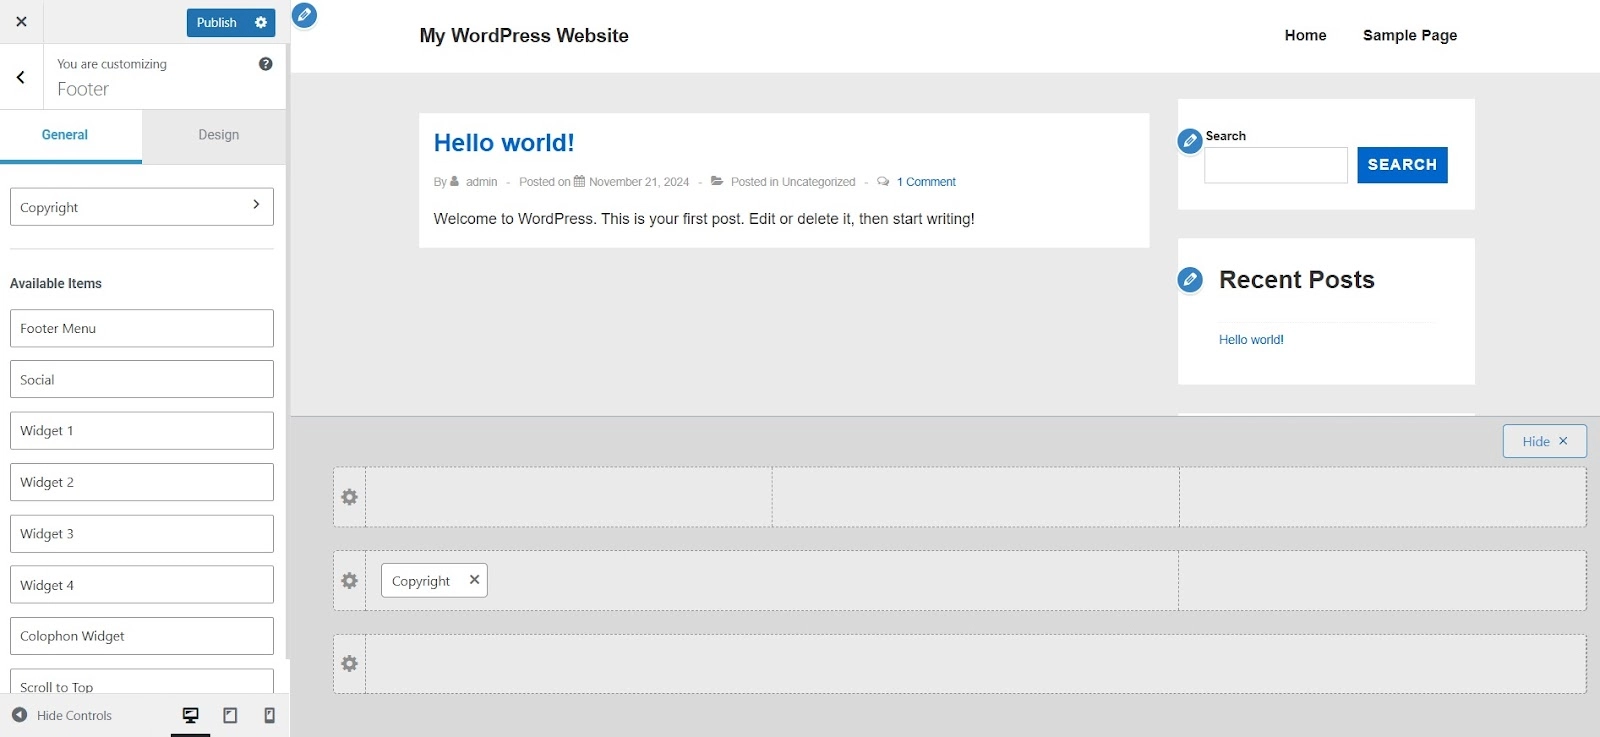
You can modify different footer sections and see instant changes using the Visual Footer Builder.
The Footer Builder is divided into three parts: Above Footer, Primary Footer, Below Footer.
Adding the Copyright Section #
The Copyright section allows you to display copyright information and customize its appearance. You can:
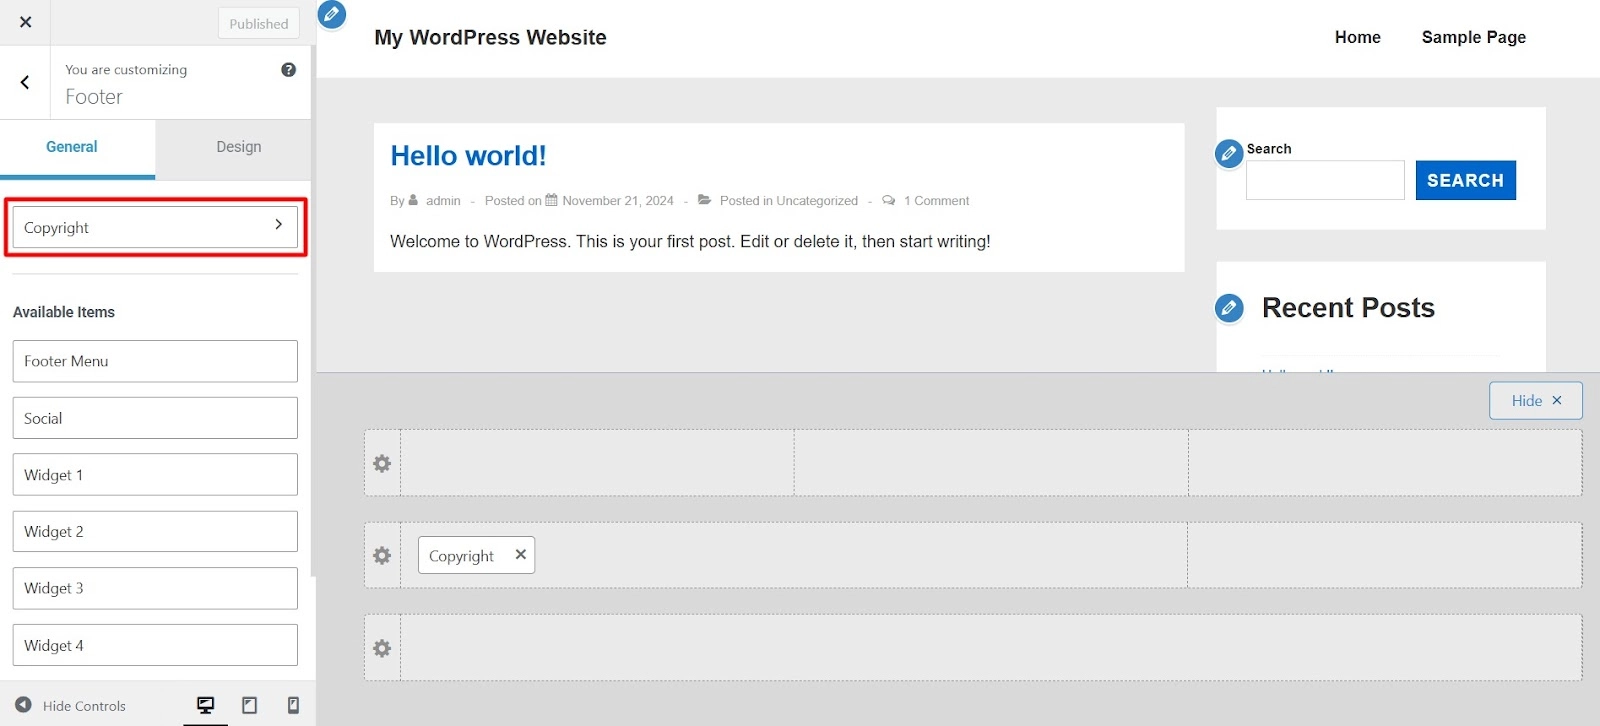
- Add custom text and style it with different fonts, italicization, and colors.
- Include useful shortcodes for dynamic content.
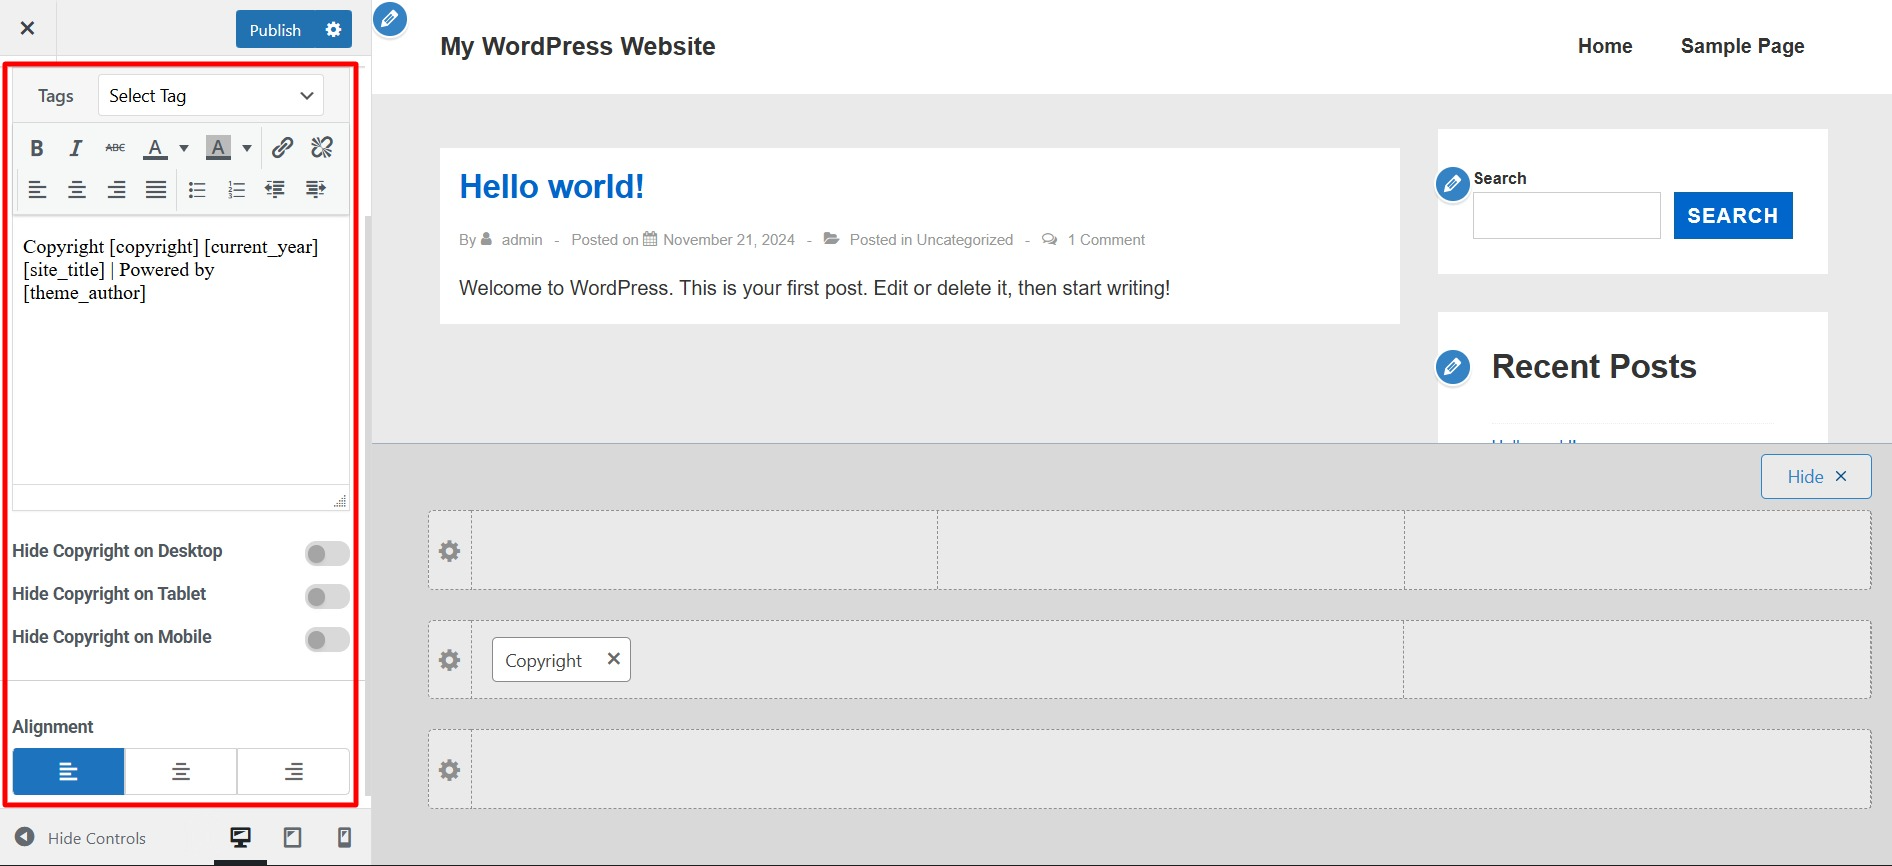
Styling the Copyright Section #
- Adjust text alignment to suit your design preferences.
- Hide or display copyright text on different devices (desktop, tablet, mobile).
Customizing Footer Design #
In the Design tab, you can personalize the overall look of your footer by adjusting the following settings:
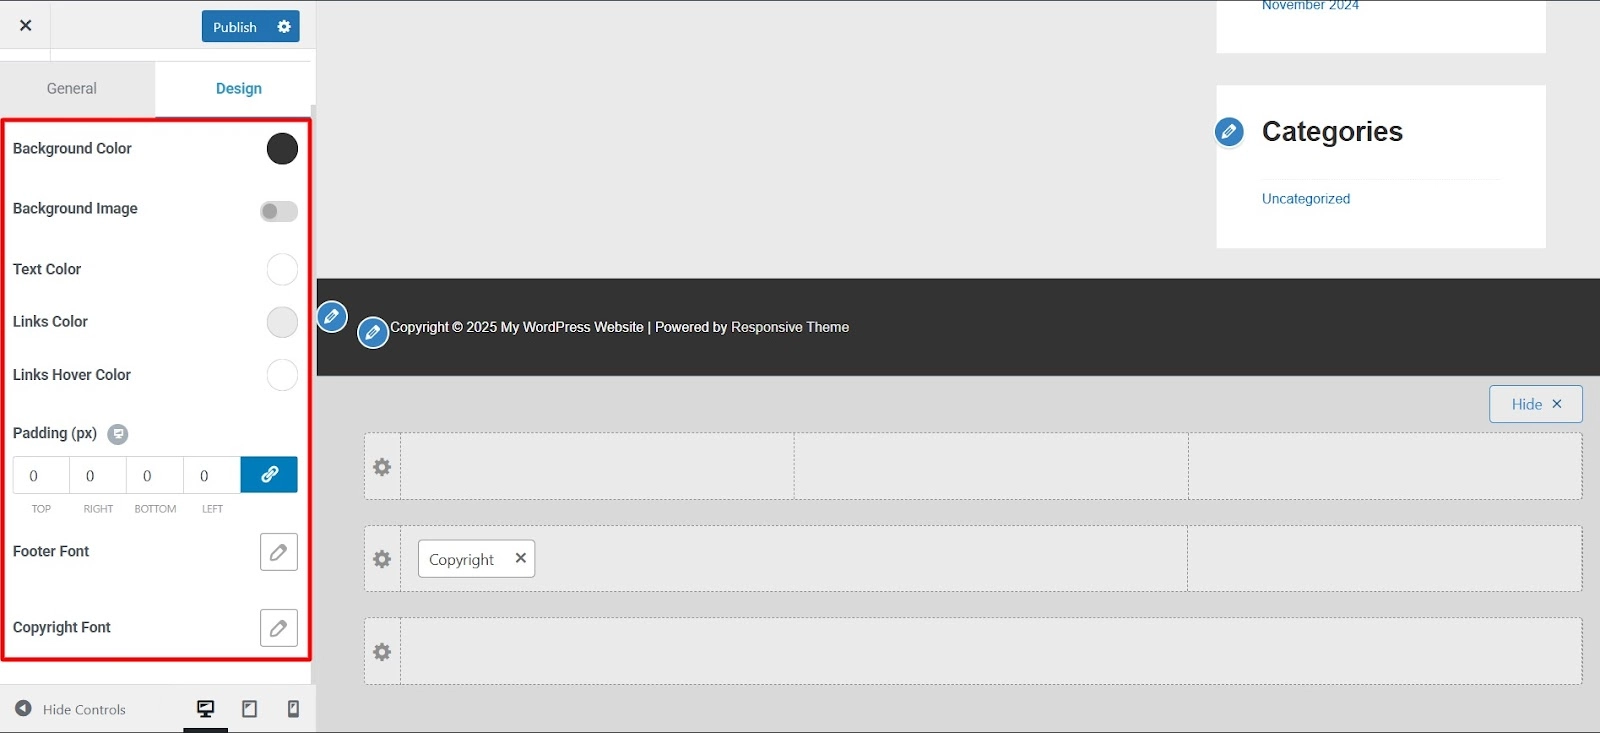
- Background Color: Change the footer’s background color.
- Background Image: Upload an image to be used as the footer’s background.
- Text Color: Modify the text color for improved readability.
- Links Color: Adjust the color of links in the footer.
- Links Hover Color: Change how links appear when hovered over.
- Padding: Add spacing around the footer content to improve visual appeal.
- Footer Font: Customize the font style used in the footer.
- Copyright Font: Change the font style for copyright text.
Visual Footer Builder #
Similar to the Header, the Visual Footer Builder is divided into three distinct sections:
1. Primary Footer – The middle section is the main footer area.
2. Above Footer – The upper section is often used for adding subscription forms or call-to-action buttons.
3. Below Footer – The lower section typically contains copyright information and contact details such as an address, phone number, email, and company registration number.
To customize each footer section, click on the “Settings” icon on the left side of the respective sections.
Finalizing Your Footer #
Once you’ve made your desired changes:
- Review the live preview to ensure your footer appears as expected.
- Click Publish to save your modifications.
- Refresh your website to see the updated footer in action.
Following these steps, you can create a professional and functional footer using the Cyberchimps Responsive Theme in WordPress.
A well-optimized footer enhances user experience and provides essential information at a glance, making it a valuable part of your website’s design.


Leave a Reply