Are you wondering how to add social icons to your WordPress website?
If yes, then you have landed in the correct place! A website and social media always run in parallel when trying to build a strong web visibility.
You might think of your website as a virtual business address; your social media acts as a medium to convey your business’s voice and personality.
While integrating your social media handles on your website can significantly boost your business, the process of adding them is quite simple.
This guide will explore the role of social icons and easy methods to add them to different places in your WordPress website.
So let’s get started!
Why Add Social Media Icons To a Website?
While your website establishes a formal presence, offering detailed information about your services and other essential details, your social media creates an informal space for personal interaction with your potential audience.
Furthermore, the increasing influence of social media and its wide penetration have seamlessly helped businesses to channel their sales funnel. When a visitor visits your website, they often tend to engage and explore; social icons are highly engaging elements that encourage users to click and visit your social pages.
This redirection helps users interact with your brand and builds trust among them. In addition, various studies highlight the importance of social icons on websites:
These crucial data points highlight the underlying importance of why you should add social media icons to your website.
Three Ways To Add Social Media Icons in WordPress
Now, let’s dive directly into understanding how you can easily add social media icons to your WordPress website.
While researching the article, I came across various ways to add social icons to my site. I will guide you with three of the easiest ways:
- Using Theme Customizer
- Using Widgets Panel
- Using A Plugin
Let’s understand each process in detail. Before proceeding, there are a few key points to keep in mind.
- If you have already worked on another part of your website or are making changes to your existing site, ensure that you back up your site before updating it.
- If you have an operational website, it is recommended that you try to update on the staging site at first (if you don’t have a staging site, here’s a guide on How to Create a Staging Site for WordPress)
Method 1: Adding Social Icons Using Theme Customizer
For those who are unfamiliar, the WordPress theme customizer is a built-in feature in classic WordPress themes that allows you to make adjustments and modify the design of WordPress sites in real-time.
While most themes provide the necessary functionalities, not all of them have an intuitive control interface. Responsive Theme is one of the themes that offers advanced customization options with intuitive controls, and I highly recommend trying it.
(For this tutorial, I will be using the Responsive Theme)
To learn how to install and activate the Responsive theme, refer to:

Using the Responsive theme customizer, you can not only add social icons and display them across headers and footers across all pages, but also style them further.
Steps To Add Social Icons To Header
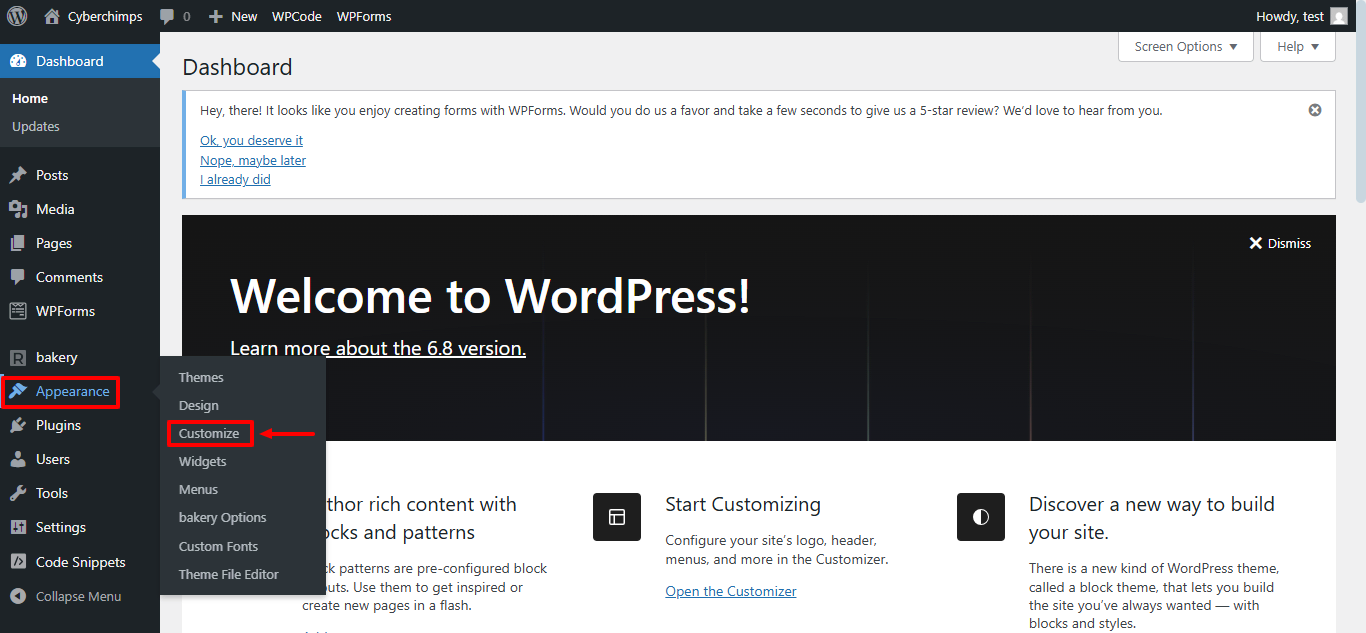
Once you have the Responsive Theme, navigate to the theme customizer from Appearance > Customize.

Next, click on “Header” in the customizer settings.
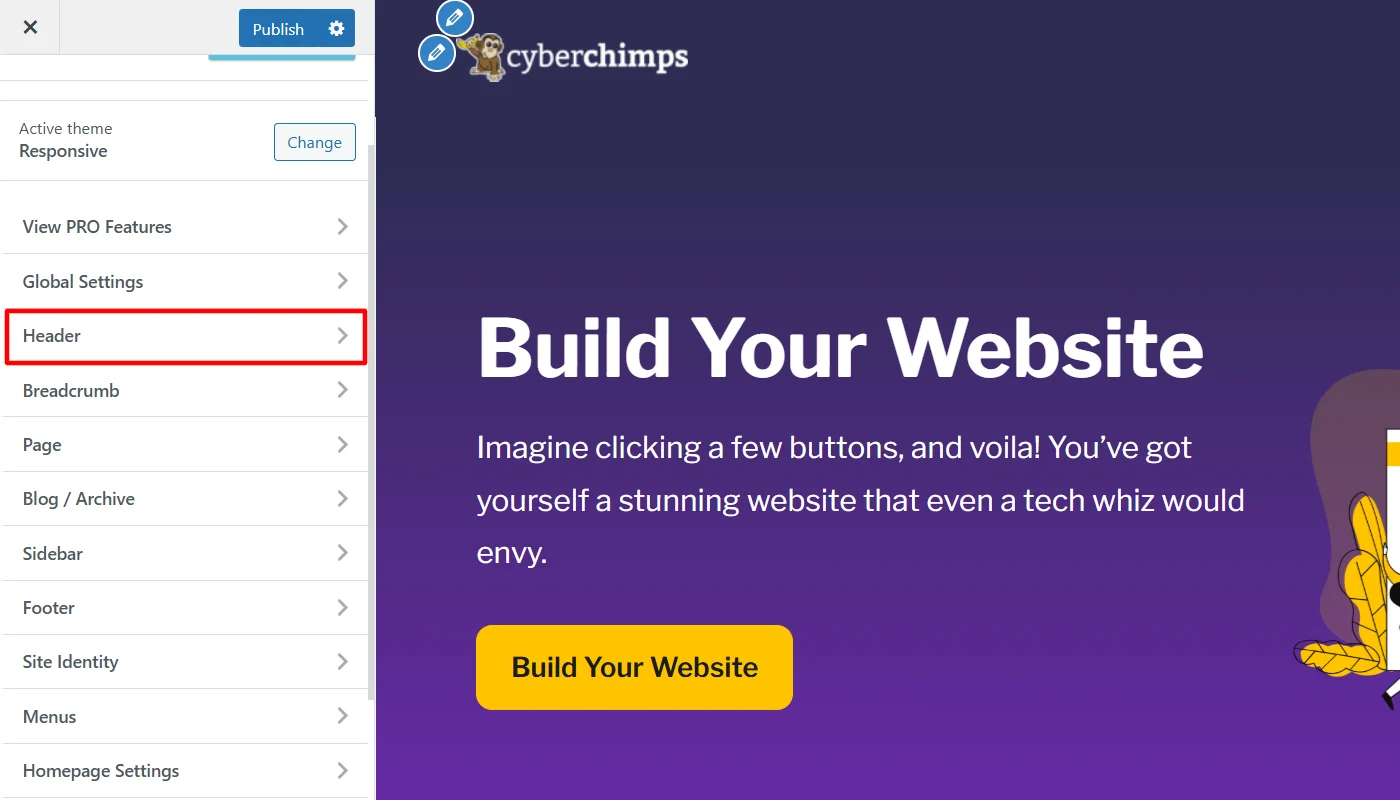
Drag and drop the Social element in any part of the Header.
(I have added it on the left side of the above footer. By default, it adds icons for Facebook, Instagram, and X, which you can change later.)
To make further customizations and styling, click on the Social element.
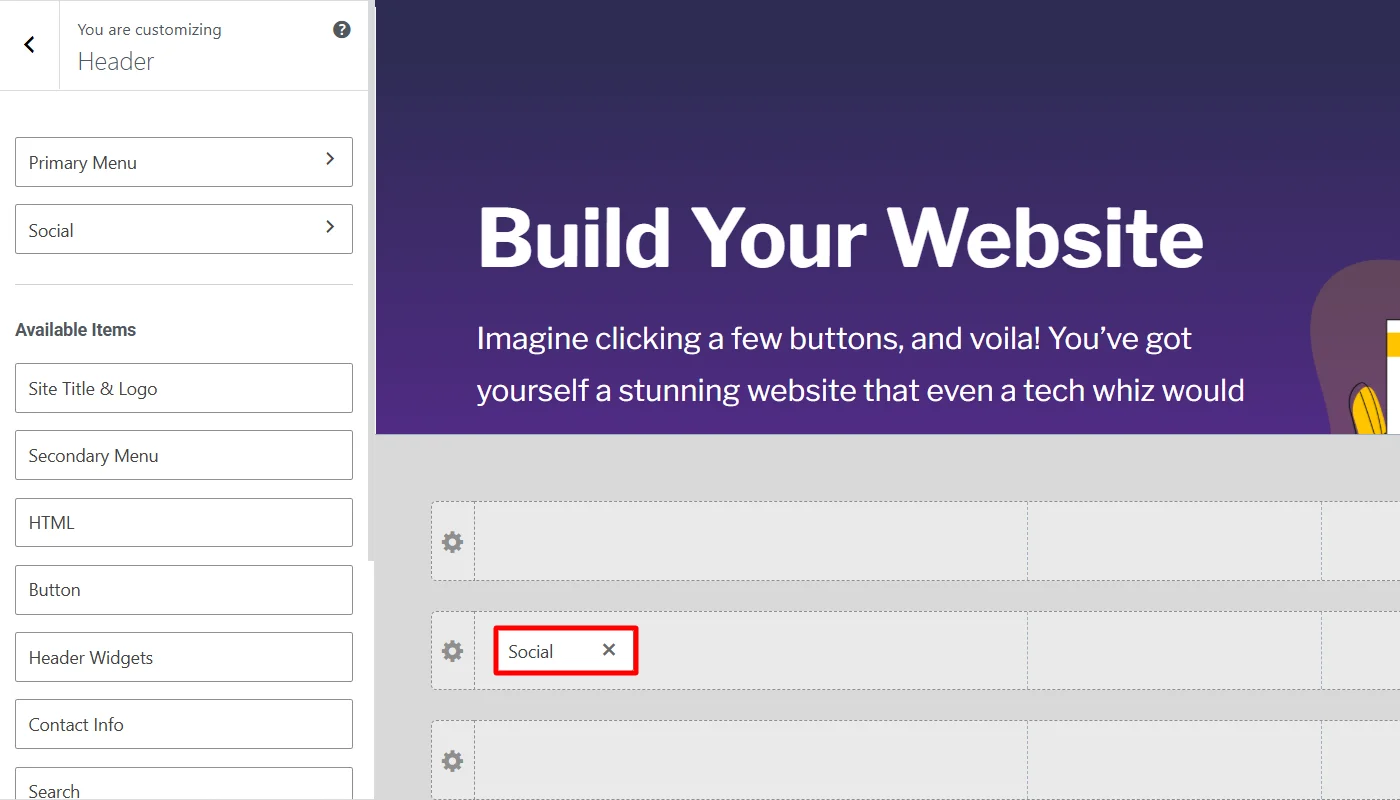
This allows you to make advanced customizations regarding:
General Customizations
The general customization options allow users to make simple display changes, such as adding social buttons from other platforms in the default style or deleting any of the existing social icons.
To add a new social button, simply click on Add social and click on the social media name you want to display.
It also allows you to enable or disable the icon label, adjust the spacing between each icon, and set the links to all the added social icons.
Design Customizations
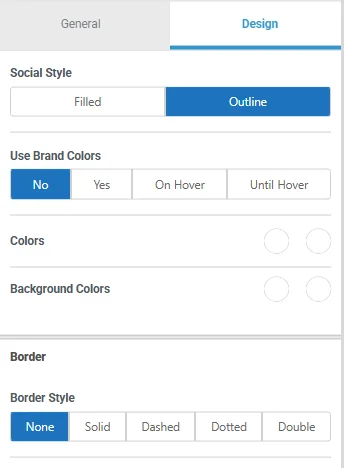

The design customization allows you to make advanced styling for the visual display of the icons.
It allows you to set a different style, use brand colors, or set brand colors in both normal and hover states, as well as self-customize the required colors for the icon and its background.
The other design settings also let you adjust the border’s style, width, radius, and color. Moreover, you can also adjust the icon size, label font if enabled, and the margins.
I made a few customizations using the options, which you can try similarly.
Initially, before making changes, it looked like:
In the general settings, I enabled the icon label and adjusted the spacing of the icons slightly. For design, I kept the style as an outline and used the brand color; I also added a solid border to the icons, increased the icon size, and changed the label font.
After all these customizations, the social icons looked like:
Steps To Add Social Icons To The Footer
Similar to the header, to add social icons in the footer, navigate to the theme customizer from Appearance > Customize.
Next, click on Footer in the customizer settings.
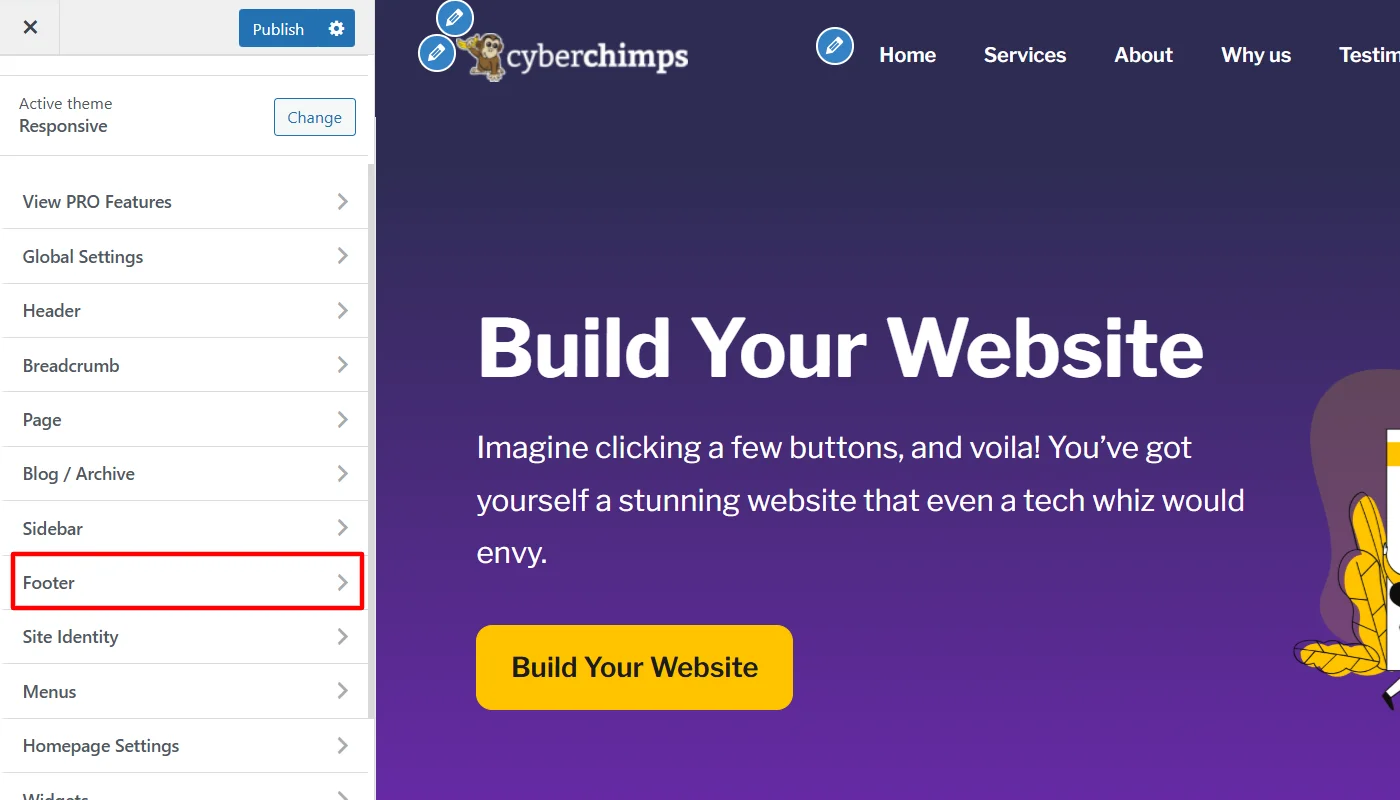
In the footer, drag and drop the Social element in any part.
(I have added it on the left side of the above footer.)
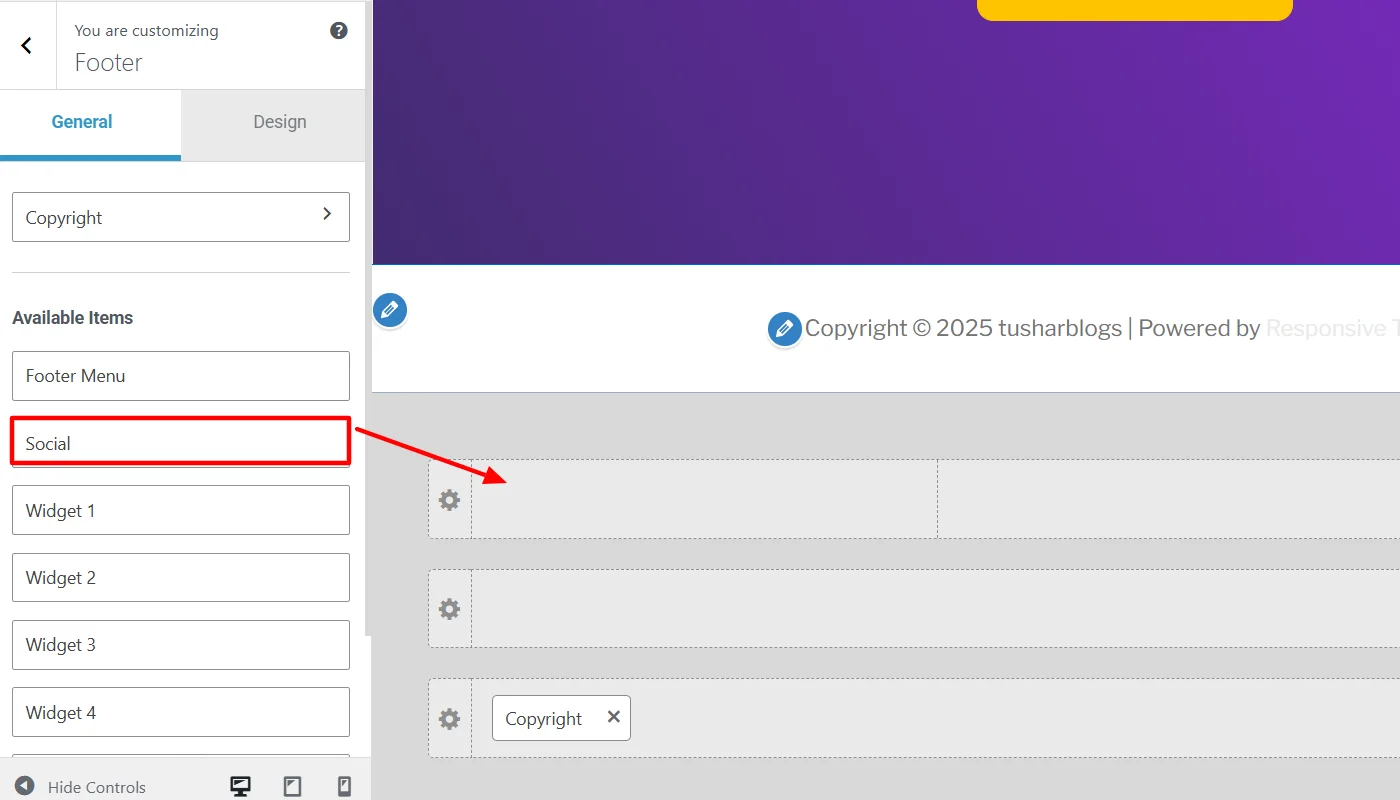
Once dropped, to make further customizations and styling, click on it.

The general and design options in the footer provide the same customization features as those offered for the header.
By following these simple steps, you can easily add and customize social icons in your website’s header and footer.
Method 2: Adding Social Icons Using Widgets Panel
Alongside the theme customizer, you can also consider using the widgets panel to add social icons on your website.
A widget panel focuses on adding and managing widgets in specific areas of your website. However, the customization and styling options it offers are limited.
To add social icons using the widgets panel, follow the following steps:
Go to your WordPress dashboard and navigate to Appearance > Widgets.
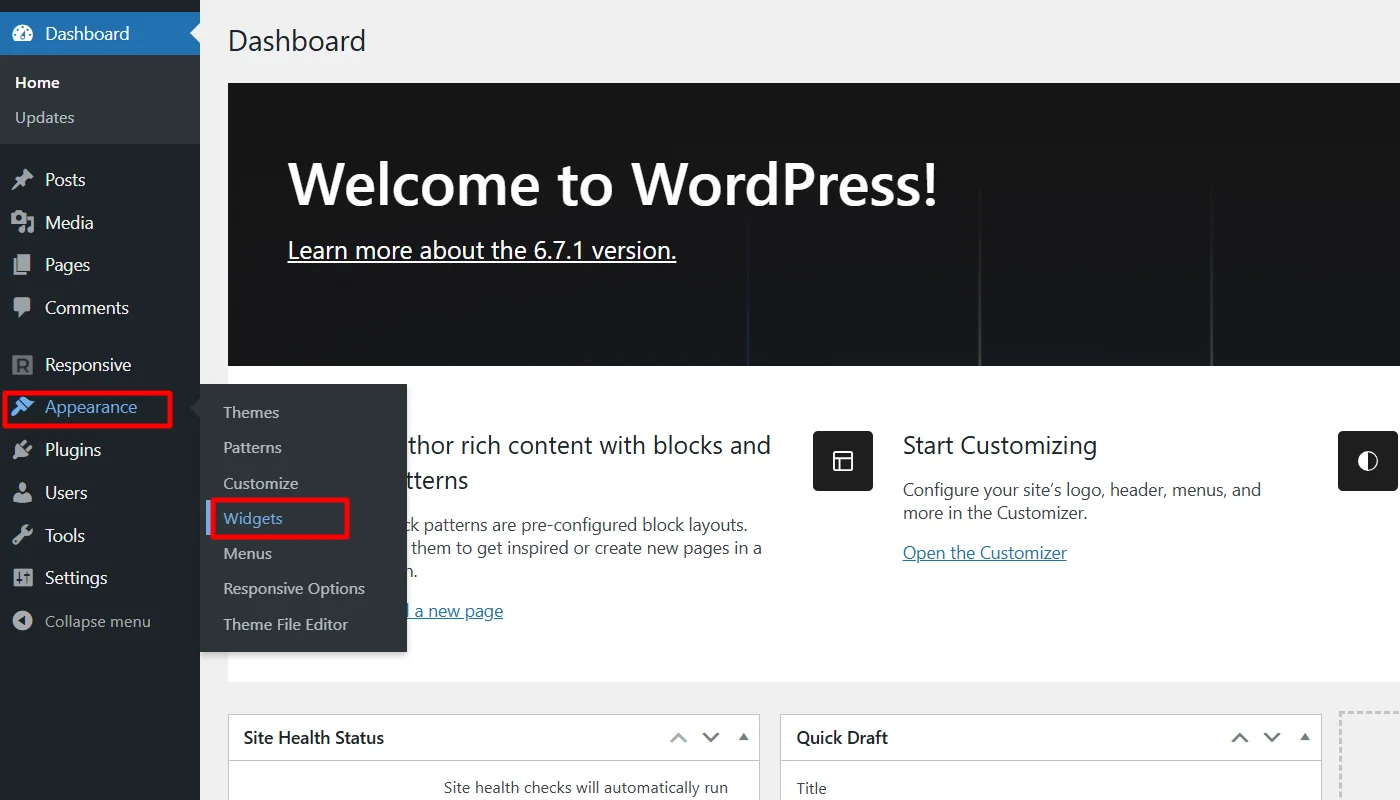
For this tutorial, I will show you how to add the social icons widget in the footer area. However, you can also add it to other locations, such as the header or sidebar, choosing a different location.
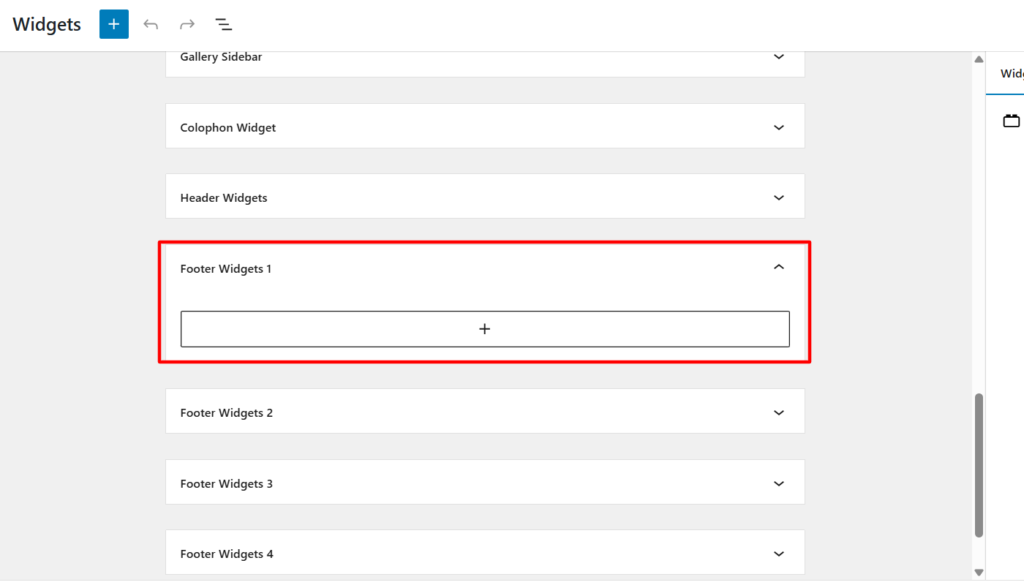
Scroll the page and locate the Footer Widget area, labeled as Footer Widgets 1, Footer Widgets 2, or Footer Widgets 3.
To add the social icons widget, click on one of the labels and then click the (+) button.
Next, in the search panel, search for the social icons widget.
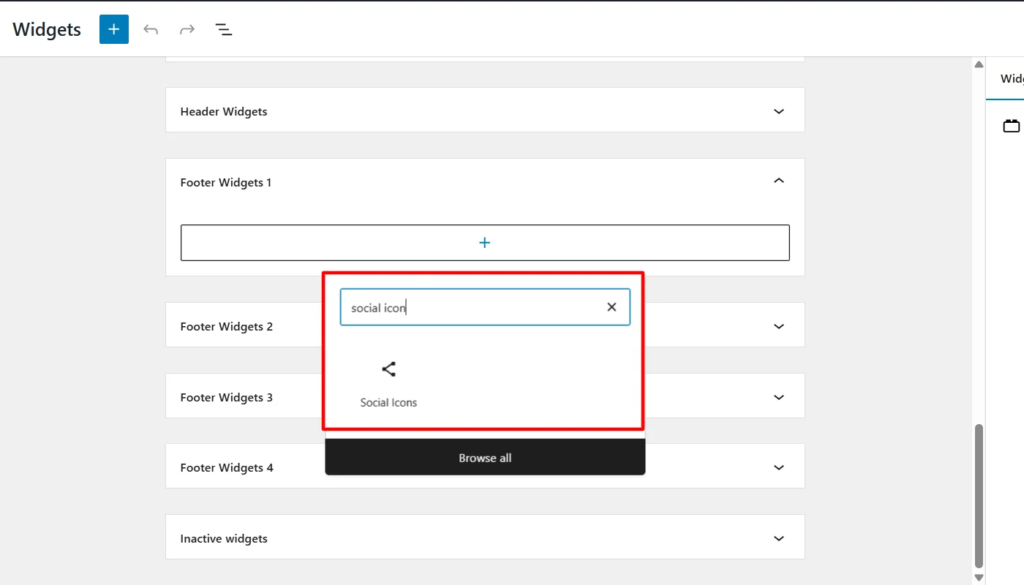
(Once I’ve added the social icon widgets, I had to search and add the buttons of specific social platforms individually.)
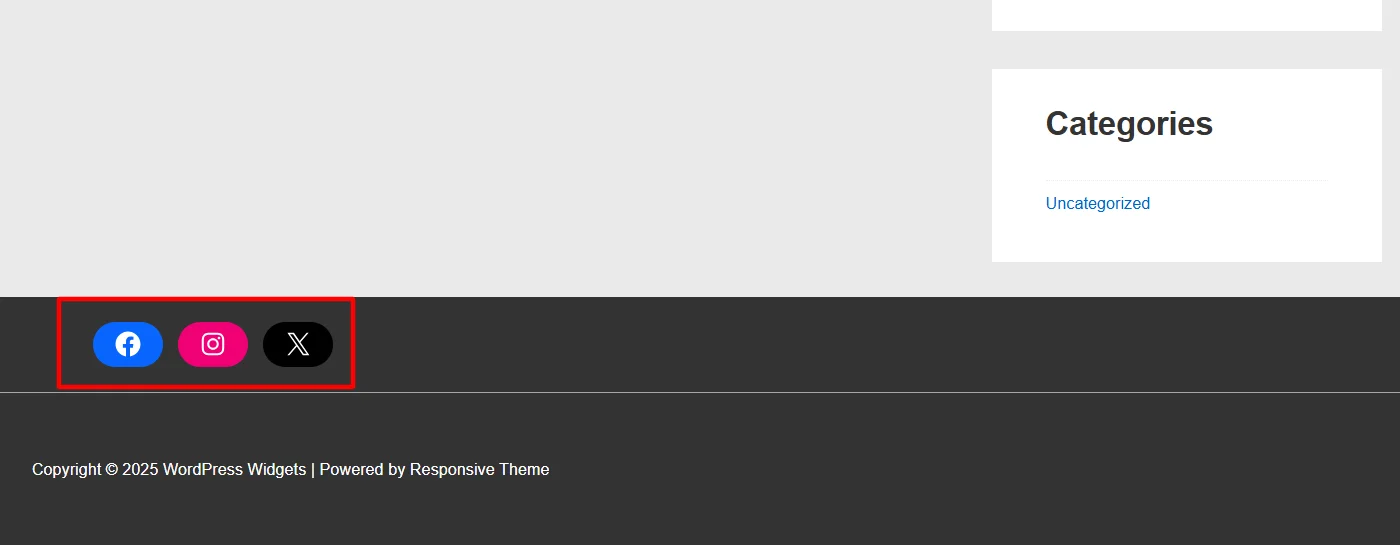
To further customize the social widget, you can add a link to each social icon, adjust its location and alignment, and modify the text for the icons.
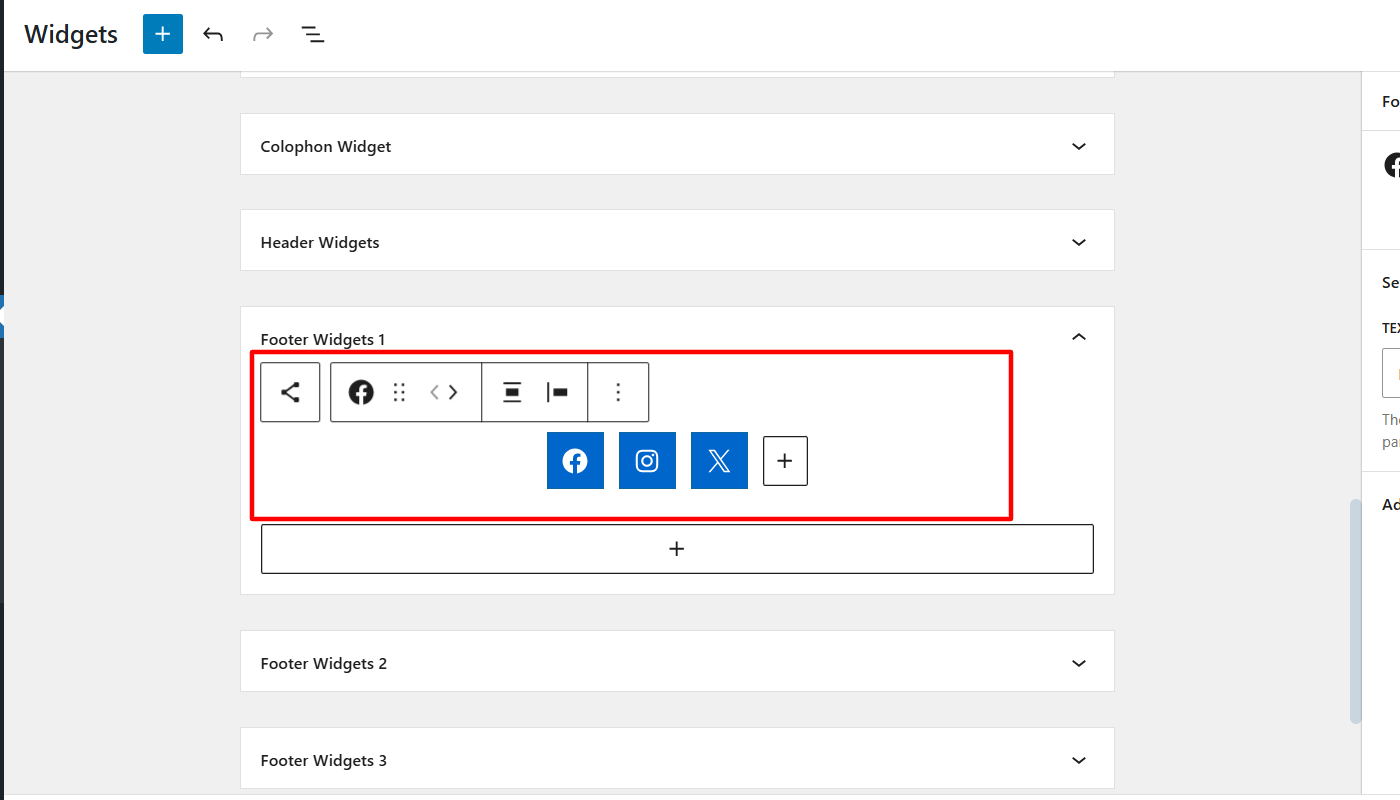
Once you are done with customizations, the social icons will appear on the footer of your website.
Method 3: Adding Social Icons Using a Plugin
Now, that we’ve discussed how to add social icons to your website using the theme customizer and widgets panel, you may also consider using a plugin on your site.
While the other two methods allow you to add the element to different widget areas on your website, if you are creating a landing page or blog where you want to add social icons in between the pages, I find using a plugin can be most effective.
Various add-on plugins provide you with Block widgets to add social icons. However, I prefer using the free Responsive Blocks Addons (RBA) plugin. Developed by Cyberchimps, it is a free and easy-to-use plugin offering over 50+ advanced block widgets with essential customization options.

To begin the process, first download the plugin. Refer to How to Install and Activate the Responsive Blocks Addons to learn how to begin the process.
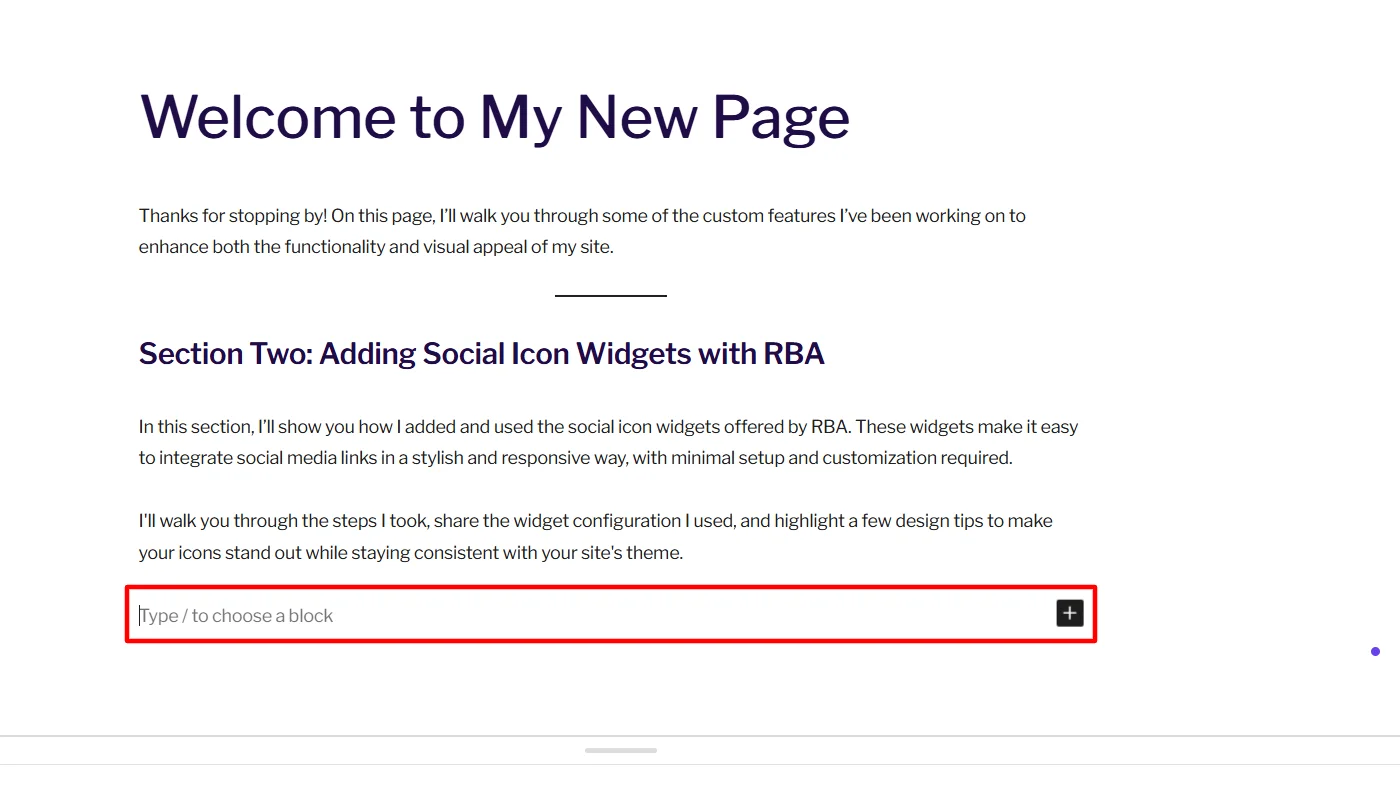
Once you have the plugin, go to the page or post where you want to add the.
(For this tutorial, I have created dummy text for a new page, where in the second section, I will show you how I added and used the social icon widgets offered by RBA.)
Next, to add the social icons widget, navigate to the place where you want to add the widget, and click on the (+) button.
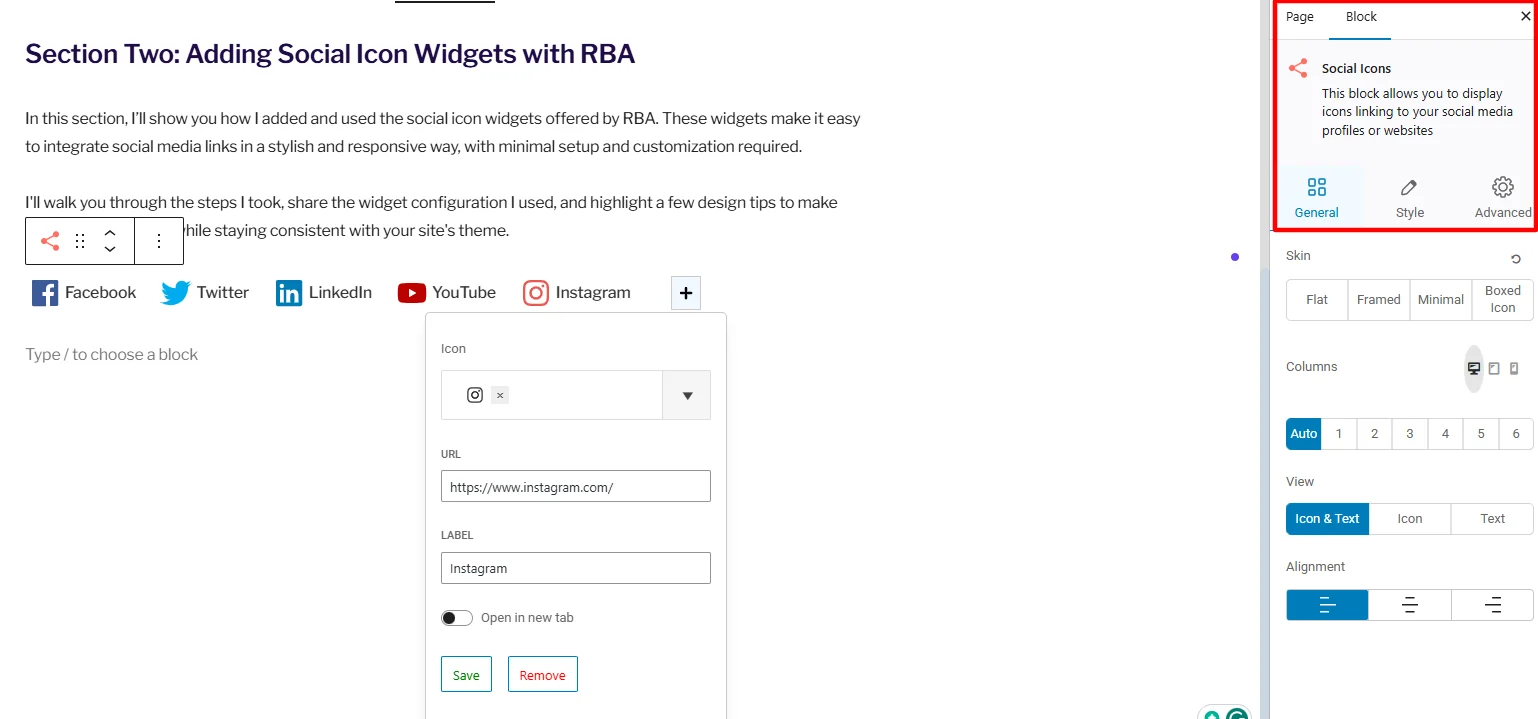
Then, in the search panel, search for “social icons” and click the RBA Social Icons widget.
By default, the widget displays the social icons of Facebook, LinkedIn, Twitter, and YouTube. To add other icons of other social media, click on the (+) button on the right side.
Now, to add or make changes to any of the existing social icons, click on the icon. Here, I have added a new Instagram icon with a URL to my Instagram profile and labeled it accordingly. Once done, click on save.
Customizing Social Icons
The RBA widgets allow you to make advanced visual changes to the appearance of the widgets.
You can find these customizable options on the panel on the right side of the page. These settings enable you to modify the general display of the widget, style its visuals, and add advanced setup options for its responsive behavior.
Now, let’s learn how I used these customizations to style the widget. Before customization, it looked like:
General Customizations
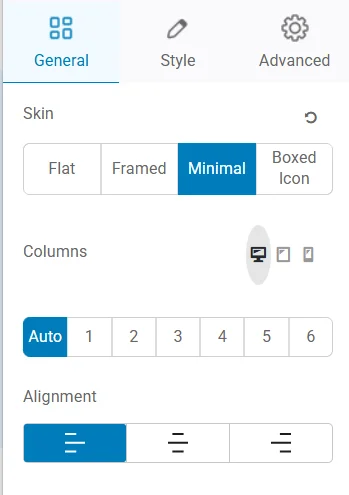
The general customization options enable you to modify the skin of the social icons, specify the number of displayed columns, and adjust the alignment.
I did not make much general changes; I only used a minimal skin for the social icons and kept the remaining settings as default.
Styling Customizations
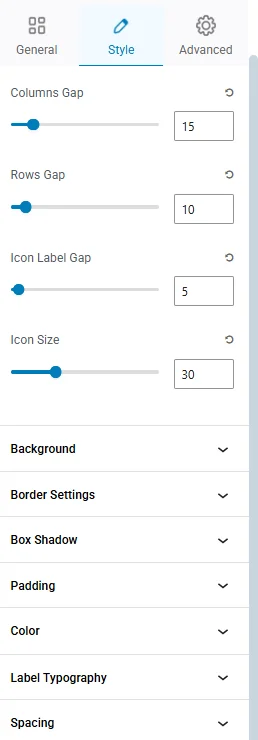
The styling customizations offer a lot of adjustment options to customize the gap between columns, rows, and icons; you can also adjust the icon size.
In addition, it also allows you to set background color, add a border and adjust its setting, set up box shadow for the widget, adjust its padding, set up icon colors and the typography of the labels and adjust the overall spacing.
To style the social icon widget,
For the social icons’ color, I used custom colors and changed the font family and size in the label typography.
I slightly increased the gap between the columns and icons and increased the icon size.
I also added a light grey background color and added a thin styled border around it.
Further, I added a box shadow with basic values on the outset of the widget and adjusted the padding.
After all these changes, the social icons widgets looked like:
You can also use the customizer similarly or make changes as needed.
Use any of the three methods to successfully add social icons to your WordPress website.
FAQ
To add social Icons to your website using a WordPress plugin, you can utilize a classic theme like Responsive theme that offers customizer settings to add social elements and widgets to your website.
To add social icons to your website footer, you can use the widget panel.
1. From your WordPress dashboard, navigate to Appearance > Widgets.
2. Look for the Footer Widget area.
3. Next, click on the block addition button and search for social icons.
4. Once found, click on it and it will be added.
Responsive Blocks Addons (RBA) is the best lightweight plugin for adding social icons to your website. It is free and easy to use, and it also offers a lot of customization and styling options.
To add social icons using the theme customizer (Cyberchimps Responsive Theme), follow these steps:
Step 1: Add Social Media Icons
1. Log in to WordPress and go to Appearance > Customize.
2. Click Header or Footer Builder, depending on where you want to place the icons.
3. Look for the Social element widget and drop it in a suitable position.
4. Click on it and Add Social Icons (Facebook, Twitter, Instagram, etc.).
Step 2: Customize Icons. It provides options for making general and design changes.
Step 3: Save Changes
Conclusion
As a beginner in website building, I often found it difficult to add features to the website. To make sure you don’t face similar challenges, I document my learnings through detailed articles.
This article covers three methods in depth for adding social icons to your website. Feel free to choose the method that you find convenient.
I would recommend that you try all three methods it help you understand WordPress customization better.
Further, if you find this article helpful, also consider reading:
- How to Add Code to WordPress Header and Footer
- What Are Widgets in WordPress and How to Use Them
- How to Change Fonts in WordPress? (4 Simple Ways)
Do not forget to check out the Cyberchimps Responsive Theme!


