
Ever find yourself halfway down a website wondering, ‘Where’s the menu?’ And had to zoom back up.
Irritating, right?
Now, imagine people doing the same with your website.
That’s where the sticky header comes into play. It helps you position your navigation tools, such as call-to-action options, the logo, or a search bar, on top, no matter how far the visitor scrolls down.
It helps users to enhance their experience and improve the site navigation.
In this blog, we’ll teach you how to add sticky header to WordPress using three simple ways: a theme customizer, a plugin, or custom code.
Why Add a Sticky Header to Your Website?
Several studies show that a poor navigation menu can seriously damage the user experience of a website.
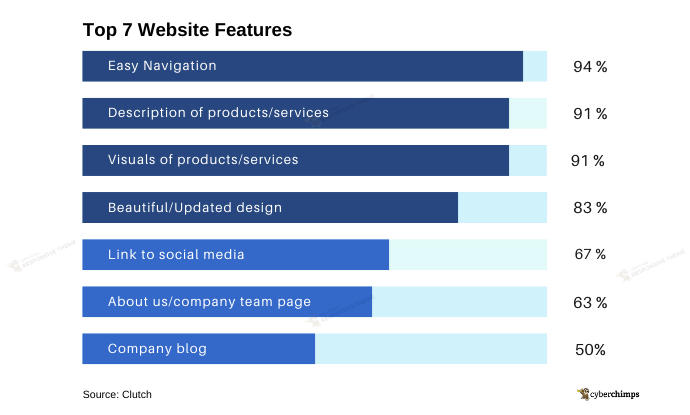
In the 2018 Clutch survey, researchers interviewed 612 participants and uncovered some eye-opening insights about what users expect from a website and what the best website features are.
According to the data, 94% of respondents said “easy navigation” was the most essential feature for a positive browsing experience.
Now, imagine you’ve created a long-scrolling page packed with great content. Your main call to action is for users to make a phone call.
Wouldn’t it be smart to make it visible all the time?
A sticky header is a fixed navigation bar that stays on top as users scroll.
Here’s why you should seriously consider adding one to your website:
- Improved Navigation: Visitors can access your menu (main menu, logo, search bar, or contact button) or CTAs without scrolling back to the top.
- Better Branding: Your logo and identity stay visible throughout the browsing session, which helps brand your website.
- Higher Conversions: People stay longer when they get what they need. Sticky headers often include CTAs or buttons that increase engagement or sales.
- Mobile Usability: Scrolling up and down is tedious, making it hard for mobile users . Sticky headers help users navigate better even on mobiles.
Continue reading to learn how to add sticky header to WordPress menu.
Best Ways To Add a Sticky Header in WordPress
There’s no one-way approach to adding a sticky header in WordPress.
Whether you prefer using the tools your theme provides, want the flexibility of a plugin, or love the control that comes with custom code, WordPress has you covered. Best of all? None of these methods requires advanced skills or developer-level know-how.
Let’s explore the three most effective (and beginner-friendly) ways to add sticky header to WordPress right where it belongs, at the top of every page.
Method 1: Add Sticky Header Using Theme Customizer
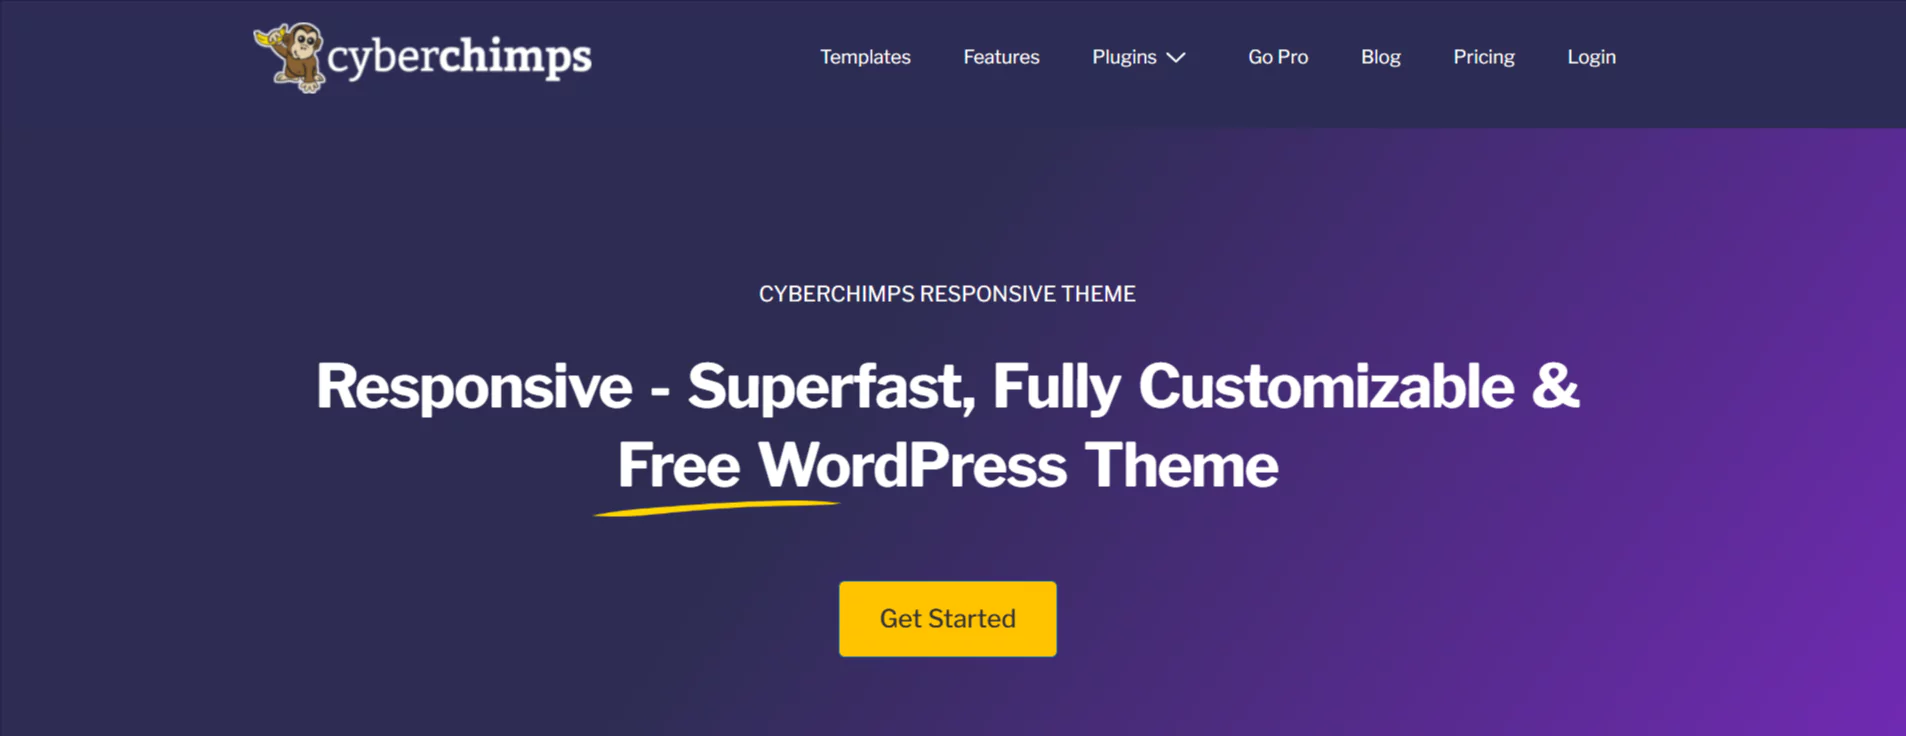
If you’re looking for the easiest way to add a sticky header without touching a line of code or installing extra plugins, the Responsive Theme by CyberChimps has your back.
This powerful yet beginner-friendly theme includes a built-in sticky header option that you can enable right from the Customizer.
You don’t need to rely on third-party tools or go through a complicated setup process. You get real-time previews and instant results, making it incredibly simple to use.
Whether you’re building a business site, a personal blog, or a full-fledged online store, the Responsive Theme provides a clean, professional, and sticky header with minimal effort.
It’s fast, flexible, and built for users who want powerful features without the technical complexity.
Let’s walk through exactly how to add sticky header to WordPress menu with Responsive Themes.
Step 1: Install the Responsive Theme
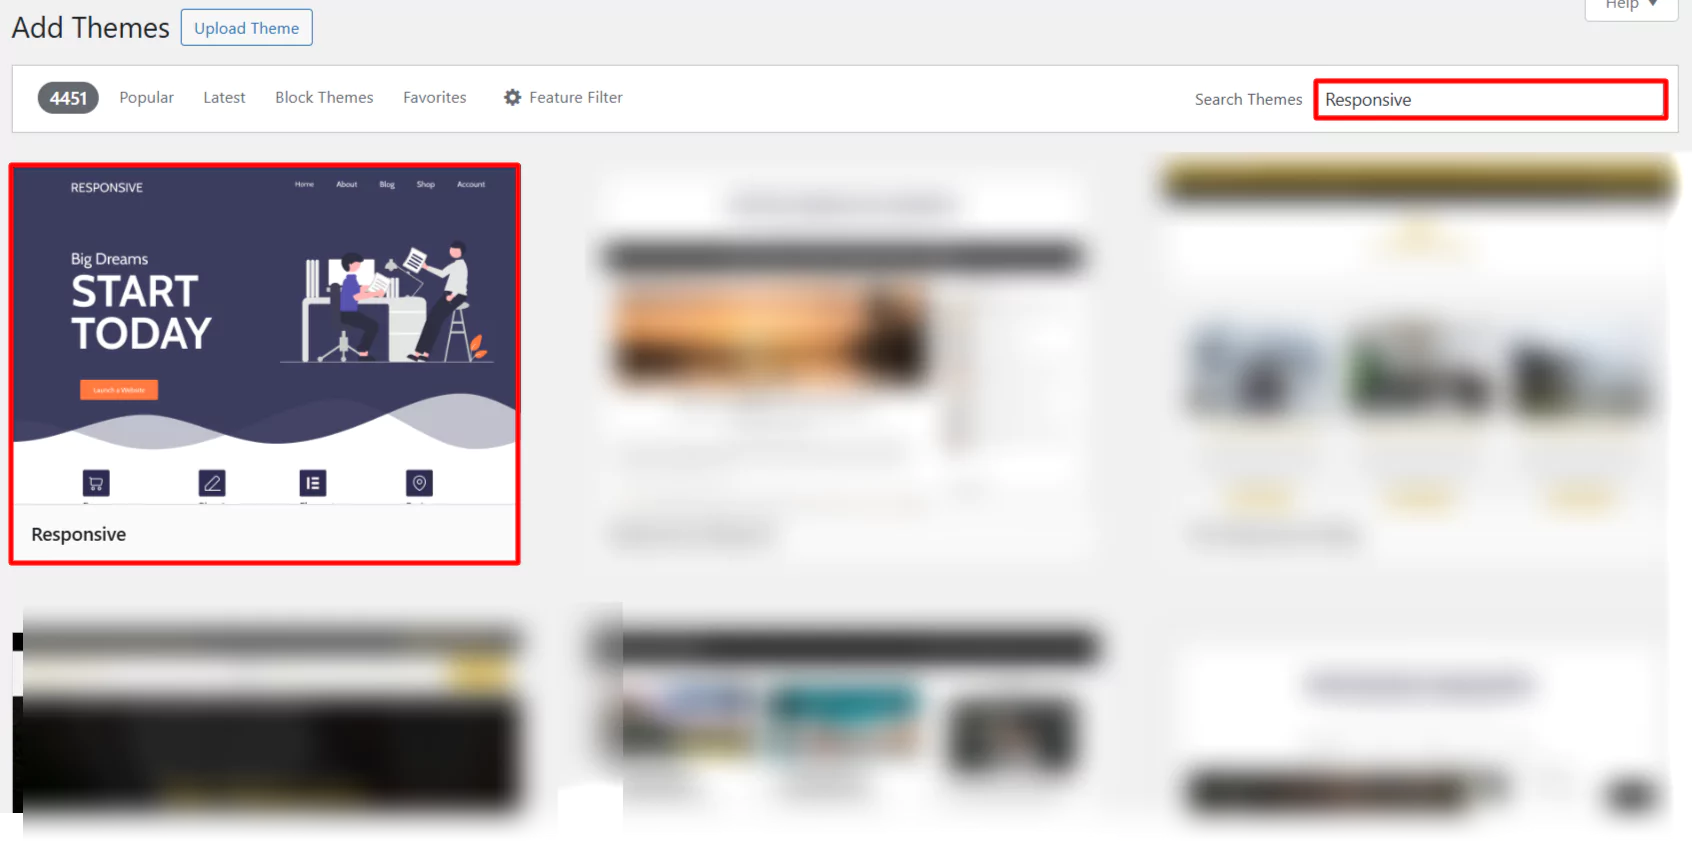
Open your WordPress dashboard and navigate to Appearance> Themes.
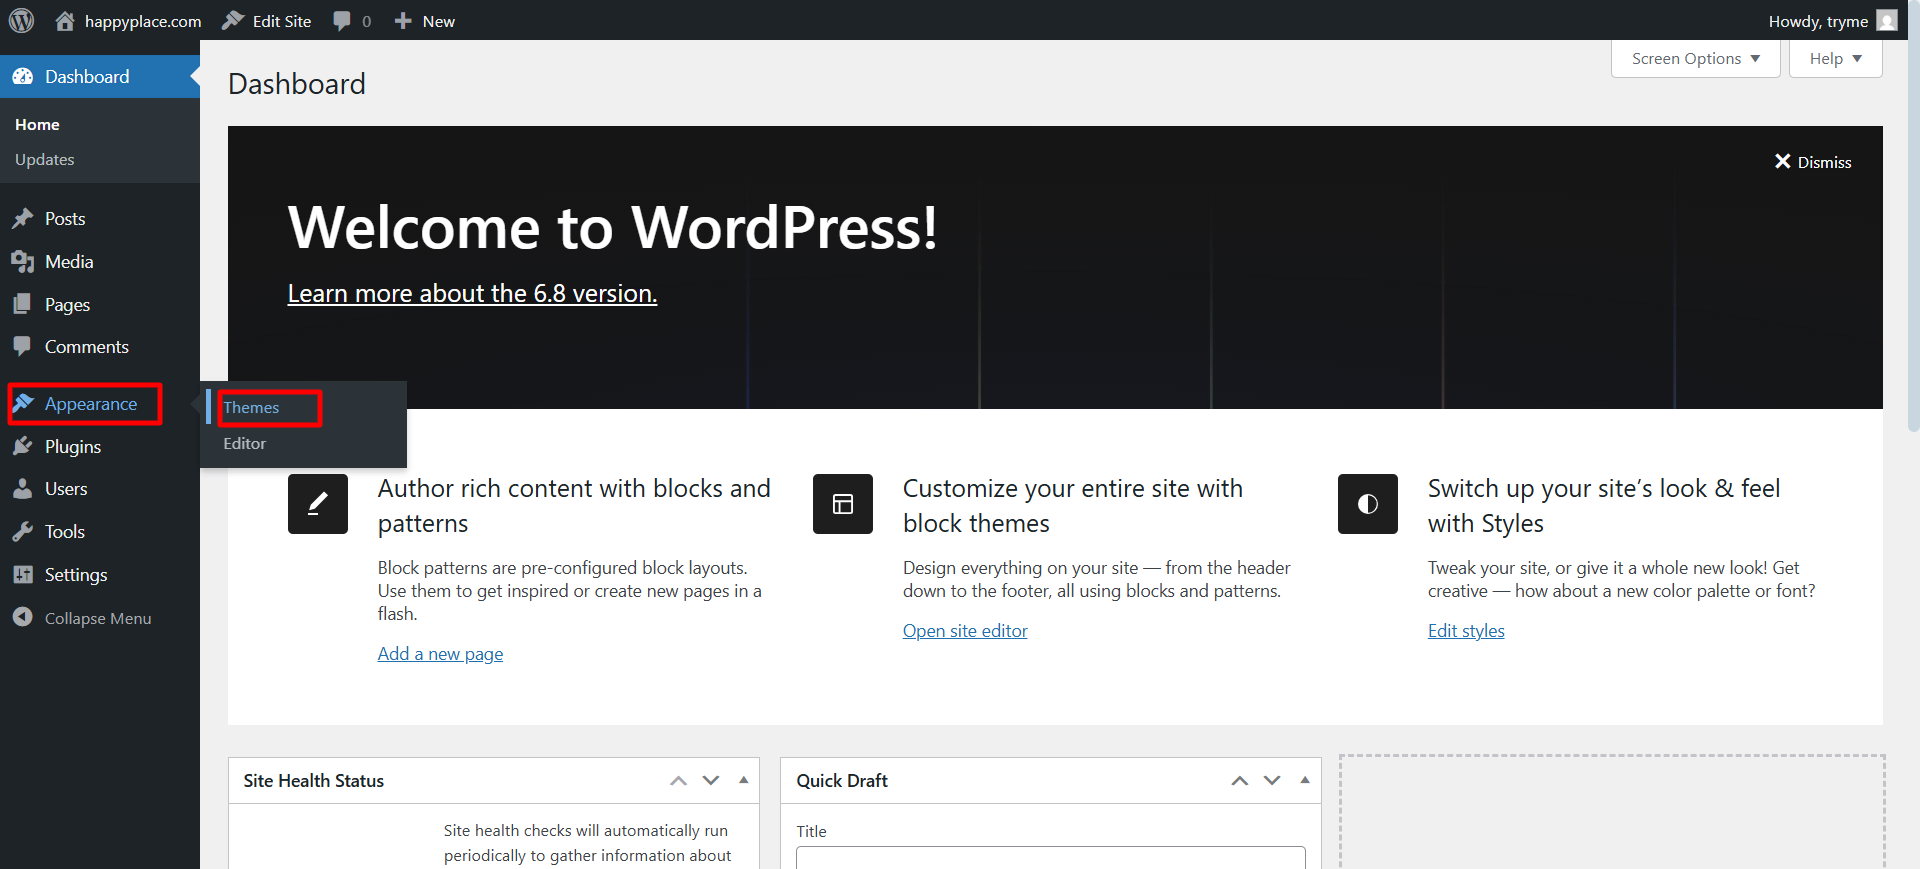
Click on Add Theme.
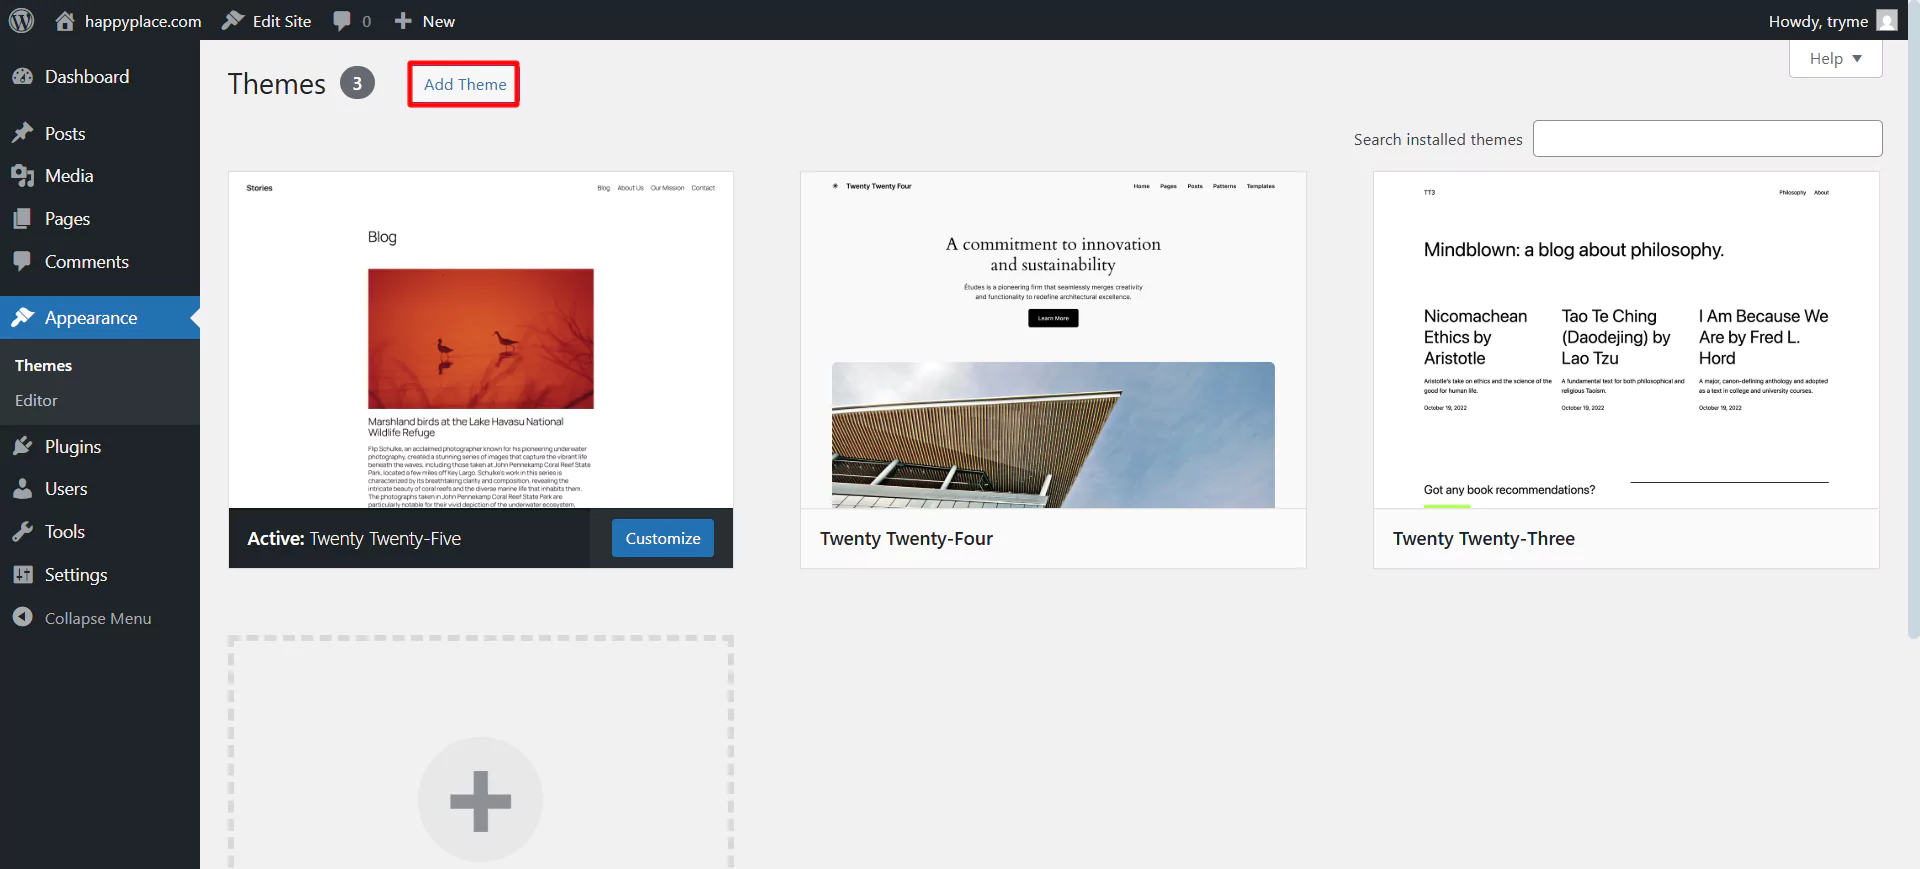
In the search bar, type Responsive.
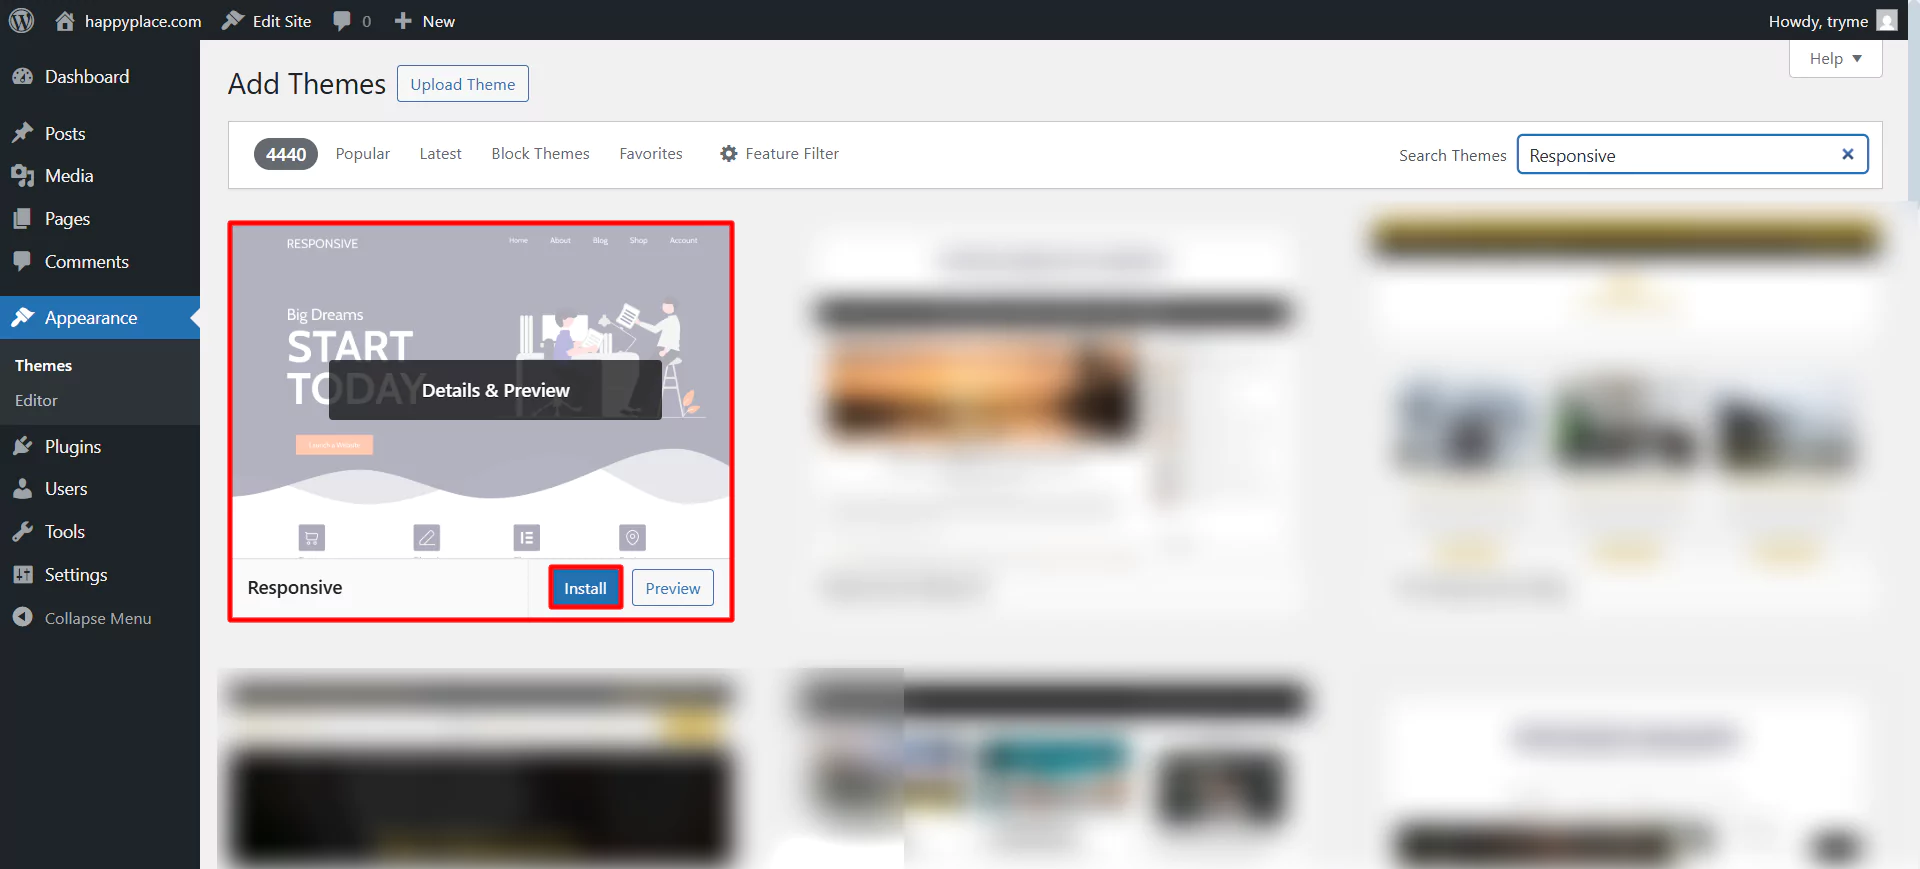
Next, Install and Activate the responsive theme.
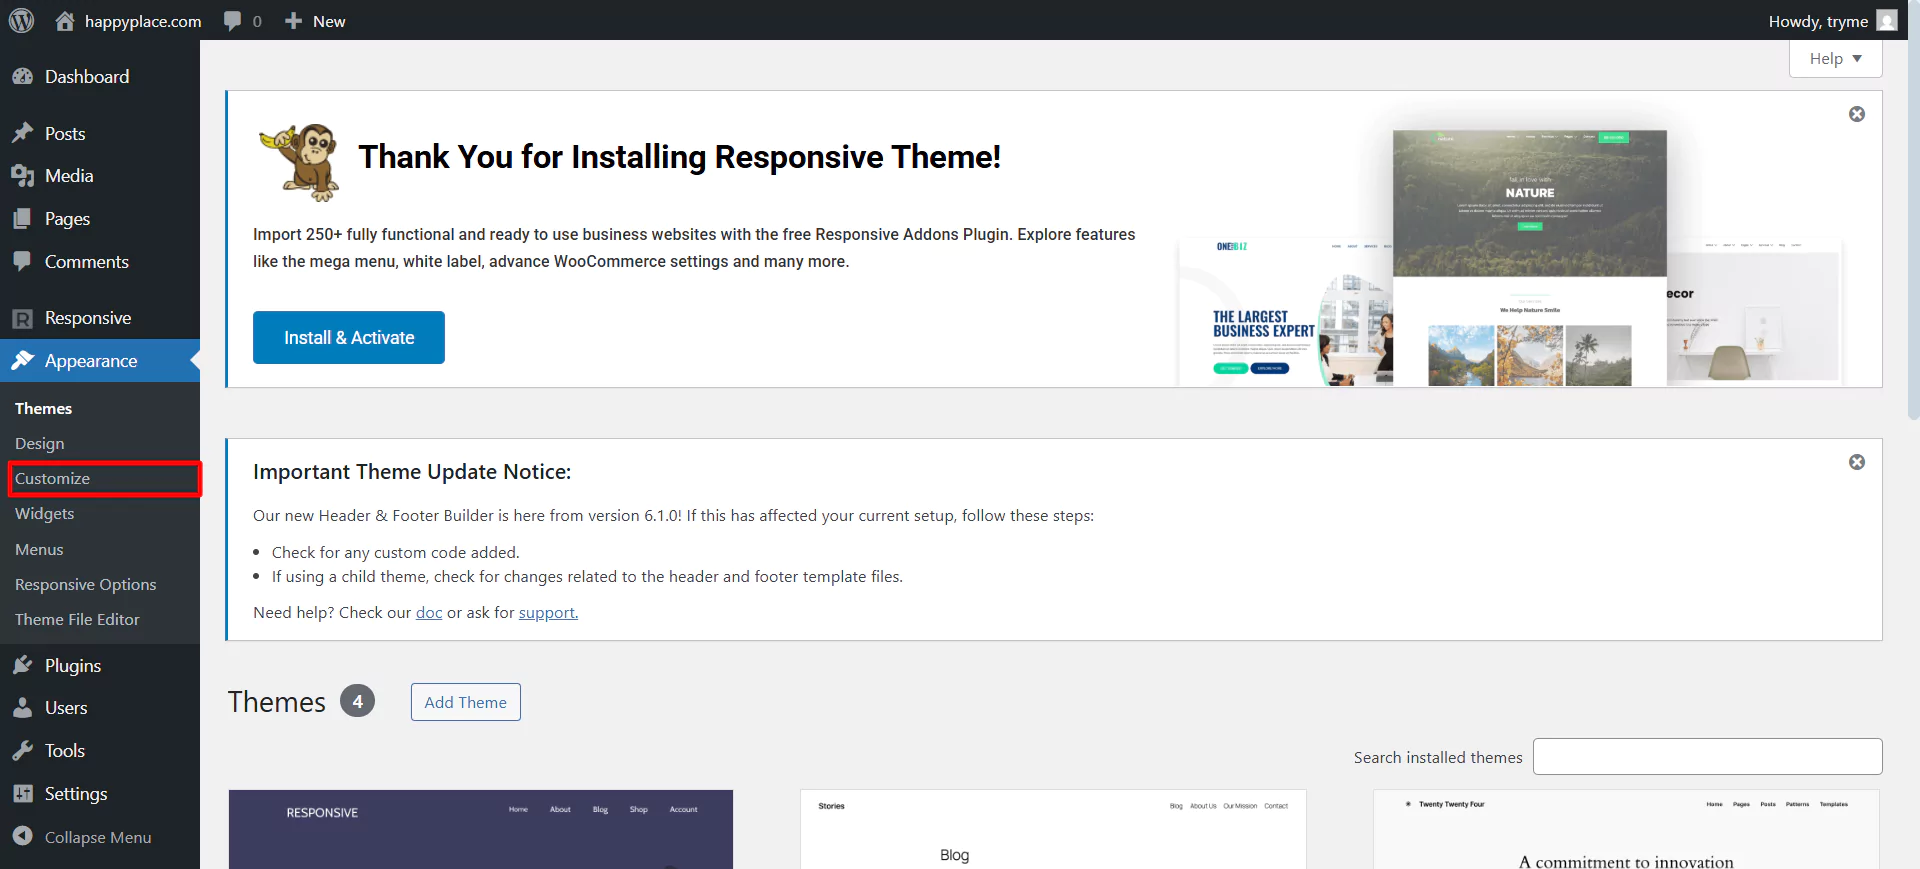
After installation, let’s make your header sticky.
Step 2: Customize the Header Using the Responsive Theme
Click on Appearance> Customize.
Click on Header.
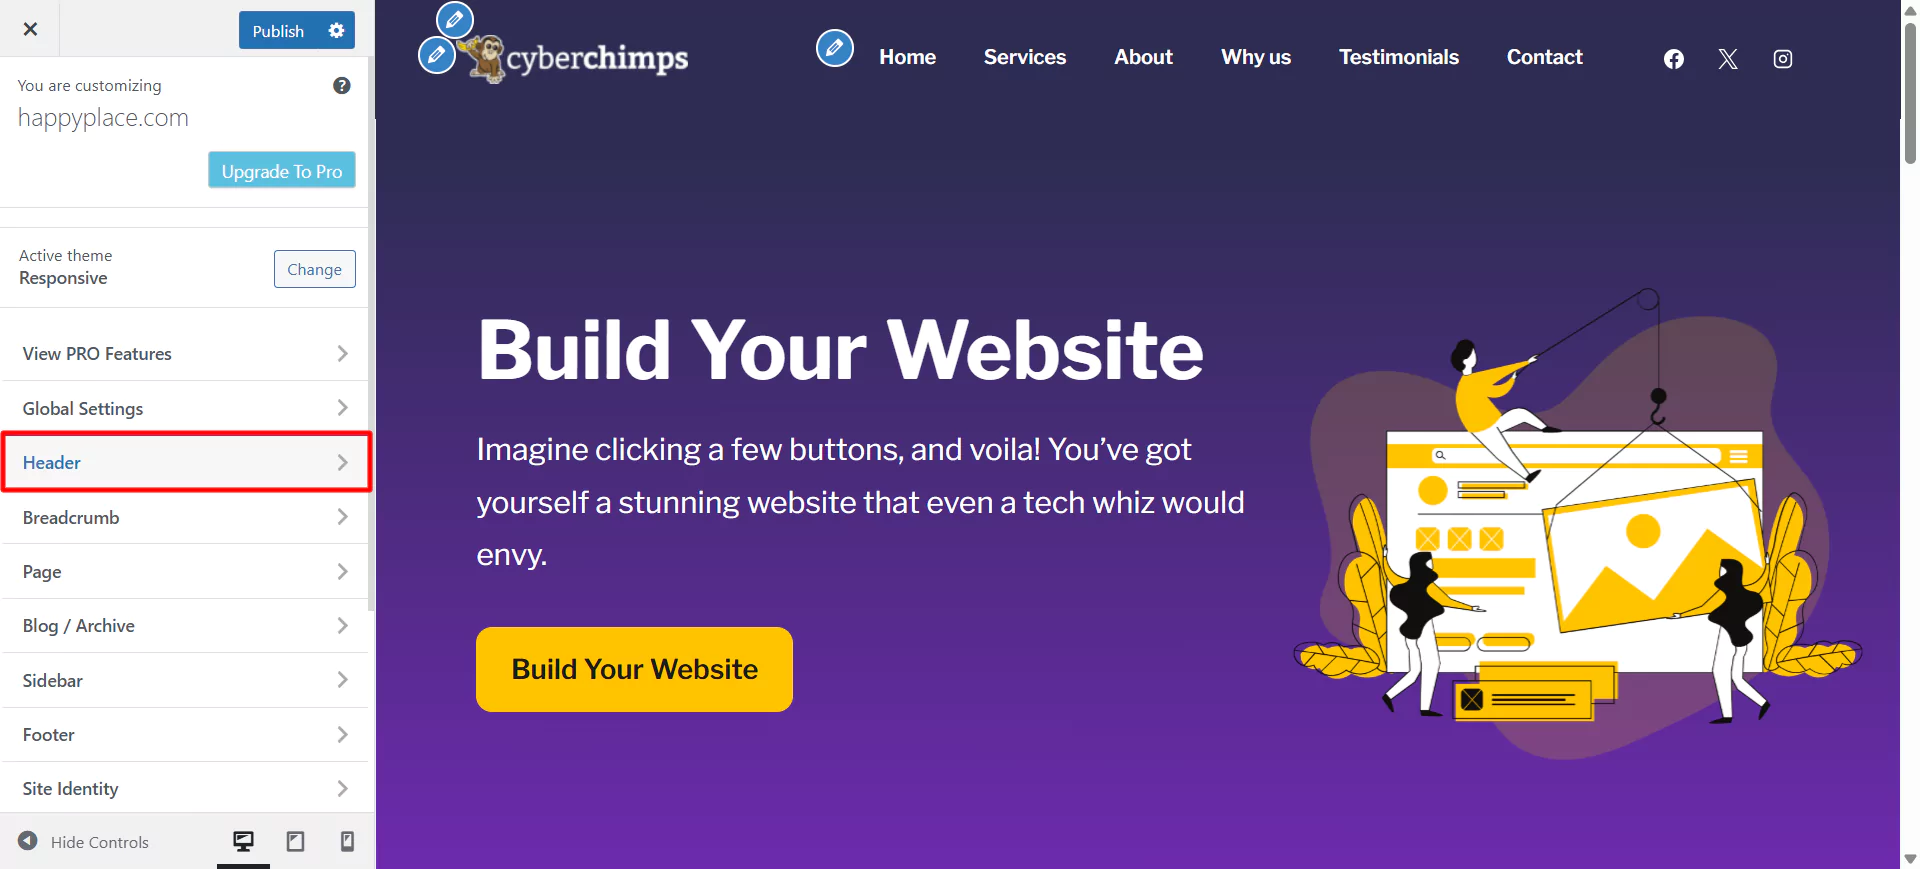
Look for the Sticky Header setting.
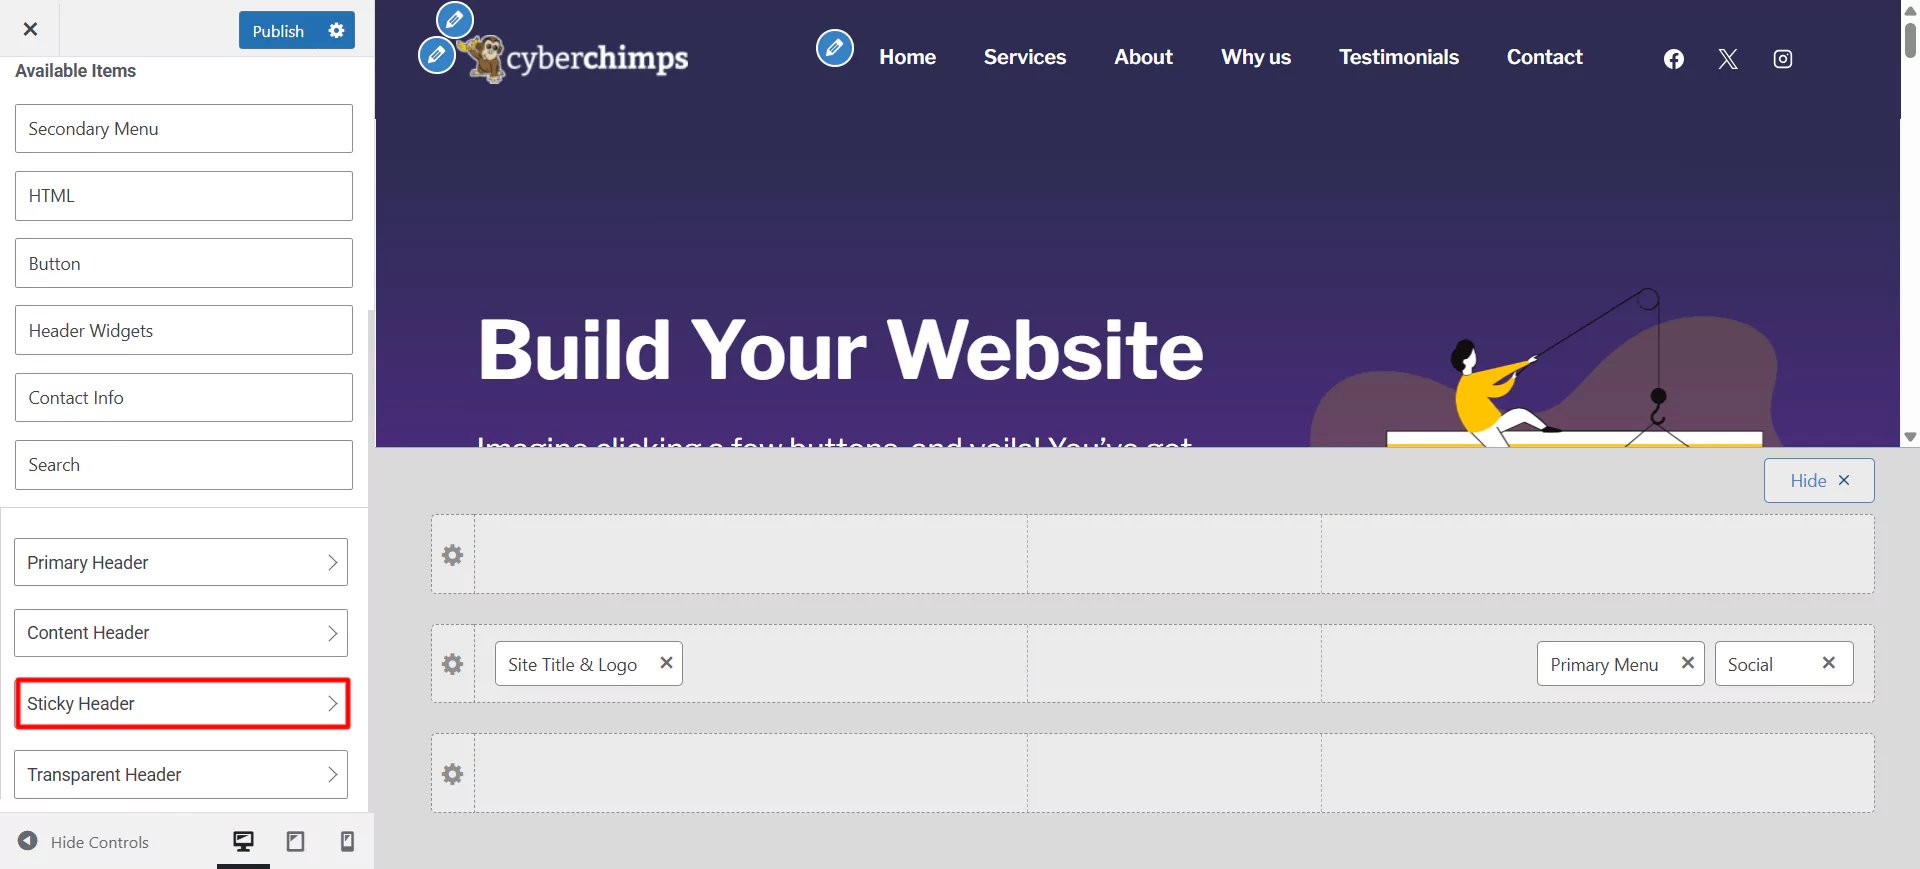
Toggle the option ON to enable the sticky header. And click on Publish.

Now, you have converted your website header into a sticky header. The Responsive theme panel provides additional customization options to make your website header more attractive.

- Enable Sticky Header: When enabled, your site’s header stays fixed at the top while scrolling.
- Shrink Logo on Scroll: When turned on, the logo size reduces slightly on the scroll to save space and improve visibility (For this, you need to upload the logo)
- Disable Sticky Header on Mobile Menu: Prevents the sticky header from appearing on mobile devices.
- Different Logo for Sticky Header: You can upload a distinct logo that appears only when the header becomes sticky (ideal for better contrast or branding during a scroll).
- Background Color – The background color of the sticky header.
- Site Title Color – Color of the site title.
- Site Title Hover Color – Color when hovering over the site title.
- Site Tagline Color – Tagline text color.
- Menu Background Color – The background color of the entire menu.
- Active Menu Background Color – The background color of the menu item that is currently active.
- Menu Item Link Color – Color of menu links.
- Menu Item Link Hover Color – Color of menu links on hover.
- Sub Menu Background Color – Background color for dropdown (sub) menus.
- Sub Menu Item Link Color – Color of links inside the sub-menu.
- Sub Menu Item Link Hover Color – Hover color for sub-menu items.
You can see how the sticky header will look on the website. I have kept all the settings default for this case, but you can change them according to your needs and preferences.
Want to try different options? Don’t worry. There’s still an easy way to do it.
Method 2: Add a Sticky Header Using a Plugin
Whether you’re a WordPress beginner or a developer, using a plugin for sticky headers is a smart and wise choice.
Here’s why you should create sticky header in WordPress using the plugin:
- Easy setup and functions
Developers make plugins to automate your workflow and save time. You need to install the plugin and then activate it. Just configure the necessary settings, and you will be able to see your sticky header in action.
- Full Customization and Flexibility
Want to modify the background color, size, and logo, or include animation in your sticky header? Most plugins provide you with full control over the design. You can also display the sticky header on desktop or mobile so it aligns with your website’s style and functionality.
- Best for all skill levels
For beginners, sticky header plugins provide a simple, hassle-free method to enhance the site’s user experience. Most plugins support custom CSS and JavaScript for experienced coders, providing greater control and flexibility for demanding requirements.
- No Coding Requirement
Not everyone is comfortable writing code, which is normal. The Sticky Header plugin removes the need to have technical skills. Even in Gutenberg, you can easily add the sticky header, customize its look, and apply it across your site.
Step 1: Select a popular sticky header Plugin
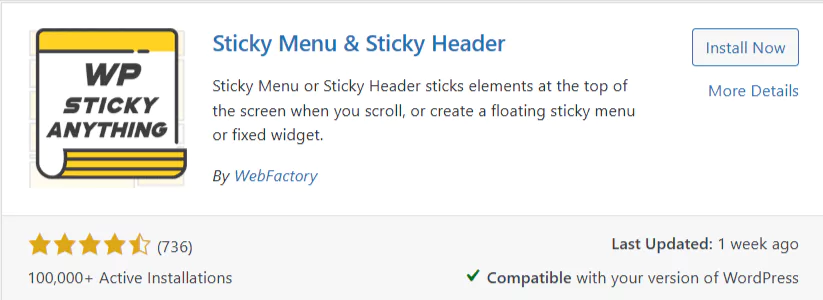
Before starting, it is essential to select the right plugin. For instance, I’m using the Sticky Menu & Sticky Header plugin.
Install the plugin on the dashboard. You can refer to the installation and activation of a plugin.
Step 2: Create a Sticky Header
Now that you have activated it, you have three options for putting it in the sticky element: the class, ID, or header nav.
You can get the class and ID of the header from Inspect by right-clicking, hovering over the header, and copying the class or ID.
I’m using the header nav to make the header sticky.
Click on Settings > Sticky Menu.
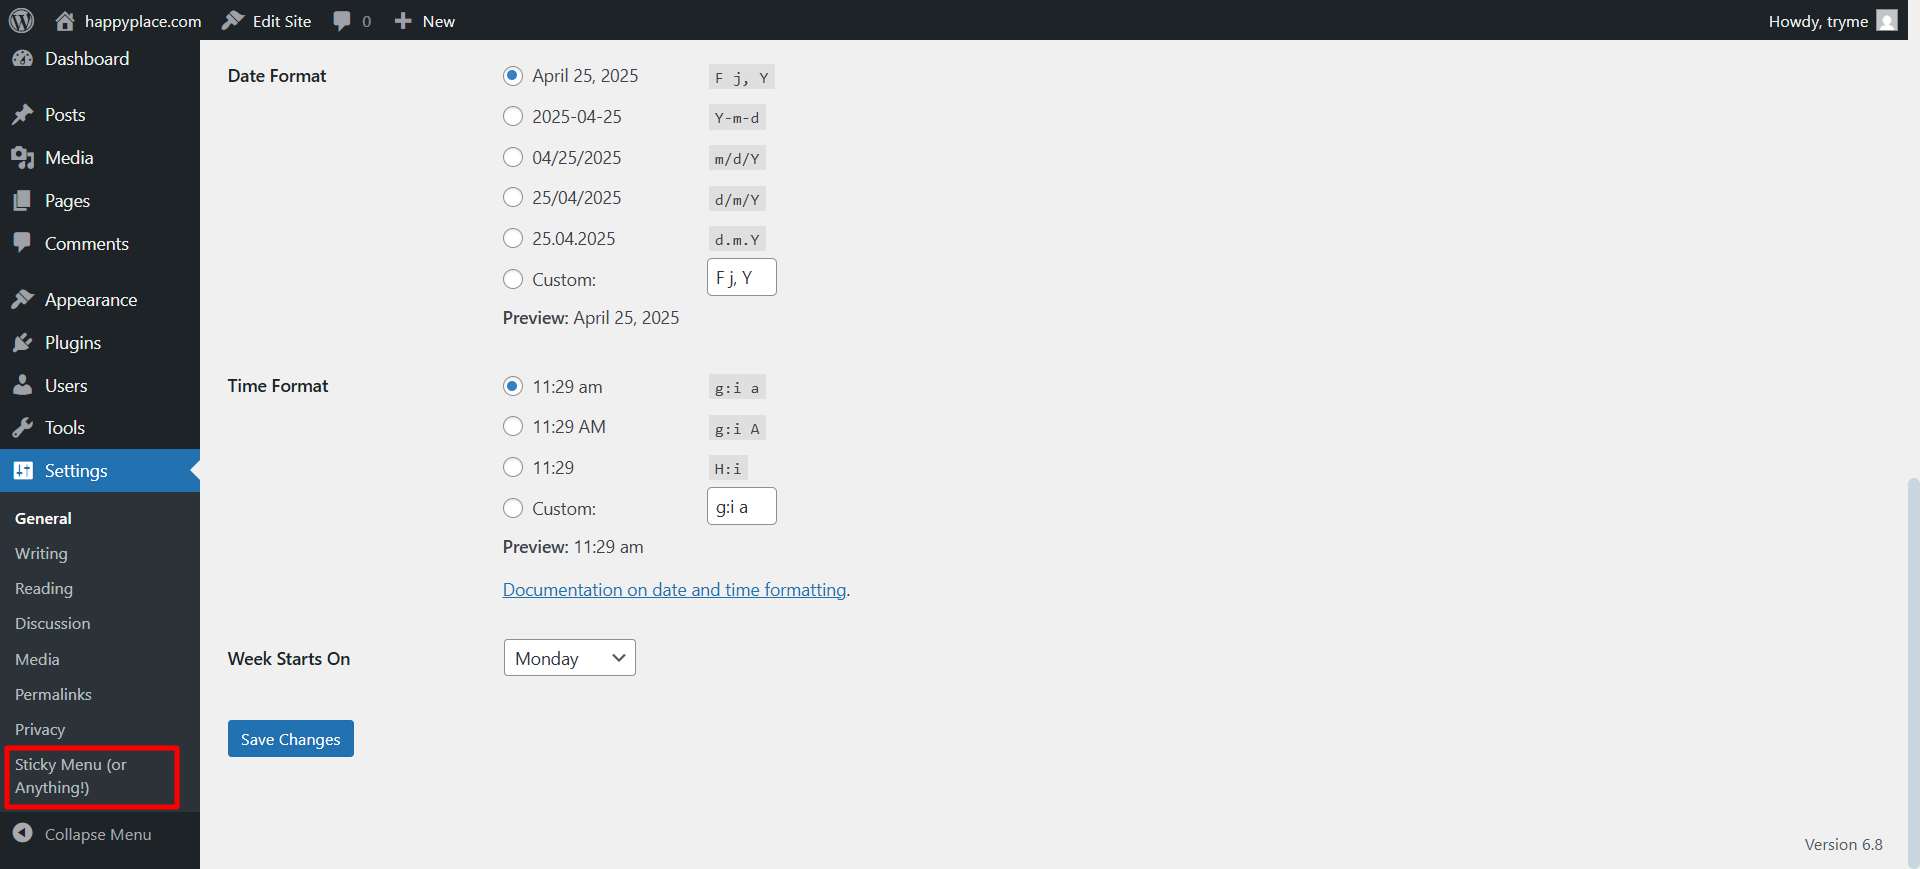
Type the header in the Sticky Element block.
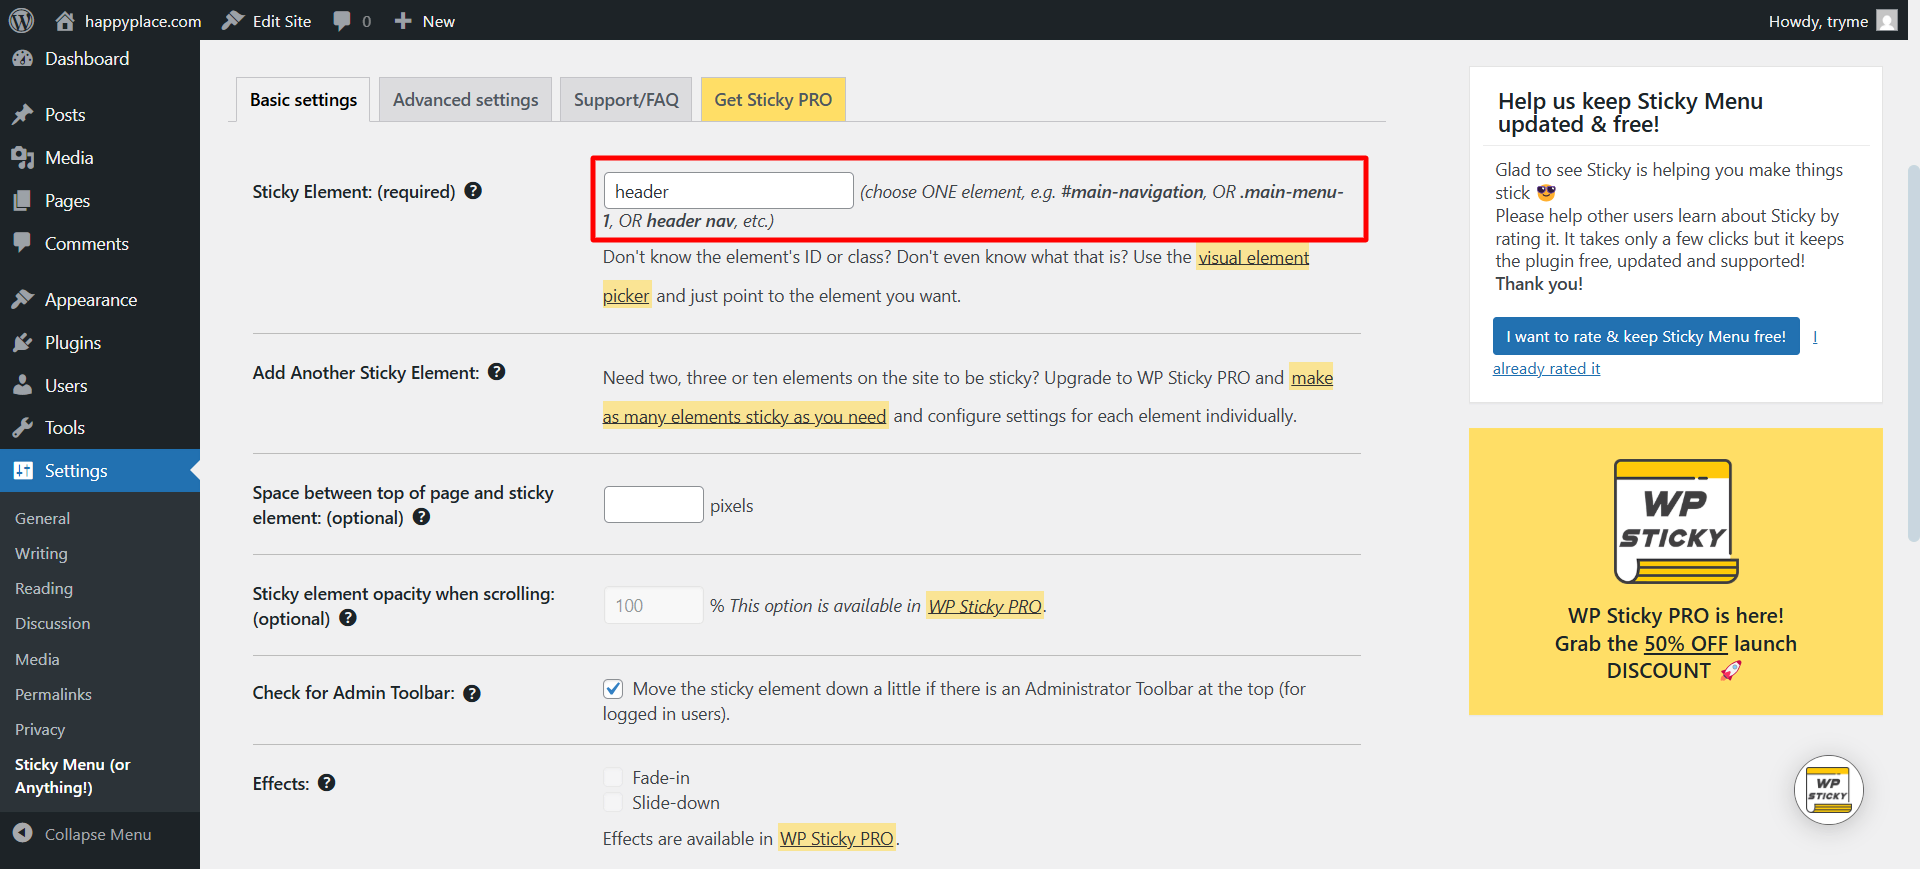
Click on Save changes. And you’re all done now, your header is sticky.
Prefer a hands-on approach or want complete control over your design? That’s no problem. There’s still a simple way to add a sticky header using custom code.
Method 3: Add Sticky Header Using Custom Code
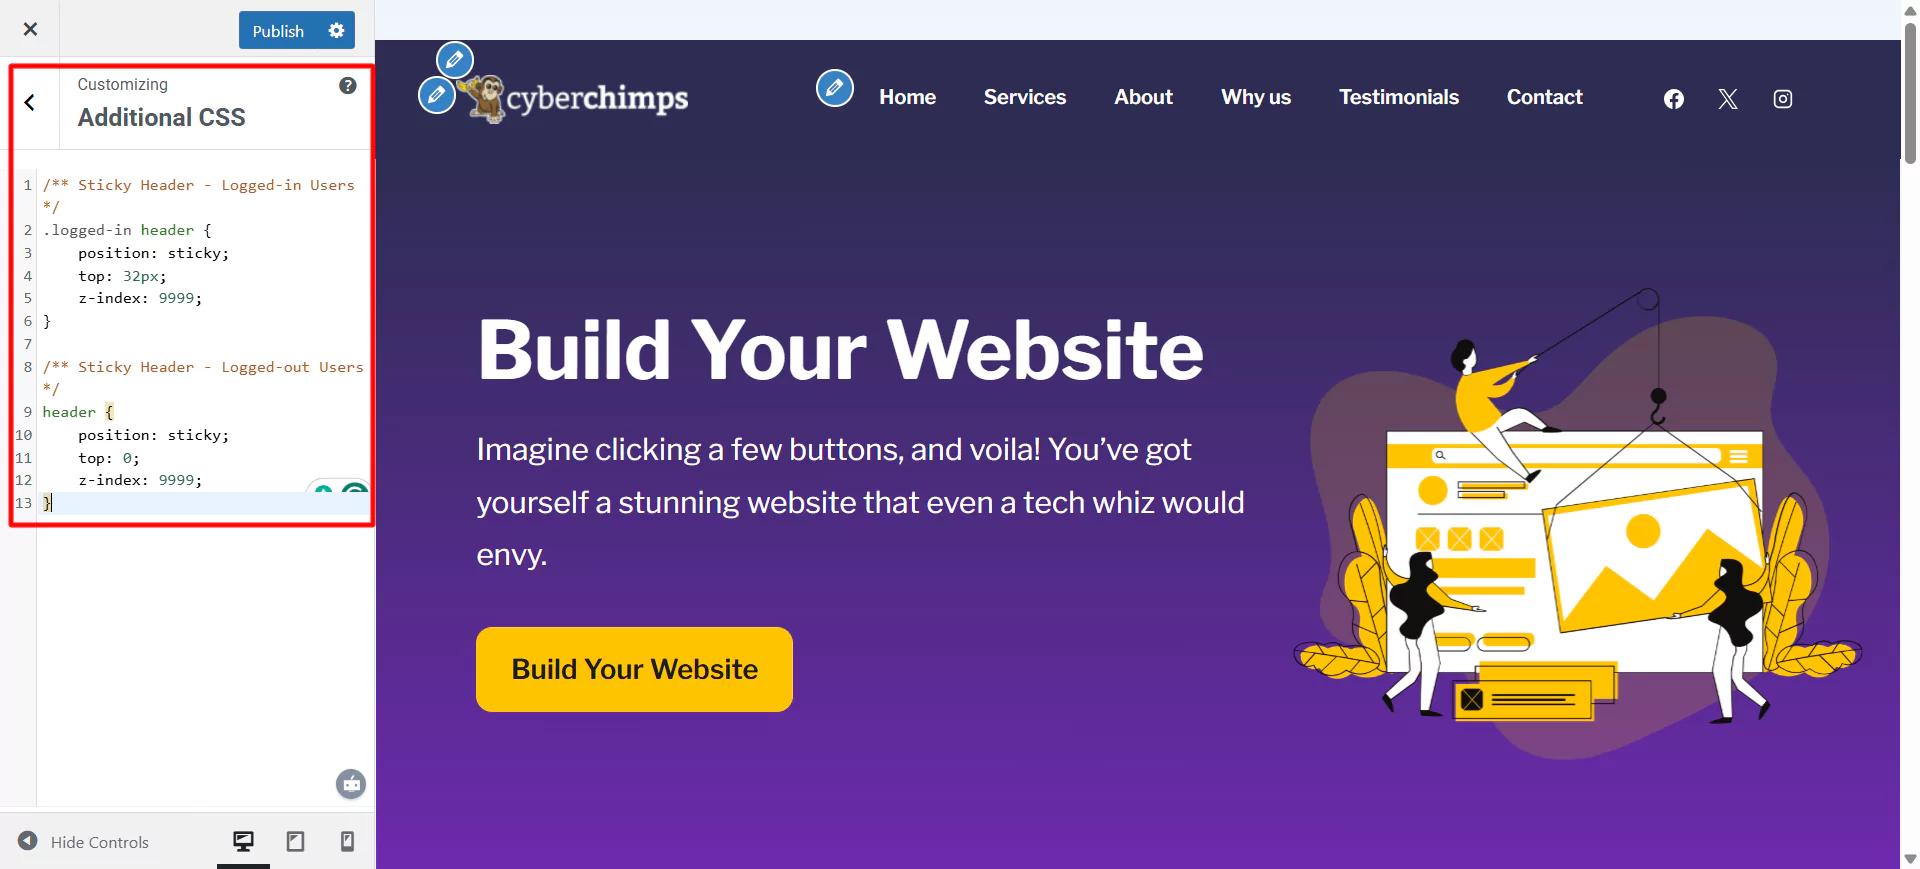
To add custom CSS code, you need to activate a theme. You can either install a responsive theme or learn to install another theme. Click on Appearance > Customize > Header > Additional CSS.

Write the code in the block.
/** Sticky Header - Logged-in Users */
.logged-in header {
    position: sticky;
    top: 32px;
    z-index: 9999;
}

/** Sticky Header - Logged-out Users */
header {
    position: sticky;
    top: 0;
    z-index: 9999;
}
Once you use this code, it will appear as follows.
Click on Publish. Now you can preview your header as a sticky element.
FAQ
To make your heading sticky, you can use the CSS code to help you stick your heading at the top of the website. Alternatively, you can even install a plugin and use the Cyberchimps Responsive Theme.
You have three main options to add a sticky header in WordPress:
1. Using the Theme Customizer – If your theme (such as Responsive by Cyberchimps) supports it, you can enable a sticky header from Appearance → Customize.
2. Using a Plugin – A plugin like Sticky Menu (or Anything!) on Scroll lets you stick headers or any elements.
3. Using Custom Code – You can use CSS or JavaScript for more advanced behavior.
There are two methods to add a sticky header without a plugin in a Responsive Theme. It is the easiest and most straightforward to use. The other method is custom CSS.
Conclusion
Sticky headers note that your website looks good, but more than that. It acts as a digital compass for the user, helping them navigate to your website more quickly and effortlessly.
Their innovative usability features help you easily navigate your site, boost your branding, and keep essential links and CTAs at the top.
Whether using the Responsive Theme, an Elementor layout with Responsive Addons, or a simple plugin, adding a sticky header to your WordPress site is doable, even if you’re a beginner.
No matter your chosen method, a sticky header will make your site feel more modern, accessible, and ultimately more effective.
If you liked this article, you can also consider reading:
- How to Add Free Author Box to your Elementor Website
- How To Add a Search Bar In WordPress – 5 Easy Methods
- How to Add Free Content Ticker To Your Elementor Website
Grab the Responsive theme today!


