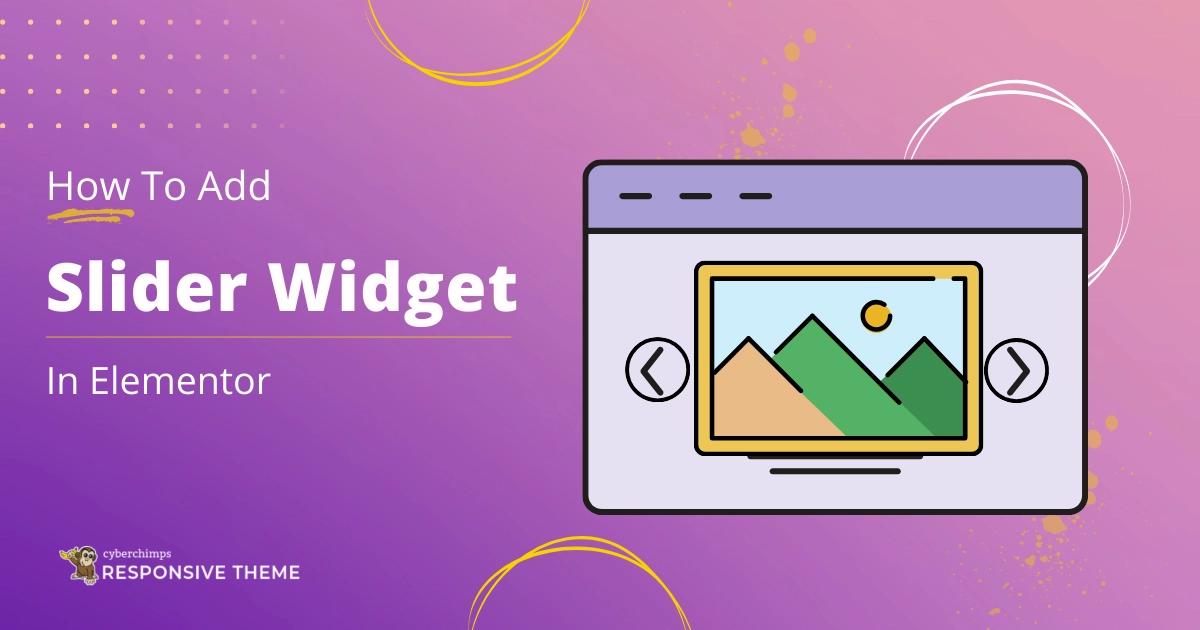
Are you looking to add Slider Widget to your Elementor Website?
Designing a visually appealing website is crucial for attracting and maintaining visitors’ interest.
In the realm of designing tools, the slider widget stands out for its remarkable versatility and the significant impact it can make on your website.
This powerful widget has evolved into a cornerstone of modern website design. It offers a seamless way to present content, highlights key information, and captivates visitors with interactive and visually appealing displays.
WordPress Slider Widget is essential for modern websites. It offers extensive customization options and a user-friendly interface for creating a portfolio, product showcase, testimonial section, and more.
This guide will take you through the step-by-step process of adding and setting up a free slider widget on your Elementor website. This will ensure your site looks impressive and provides a smooth user experience across all devices.
What is an Elementor Slider Widget?
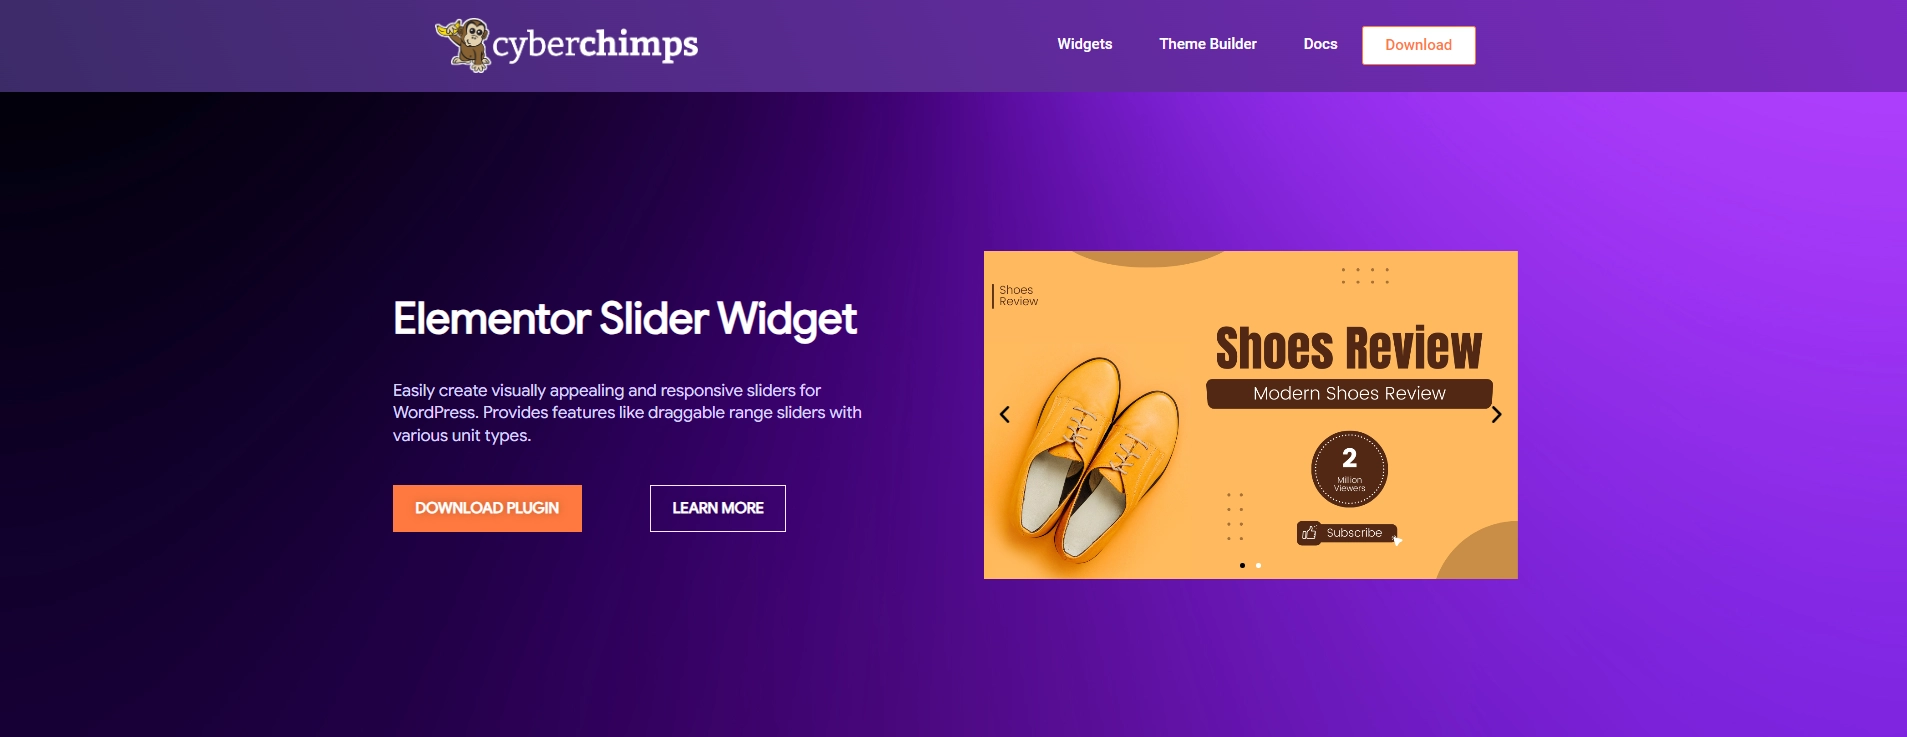
Elementor slider widget is an eye-catching tool that empowers users to make engaging and dynamic slideshow presentations on their websites.
The slider widget allows you to dynamically present various types of content, including images, text, and videos, improving overall user interaction.
It offers a user-friendly interface and customizable settings, allowing users to easily manage slide transitions, animation effects, and navigation options. This capability makes showcasing products, services, or essential information seamless.
For example, a slider widget can be used in a photography portfolio to showcase a series of images, while on an ecommerce site, it can highlight featured products.
The slider widget attracts attention and leads users through important content. It also guarantees that it functions well on different devices and screen sizes.
Things You’ll Need for Adding Free Slider in Elementor
Before you add a slider widget to your WordPress website, you must ensure that the following two prerequisites are in place.
1. Elementor Page Builder

Elementor, a widely used page builder for WordPress, allows users to design impressive and extensively adaptable websites without coding.
Moreover, you can easily add and organize texts, images, and widgets using its simple drag-and-drop interface.
This plugin effortlessly integrates with different WordPress plugins and themes, making it a flexible option suitable for beginners and experienced developers.
Elementor’s user-friendly interface enables users to create pages in real-time, providing a live preview of any changes made.
Elementorblock editor is an easy-to-use plugin that is a popular choice among beginners.
2. Responsive Addons for Elementor

Responsive Addons for Elementor is a versatile plugin designed to improve the functionality of the Elementor page builder. This free WordPress plugin includes 80+ Elementor widgets and more than 250 Elementor website templates.
It focuses mainly on responsiveness, ensuring all elements look great on mobile, tablet, and desktop views.
It also empowers users to elevate their web designs by providing the necessary tools to create captivating, flexible, and visually striking websites that stand out in today’s highly competitive online landscape.
How to Add Slider To Your Elementor Website
[Note: To add a slider widget, your website must be built with the Elementor page builder].
Cyberchimps offers 250+ Elementor templates you can use to build your website instantly.
Enhance your website design capabilities with the Responsive Addons for Elementor plugin.
Follow these steps to add a free slider widget to your website easily.
Step 1: Install and Activate Responsive Addons for Elementor
From your WordPress dashboard, go to the bottom left and click on Plugins > Add New Plugin.

On the search bar, search for Responsive Addons for Elementor plugin. Click on Install Now and let it download.
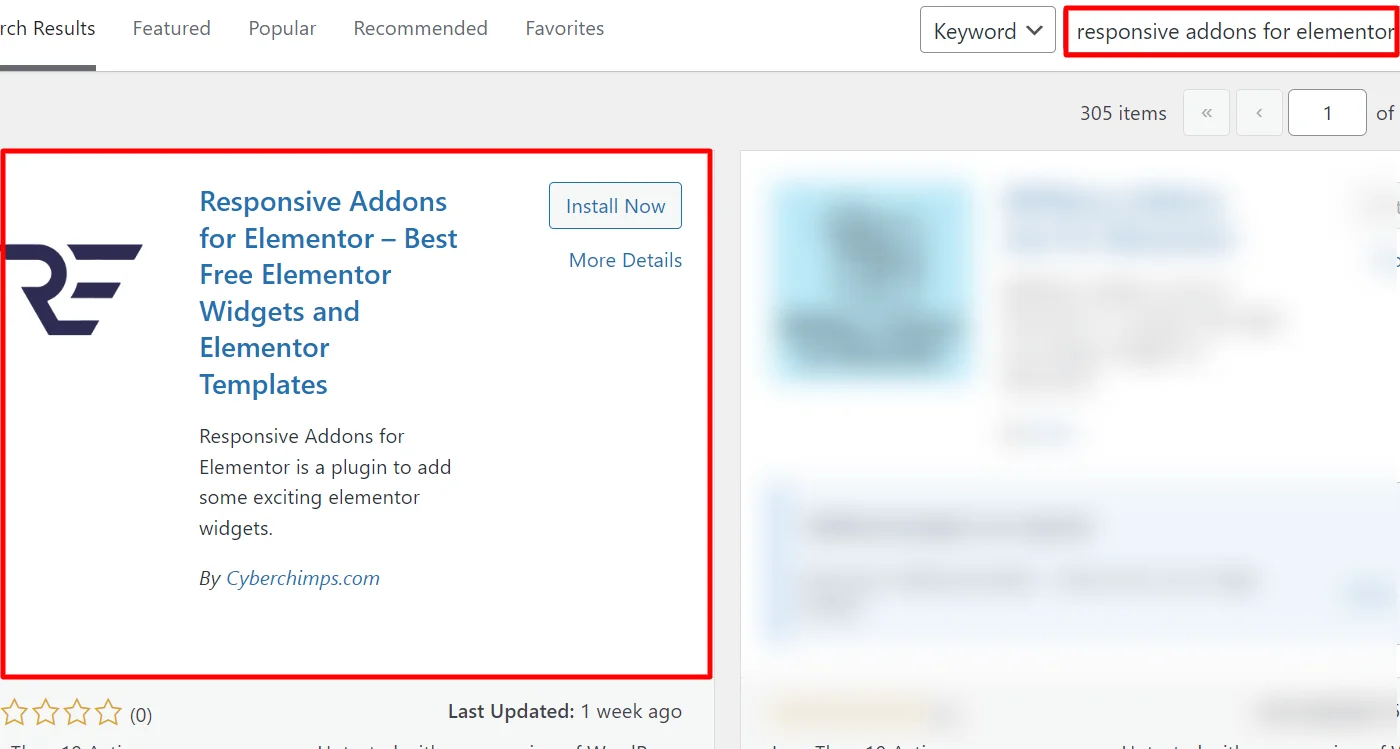
After downloading, simply click on Activate to start using the plugin.

Step 2: Adding the Slider Widget to the Page.
Let’s dive into learning how to add a slider to your Elementor website using a pre-designed Restaurant template for a hassle-free experience.
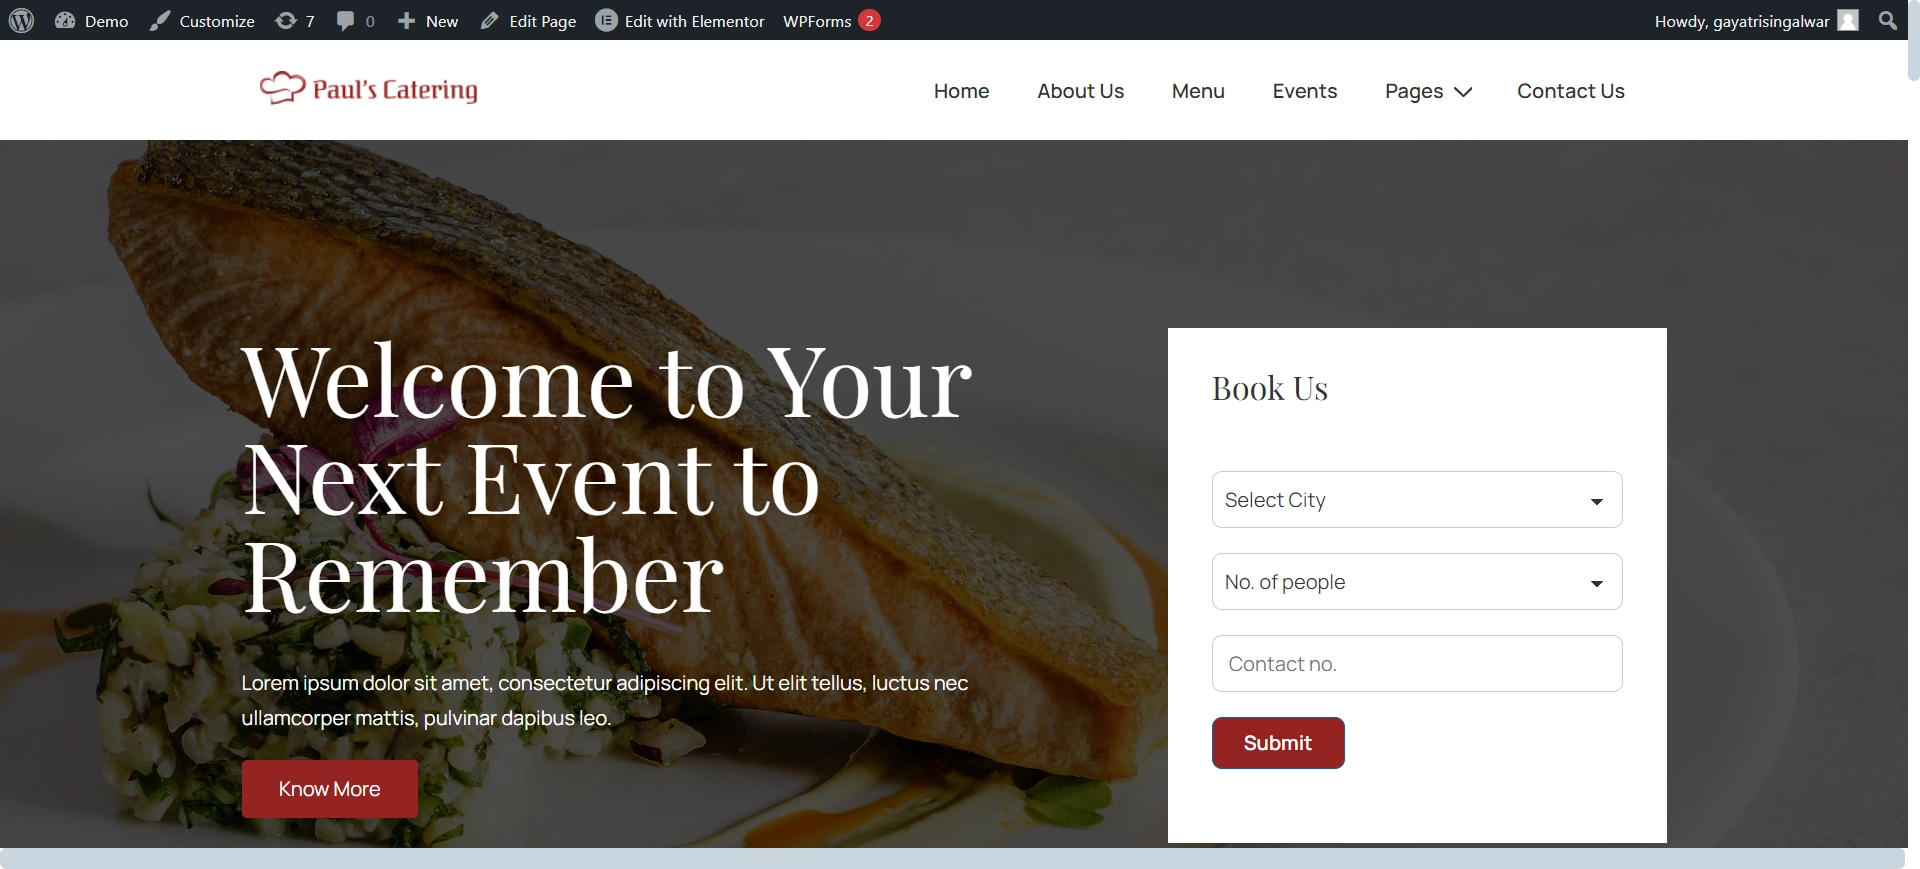
If you need a website template, you can use any of the free WordPress templates offered by the Responsive Plus plugin.
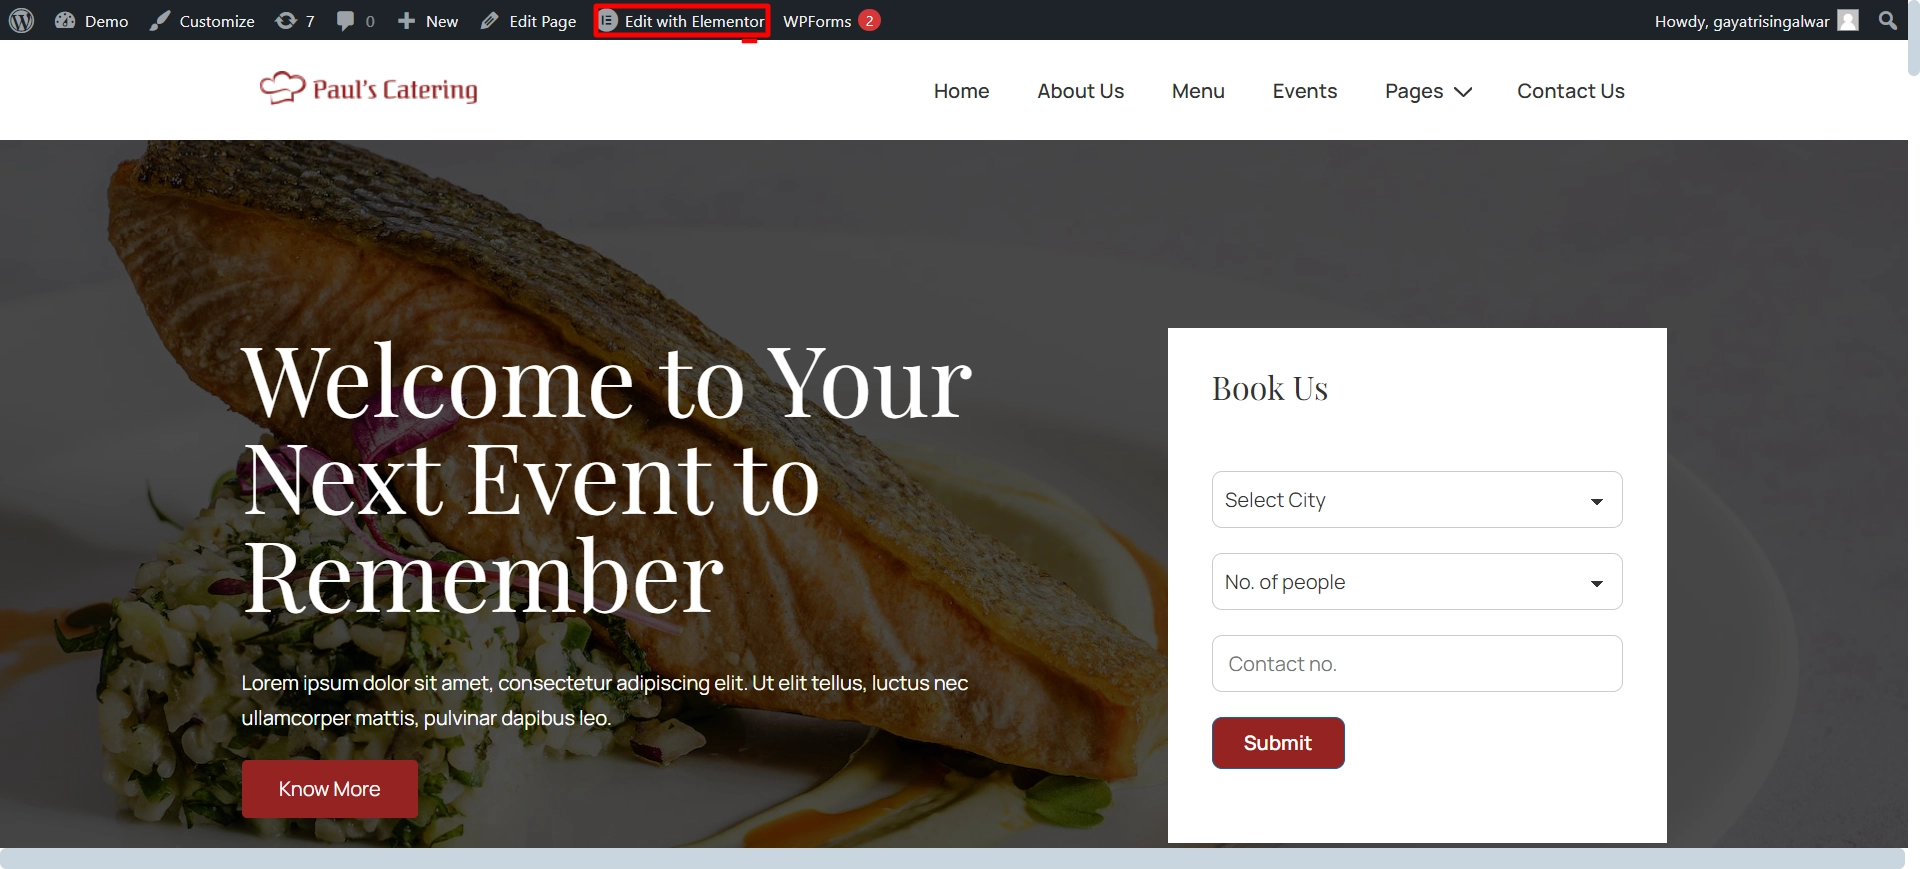
Click on Edit with Elementor, once you are on the page.
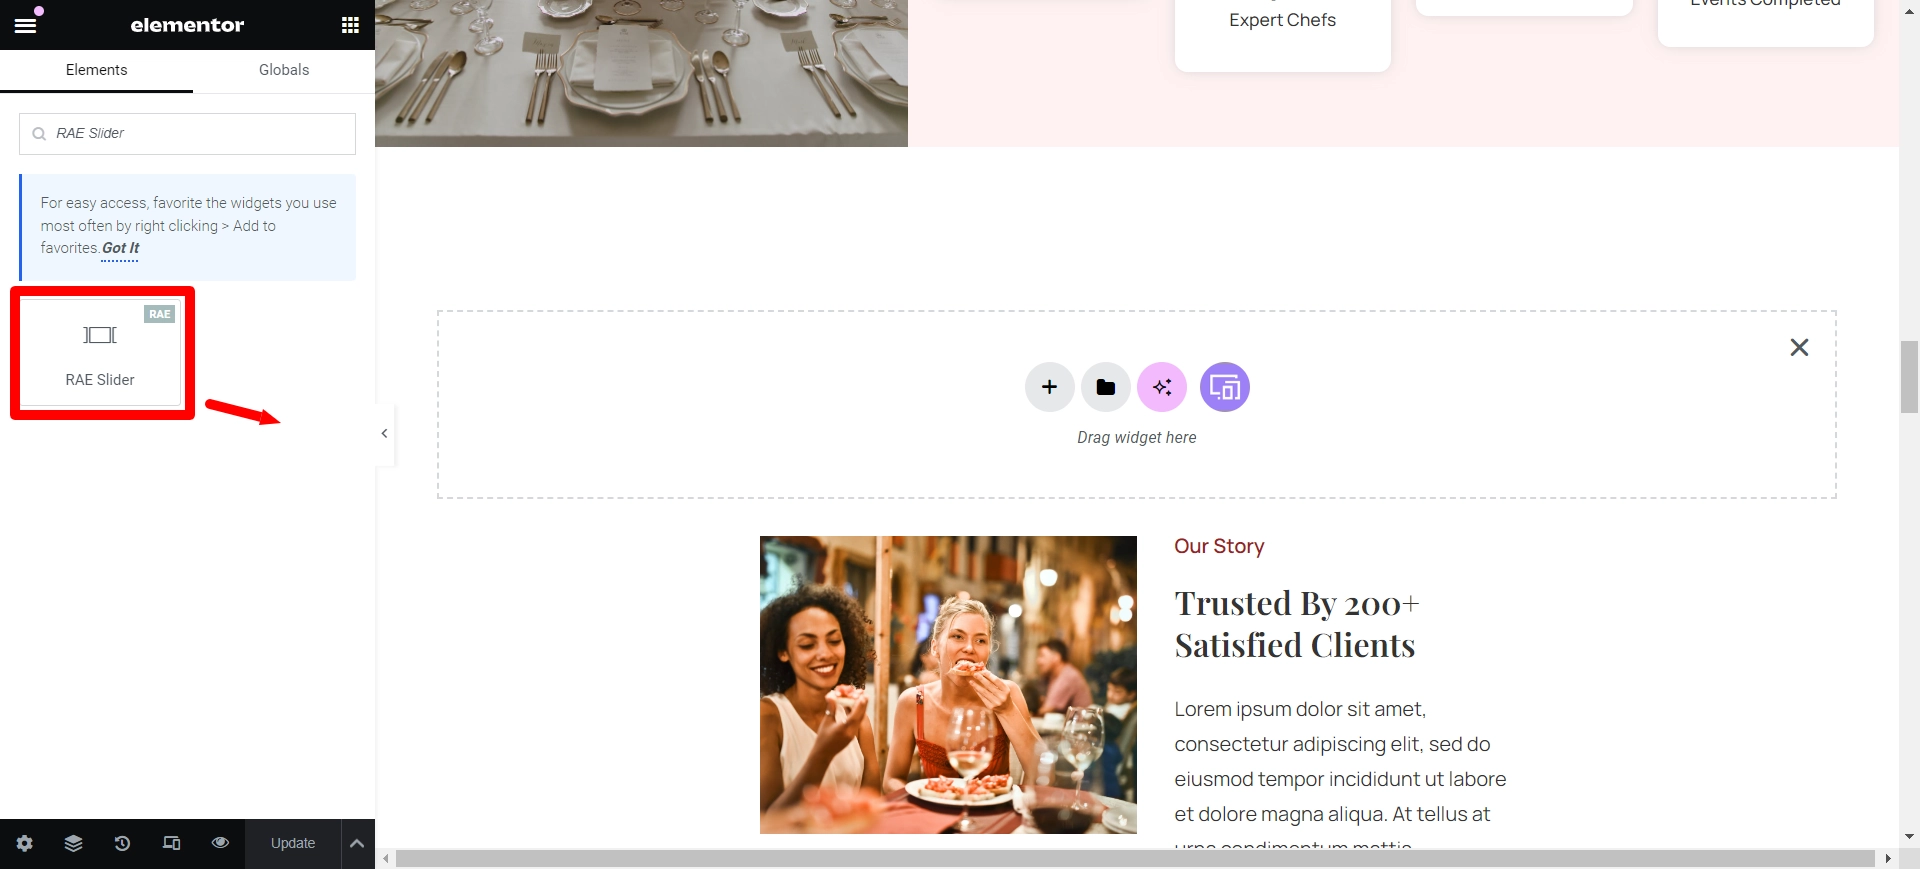
Head to the widget search bar and look up for RAE Slider.
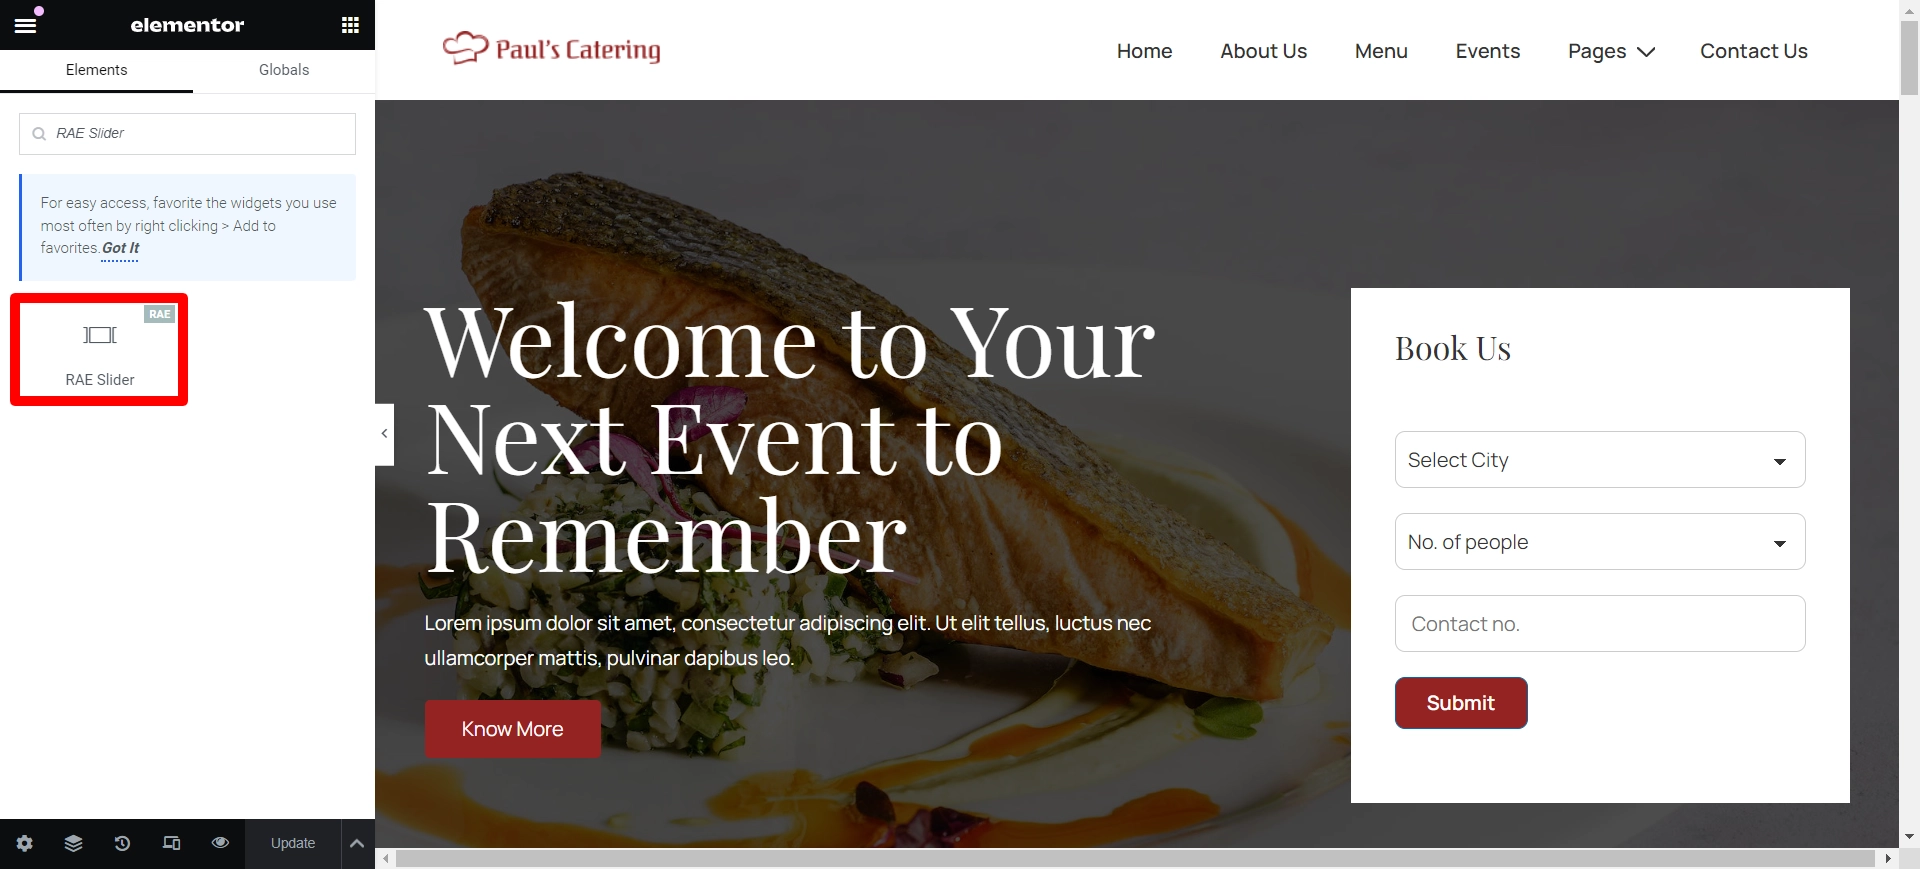
Now, Drag and drop the widget onto your page.
Step 3: Customize the RAE Slider Widget
Customize the widget to match the website theme for a more appealing appearance.
Let’s explore the Content section.
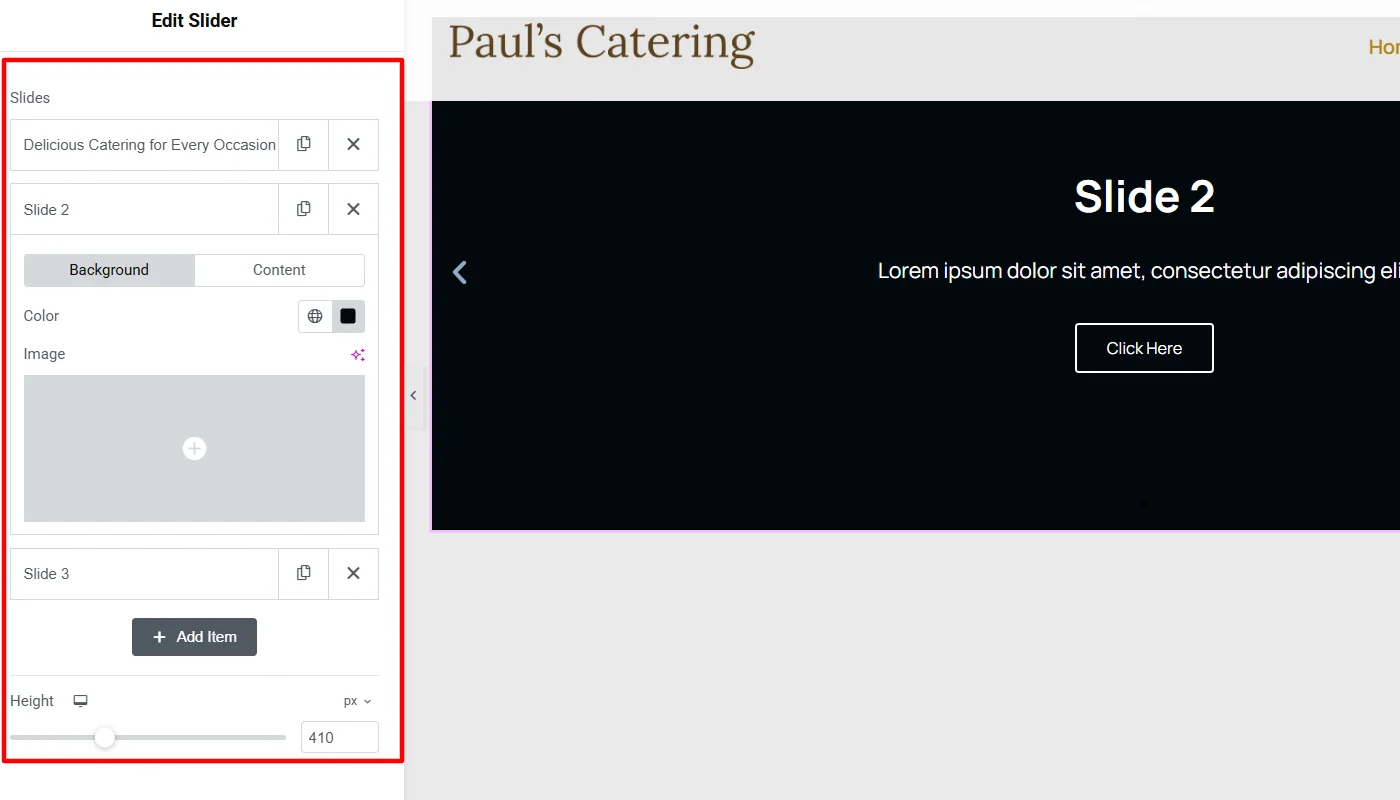
Slides
Shows the total number of slides added in the slider. You can rearrange their order by dragging, dropping, creating duplicates, and deleting or adding slides.
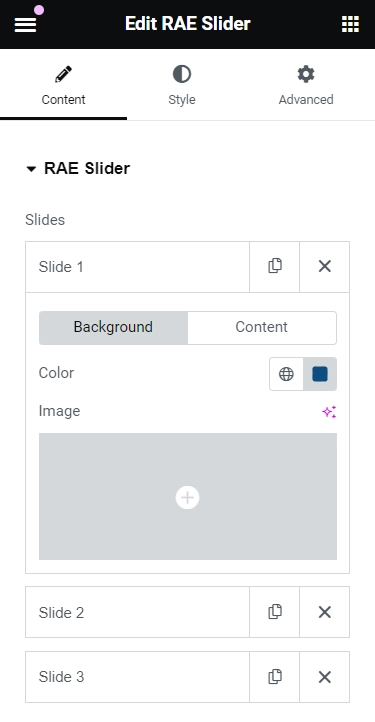
Background Features
- Color: Select a background color for the slide.
- Image: Pick an image to use as the background for the slide.
- Size: Choose whether to display the background image as cover, contain, or auto.
- Background Overlay: Opt to set a color over another image by adjusting the opacity to control the transparency of the overlay color.
- Ken Burns Effect: Enable this feature to create a zooming effect on the background image.
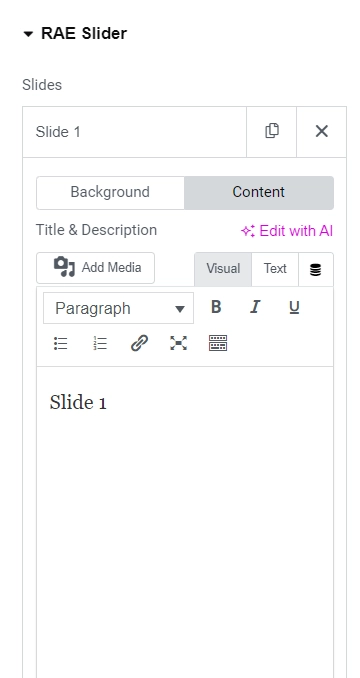
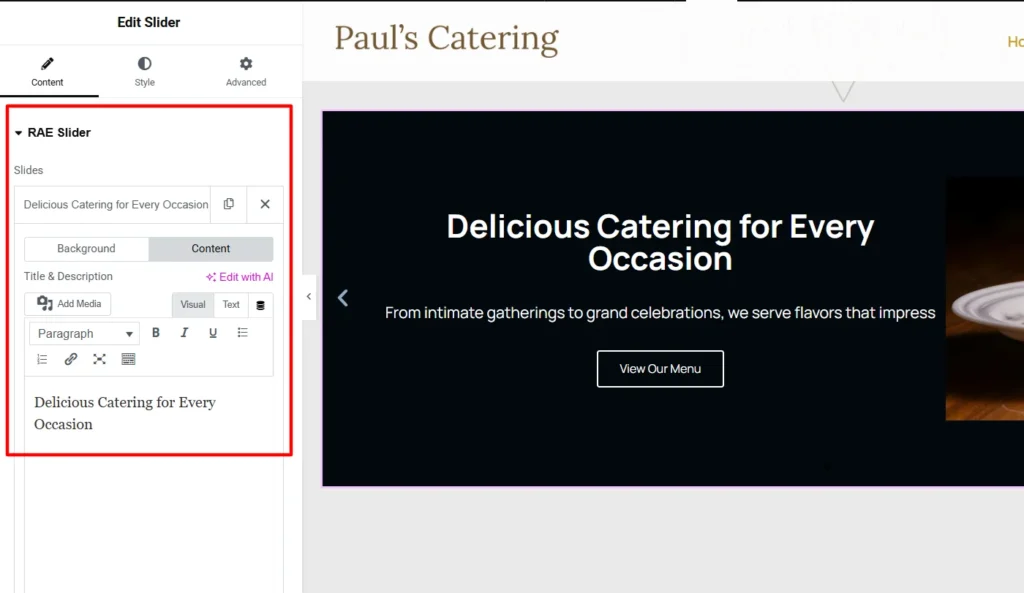
Content Features
- Title & Description: Provide the title and description for the slide.
- Button Text: Enter the text for the button.
- Link: Add a URL for the slide or button to link to.
- Apply Link On: If a link is added, choose if it applies to only the button or to the entire slide.
- Display Image: Select Yes to add the necessary class and properties to display images next to the slide title and description. Additional image settings will also be displayed in the editor.
- Image: Choose an image to be displayed next to the slide content.
- Height: Adjust the image height.
- Width: Adjust the image width.
- Size: Adjust the image size within its container. Options include Auto, Contain, and Cover.
- Position: Change the image position within its container.
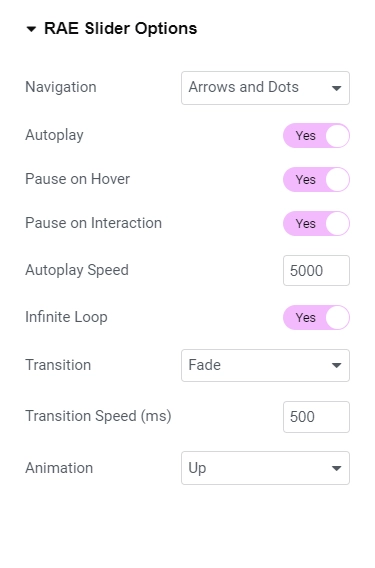
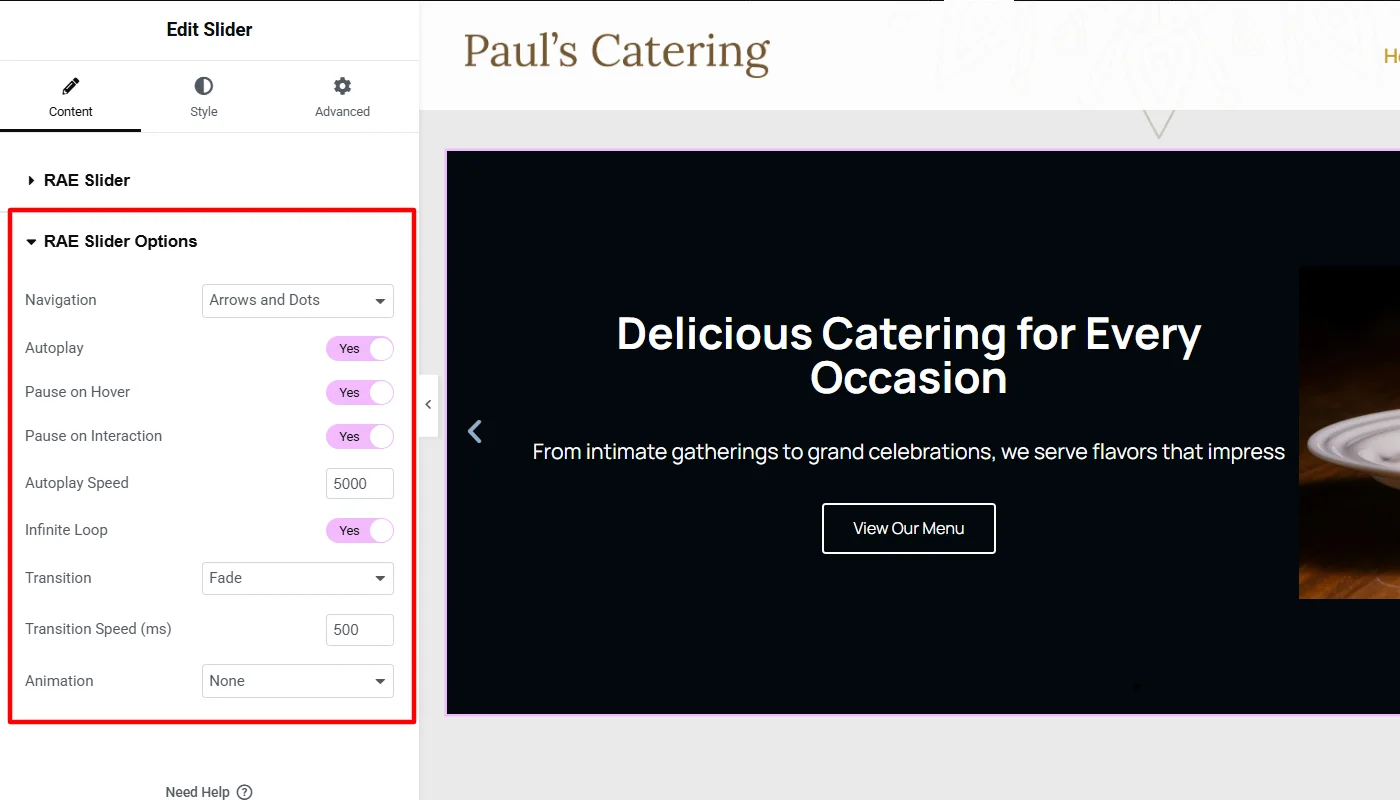
RAE Slider Options
RAE Slider option will give you various features to edit your slider Widget.
Slider Features
- Navigation: You can choose to display arrows, dots, both, or none to guide the user through the slides.
- Autoplay: Enable the slides to rotate automatically at your chosen speed.
- Pause on Hover: Allow the slide to pause when the user hovers over it with the mouse.
- Autoplay Speed: Set the duration for each slide before it transitions to the next one.
- Infinite Loop: Keep the slides rotating endlessly without any breaks.
- Transition: Select the transition style for the slides, such as slide or fade.
- Transition Speed: Adjust the speed at which the slides transition from one to the next.
- Animation: Choose from various animations to enhance the display of content when the slide is shown, including None, Down, Up, Right, Left, or Zoom.
Step 4: Styling the RAE Slider Widget
Now that we are done with the customization, let’s move towards the styling of the slider widget.
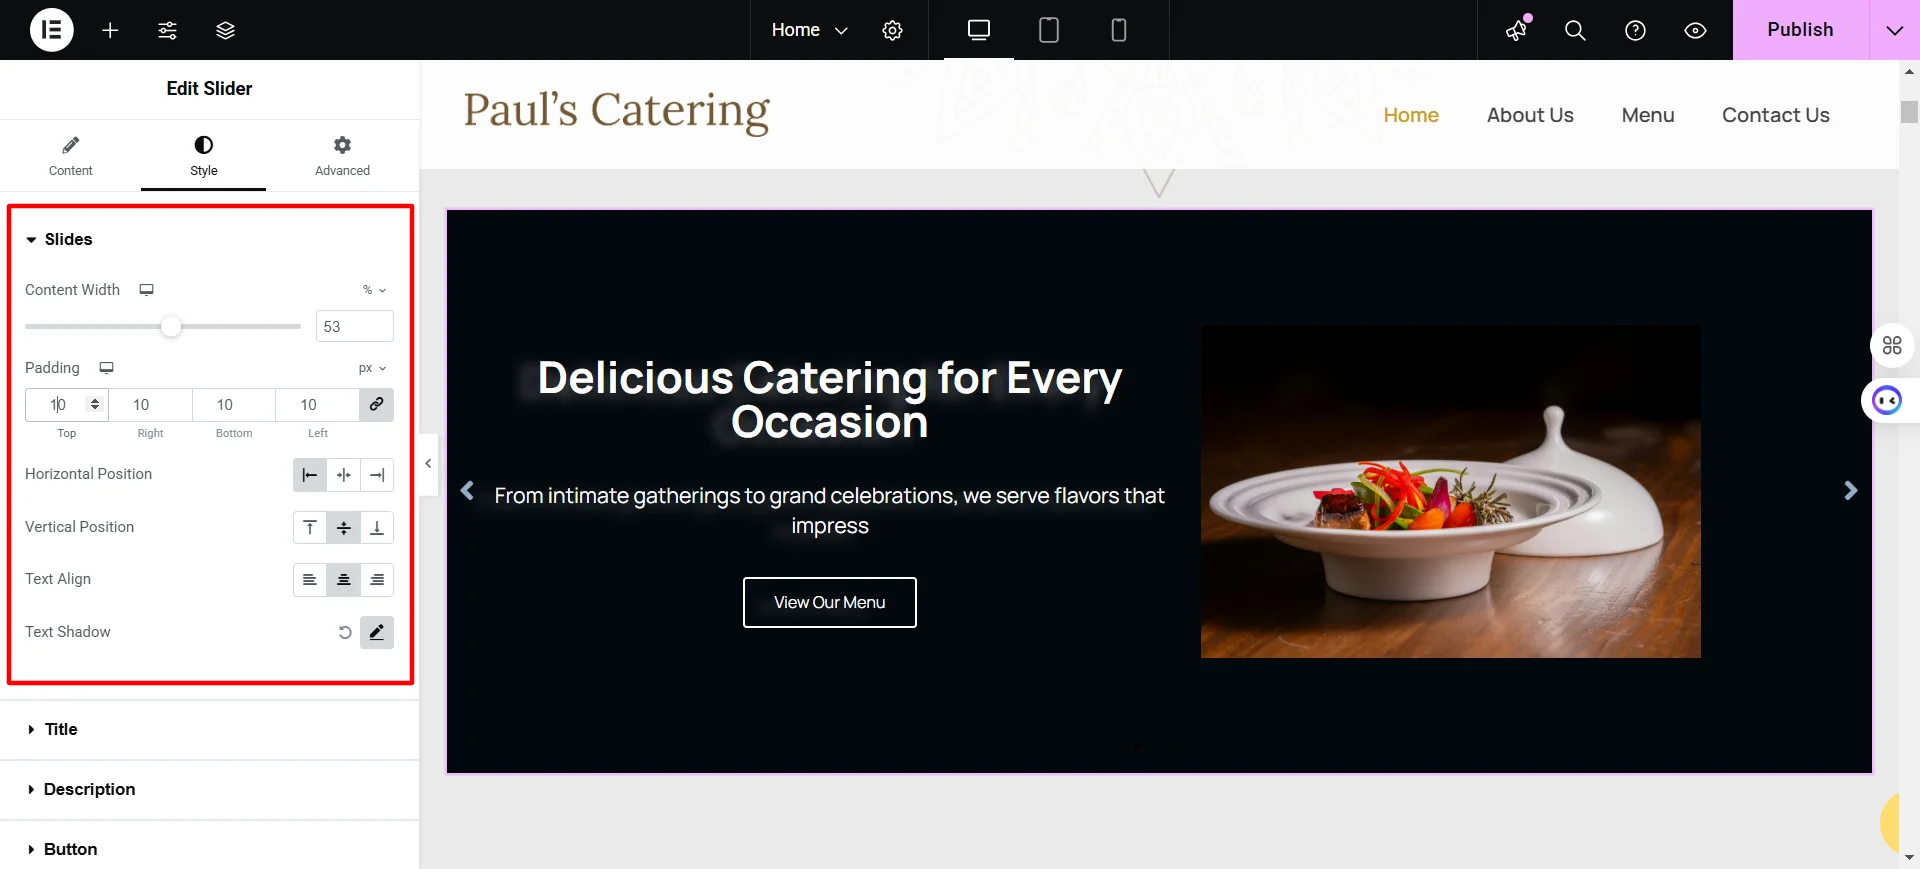
Slides
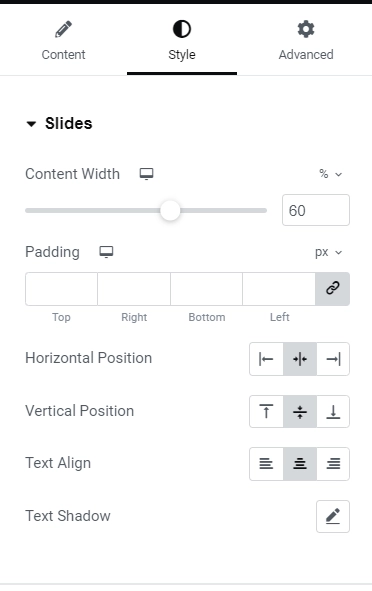
Slides Features
- Content width: You can set the width of the content inside the slide to ensure it fits perfectly.
- Padding: Adjust the inner spacing between the edge of the content and the edge of the slide for a clean and organized look.
- Horizontal Position: Set the position of the content as right, left, or center to achieve the desired layout.
- Vertical Position: To control the content’s vertical placement, you can set the position of the content as top, middle, or bottom.
- Text Align: Align text to the right, left, or center for a polished and professional look.
- Text Shadow: Add a shadow and blur to the text to create emphasis and depth.
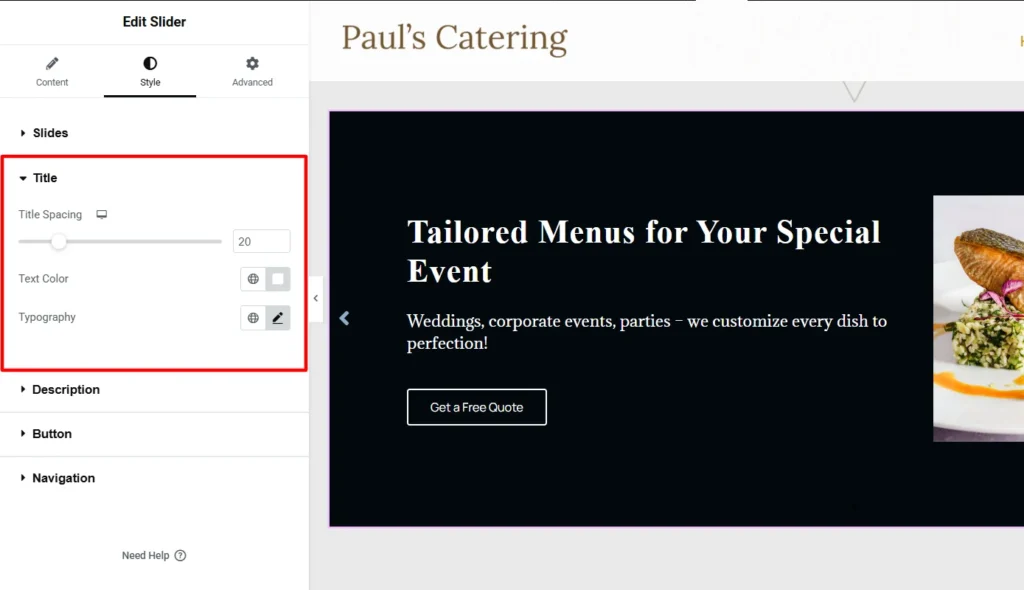
Title
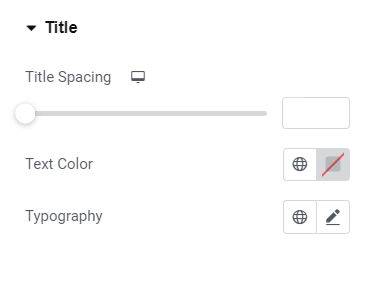
Title Features
- Title Spacing: Adjust the spacing between the title and the description to achieve the desired layout.
- Text Color: Customize the color of the title to enhance the overall aesthetic appeal.
- Typography: Tailor the typography of the title to create a consistent and polished look across the design.
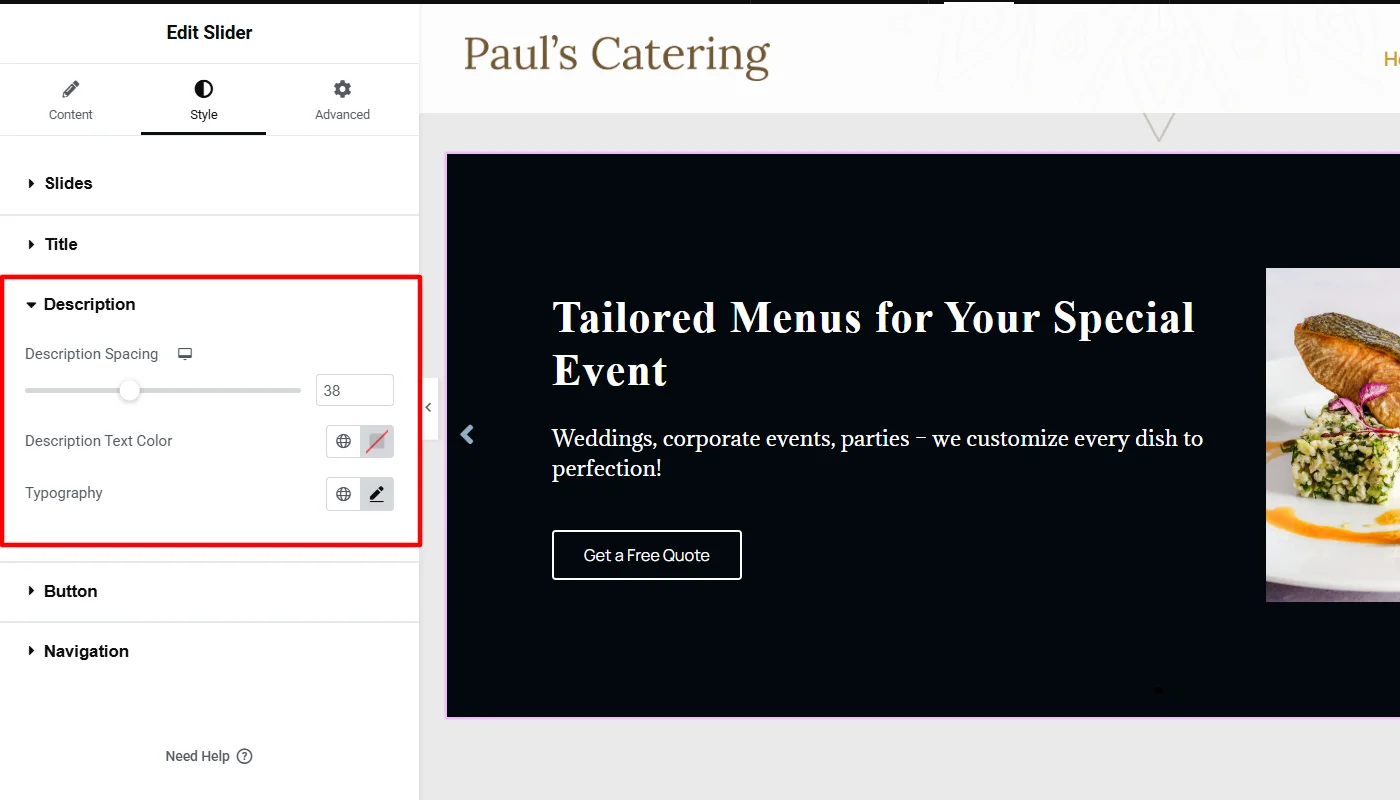
Description
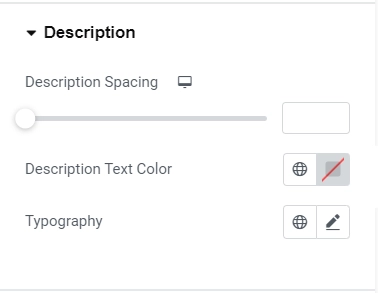
Description Features
- Spacing: Let’s adjust the spacing between the description and the button.
- Text Color: We need to decide on the color for the description text.
- Typography: Let’s determine the typography for the description text.
Button
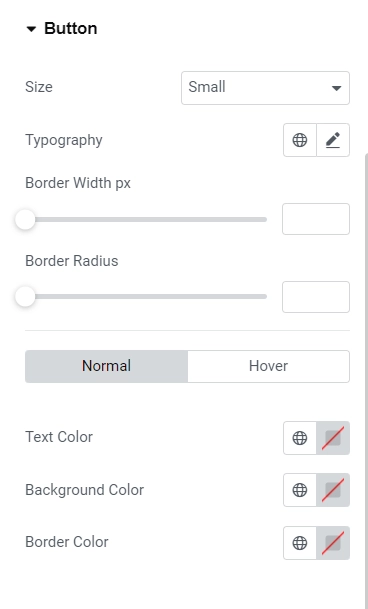
Button Features
- Size: Adjust the size of the button, ranging from extra small to extra large.
- Text Color: Customize the color of the button text.
- Typography: Set the font style for the button text.
- Border Width: Define the width of the button’s border.
- Border Radius: Set the border-radius to determine the roundness of the button corners.
- Normal state / Hover State:
- Text Color: Define the text color for the button in its normal and hover states.
- Background Color: Customize the background color of the button.
- Border Color: Set the border color of the button.
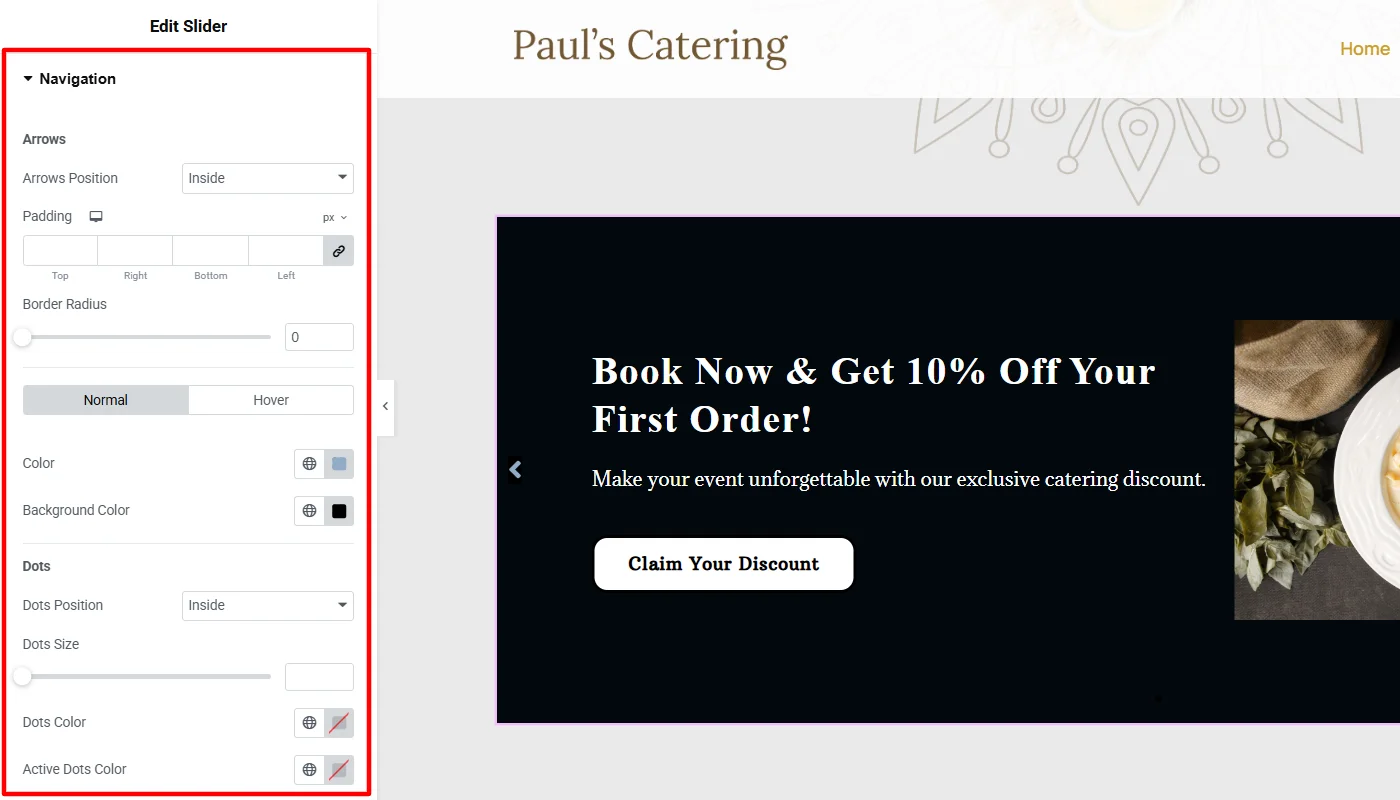
Navigation
The navigation option is determined by your selection in the REA Slider Option under the Content tab.
Arrows Features
- Arrow Position: This setting allows you to place the arrows either inside or outside the slider.
- Padding: Adjust the inner spacing between the content edge and the arrow icon.
- Border Radius: Customize the border curvature to achieve rounded rectangle or circle styles for the buttons.
- Normal State / Hover State:
- Color: Define the text color for the arrow.
- Background Color: Set the button’s background color.
- Transition Speed: Control the speed of the hover transition in milliseconds.
Dots
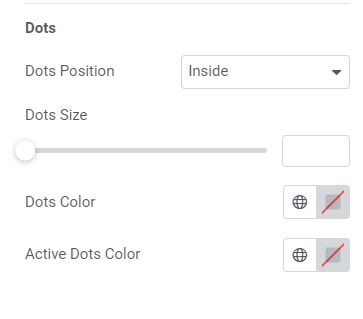
Dots Features
- Dot Position: Choose whether to place the dots inside or outside the slider.
- Dot Size: Adjust the size of the dots to your preference.
- Dot Color: Customize the color of the dots to complement your design.
How To Use the RAE Slider Widget?
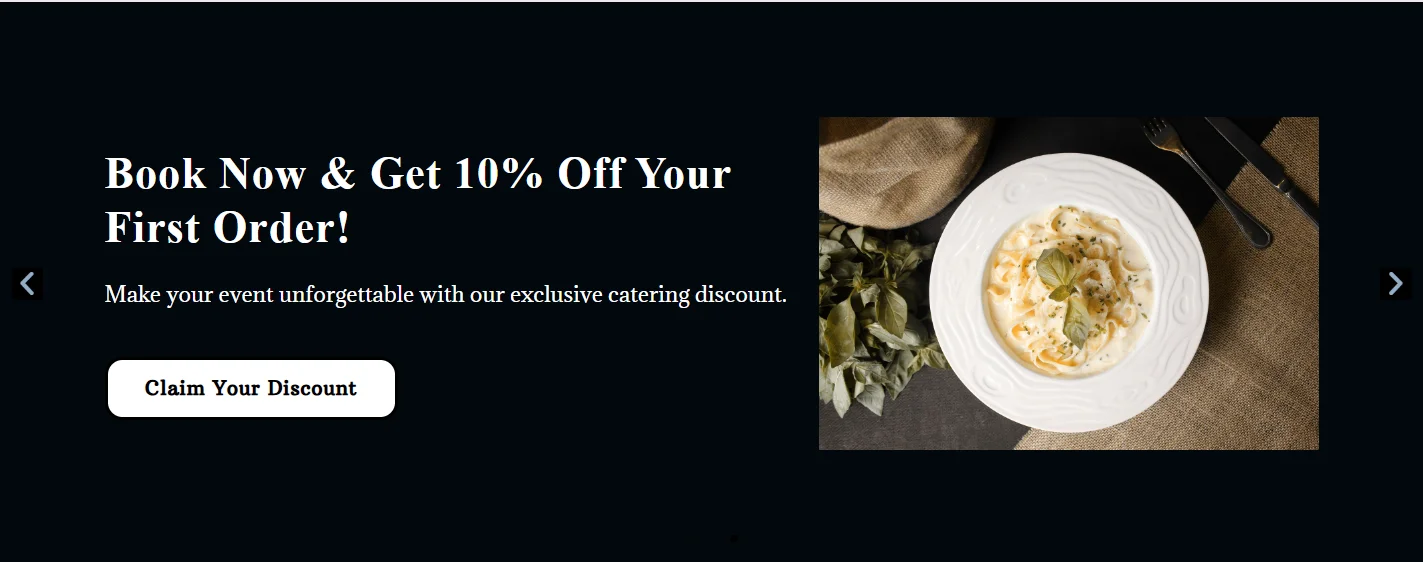
Now, let us understand how we used the RAE slider widget for the catering website.
When you drop the widget, it appears as below.
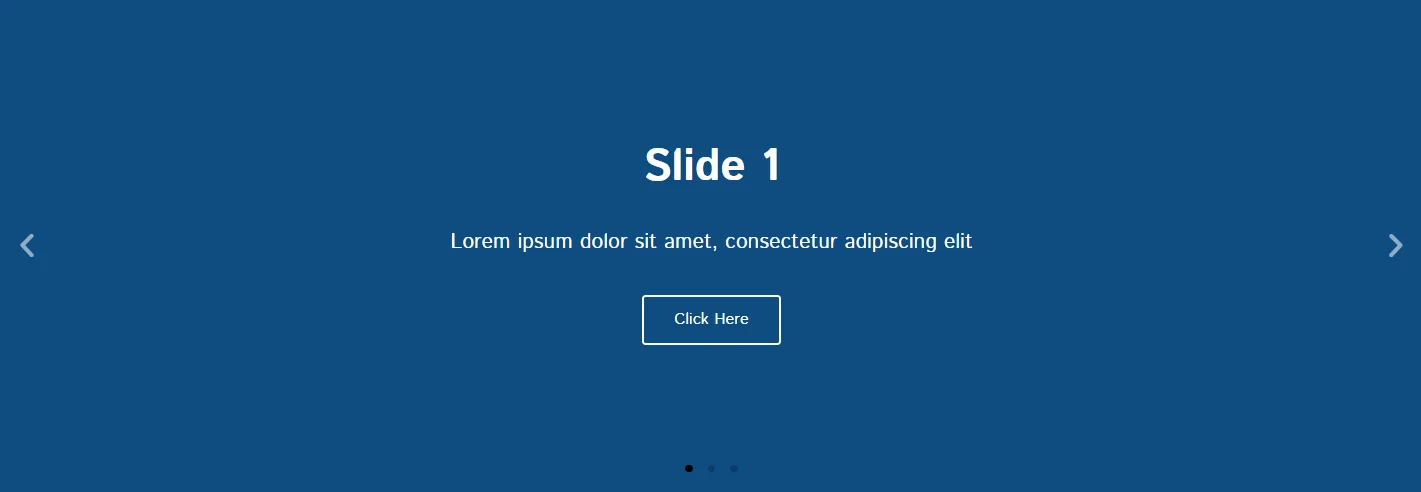
To begin with, I added some dummy content for the slides with some solid colored background. (You can also consider adding a background image instead of some color instead of a solid color.)
Next, I customized the RAE slider options, keeping all the settings as default, making the widget appear intuitive.
Further, I moved into styling the widget. Where in I began with styling the slides.
I made minor adjustments to adjust the slider’s view, such as changing the content width, padding adjustments, aligning the horizontal position to the center, and aligning the text to the left. Remaining, I kept the settings to default.
To style the title, I slightly increased the content width and changed the font while keeping the text color and typography the same, which blended well with the overall website aesthetics.
Similarly, I adjusted the description spacing and changed the font while styling the description.
To style the button, I experimented with various customization options. First, I changed the button size from small to medium, changed the font and typography, and adjusted the border width and radius.
Moreover, I made a few changes in the button color and text to match the website aesthetics.

Lastly, I did not change the navigation style and kept all the settings as default. You can make changes to it at your convenience.
With all these changes, I could finally customize the appearance of sliders on the website as below.
FAQ
To add a slider to the Elementor website, follow these simple steps:
1. Install and Activate Responsive Addons for Elementor
2. Open the page where you want to add slider (Use an Elementor template)
3. Edit with Elementor
4. Search for the slider widget
5. Drag and drop the widget
6. Customize the slider widget
The Responsive Addons for Elementor’s slider widget is a user-friendly tool that enables you to design a sleek and functional slider for your website effortlessly
Yes, you can add a free slider widget to your Elementor website using the Responsive Addons for Elementor plugin.
Conclusion
You can use the Responsive Addons For Elementor plugin to design and personalize, enhancing your users’ interactions by integrating a slider widget into your Elementor-powered website. Thus, the plugin enhances user experience and streamlines communication.
If you enjoyed this article, you may also want to check out:
- How To Add FAQ To Your Elementor Website
- How to Add Table Of Contents To Your Elementor Website
- How To Add Multi Buttons To Your Elementor Website
If you want to integrate a slider into your website, get the Responsive Addons for Elementor now!
Moreover, you can opt for the Responsive theme, a versatile website theme designed to streamline your website creation process.


