
Are you looking to add a banner to your Elementor website?
Adding a banner to your website is a great way to make your page stand out. Banners quickly grab visitors’ attention and are great for highlighting things.
If you are a beginner, adding and customizing the banner can be challenging. This guide will walk you through adding and customizing the banner widget.
We will use the Responsive Addons for the Elementor plugin by Cyberchimps to add this widget for free.
What is Elementor Banner Widget?
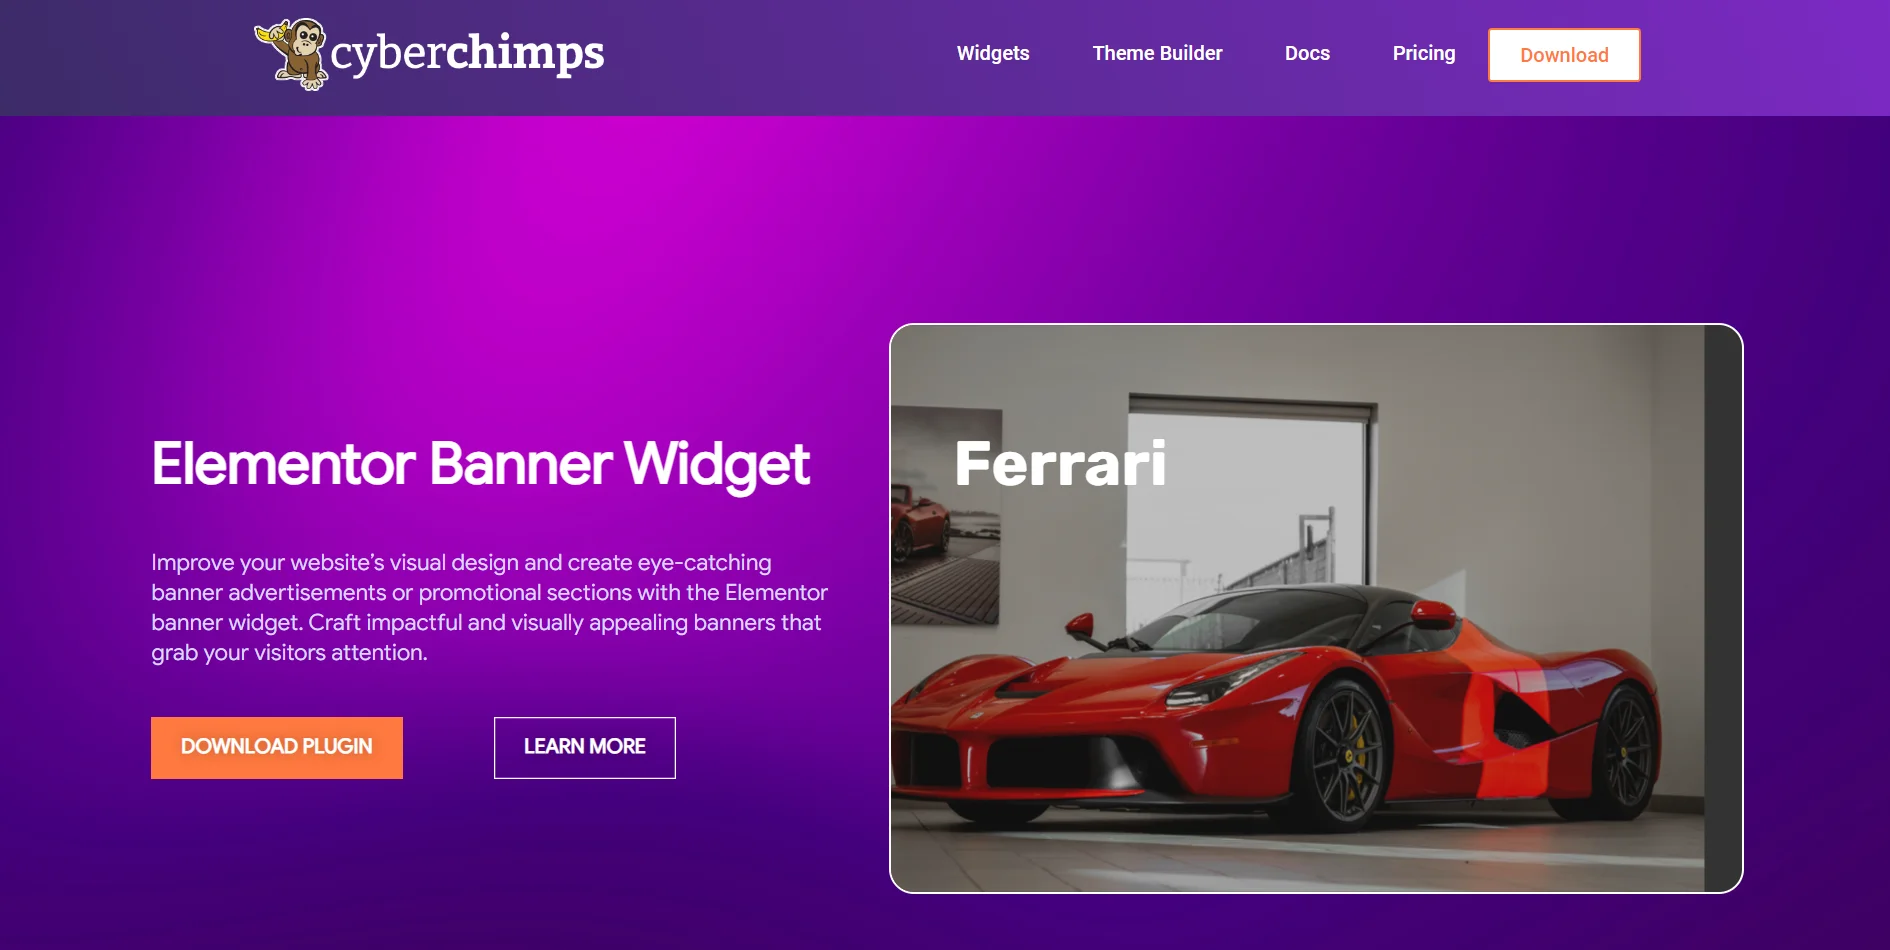
The Elementor banner widget is a tool for adding banners to your webpage. Banners are often large images, graphics, or messages that grab visitors’ attention.
You can use them to display offers, promotions, announcements, or important messages. This can make your website more engaging and professional.
Let’s look at what you need to quickly design banners and place them on your webpage without any code.
Things You’ll Need for Adding a Free Banner in Elementor
Here are the two essential WordPress plugins that’ll help add a banner.
1. Elementor Website Builder
Elementor is a popular page builder plugin for WordPress, allowing users to create responsive websites efficiently.
With its drag-and-drop feature, Elementor lets you arrange text, images, buttons, and widgets, making design simple for everyone.
Anyone can use Elementor to build a free, well-designed, responsive website, thereby making it a top choice for WordPress users.
To add a banner to your site, you’ll need the Elementor plugin.
2. Responsive Addons for Elementor
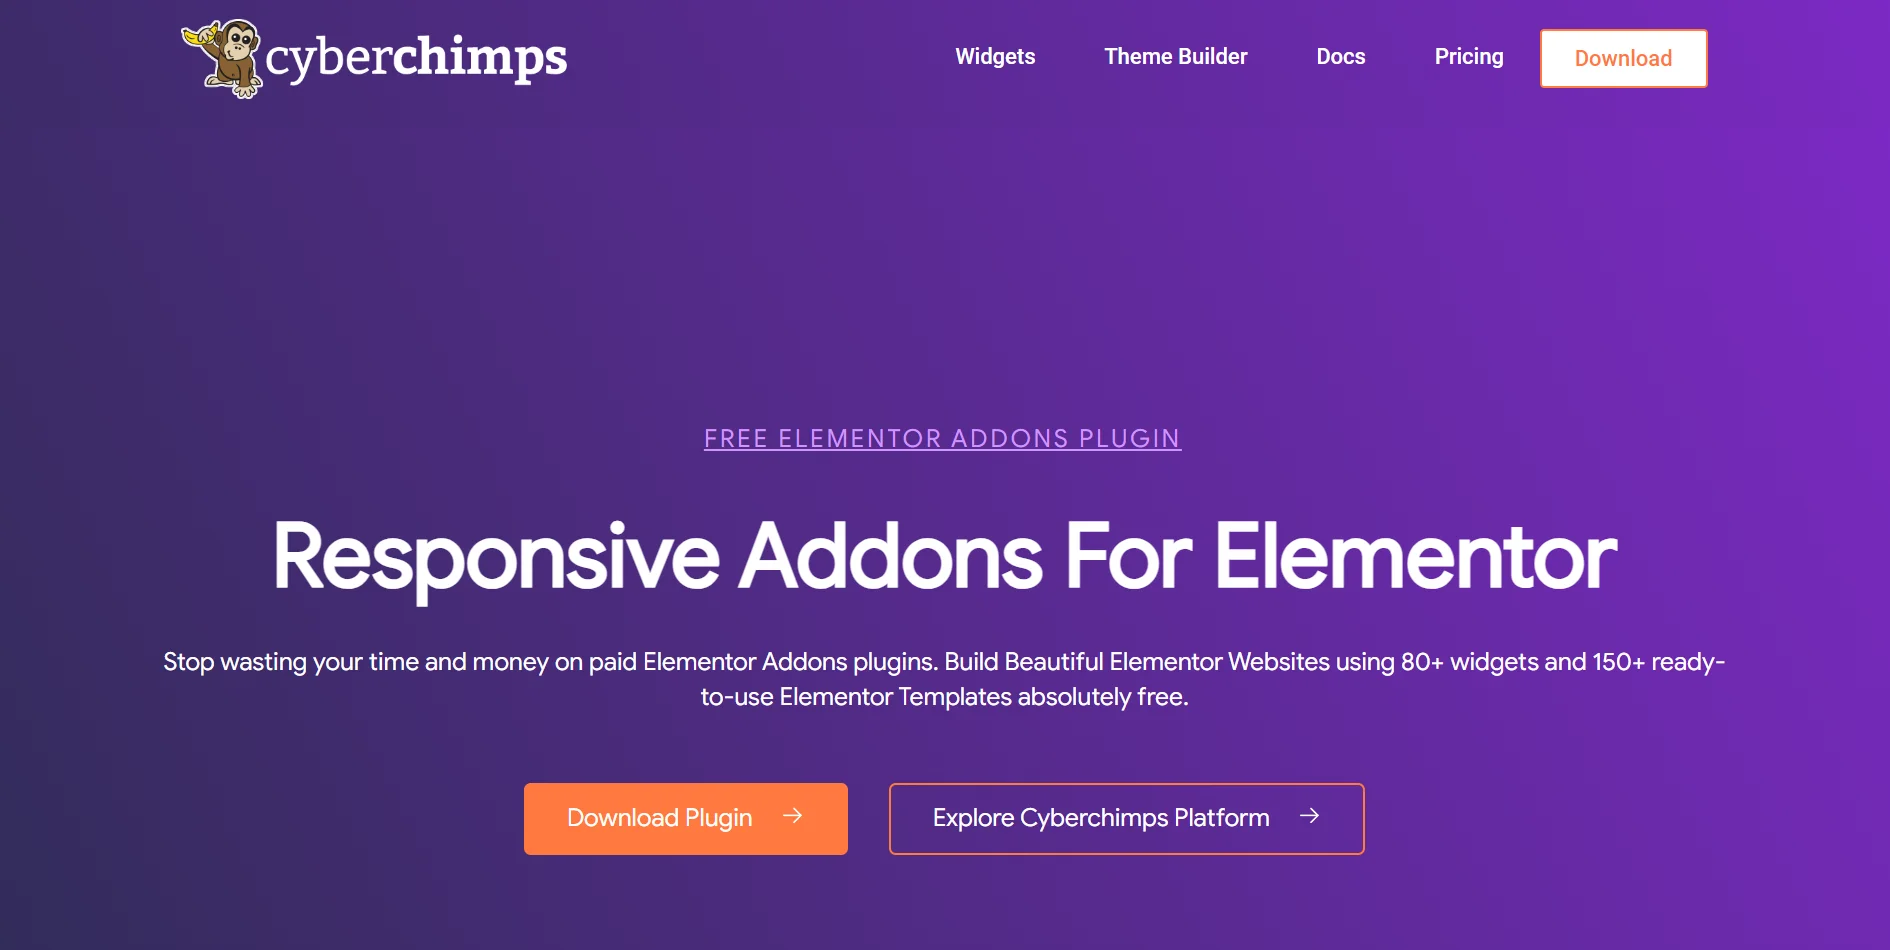
To add a free Elementor banner widget to your WordPress website, you must install the Responsive Addons for Elementor plugin.
This plugin is designed to enhance the functionality of the Elementor website and includes over 80 free widgets and 250+ Elementor templates.
It ensures its widgets are compatible with all devices while maintaining great functionality.
How to Add Elementor Banner To Your Website
(Note: To add a Banner widget, your website should be built with Elementor builder)
We will go through the steps to add an Elementor banner widget to your webpage.
Step 1: Installing Responsive Addons for Elementor Plugin
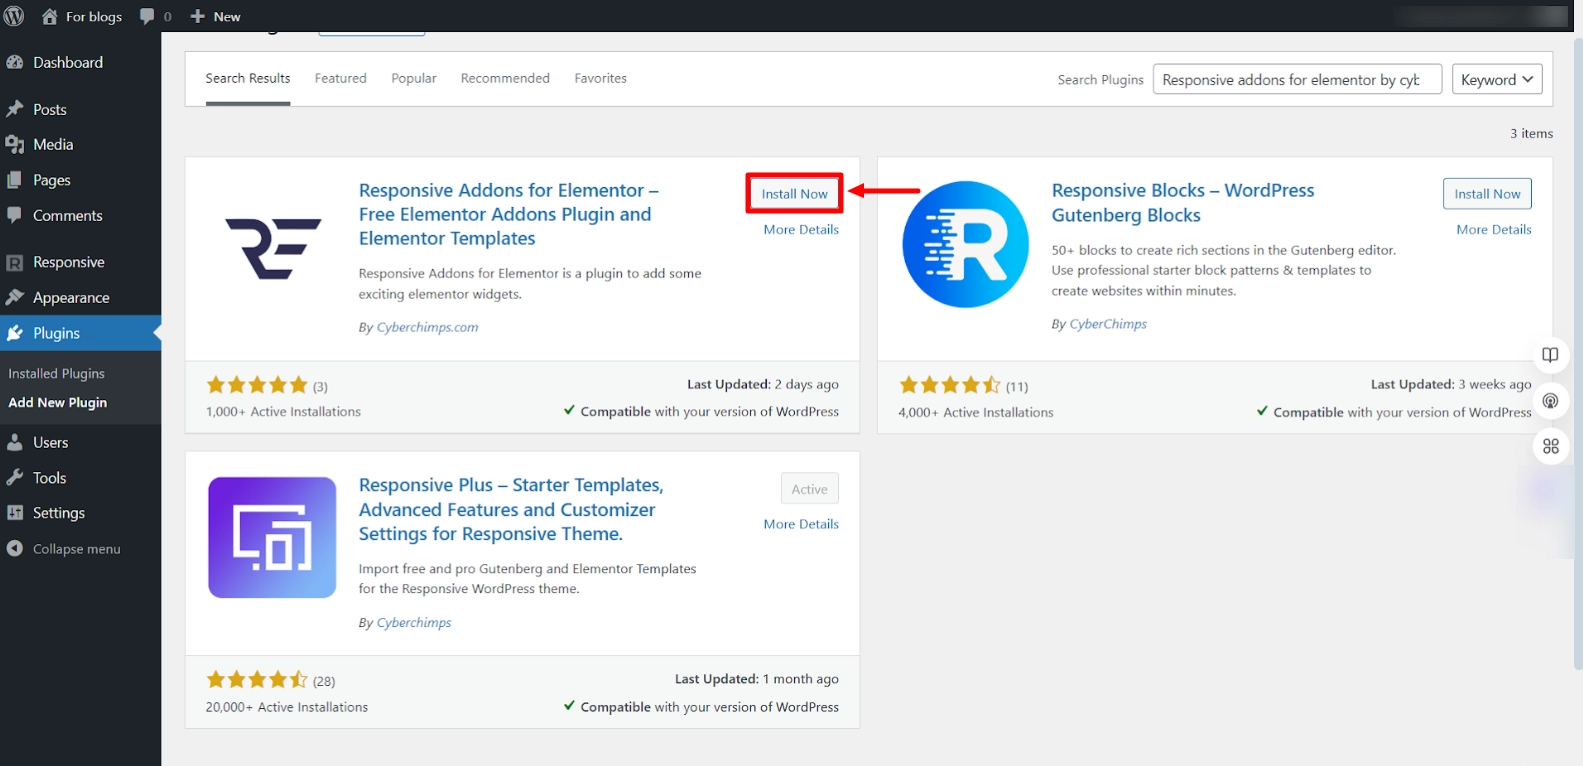
Go to your WordPress Admin dashboard and go to Plugins > Add New Plugin.
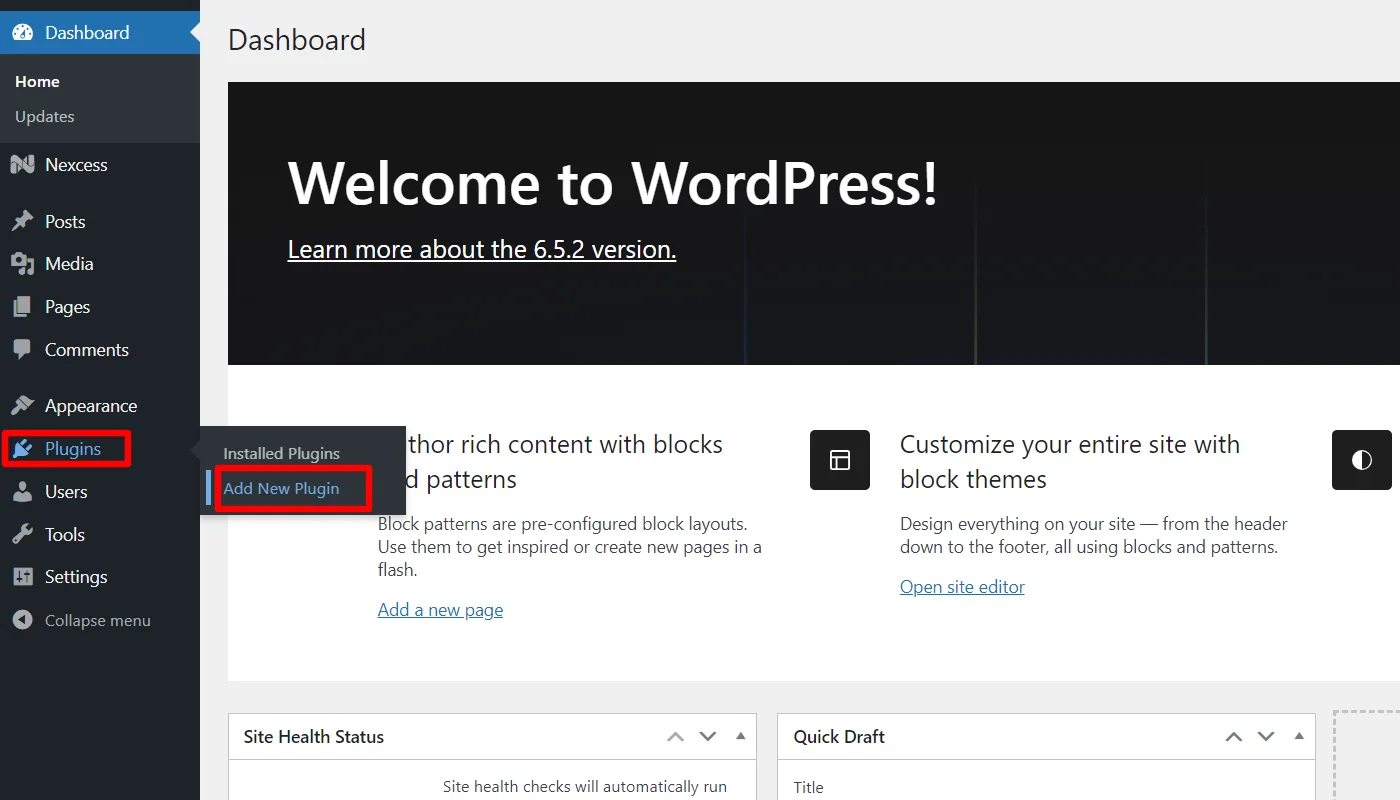
Go to the search bar above and search for Responsive Addons for Elementor and then click on Install now.
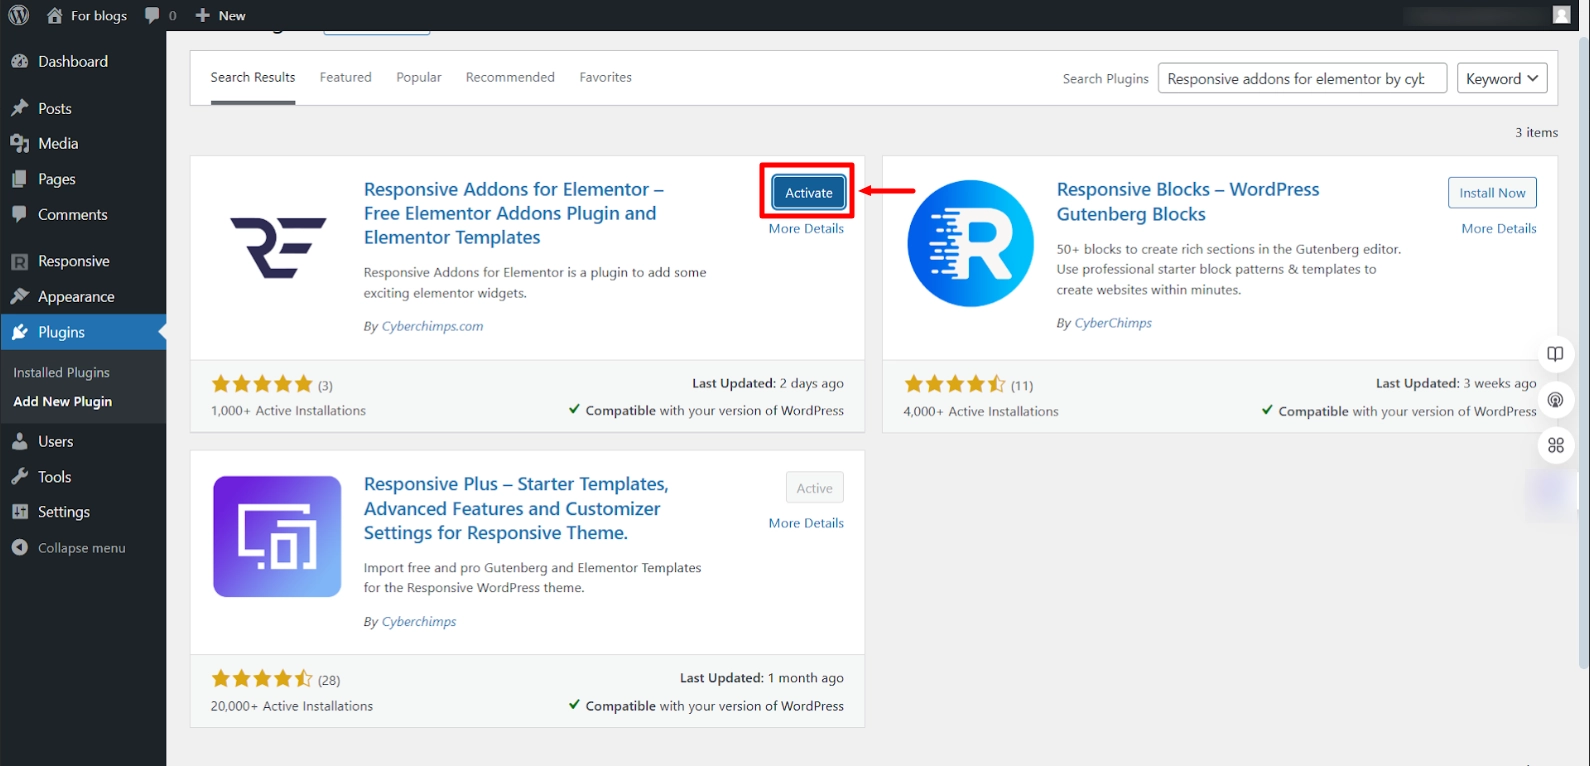
Click on the Activate button to activate the plugin.
You have now installed and activated the plugin. Now, let’s add the Elementor banner widget.
Step 2: Adding RAE Banner Widget
Open the page where you want to add the widget in the Elementor editor. For the tutorial, we will use a Digital Agency template by Cyberchimps.
Next, click on Edit with Elementor.

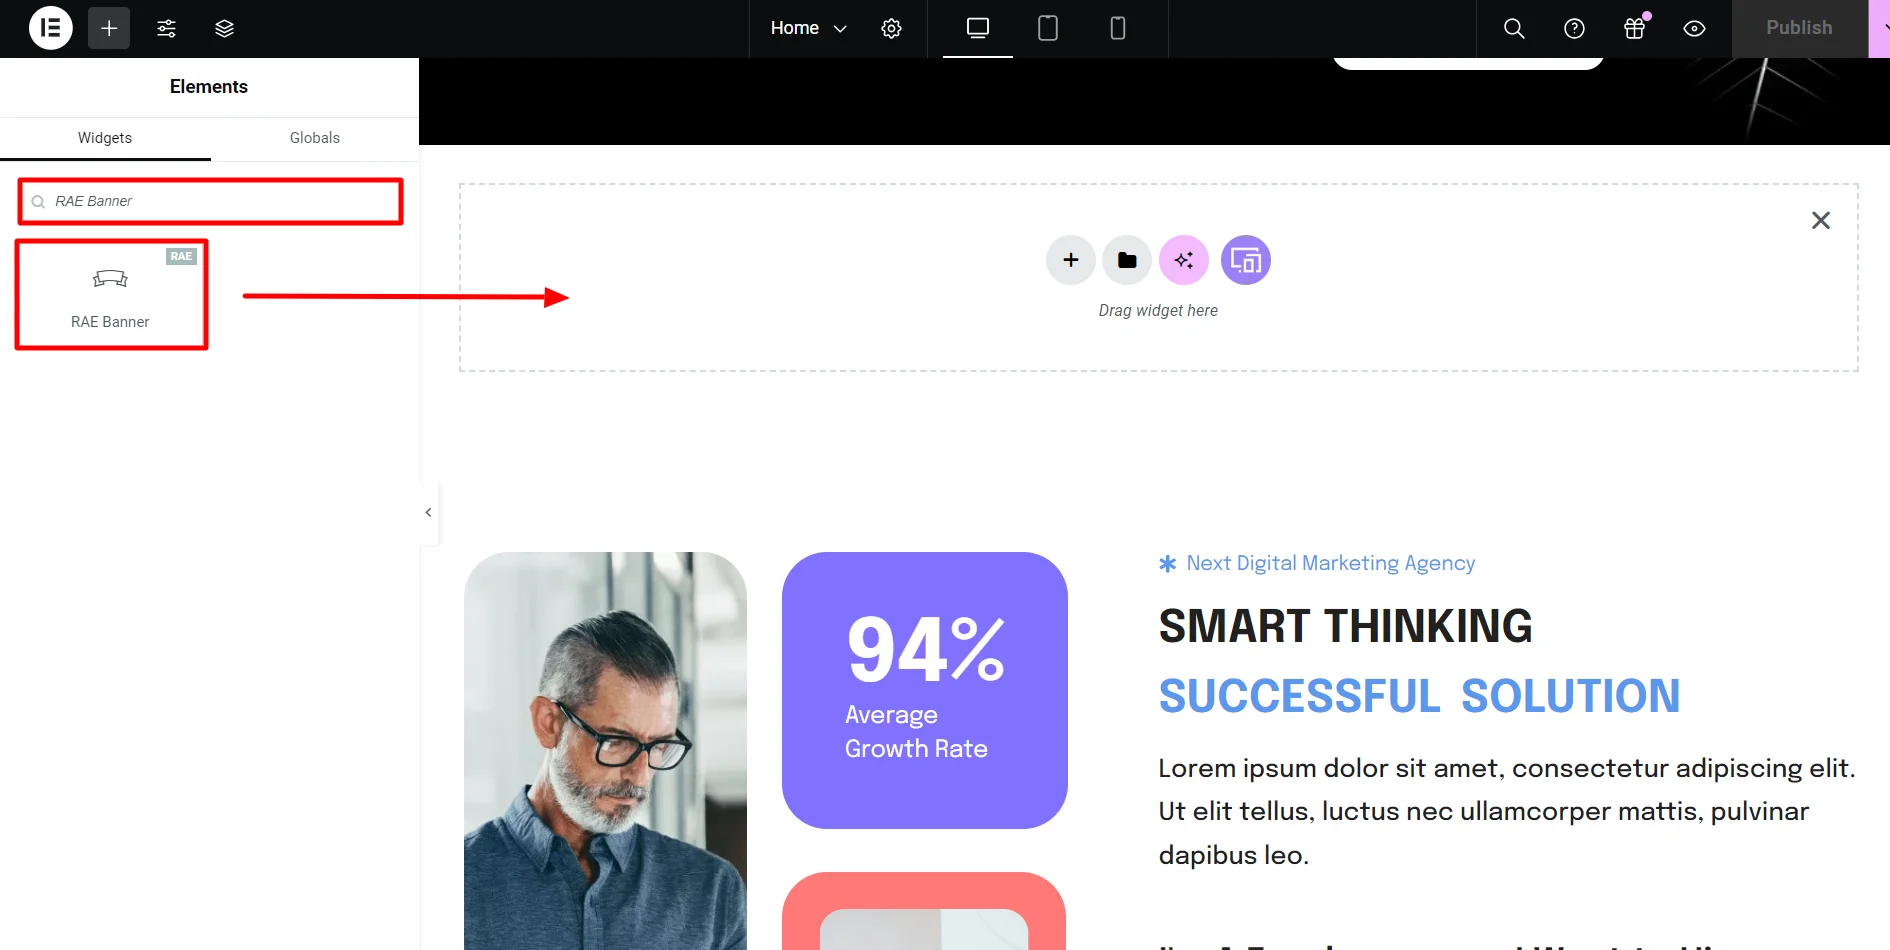
In the Elements section, search for RAE Banner.
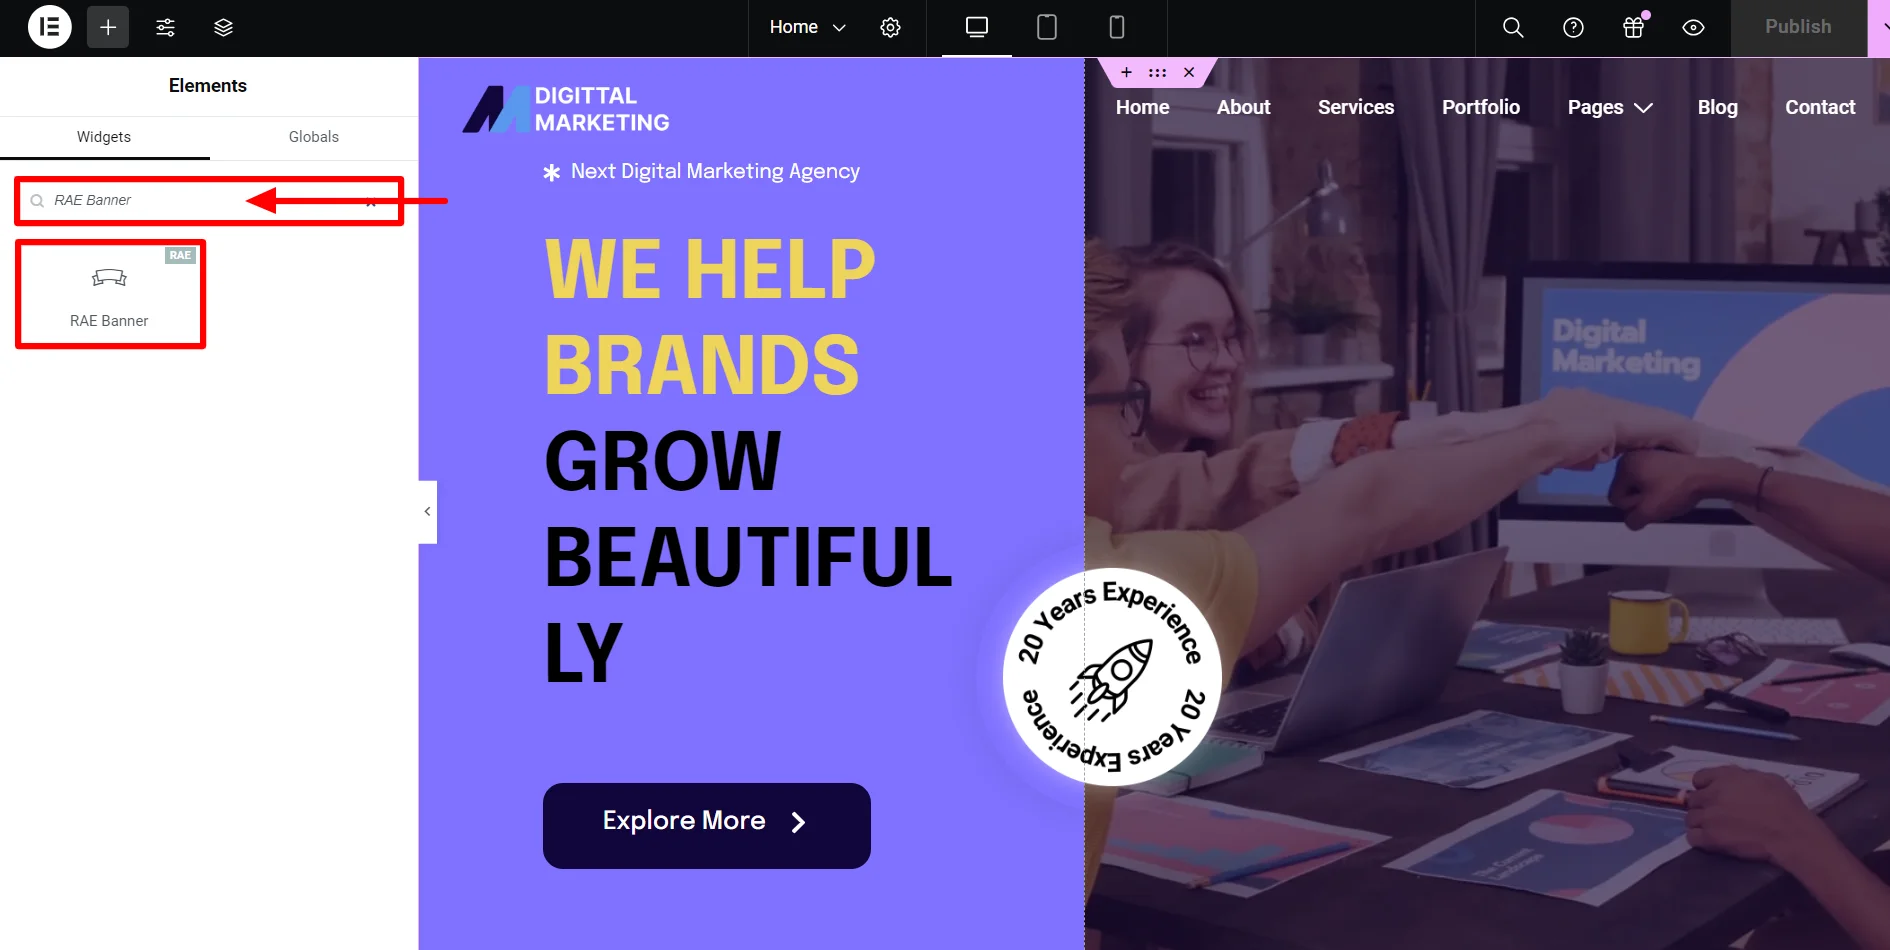
Insert the RAE Banner widget wherever you want on the page.
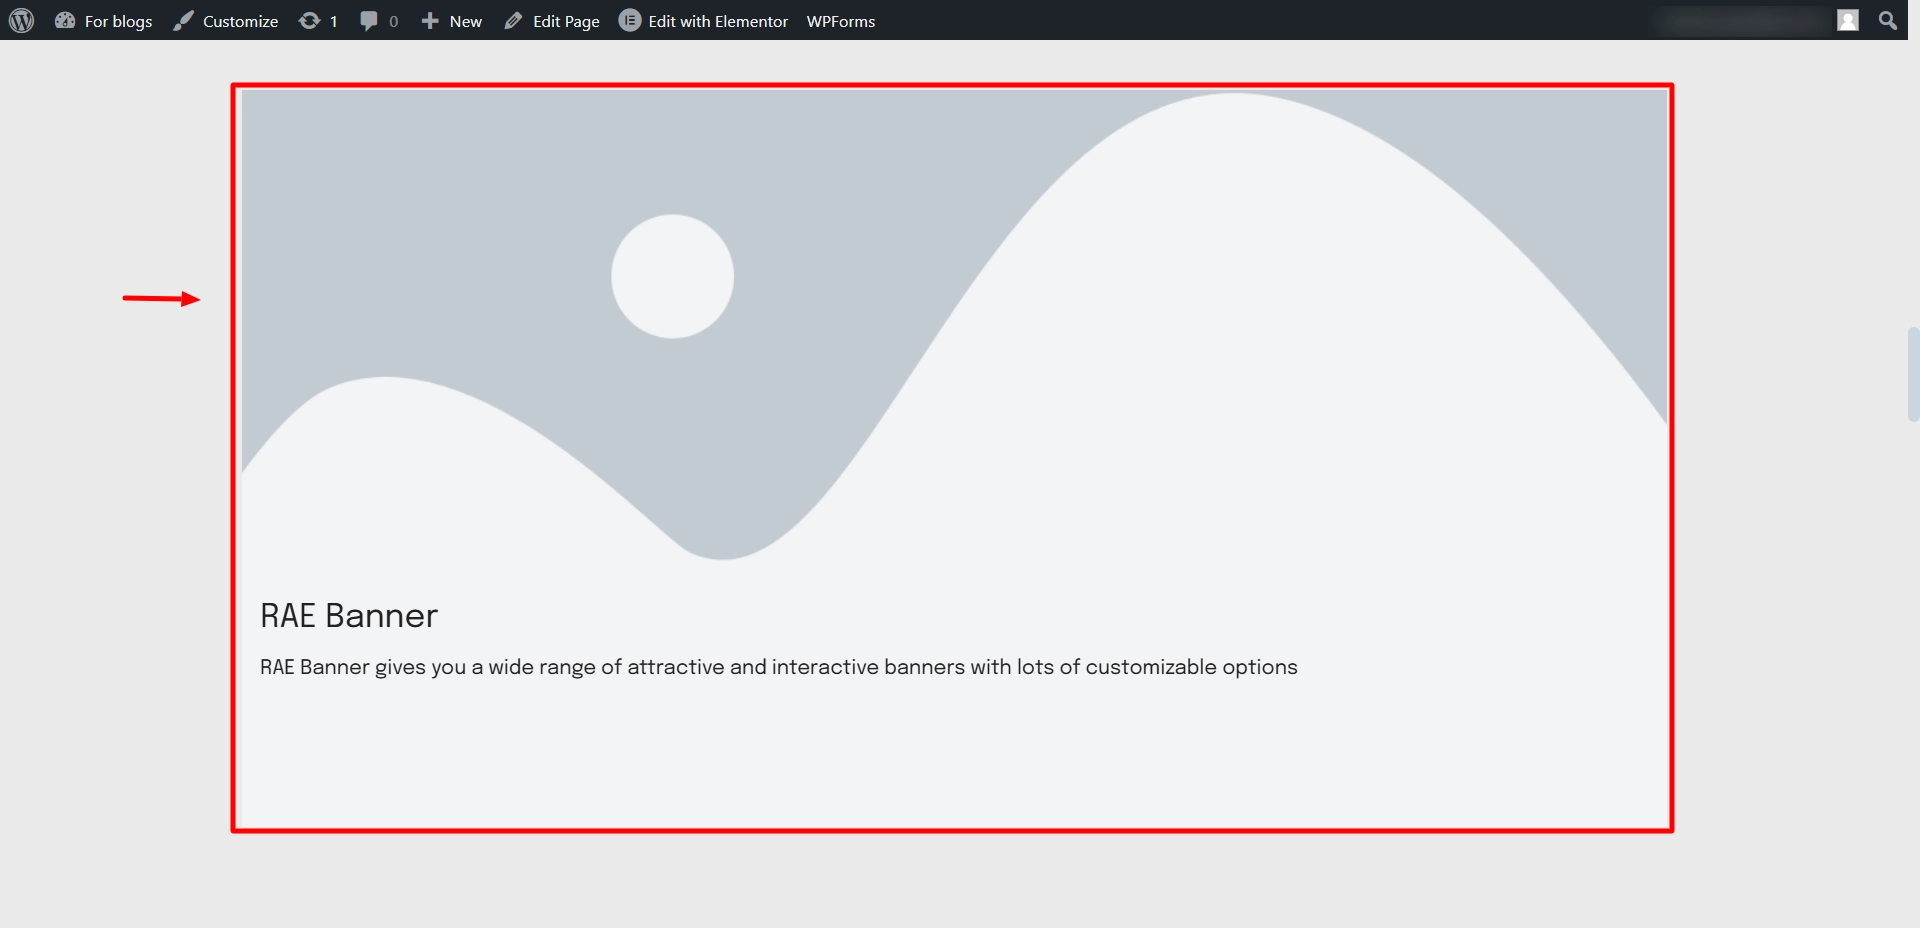
And this is how the RAE Banner widget will look like by default.
Step 3: Customising RAE Banner Widget
You have added the widget successfully. Let’s look at its customization options.
Content Settings
Let’s understand the content setting of RAE Banner widget.
Image
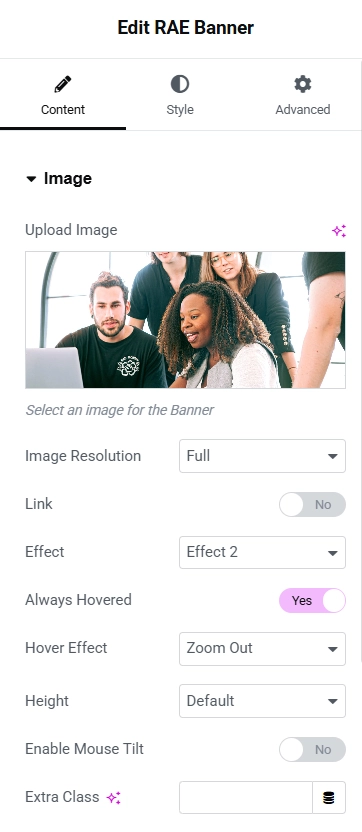
Image Settings
- Upload image: Upload the image you want in your banner in the blank section.
- Image Resolution: Select the resolution of your image from the dropdown menu.
- Link: You can give a link to the image by switching on the toggle.
- Effect: Change the effects of the image whenever a user hovers their cursor.
- Always Hovered: Turn on this option if you don’t want the hover effect.
- Hover effect: Add animations to the image while users hover their cursor using this option.
- Height: Adjust the height of the image.
- Enable Mouse Tilt: If you turn on this option, your image will have a tilting effect when hovered.
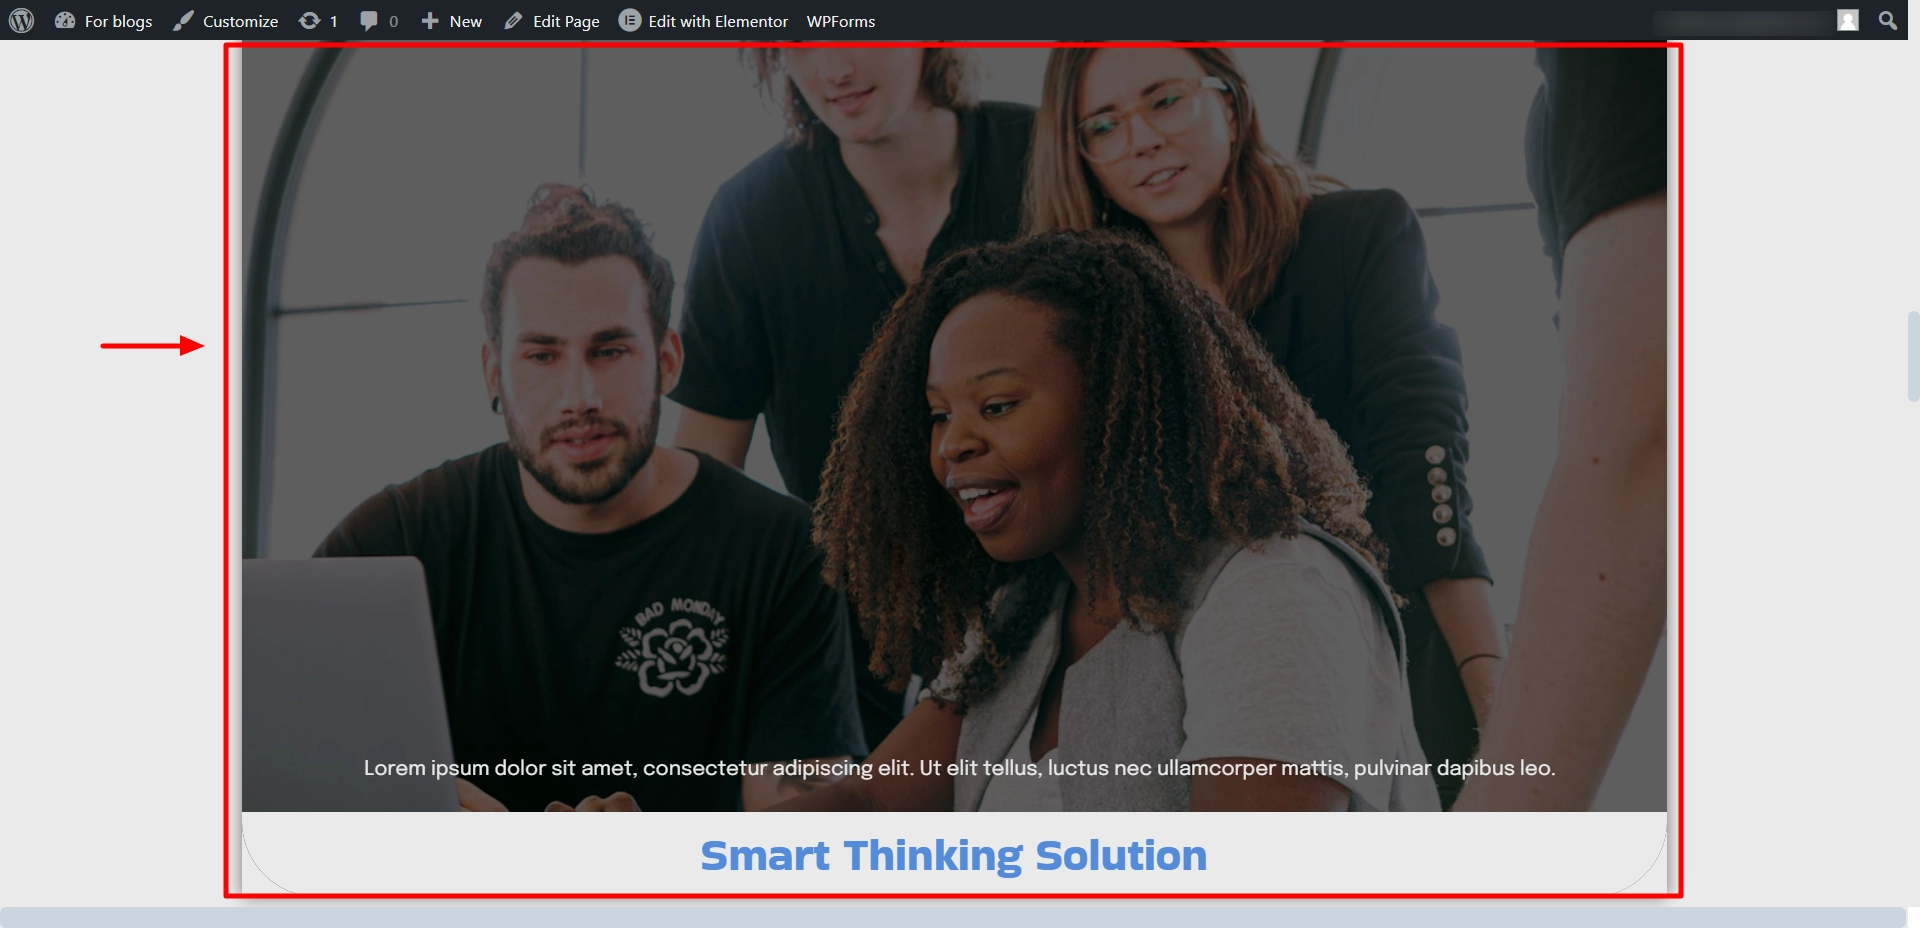
We’ve made specific adjustments to the Content Tab settings to enhance the visual appeal of our example digital marketing website.
We uploaded a beautiful photo from the media library to make the banner more engaging and visually captivating.
To ensure the best quality, we set the image resolution to Full, allowing it to look sharp and professional on all devices.
Out of the many hover effects available, we selected Effect 2, giving the banner a modern and dynamic touch when users interact.
To create an immersive experience, we chose the Zoom Out hover animation, which adds a subtle yet striking effect when the user hovers over the image.
Content
Content Settings
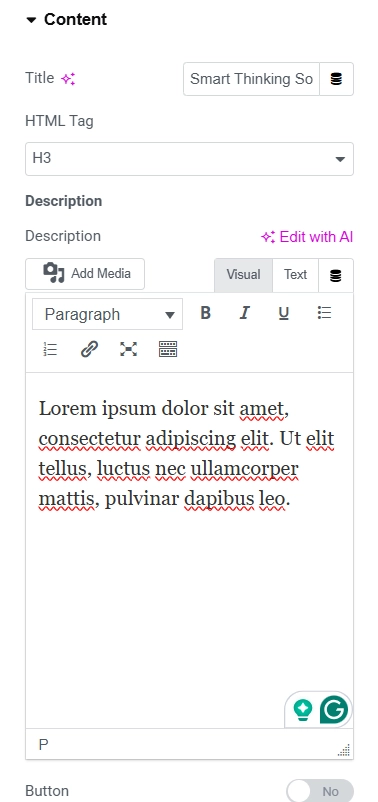
- Title: Give the title to your Banner here.
- HTML Tag: Select which H tag you want to use for the title of your banner.
- Description: Add the description for your banner here, and customize the content as you want.
- Button: If you want to add a CTA button, turn on this option and insert the link.
- Alignment: Select where you want your content to be: left, middle, or right.
We have implemented targeted modifications to the Content Tab of the Banner Widget by utilizing the Responsive Addons for Elementor plugin.
We’ve customized the banner title to “Smart Thinking Solutions,” making it clear, impactful, and aligned with our website’s theme.
To enhance the visual appeal and maintain a professional look, we’ve set the content alignment to the left, ensuring the text flows naturally with the overall design.
Responsive
Responsive Settings
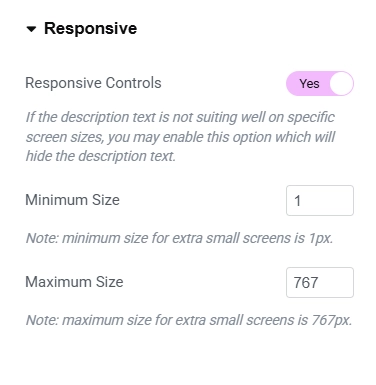
- Responsive Controls – This option will hide the description text if the description text does not suit specific screen sizes well.
Style Settings
Now, let’s style our widget for more visually appealing look.
General
General Settings
- Background Color: Add a background color to your banner if you want.
- Image Opacity: Adjust the image’s opacity; the lesser the opacity, the more transparent the image will be.
- Hover Opacity: Adjust the image’s opacity while the user hovers over it.
- CSS Settings: If you want additional customization, edit these settings.
- Border Type: Select the border type of the widget from the dropdown menu.
- Border Radius: Use the slider if you want rounded borders.
- Blend Mode: Add color filters to your image using this option.
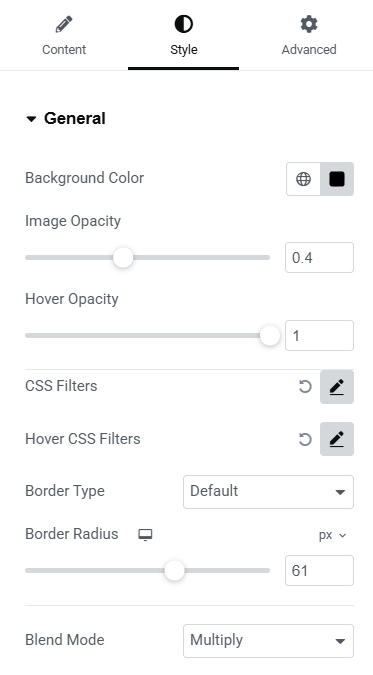
To design an attractive and modern banner for our sample website utilizing we have implemented the following adjustments.
The banner’s background color has been set to black (#000000). This choice ensures a bold and striking base that enhances the overall design of the banner.
To add a subtle overlay effect, the image opacity has been adjusted to 0.4. This creates a slightly transparent image that blends harmoniously with the background color.
When users hover over the banner, the image becomes fully visible with the hover opacity set to 1. This dynamic effect grabs attention and adds interactivity to the banner
The border-radius has been set to 61, giving the banner a smooth, rounded appearance. This softens the edges and adds a modern, polished touch to the design.
The blend mode has been set to Multiply to achieve a creative color effect. This filter adds depth to the image by blending it seamlessly with the background color
Title
Title Settings
- Color: Set the color of your title using this option.
- Typography: Customize everything about the font of the title using this setting.
- Shadow: If you need a shadow to your title, adjust the setting in the shadow option.
- Margin: Set the margins to the sides of the title.
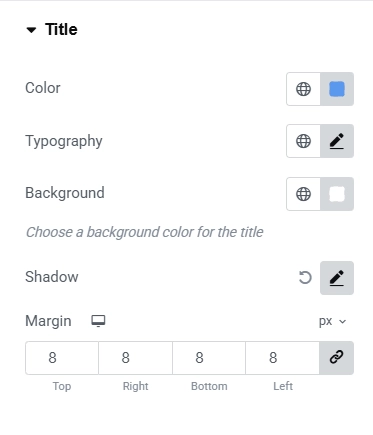
We adjusted specific settings in the Style Tab to ensure that the title matches our design aesthetics:
We chose a vibrant blue shade (#5FB9EE) for the title color. This gives the banner a clean and professional look, ensuring it stands out and grabs attention.
To enhance readability and add character to the title, we set the typography to Bakbak One and adjusted the font size to 37px. This creates a bold and stylish visual impact.
We fine-tuned the spacing around the title by setting the margins to 8px. This adds balance and ensures the title blends seamlessly within the design.
Description
Description Settings
- Color: Set the color of your description using this option.
- Typography: Customize the font of the description using this setting.
- Shadow: You can add shadow to your description using this setting.
- Margin: Set the margins to the sides of the description.
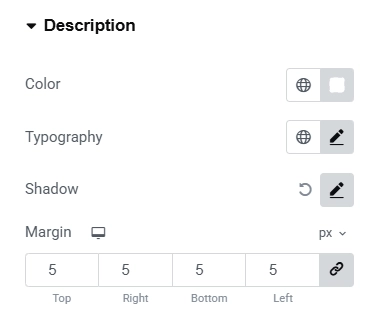
We have made some significant updates to the Description section.
We’ve set the description color to white, ensuring the text stands out beautifully against the banner’s background for a clean and modern look.
The margin has been adjusted to 5, providing balanced spacing around the description and enhancing the overall alignment and layout.
Container
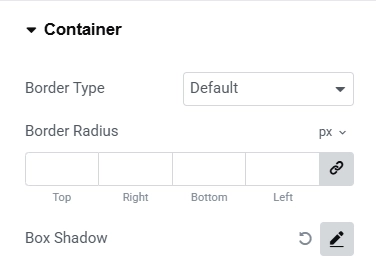
Container Settings
- Border Type: From the dropdown menu, select the type of border you want for your banner.
- Border Radius: Make your border rounded by adding the required amount.
- Box Shadow: Add a shadow to your banner to using this option.
That’s it; your free elementor banner widget is live on the page.
FAQ
You can add a Banner to your Elementor Website by installing the Responsive Addons for the Elementor website. Add the RAE Banner widget when editing the page.
The Elementor Banner widget is a tool in the Elementor builder that helps you add banners to your webpage. Banners are a great way to grab viewers’ attention as they occupy huge space.
Yes, the Responsive Addons for Elementor plugin is free and offers 85 widgets. You can use all these widgets for free, including the banner widget.
Conclusion
Adding a banner to your website shouldn’t have to be a difficult task. With Responsive Addons for Elementor, you can easily add a free Elementor banner widget and create eye-catching banners.
It is the most effective way to announce, share important information, or promote sales. Following the above simple steps, you can include a banner on your webpage for free.
If you like reading this article, check out our other guides.
- What is a Featured Image in WordPress, and How to Add One
- How to Add Google Maps To Your Elementor Website
- How To Add Lottie Animations In WordPress
Install the Responsive Addons for Elementor and get access to over 80 plugins.


