Are you looking to add Google Maps to your Elementor website?
Integrating Google Maps into your website allows your visitors to locate your business or events easily and makes your website more interactive and engaging.
An easy way to add and customize Google Maps on your website without coding, is by using a Google Maps widget.
Here, in this article, we’ll look at how we can add google maps to Elementor website.
Let’s dive right in!
What is Elementor Google Maps Widget?
The Google Maps widget is a powerful Elementor widget that allows you to embed interactive maps directly into your website. It provides a user-friendly interface for your visitors to explore your location, get directions, and even view nearby landmarks or attractions.
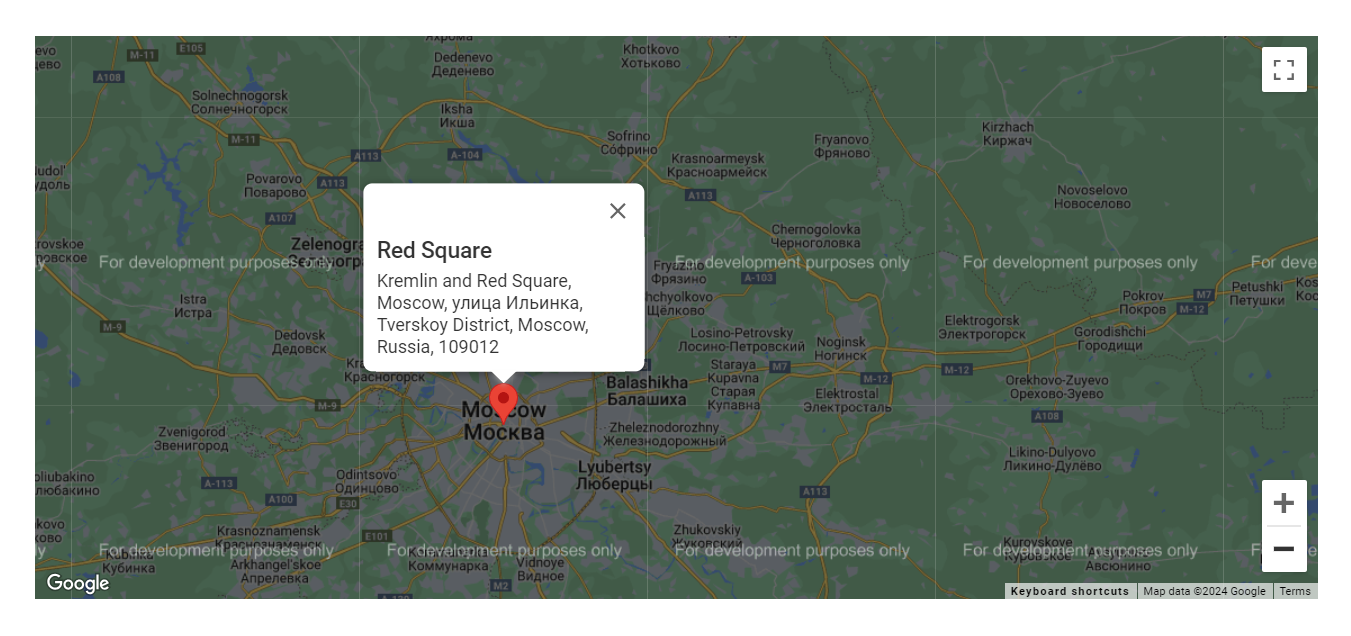
Using the Google Maps widget, you can enhance the overall user experience and make it easier for your audience to find and engage with your business. Furthermore, it also offers customization options, enabling you to enhance the map’s appearance and functionality to seamlessly fit the design and branding of your website.
Pre-requisites To Add Google Maps To Your Elementor Website
Before we dive into the process of integrating Google Maps into your Elementor website, you’ll need a few tools to add Google Maps to your website.
Firstly, you’ll need to have a Google Maps API key, which allows your website to communicate with the Google Maps platform. Additionally, you’ll need to have the Elementor page builder plugin installed and activated on your WordPress website.
And lastly, you’ll be needing a plugin that offers the Google Maps widget. We recommend using the Responsive Addons for Elementor.
Responsive Addons for Elementor is a free, powerful and easy-to-use WordPress plugin that enhances Elementor’s functionality. It offers over 80 interactive and functional widgets that can be used alongside Elementor’s built-in widgets.
To learn more, read Responisve Addons for Elementor Review.
Let us now delve into how to add the Elementor Google Maps widget offered by Responsive Addons for Elementor.
How to Add Google Map to Your Elementor Website
Follow the steps to easily add an interactive Google Maps to your Elementor website
Step 1: Install and Activate Responsive Addons for Elementor
Navigate through your WordPress Admin dashboard and go to Plugins > Add New Plugin.

Go to search bar and search for responsive addons for elementor.
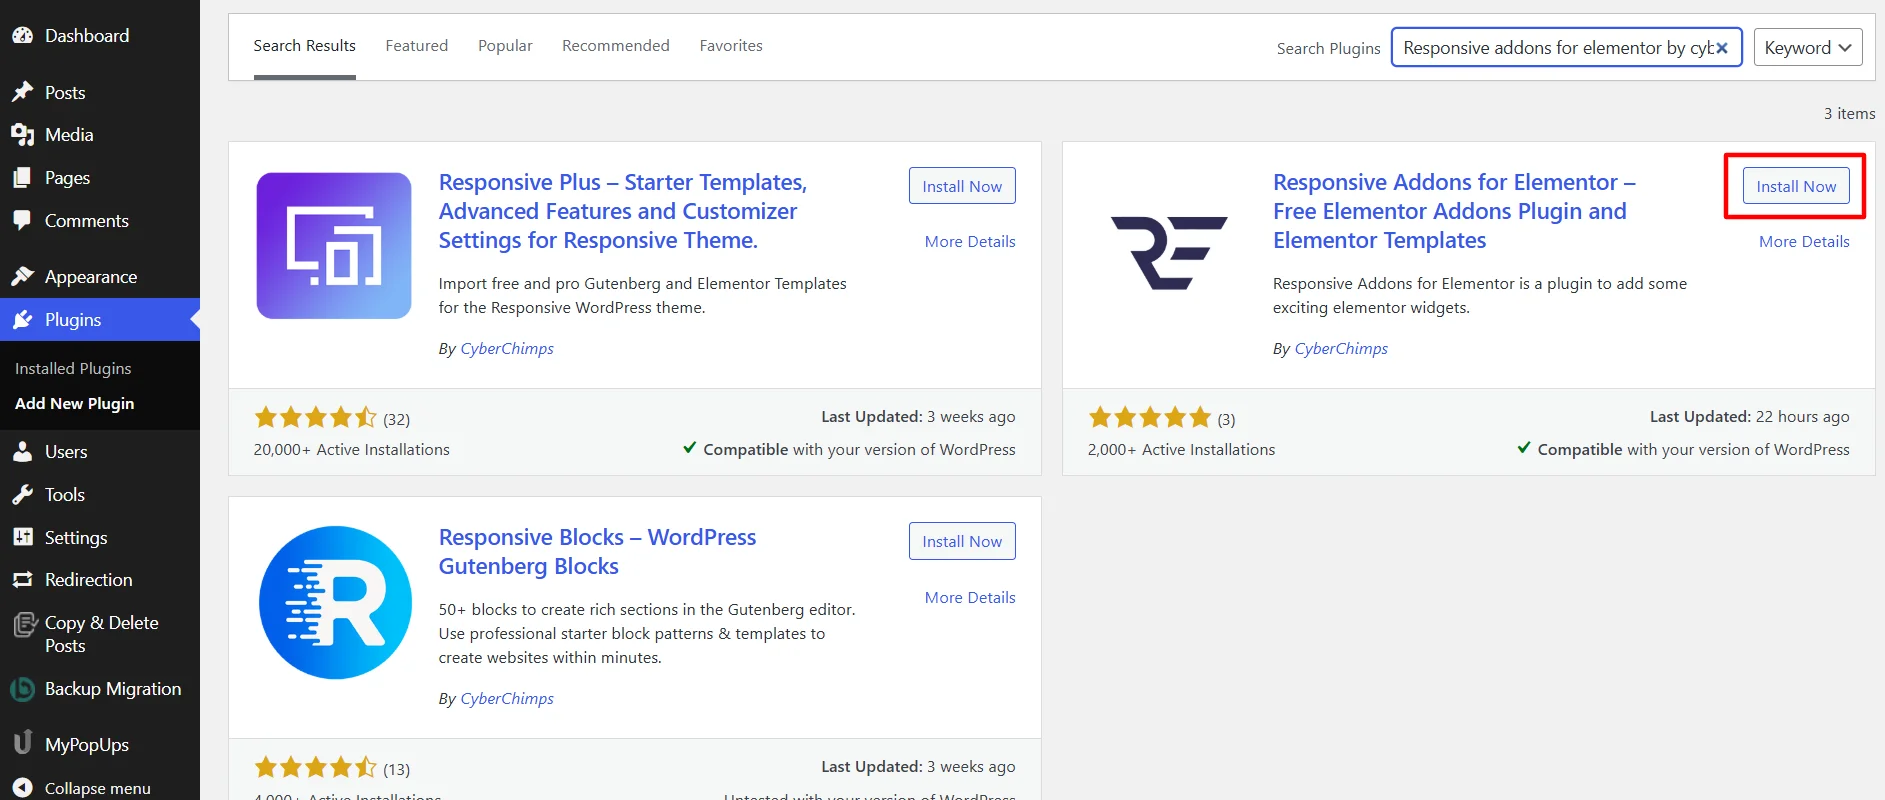
Next, click on the Install Now button.
Click on the Activate button to activate the plugin.

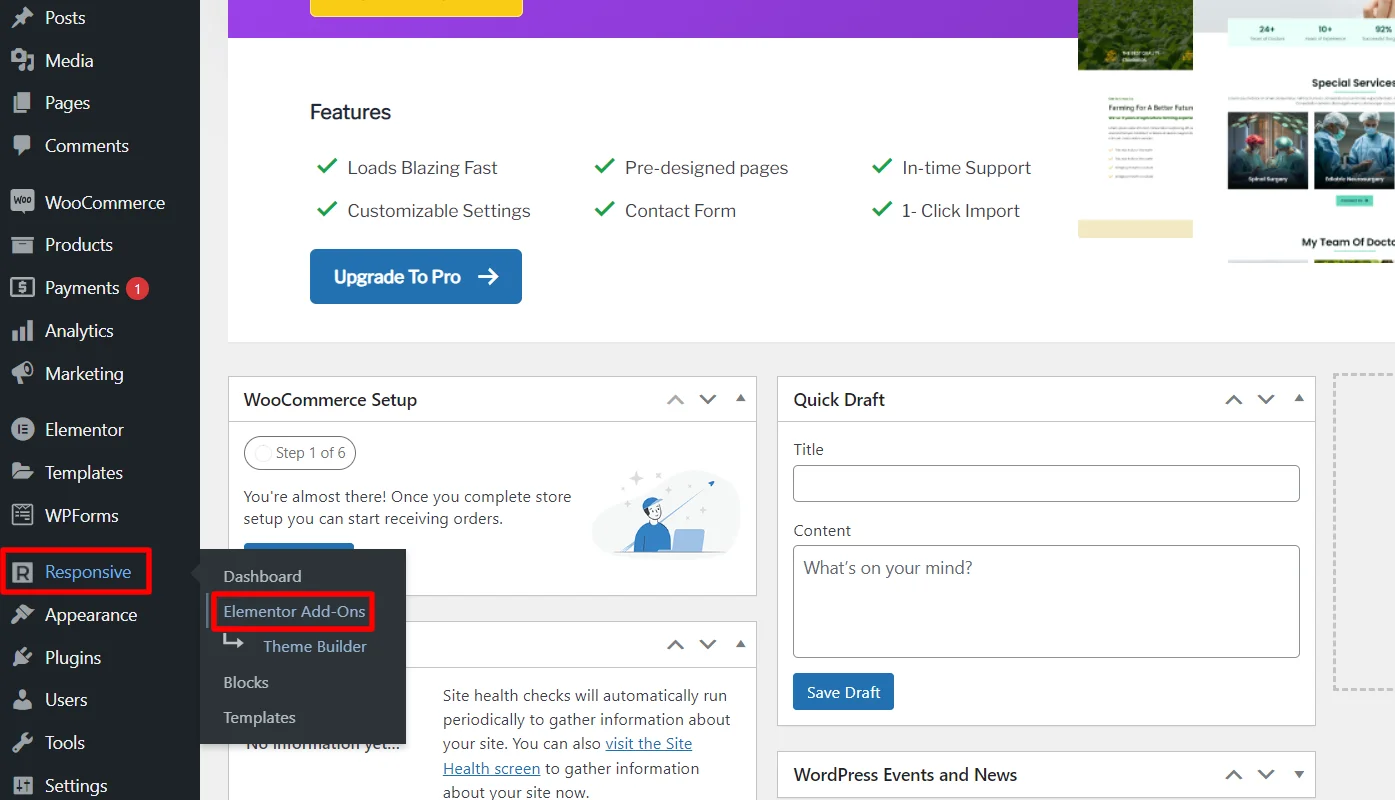
Step 3: Configure the Google Map API
To configure the Google Map API for the widget, follow these simple steps:
Navigate to the WordPress Admin Dashboard, and click on Resposive > Elementor Addons.
Click the RAE Settings tab.
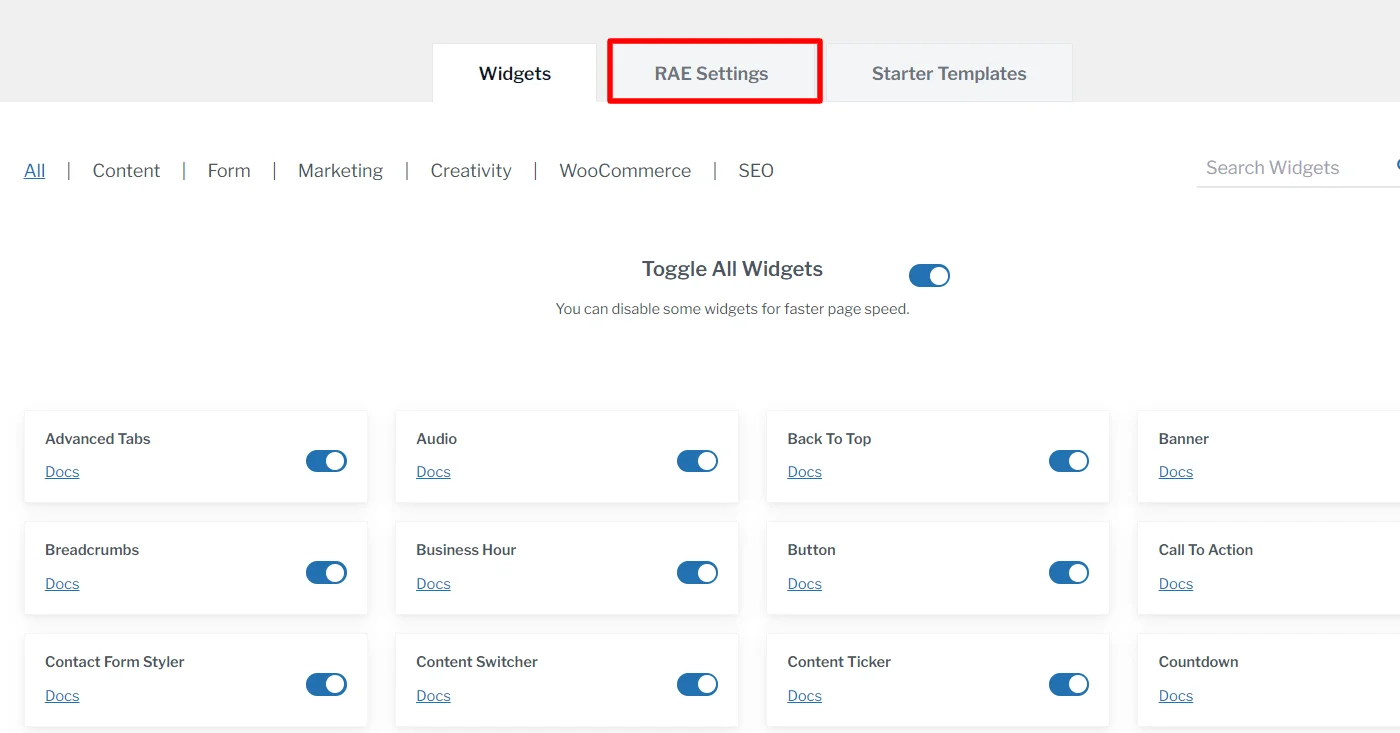
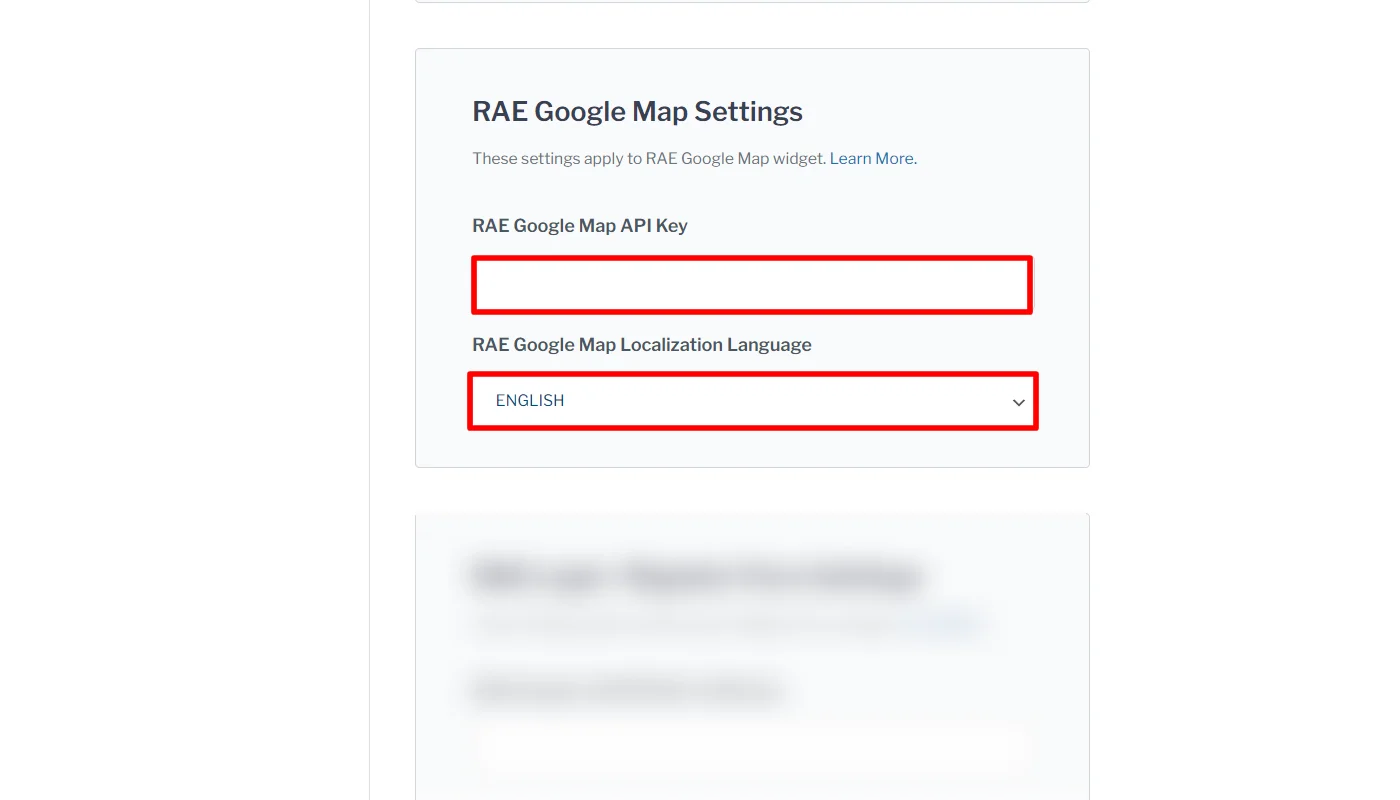
Next, scroll down and find RAE Google Map Settings. Fill in the required details, such as the RAE Google Map API Key and RAE Google Map Localization Language, and save the changes.
[Refer to this to learn how to get Google Maps API Key.]
Step 3: Adding Elementor Google Map Widget to Elementor Site
Once you have added the widget API and activated the plugin, open the page where you want to add Google Maps.
[For the purpose of this article, we will be using the Fast Food Restaurant WordPress Website Template. For more templates, check out the 150+ Elementor templates offered by Responsive Addons plugin]

Once you’ve selected the page, click on Edit with Elementor.

Search for Google Map in the widget search bar.
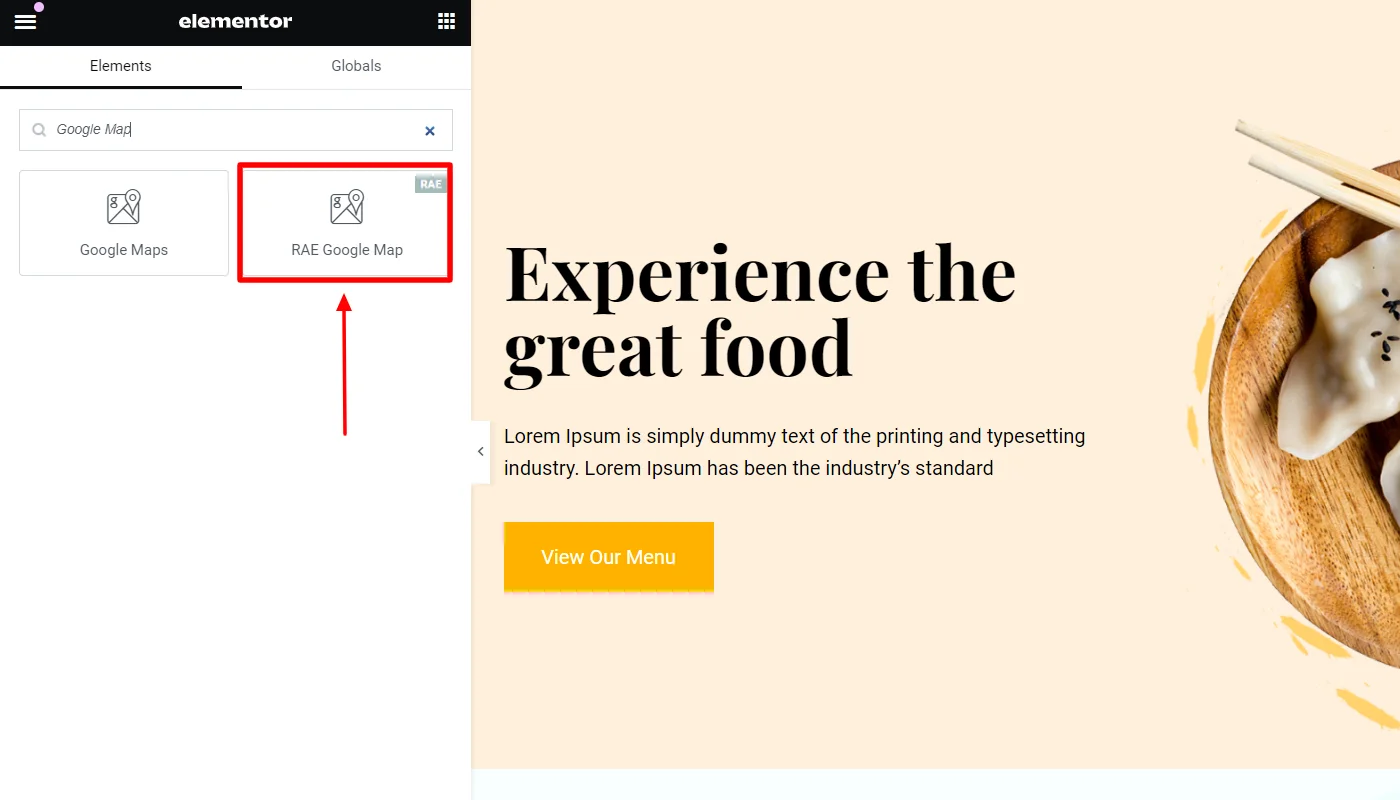
Next, drag and drop the RAE Google Map widget.

Once you’ve added the widget, you can customize it using the following step.
Step 4: Customizing the Google Map in WordPress
The Google Map widget enables you to customize the widget as per your needs. Here are the various customization options:
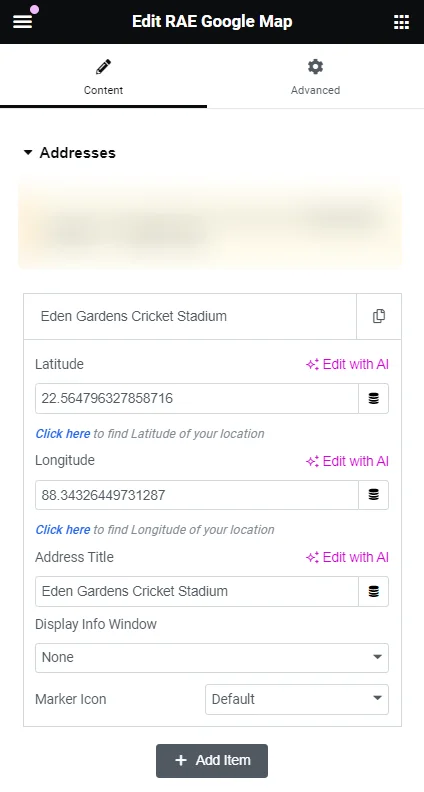
Addresses
Add the address location to be displayed with a marker on the map. To find the latitude and longitude of any place click here.
Each address location has the following fields:
- Latitude – Allows the user to add the latitude of the location.
- Longitude – Allows the user to add the longitude of the location.
- Address Title – Allows the user to add the address title for the location.
- Display Info Window – Allows the user to select on what action should the Info Window for the location be displayed.
Marker Icon – Allows the user to select what type of marker should be displayed with the location.
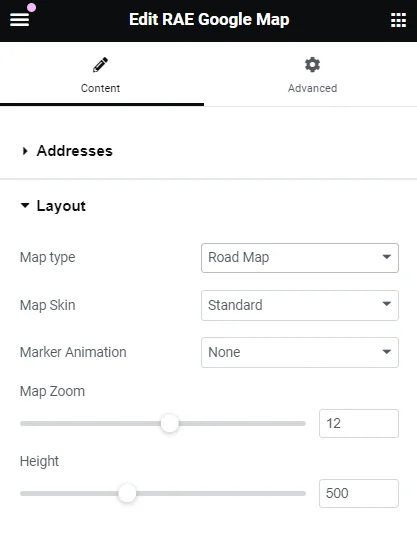
Layout
The Google Map Widget allows the following layout customizations:
- Map Type – Allows the user to select the type of map to be displayed. Available options are Road Map, Satellite, Hybrid, and Terrain.
- Map Skin – Allows the user to select the theme/skin for the map. Available options are Standard, Silver, Retro, Dark, Night, Aubergine, Aqua, Classic Blue, Earth, Magnesium, and Custom. This setting is not available when the Map Type is set to Satellite.
- Custom Style – Allows the user to add the JSON for custom style.
- Marker Animation – Allows the user to select the type of action on which the marker animation should occur. Available options are None, On-Page Load, and Continuous.
- Map Zoom – Allows the user to set the map zoom value.
Height – Allows the user to set the height of the map.
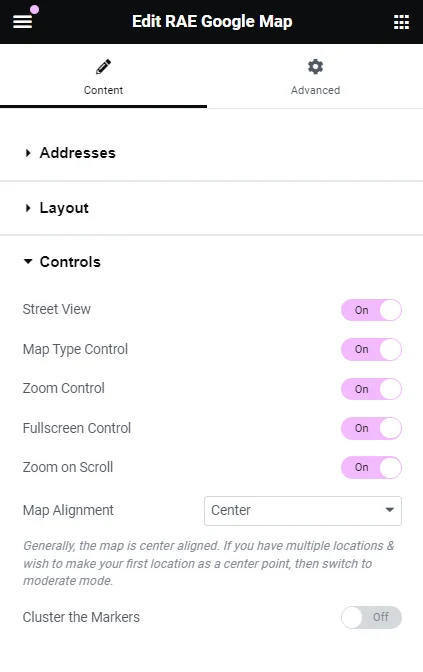
Control
You can also change the following settings of the Google Map widget:
- Street View – Allows the user to add/remove the street view control button of the Map.
- Map Type Control – Allows the user to add/remove the map type control button of the Map.
- Zoom Control – Allows the user to add/remove the zoom control button of the Map.
- Fullscreen Control – Allows the user to add/remove the fullscreen control button of the Map.
- Zoom on Scroll – Allows the user to add/remove the zoom on scroll feature of the Map.
- Map Alignment – Allows the user to select an option for map alignment.
Cluster Markers – Allows the user to choose whether the markers should be clustered or not.
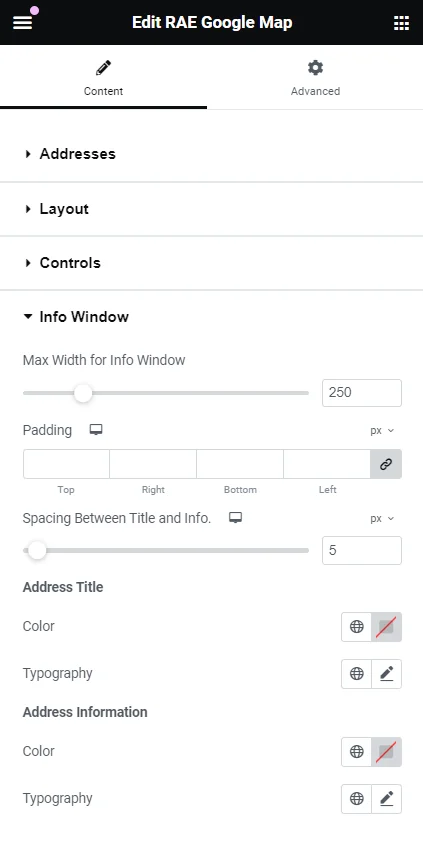
Info Window
Further, the look and feel of the map widget can also be controlled to set:
- Max Width for Info Window – Allows the user to set the maximum width for the Info Window.
- Padding – This is a responsive control that allows the user to set the padding for the Info Window.
- Spacing between Title and Info. – This is a responsive control that allows the user to set the spacing between the Info Window Title and Description. Address Title
- Color – Allows the user to choose the text color for the Info Window Title.
- Typography – Allows the user to set the typography options for the Info Window Title. Address Information
- Color – Allows the user to choose the text color for the Info Window Information.
Typography – Allows the user to set the typography options for the Info Window Information.
FAQ
You can easily add the Google Maps to your Elementor website by using a popular plugin like Responsive Addons for Elementor.
The Google Maps widget is an Elementor tool that allows you to add interactive maps directly to your website. It provides a user-friendly interface for your visitors to explore your location, get directions, and even view nearby landmarks or attractions.
Responsive Addons for Elementor is a plugin that lets you add Google Maps to your website for free. Additionally, it offers 80+ free widgets to enhance your website building functionalities.
Conclusion
Overall, the Elementor Google Maps Widget is one of the most effective features to boost your website’s functionality and appeal.
With the Responsive Addons for Elementor plugin, adding Google Maps to your website has never been easier. Just drag and drop the widget to the Elementor editor and customize it the way you want.
If you’ve liked reading this article, do check out our other similar articles:
- How to Add Testimonial Slider To Your Elementor Website
- How to Create an Image Gallery in WordPress
- How to Create A Data Table in WordPress With Elementor
Want to add Google Maps to your website, grab the Responsive Addons for Elementor now! Additionally, you can enhance your website’s functionality bu using the Responsive theme by Cyberchimps.