
Are you looking to add a menu cart to your eCommerce website?
This article will help you out!
A menu cart is a shopping cart feature integrated directly into an eCommerce website’s navigation menu. It allows website visitors to view and manage the items in their cart without leaving the current page, providing a convenient and streamlined shopping experience.
While there are various ways to add the feature to your website, one of the easiest is to use the Elementor Menu Cart widget.
This article will cover all the technical aspects of adding an Elementor menu cart widget to your website.
So, let’s get started without further ado.
What is A Menu Cart Widget?
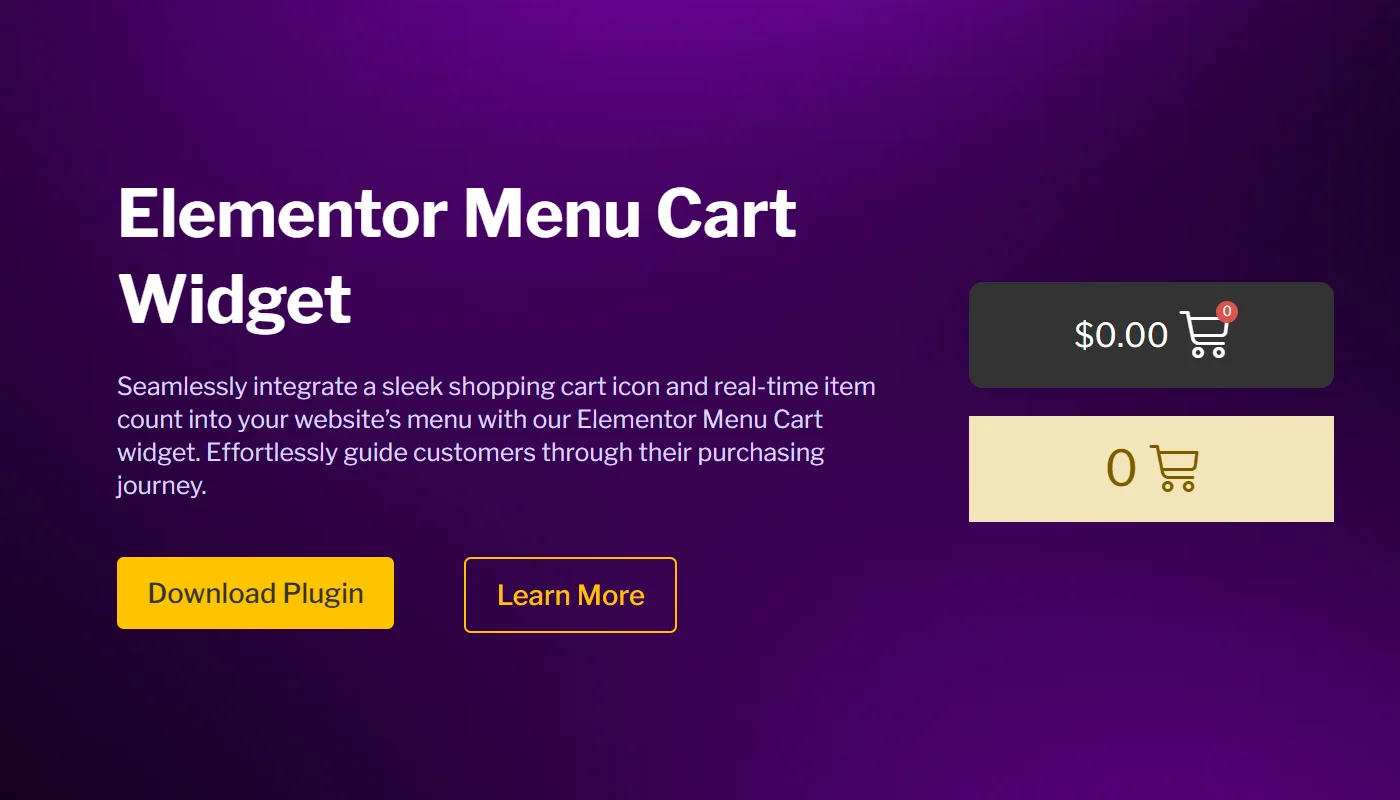
A menu cart widget is a feature on an e-commerce website that allows customers to easily view and manage the items they have added to their shopping cart.
This widget is typically displayed on the website’s navigation menu or header, making it quick and convenient for customers to access their cart without navigating to a separate page.
Importance of Adding A Menu Cart Widget
Adding a menu cart widget to your website can improve your customers’ overall user experience. It helps them keep track of the items they want to purchase and complete their checkout process more efficiently.
Additionally, the feature helps reduce the chances of customers abandoning their cart, leading to more completed sales and increased revenue for your business.
Furthermore, the menu cart widget also makes the shopping cart more visible to customers, which can serve as a helpful reminder to finish their purchase.
Pre-requisites Required to Add Free Menu Cart Widget To Elementor
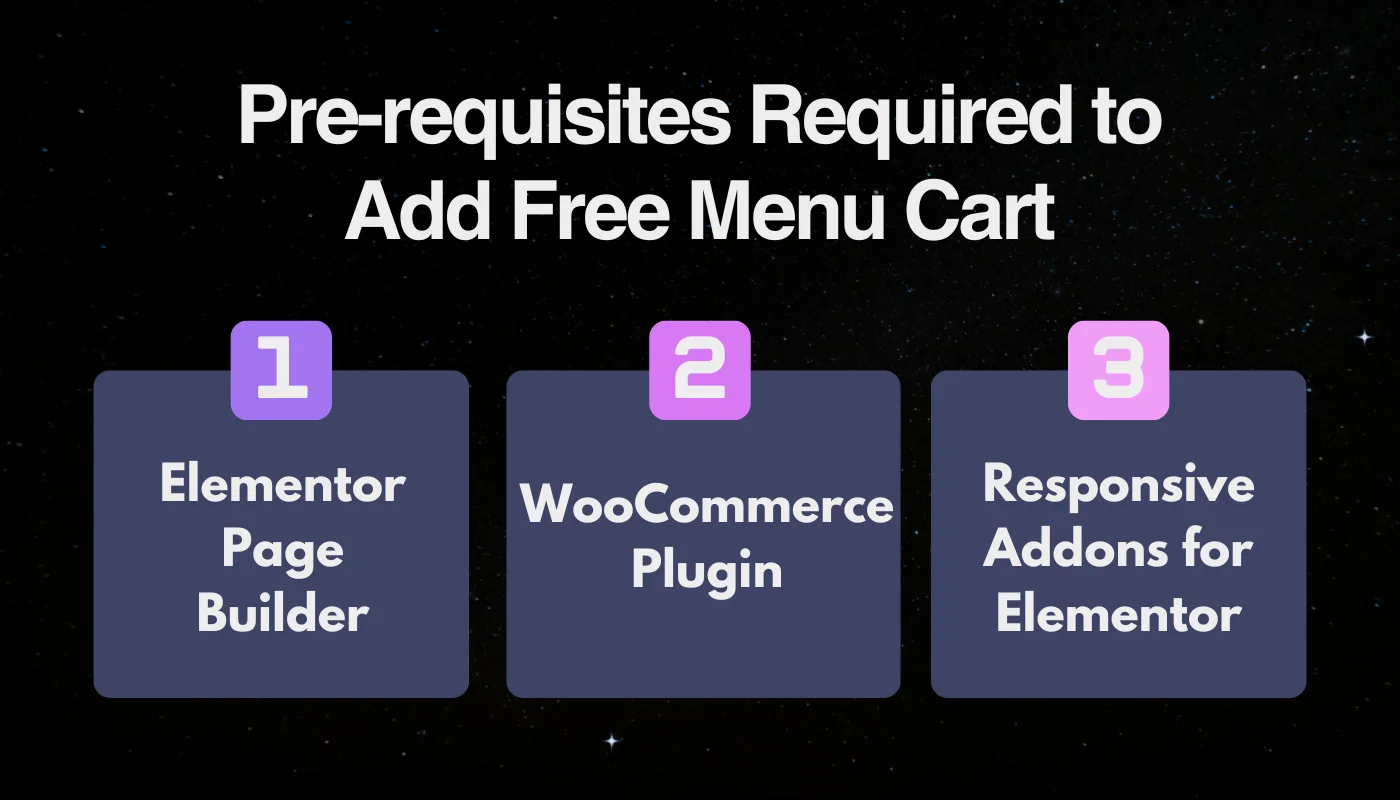
Before adding a free menu cart widget to your Elementor-powered website, you must have a few things in place.

First, you must install and activate the Elementor plugin on your WordPress website. It is a popular page builder tool that allows you to create custom page designs and layouts for your site.

Additionally, you’ll need to have the WooCommerce plugin installed and configured on your WordPress site. WooCommerce is the leading e-commerce plugin for WordPress, and it provides the necessary functionality for setting up an online store, which is essential for the menu cart widget to work correctly.
Once you have both plugins, you need a free menu cart widget. There are various ways to add the widget to your website. You can either write and integrate a code into your Elementor site or use the menu cart widget Elementor offers from its widget library.
However, these methods are either too technical or offer fundamental functionality. Using a third-party plugin that offers free advanced menu cart widgets can make adding the Elementor menu cart to your website easier and free to use a third-party Elementor Addons plugin.

Responsive Addons for Elementor is a free and easy-to-use Elementor add-ons plugin that expands the functionality of the Elementor page builder. It offers over 80 powerful widgets, including various advanced and theme builder widgets that let you easily create an interactive and feature-rich website.
To learn more, you can further read Responsive Addons for Elementor review.
How to Add Menu Cart To Your Elementor Site
Now, let’s understand how to use the Responsive Addons for Elementor plugin to add the widget.
To add an Elementor Menu Cart widget to your WordPress website, follow these steps:
[Note: To use the Elementor testimonial slider widget, you must have a website template built with the Elementor page builder].
Cyberchimps offers 150+ WordPress Website templates that you might consider using to build your website instantly.
Step 1: Install and Activate Responsive Addons for Elementor
Navigate through your WordPress Admin dashboard and go to Plugins > Add New Plugin.

Go to the search bar above and search for responsive addons for elementor.
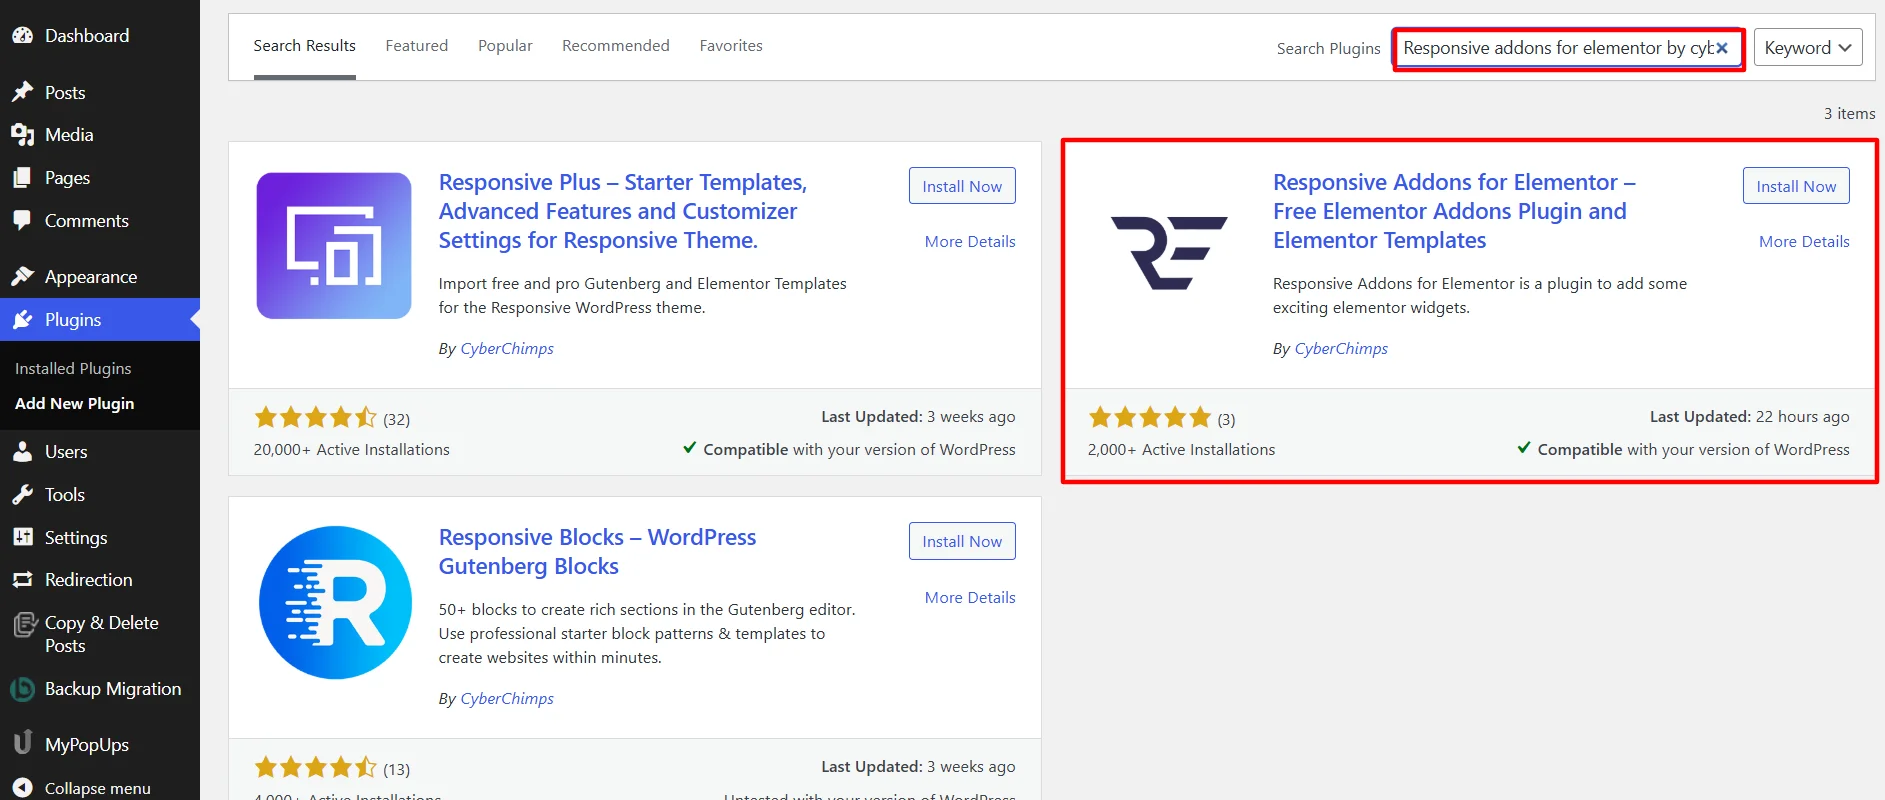
Next, click Install Now to download the Responsive Addons for Elementor plugin.
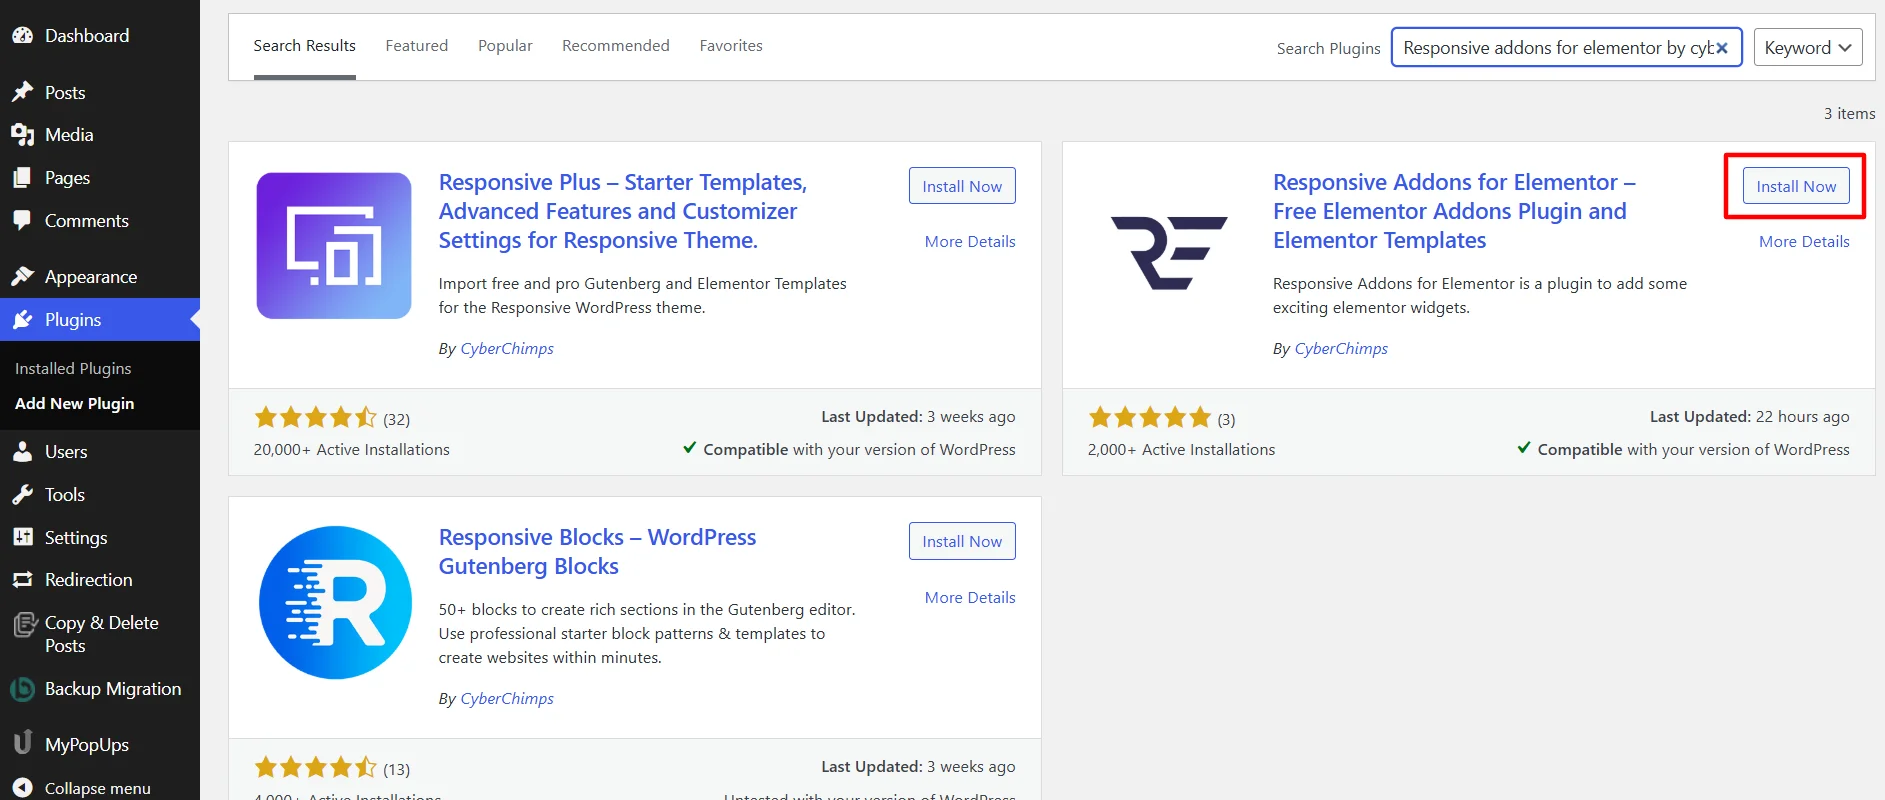
Click on the Activate button to activate the plugin.

Step 2: Adding The Menu Cart Widget
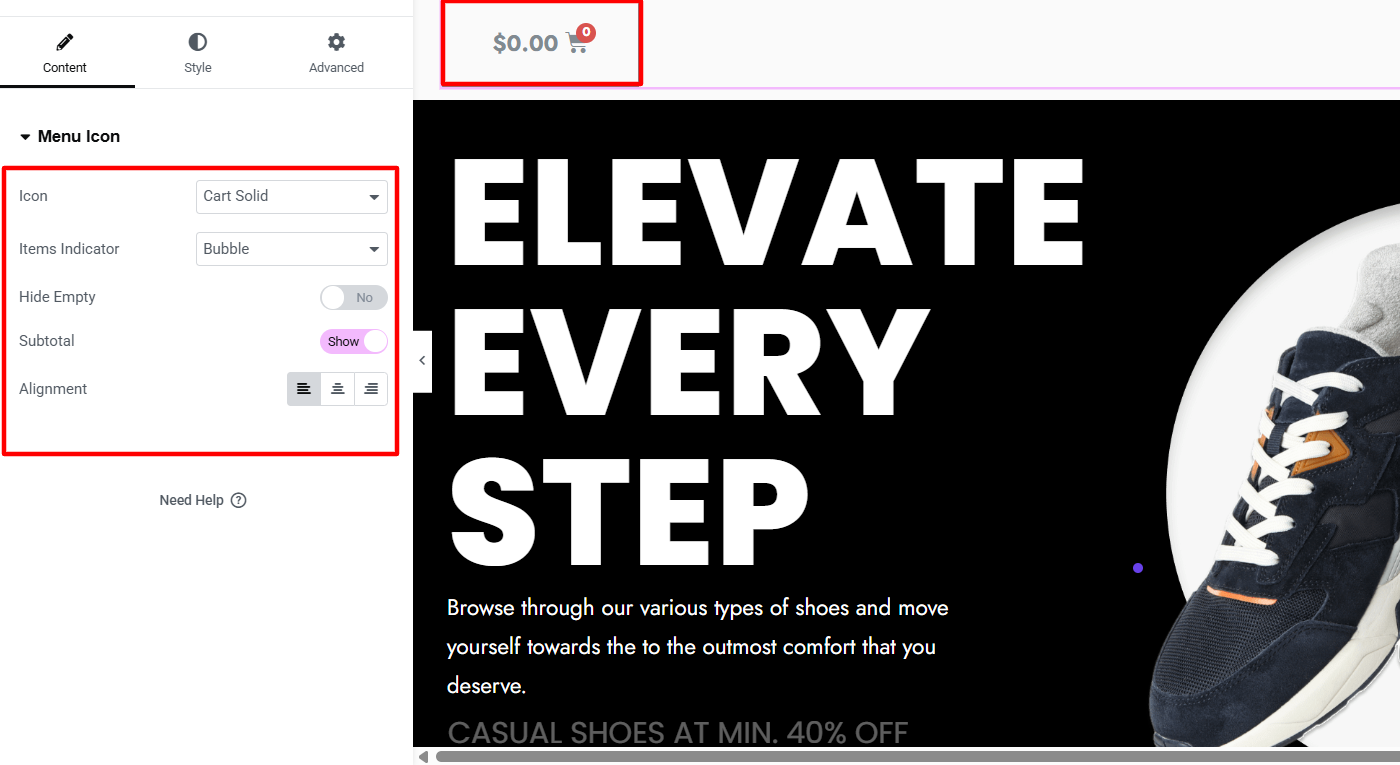
Once you activate the plugin, open the page where you want to add the breadcrumbs widget. For this tutorial, we’ll use the Shoe Store WordPress Website Template.

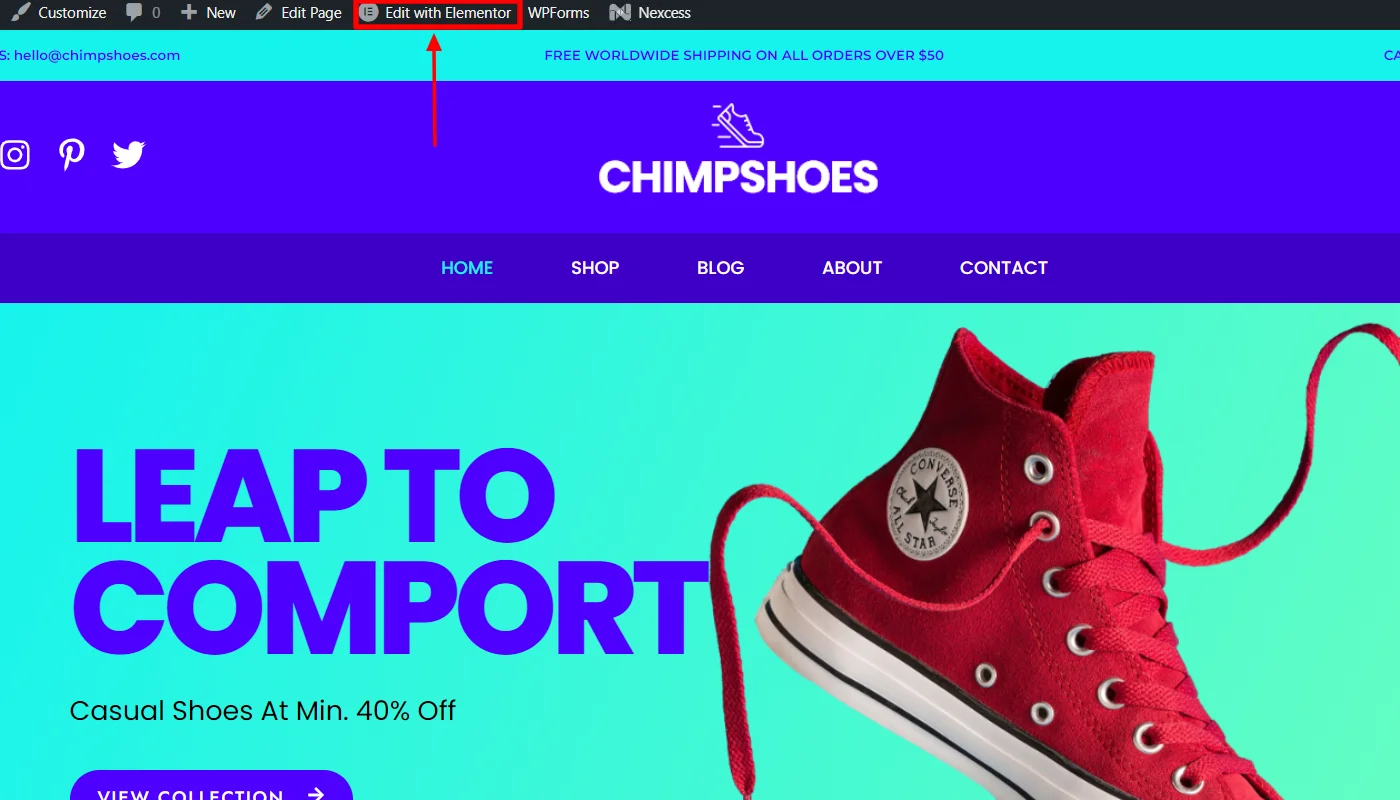
Click on Edit With Elementor on the page you want to edit.
Next, on the left sidebar, search for Menu Cart.
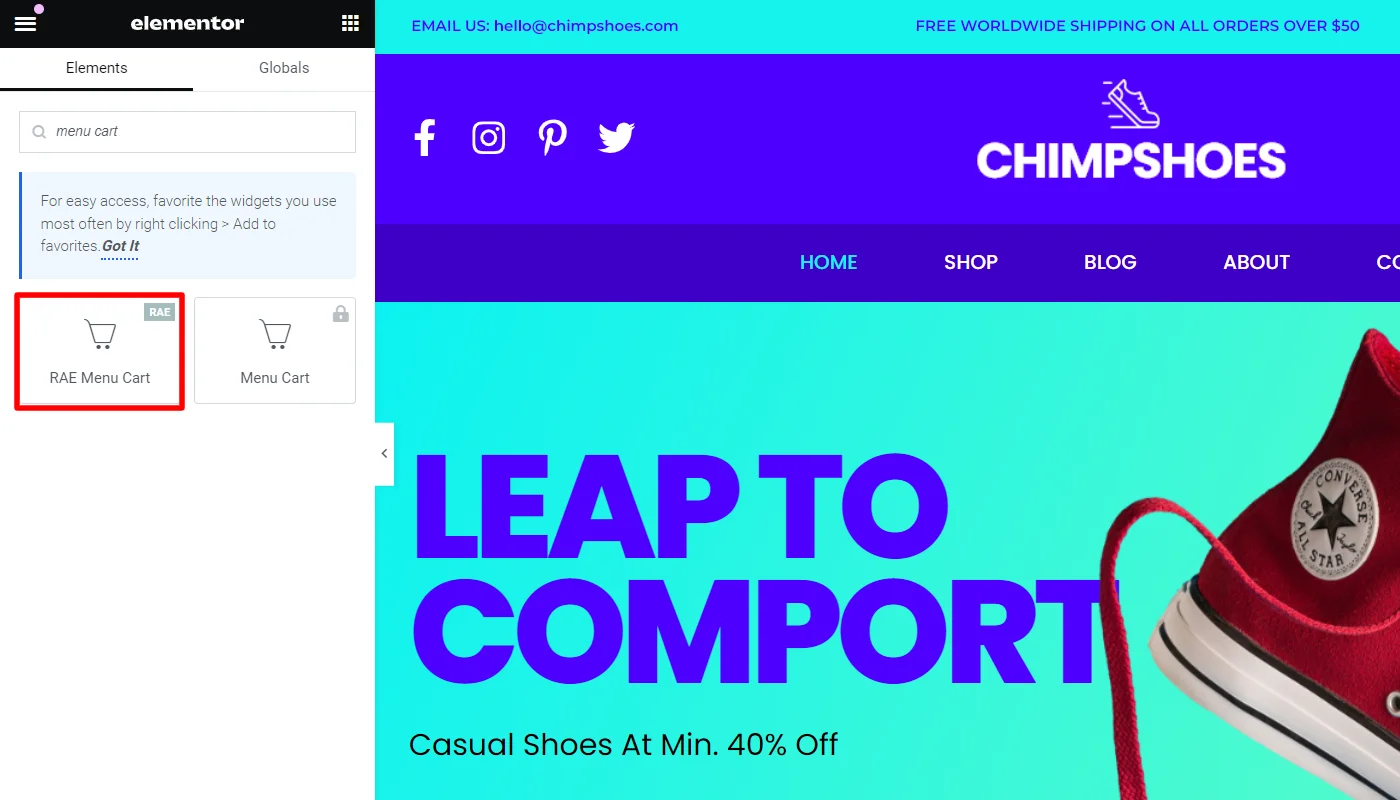
Drag and drop the RAE Menu Cart Widget in the section where you want to add it.
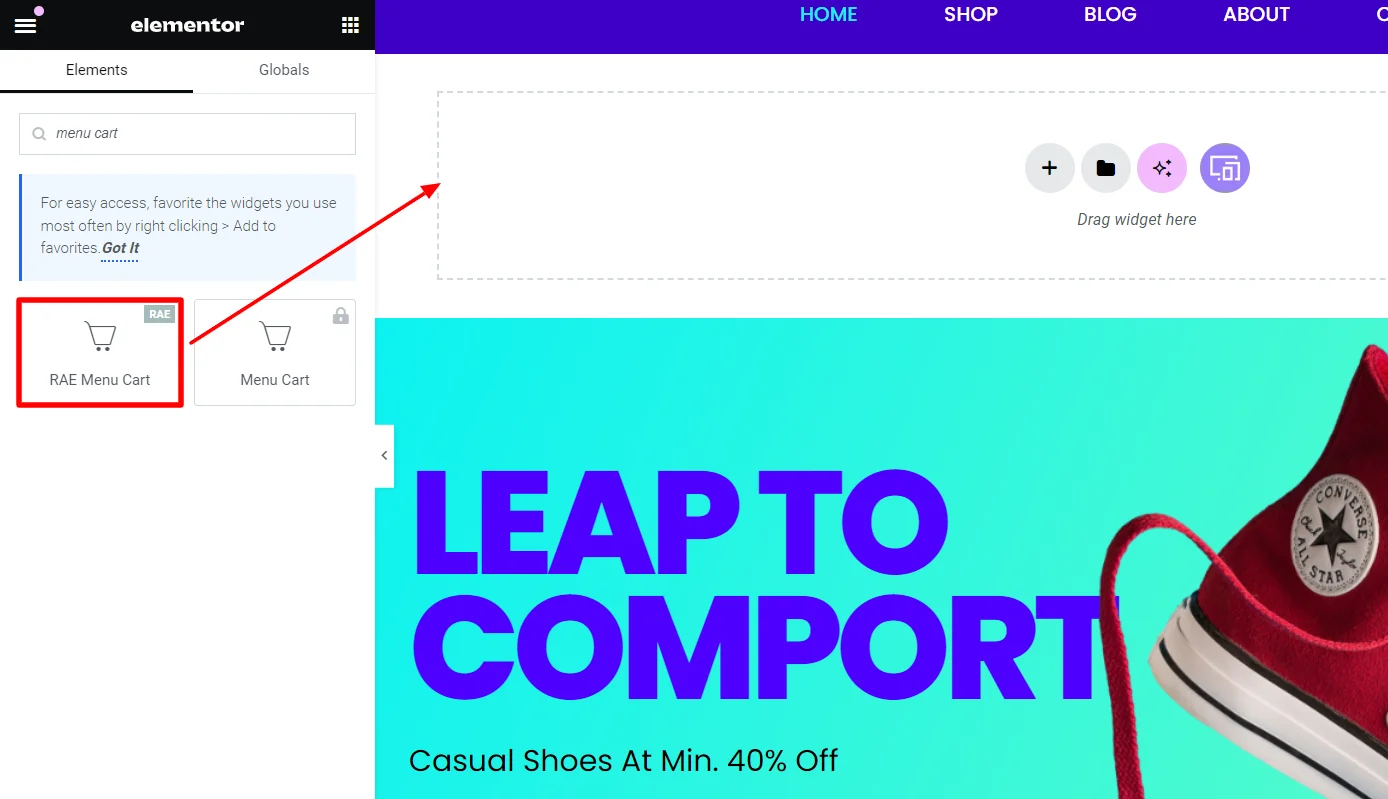
You have successfully added the Menu cart widget; now, let’s understand how to customize it.
Step 3: Customizing The Menu Cart Widget
The menu cart widget offers the following options to customize the appearance of the menu cart icon:
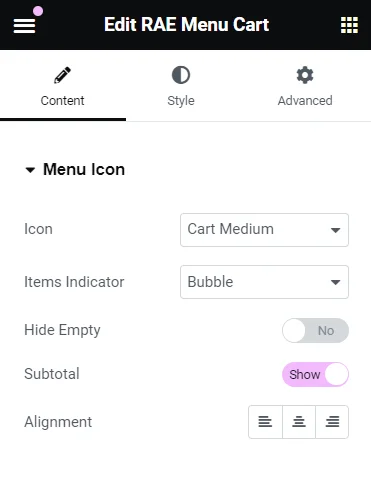
- Icon: This allows you to select the cart icon.
- Items Indicator: You can select an indicator to show the number of elements in the cart. Choose from a Bubble or plain option, or choose not to display this option.
- Hide Empty: If an indicator option is selected, you can hide that indicator when no products are in the cart.
- Subtotal: This option lets you display the subtotal with the cart icon.
- Alignment: Set the alignment for the menu icon.
Step 4: Styling The Menu Cart Widget
The menu cart widget offers you various styling options to enhance the look and feel of the menu cart:
Menu Icon
- Text Color: Select text Color & Opacity for normal and hover behavior of the menu icon.
- Icon Color: Select icon Color & Opacity for normal and hover behavior of the menu icon.
- Background Color: Select background Color & Opacity for normal and hover behavior of the menu icon.
- Border Color: Select border Color & Opacity for normal and hover behavior of the menu icon.
- Border Width: Provide width for top, right, bottom, left side of the menu icon border.
- Border Radius: Radius for the menu icon border.
- Typography: Select typography options such as font family, size, weight, transform, style, decoration, line height, and letter spacing.
- Size: Allows you to set the size of the icon.
- Spacing: Enables you to select the spacing for the icon.
- Padding: Set the padding for the icon.
- Text Color: Allows you to select text Color & Opacity for normal and hover behavior of the items indicator.
- Background Color: Select background Color & Opacity for normal and hover behavior of the items indicator.
- Distance: Select the distance of items indicator from the cart icon.
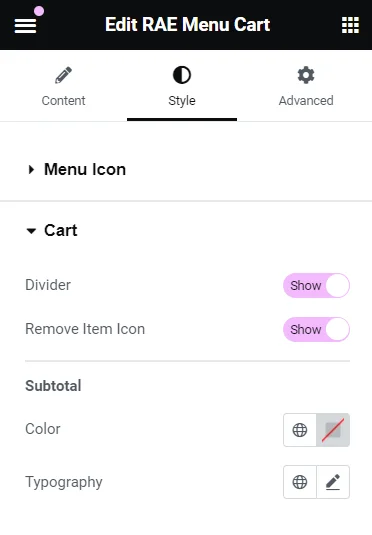
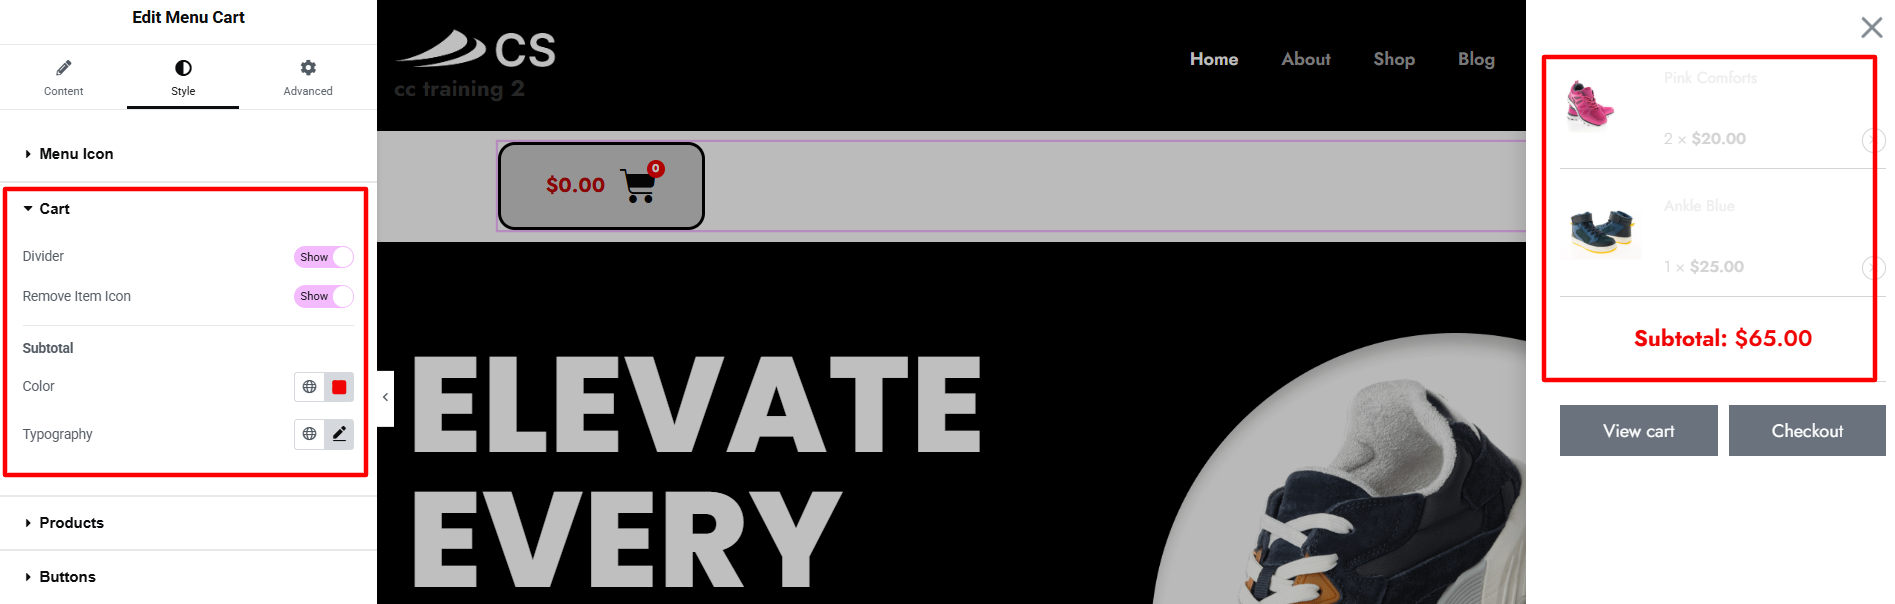
Cart
- Divider: Let’s you show or hide the divider.
- Remove Item icon: Allows you to choose to display or hide the remove item icon.
- Color: Select the Color & Opacity of the subtotal amount in the cart.
- Typography: This allows you to select options for font family, size, weight, transform, style, decoration, line height, and letter spacing of the subtotal amount.
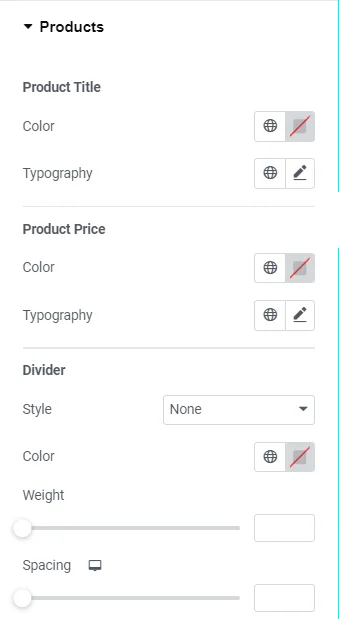
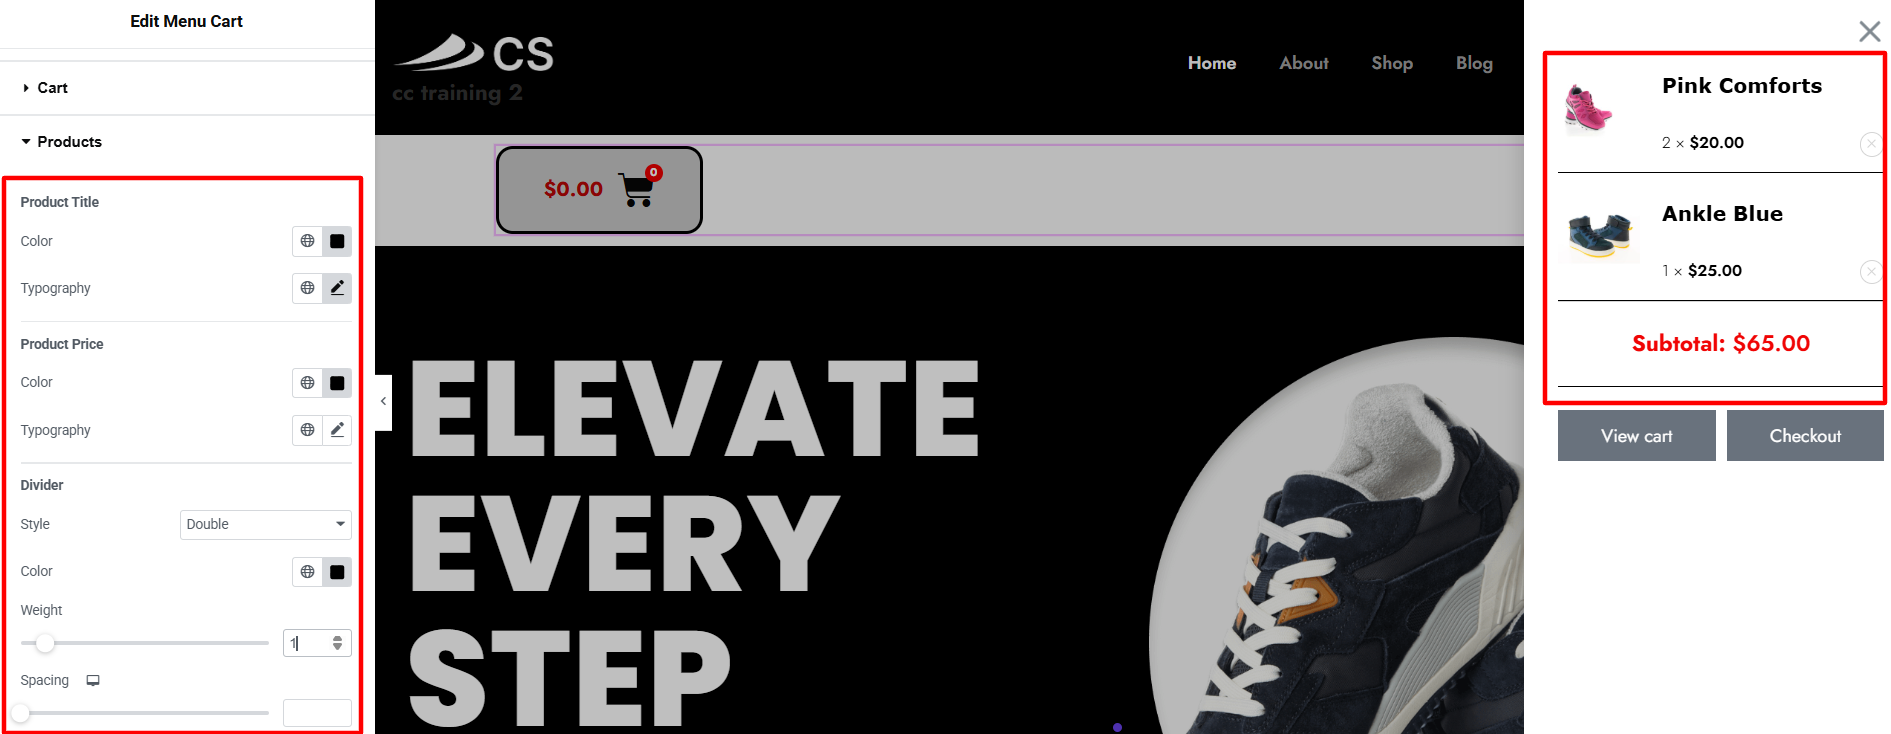
Product
- Color: Allows you to select the Color & Opacity of the product title.
- Typography: Set the typography options such as font family, size, weight, transform, style, decoration, line height, and letter spacing.
- Color: Allows you to set the Color and opacity of the product price.
- Typography: It allows you to select options for font family, size, weight, transform, style, decoration, line height, and letter spacing.
- Style: Let’s you select the style for the divider.
- Color: Enables you to select the Color & Opacity of the divider.
- Weight: Allows you to set the weight of the divider.
- Spacing: This enables you to adjust the spacing around the divider.
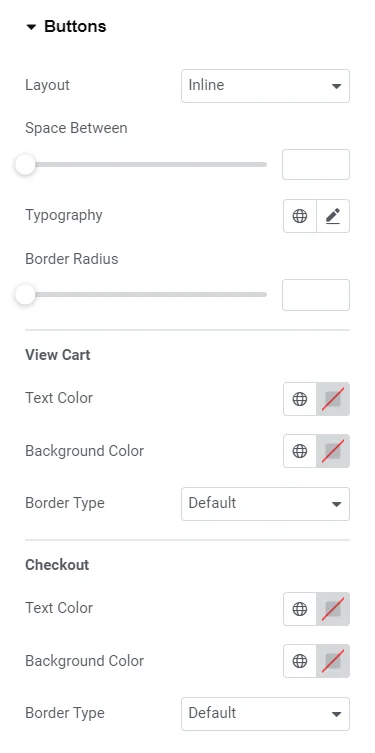
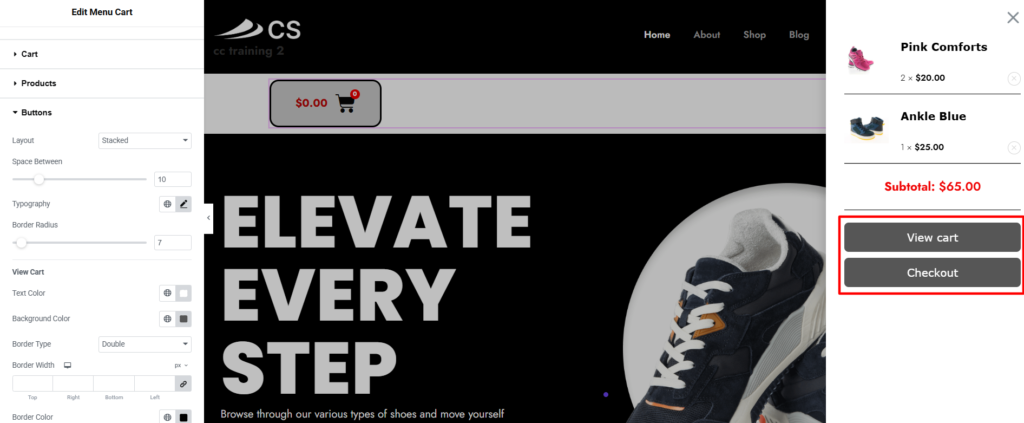
Button
- Layout: Allows you to select button layout as inline or stacked.
- Space Between: Provides space between the buttons.
- Typography: This allows you to set typography options such as font family, size, weight, transform, style, decoration, line height, and letter spacing.
- Border Radius: Set the radius for the button border.
- Text Color: Select the text color for the view cart button.
- Background Color: Let you select the text color for the view cart button.
- Border Type: Select a border type for the button.
- Text Color: Set the text color for the checkout button.
- Background Color: Enables you to select the text color for the checkout button.
- Border Type: Enables you to select a border type for the checkout button.
How To Use the Menu Cart Widget?
Now that you know how to add the menu cart widget, let’s understand how to use it.
For this tutorial, I will show how I used the above customization settings to build a functional menu cart.
Customizing Menu Cart Widget Content
To begin with, I customized the menu cart content, changing the cart icon from light to solid. However, all other default customizations looked good, so I kept them the same.
Styling Menu Cart Widget
The menu cart widget is useful yet simple to use; hence, I preferred keeping the content simple and directly jumped into its styling.
I made basic appearance customizations for the menu icon, changing the colors of text, icon, background, and border in normal and hover states.
Additionally, I slightly adjusted the border width and radius and increased the icon size and spacing.
[Note: To preview further styling changes with the menu cart widget, go to the front end of your website and add some products to the cart for a sample.]
Further, to style the cart, I kept all the settings on default.
Next, to improve the appeal of the products added to the cart section, I simply changed the colors of the product title and price to clear black and changed the typography font, weight, and size.
Moreover, to style the divider, I changed its style, color, and weight.
To style the buttons, I began by changing the common default button style from inlined to stacked. Additionally, I also adjusted the space between buttons and border radius.
Further, I also made menial changes in the buttons’ background and text color and added a dotted black border.
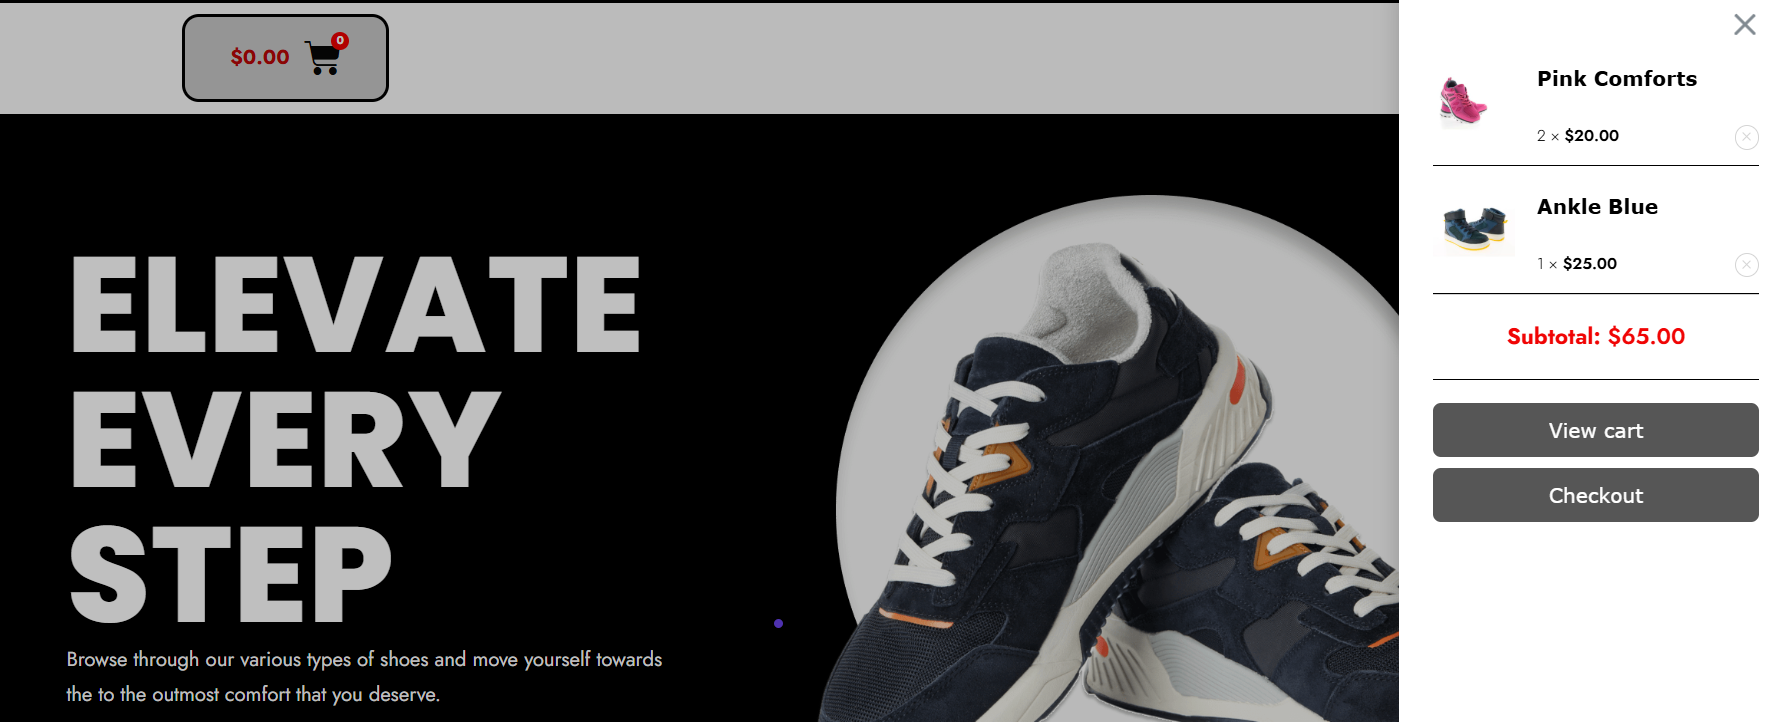
Final Appearance of Menu Cart Widget
Following this customization, I was able to add a functional, visually appealing menu cart, which looked like this:
You can also follow similar process to add and customize the menu cart feature to your website.
FAQ
A menu cart widget is a feature on an e-commerce website that allows customers to easily view and manage the items they have added to their shopping cart.
Yes, you can add a free menu cart widget to your website using the Responsive Addons for Elementor plugin. This plugin provides a free and powerful Elementor add-ons plugin to enhance your website.
To add the menu cart widget to your website, follow the following steps:
1. Install & activate the Responsive Addons for Elementor plugin.
2. Search and drag & drop the menu cart widget.
3. Customize and style the overall appearance of the widget.
Conclusion
Adding a free menu cart widget to your Elementor-powered website can greatly enhance your customers’ user experience.
It is a convenient and accessible way for them to view and manage the items in their shopping cart; also, it can help reduce cart abandonment and increase the likelihood of completed purchases.
We recommend using the Responsive Addons for Elementor plugin to drag and drop this functional widget to your website easily.
If you liked this article, you can also consider reading:
- How To Add Breadcrumbs To Elementor Website
- How to Add Testimonial Slider To Your Elementor Website
- How to Add Modal Popup in Elementor
Further, check out the Responsive Theme by Cyberchimps to create a multi-purpose website with ease.


