
Are you looking for ways to add a navigation menu to your WordPress website?
If yes, then this article is for you!
You see, when you land on an unknown website and have no idea about it, a navigation menu is a customizable list of links that helps visitors navigate your website. It guides the user to the desired location and explores the most essential pages of the website.
While you might think it would be a challenging task to create a navigation menu, it’s actually quite simple, especially with WordPress.
This article will help you explore some easy ways to create and add a fully functional navigation menu on your WordPress website.
Let’s get started!
What is a Navigation Menu?
A navigation menu functions as a website map, enabling you to easily locate and explore the key pages and sections on a website.
It typically appears in the header or footer section of your website, displaying important links and buttons that redirect to other pages on the website.
Importance of a Navigation Menu
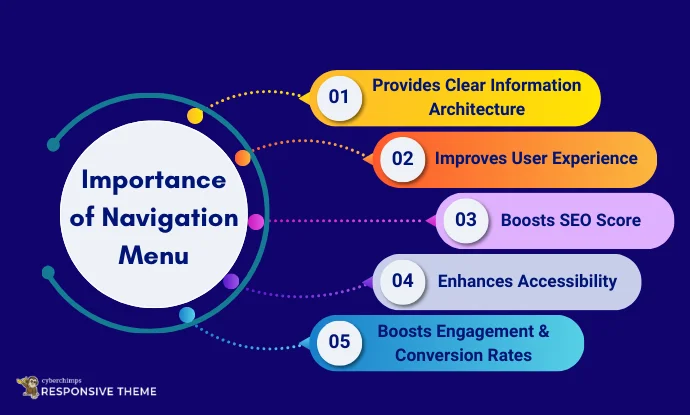
The presence of a functional navigation menu can make or break your website.
Suppose you landed on a website with no navigation menu, or a menu that leads to the wrong pages when clicked, you get a bad user experience.
This is terrible, right?
Well, the experience is no different for other users. Additionally, the appearance, functionality, and usability of menus have a significant impact on the revenues and operations of business websites.
Other studies highlight the underlying importance of the user experience, with the navigation menu playing an integral role:
- In 2023, HubSpot conducted a consumer survey that revealed over 86% of users leave a website with a poor user experience, whereas a well-structured navigation can increase conversion rates by up to 200%
- Another research by Northumbria University found that 94% of first impressions are design-related, and easy navigation plays a crucial role in that impression.
- Furthermore, Google’s blog on how design impacts users has recently reported that proper navigation helps search engines crawl your site, thereby improving visibility. Additionally, 40% of users abandon a website if it takes more than three seconds to load, often due to poor navigation and user experience.
You probably already understand the importance of navigation menus. Let’s now delve further into the topic to explore some simple ways to create a navigation menu for your website.
How to Create a New Navigation Menu in WordPress
When your website has a lot of pages, custom links, or category pages, the best way to organize and map them is by creating a navigation menu through a classic theme.
The default WordPress themes do not allow for proper menu organization, whereas classic themes provide a direct interface for creating and organizing pages on your website.
While all classic themes offer a menu setup, for this tutorial, we’ll be using the Responsive theme by Cyberchimps. It is one of the best classic themes, featuring an intuitive panel and offering advanced styling options in its customizer.
Learn How to Install and Activate the Responsive Theme:

Now, to set up and organize the navigation menu on your website, you can follow the steps given below.
Step 1: Create New Menu
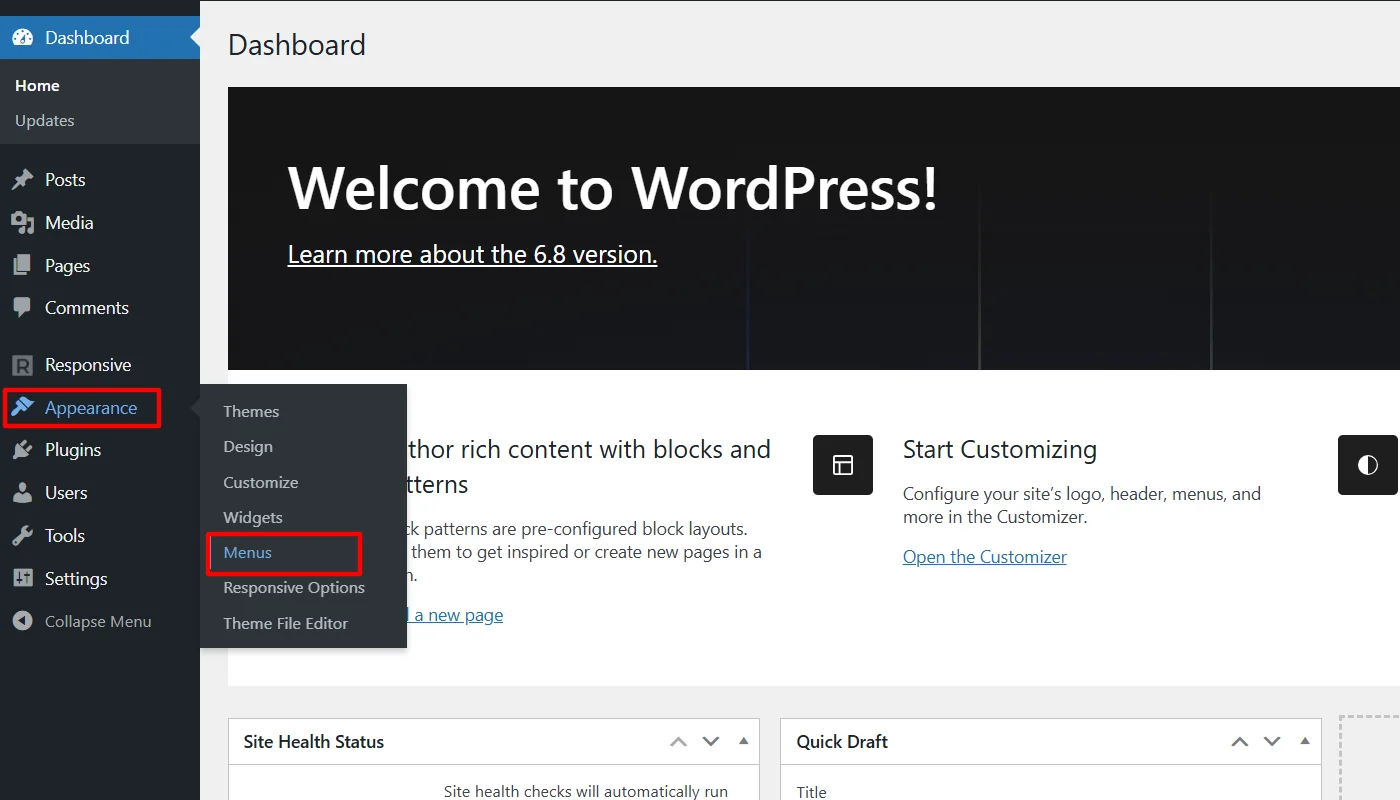
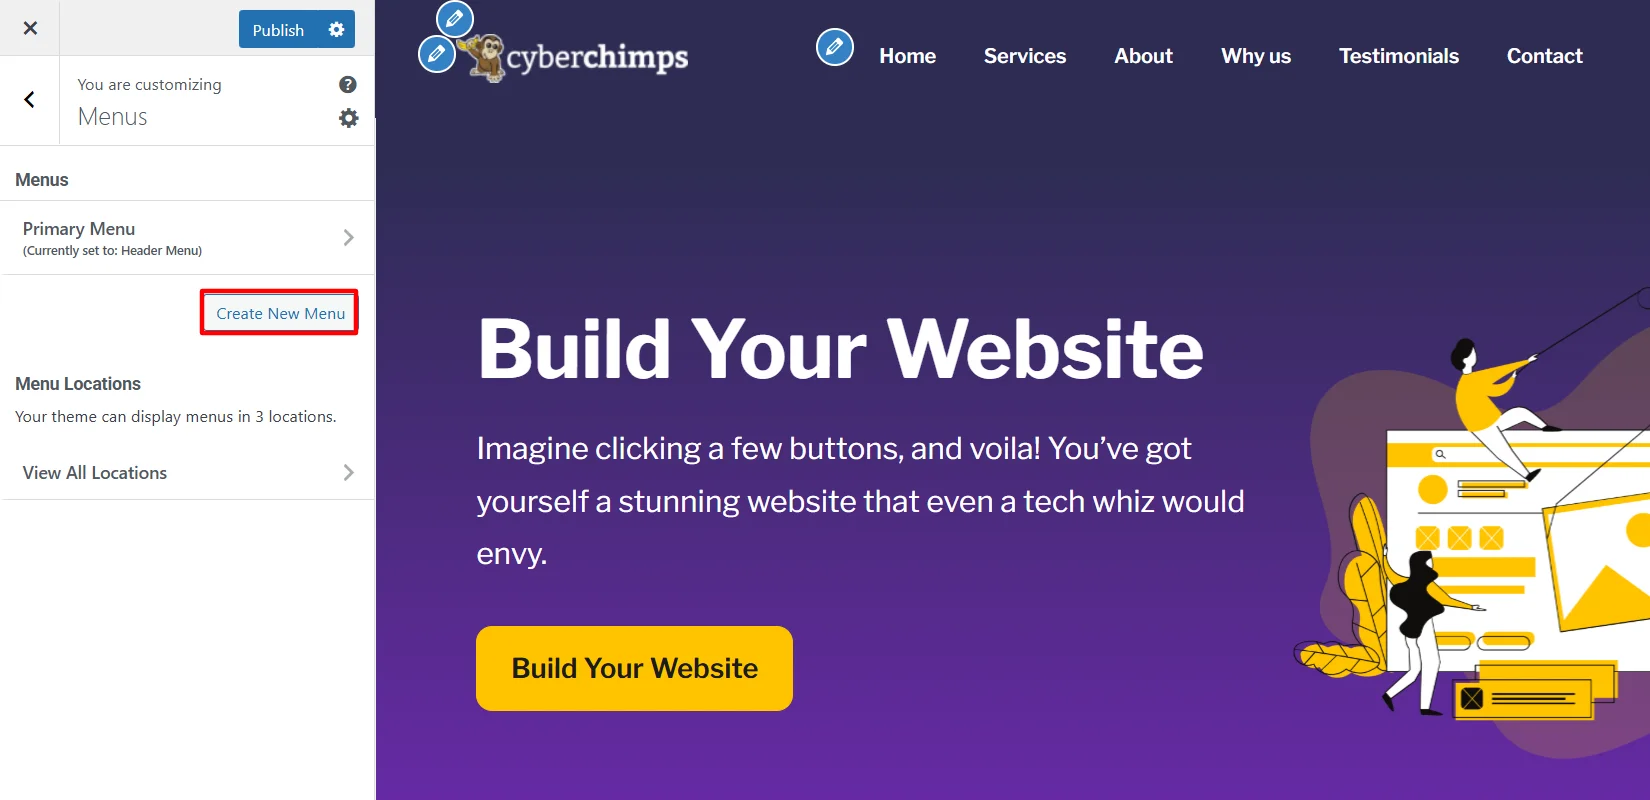
Open your WordPress dashboard, and on the left side, hover your cursor over Appearance > Menus.
Once here, you can either choose a pre-built one or click create a new menu.
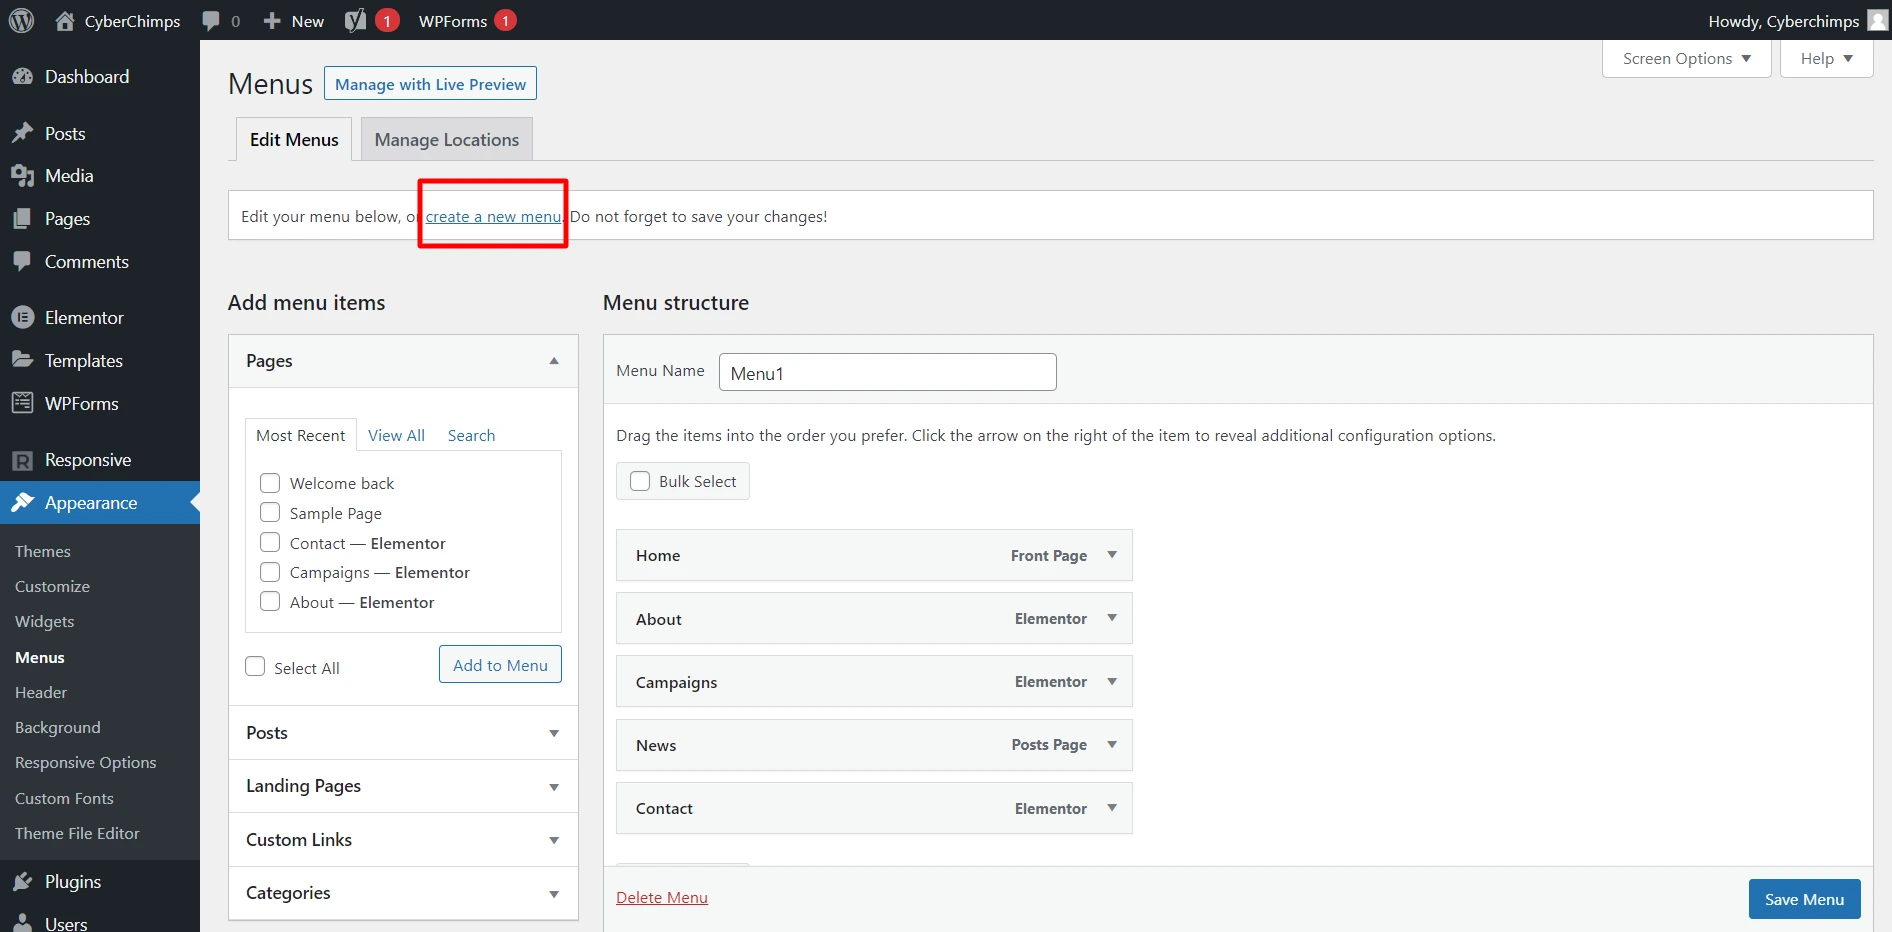
Additionally, classic themes enable you to view live previews while building a menu. To check the preview, click on Manage with Live Preview.
(I find managing with live preview more intuitive, so I proceeded with that.)
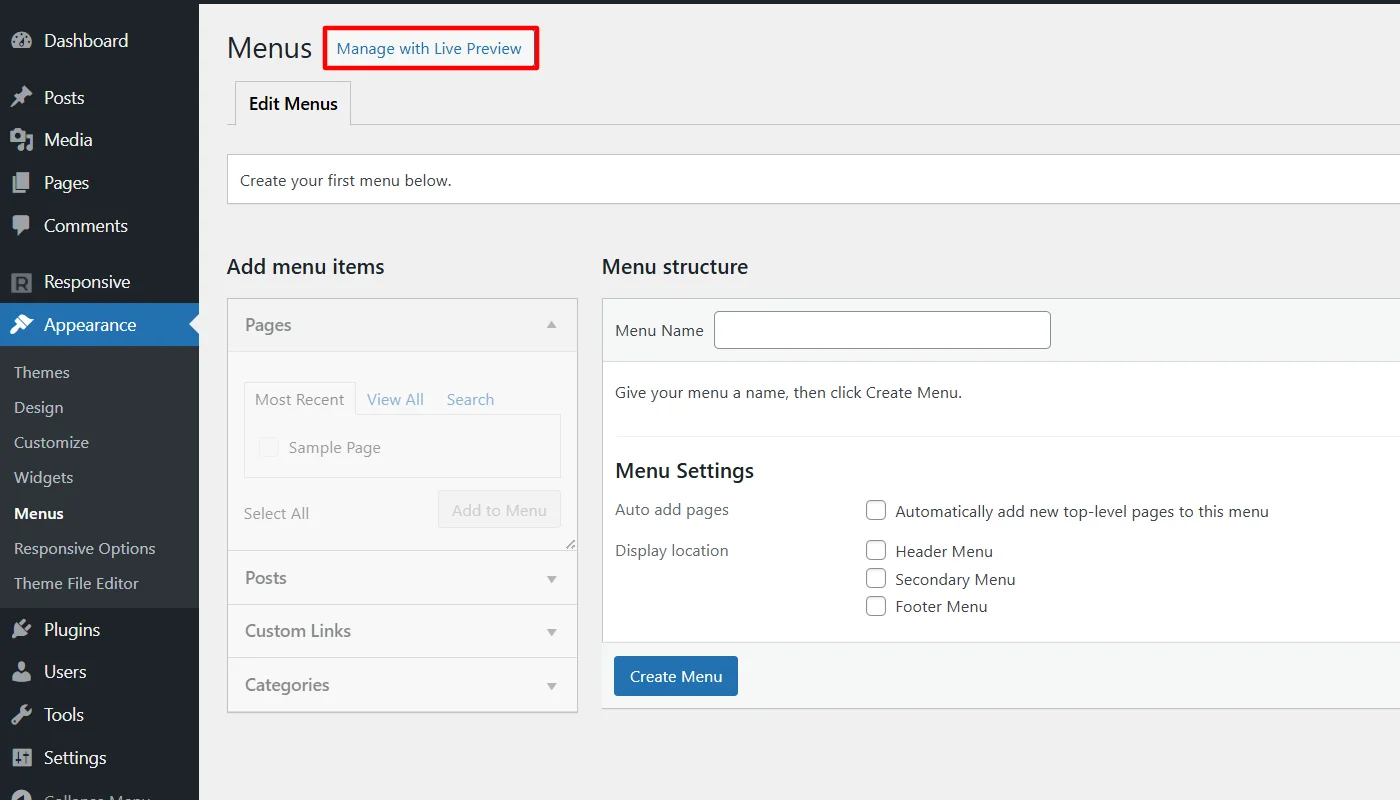
Next, you can either add the default primary menu or choose to create a new one. Click on Create New Menu.
Step 2: Add Menu Items
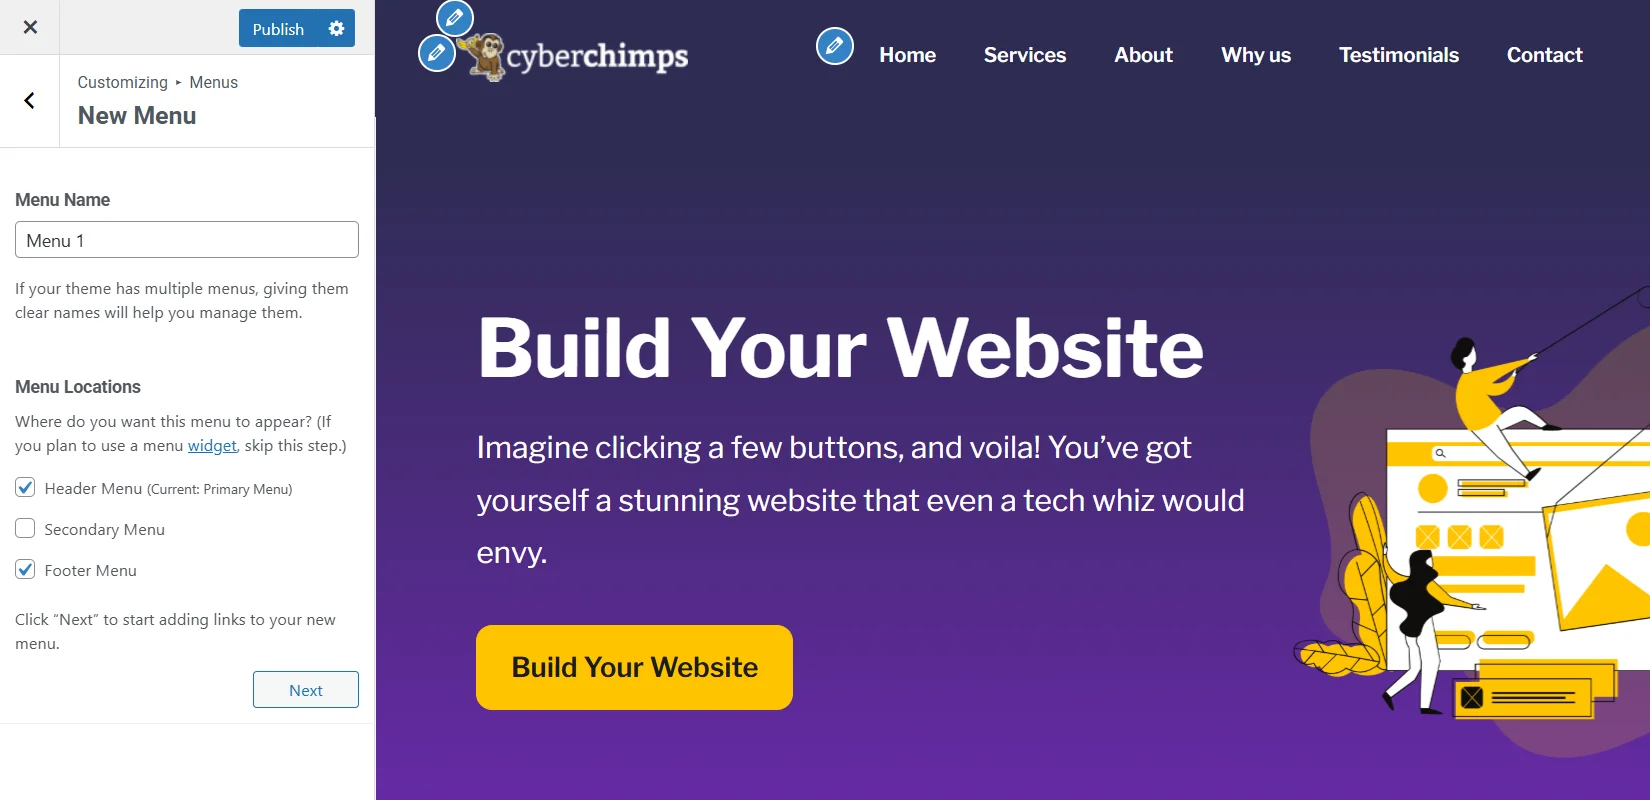
Next, add a unique Menu Name and set Menu Locations, and click Next.
(You can add the same menu to display at more than one location.)
Here, click on Add Items to add pages, custom links, posts, and categories to the menu bar.
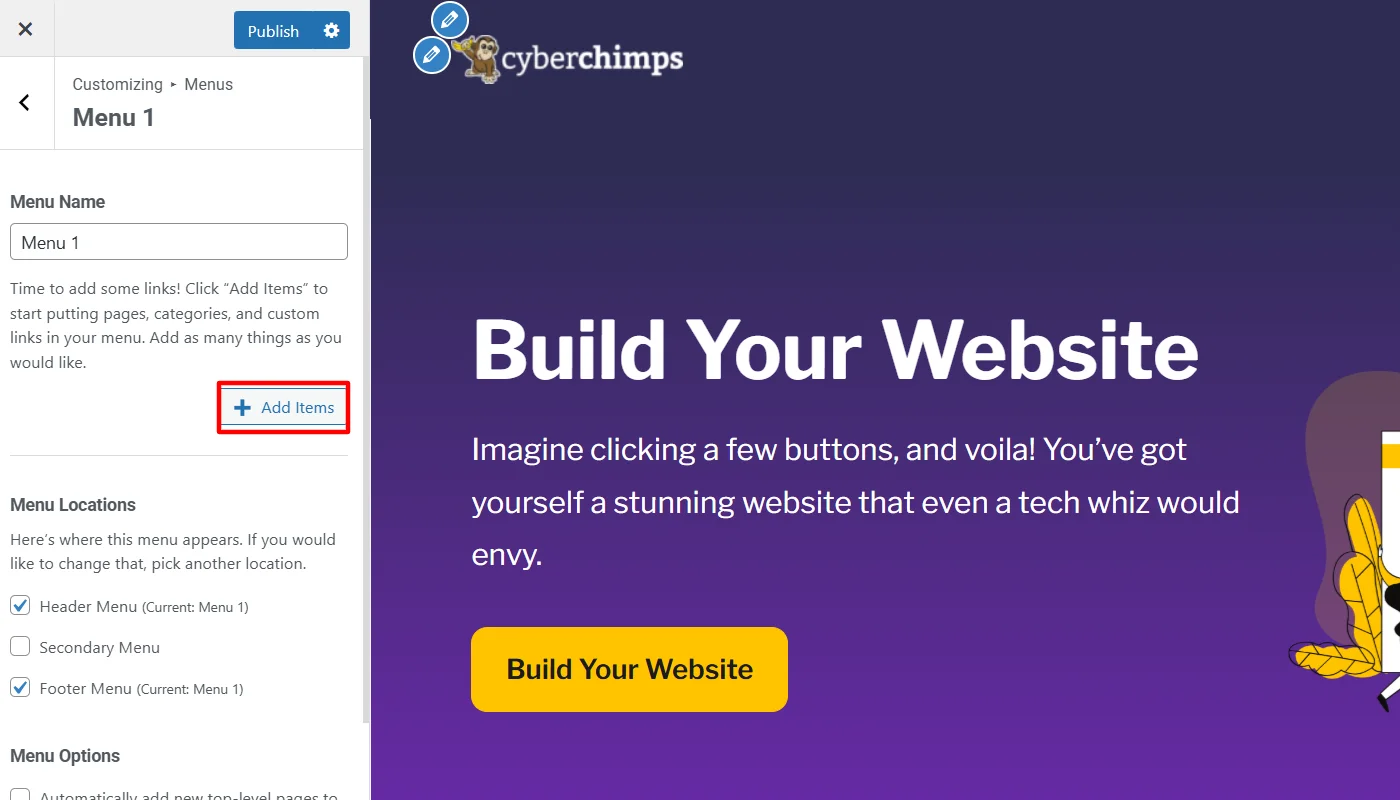
Next, add existing pages you want to display in the menu, or click Add page to create new ones.
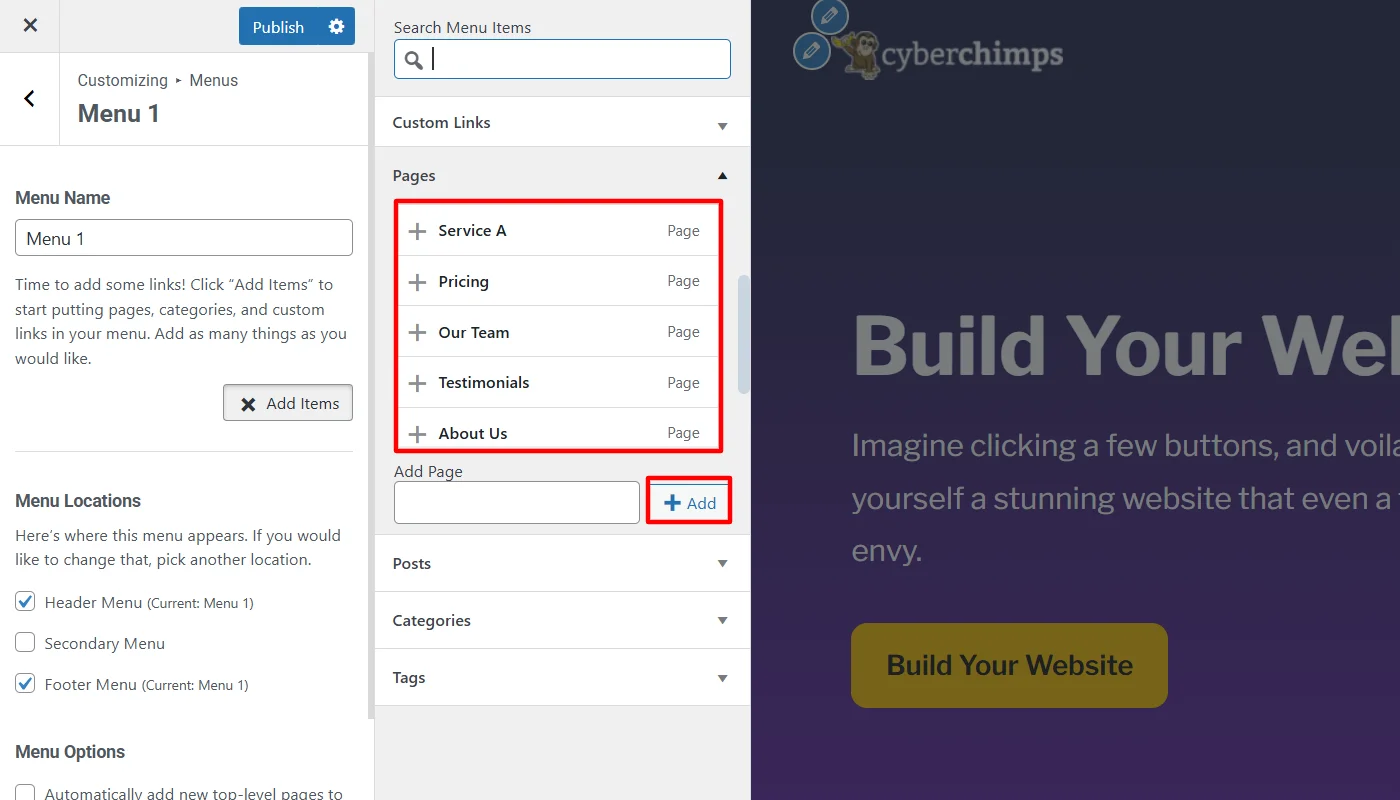
For this tutorial, I have added all new pages; however, before organizing, it looks messy.
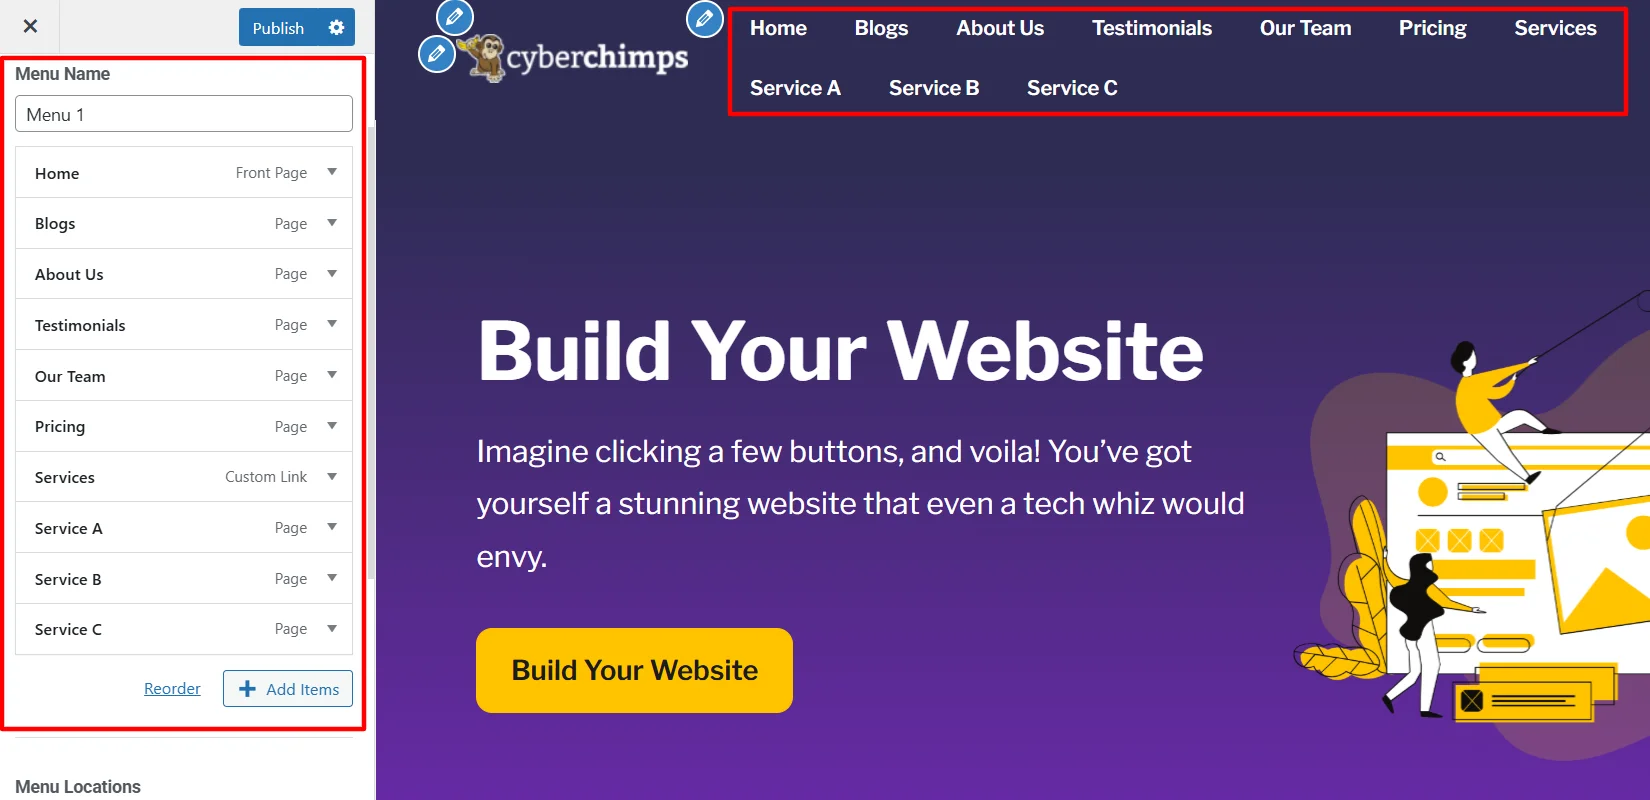
Step 3: Organize Menu and Sub-Menu Items
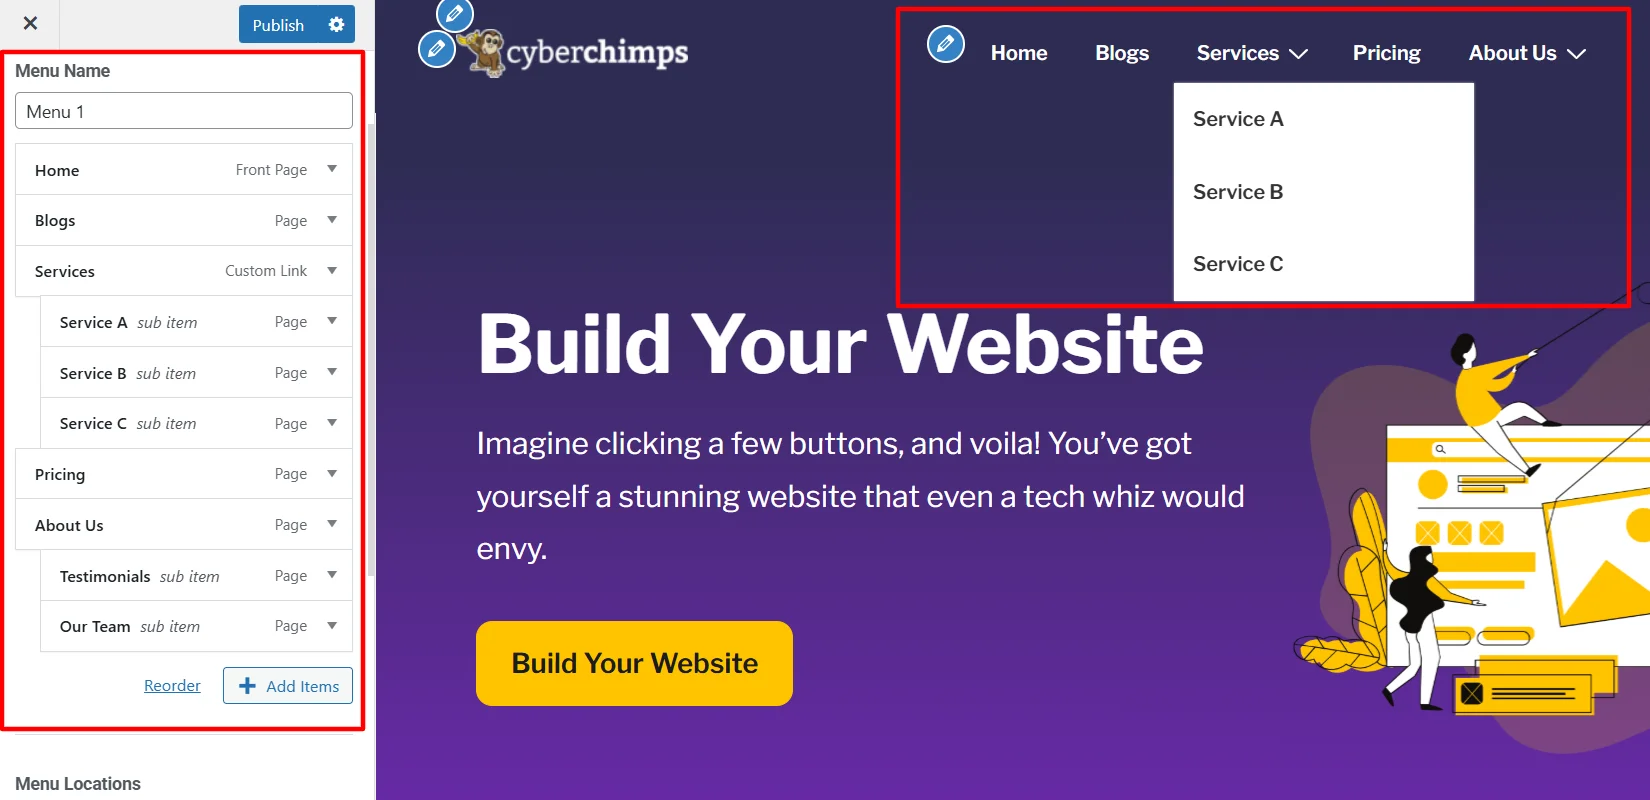
Once all the pages are added to the menu, you can organize them according to your needs.
To organize the menu, simply put all the items in the proper order. You can simply drag any item and rearrange it as needed.
You can also add items as sub-items to create a sub-menu (also known as a drop-down menu or nested menu) under one or more primary items in the menu.
(I have rearranged the items in my menu as you can see below.)
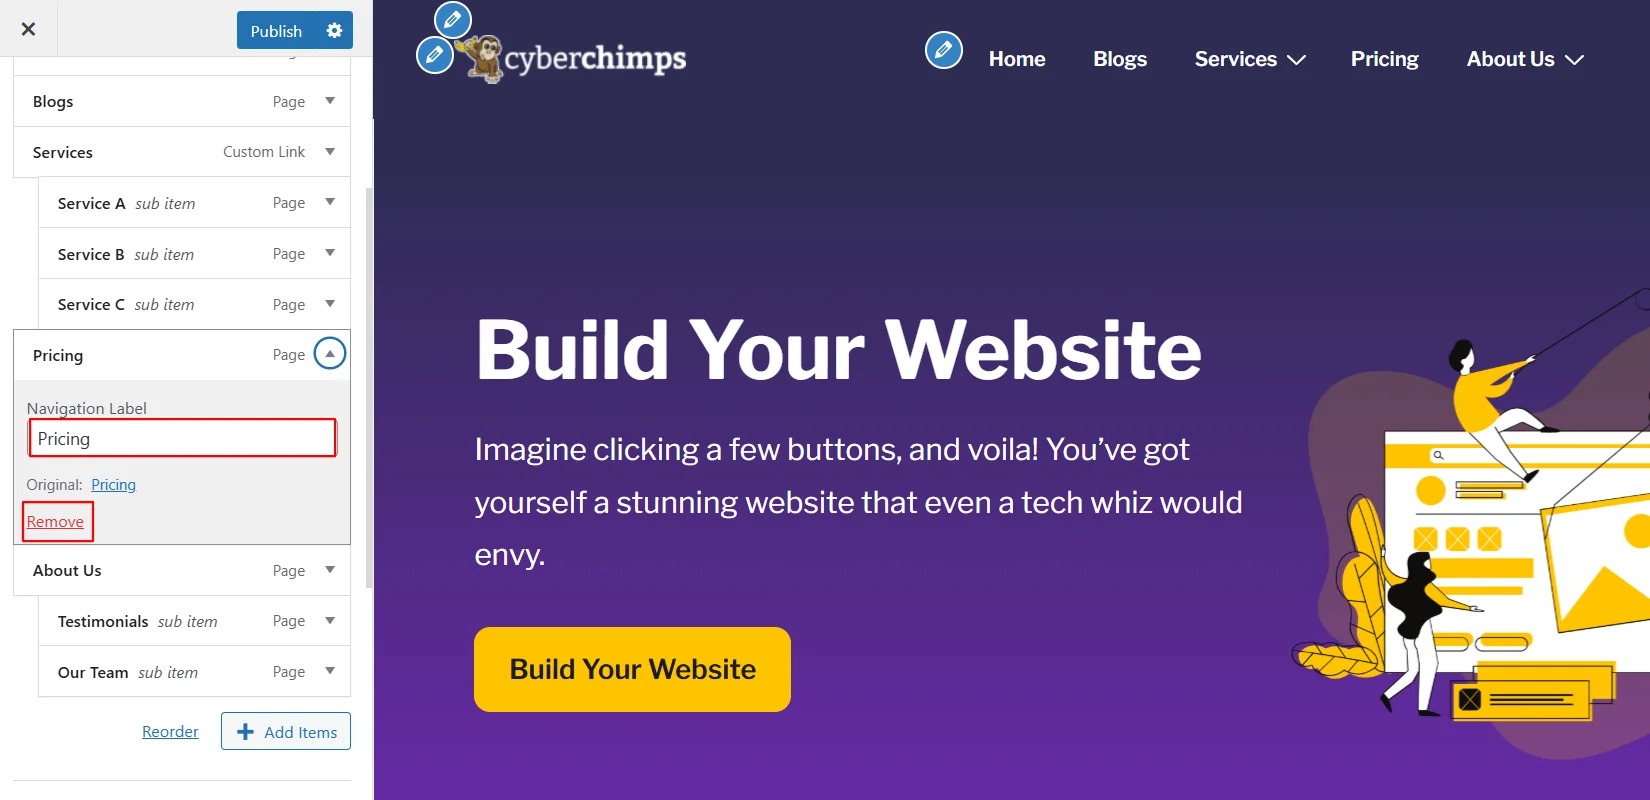
Step 4: Editing or Removing a Menu Item
In the previous steps, you learned how to create a menu and add items to it, as well as organize them. However, you might want to edit or remove any of the items in the menu.
To edit or remove any item from the menu, click on the small drop-down icon beside the item.
Here, you can change the existing Navigation Label or click Remove to delete the item from the navigation menu.
Once all the changes are done, click on publish and make the changes live on the website.
How to Add a Navigation Menu To the Header and Footer
So far, we have learned how to create a navigation menu; however, you can also display the same menu or different menus in various locations on the website.
Navigation menus are generally displayed within the website header or footer.
The free Responsive theme is among those advanced classic themes that not only allow you to add a menu in different locations but also offer advanced styling options to enhance its visuals, which most other themes do not provide.

Let’s now explore how to add and style a navigation menu in different parts of your website.
However, before we proceed, there are a few key points that you should not forget.
- If you have already worked on another part of your website or are making changes to your existing site, ensure that you back up your site before updating it.
- If you have an operational website, it is recommended that you try to update on the staging site at first (if you don’t have a staging site, here’s a guide on How to Create a Staging Site for WordPress)
How to Customize the Navigation Menu In the Header
To customize a navigation menu in your website header, follow the following steps:
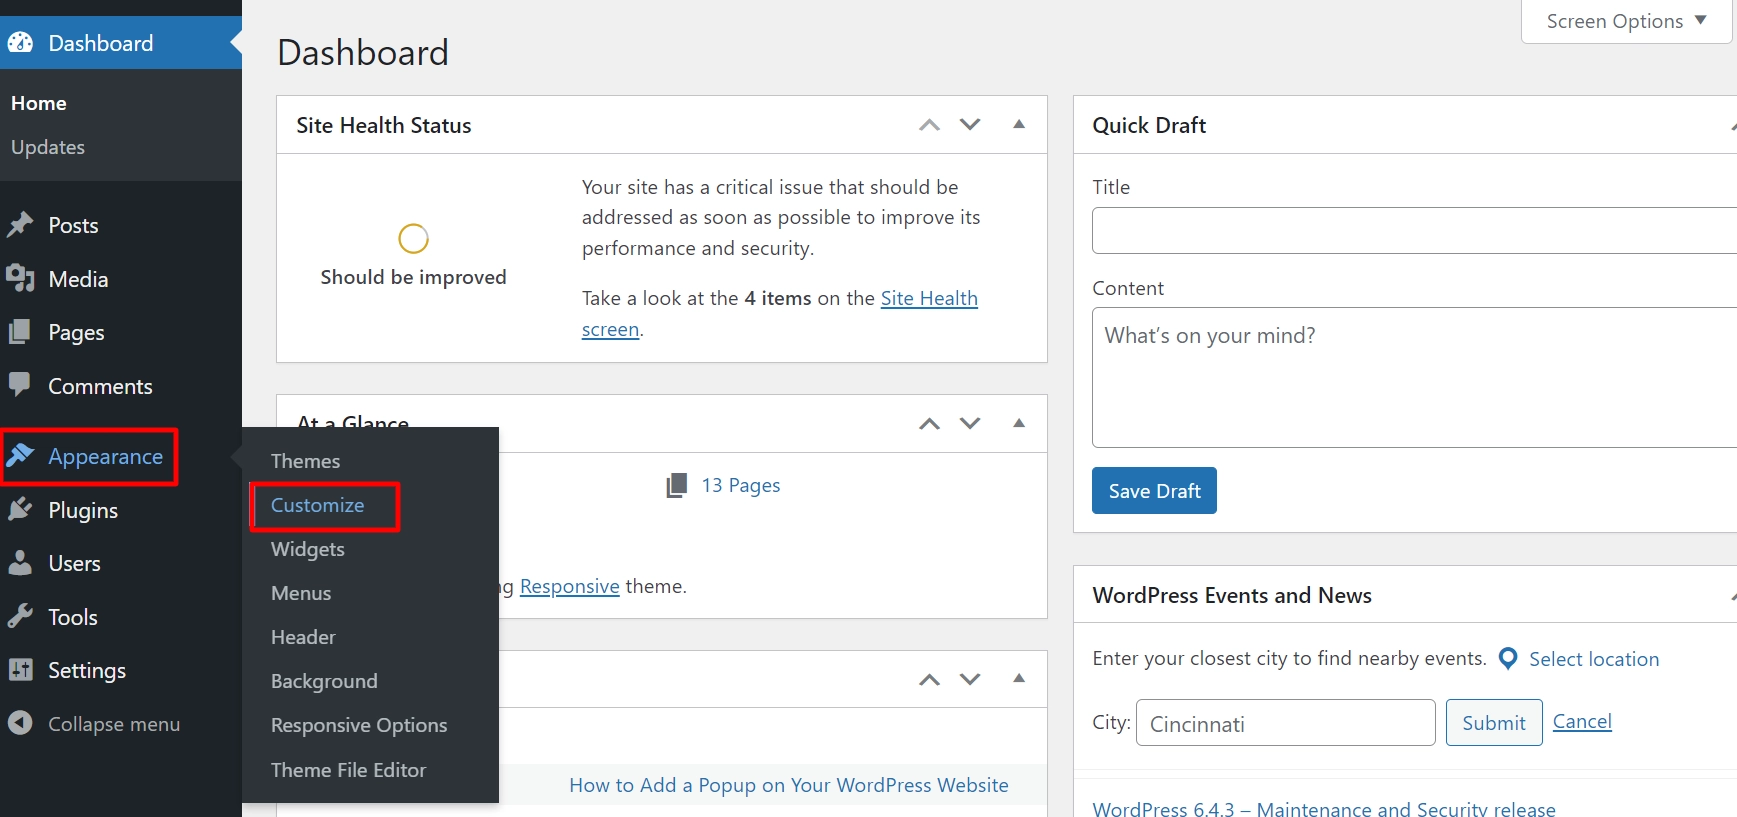
From your WordPress dashboard, navigate to Appearance > Customize.

Next, navigate to Header in the customizer settings.

The menu header will appear by default, as shown below. To customize the menu’s appearance, simply click on Primary Menu.
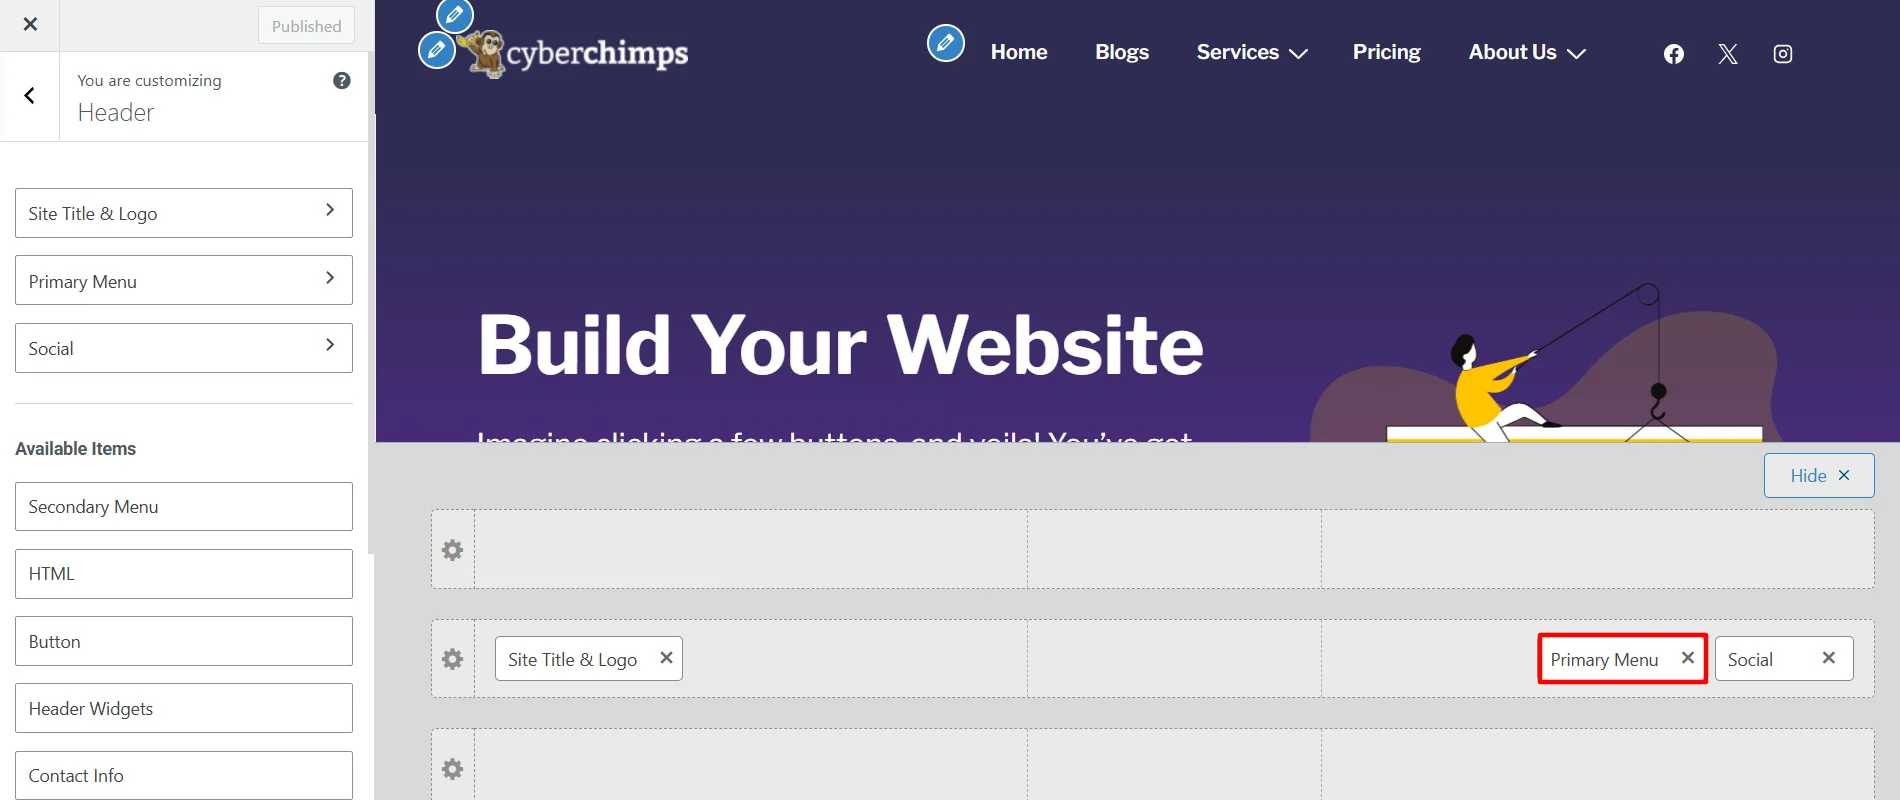
This provides you with a variety of options to customize the menu. In particular, the Responsive theme stands out with the number of features when compared with other theme customizers. Here are the following options you can edit with the customizer:
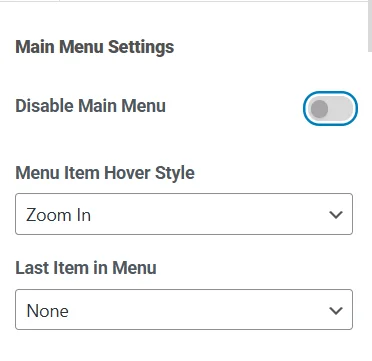
Main Menu Settings
The main menu settings allow you to enable or disable the menu and style the menu items on hover.
It also allows you to add the last item in the menu as a CTA button or Text / HTML. If you add any of these options, it further allows you to edit the text and link in them.

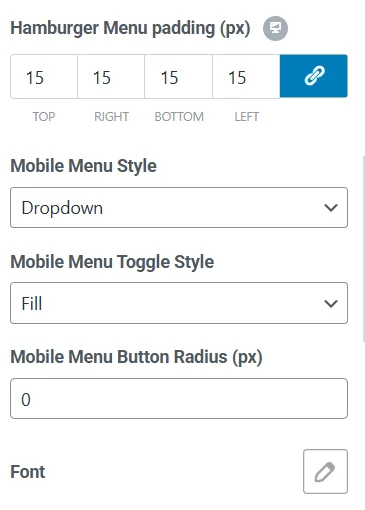
Mobile Menu Settings
The mobile menu settings allow you to enable or disable the main menu, its stack display, and the last item in the mobile view of the menu. It also allows you to adjust the visibility of the mobile menu with the breakpoint value setting.
Further, instead of the hamburger icon, you can also rename the mobile menu and its font. Moreover, you can also style the mobile menu and toggle style.
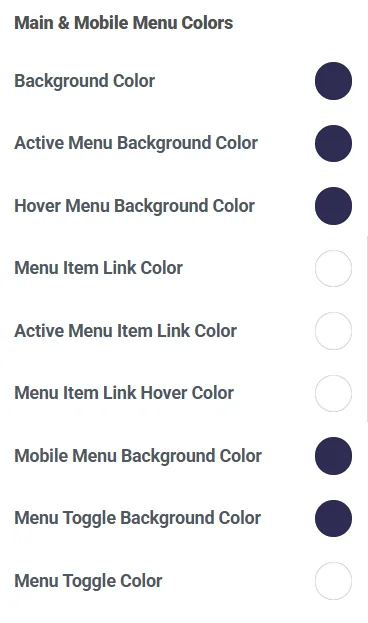
Mobile and Main Menu Colors
The main and mobile menu colors allow you to style the overall background and active menu items, links, and background color on all devices.

Sub-Menu Settings
The sub-menu setting allows you to set the border width of the sub-menu container on all sides.
You can also set the vertical distance between the main menu and the sub-menu container usingthe Container Top offset option. You can also enable and disable the item divider.
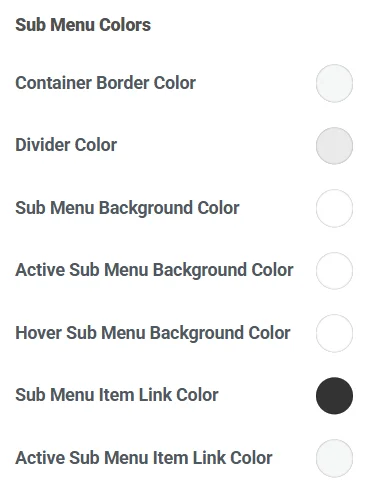
Sub-Menu Colors
The submenu color option offers color customization options, similar to the main menu, as mentioned before.
Once you have customized the navigation menu in the header, you can click Publish and make the menu live in the header.
How to Customize The Navigation Menu In the Footer
Similarly, like the header, if you want to add a navigation menu to the website footer, you can follow these steps:
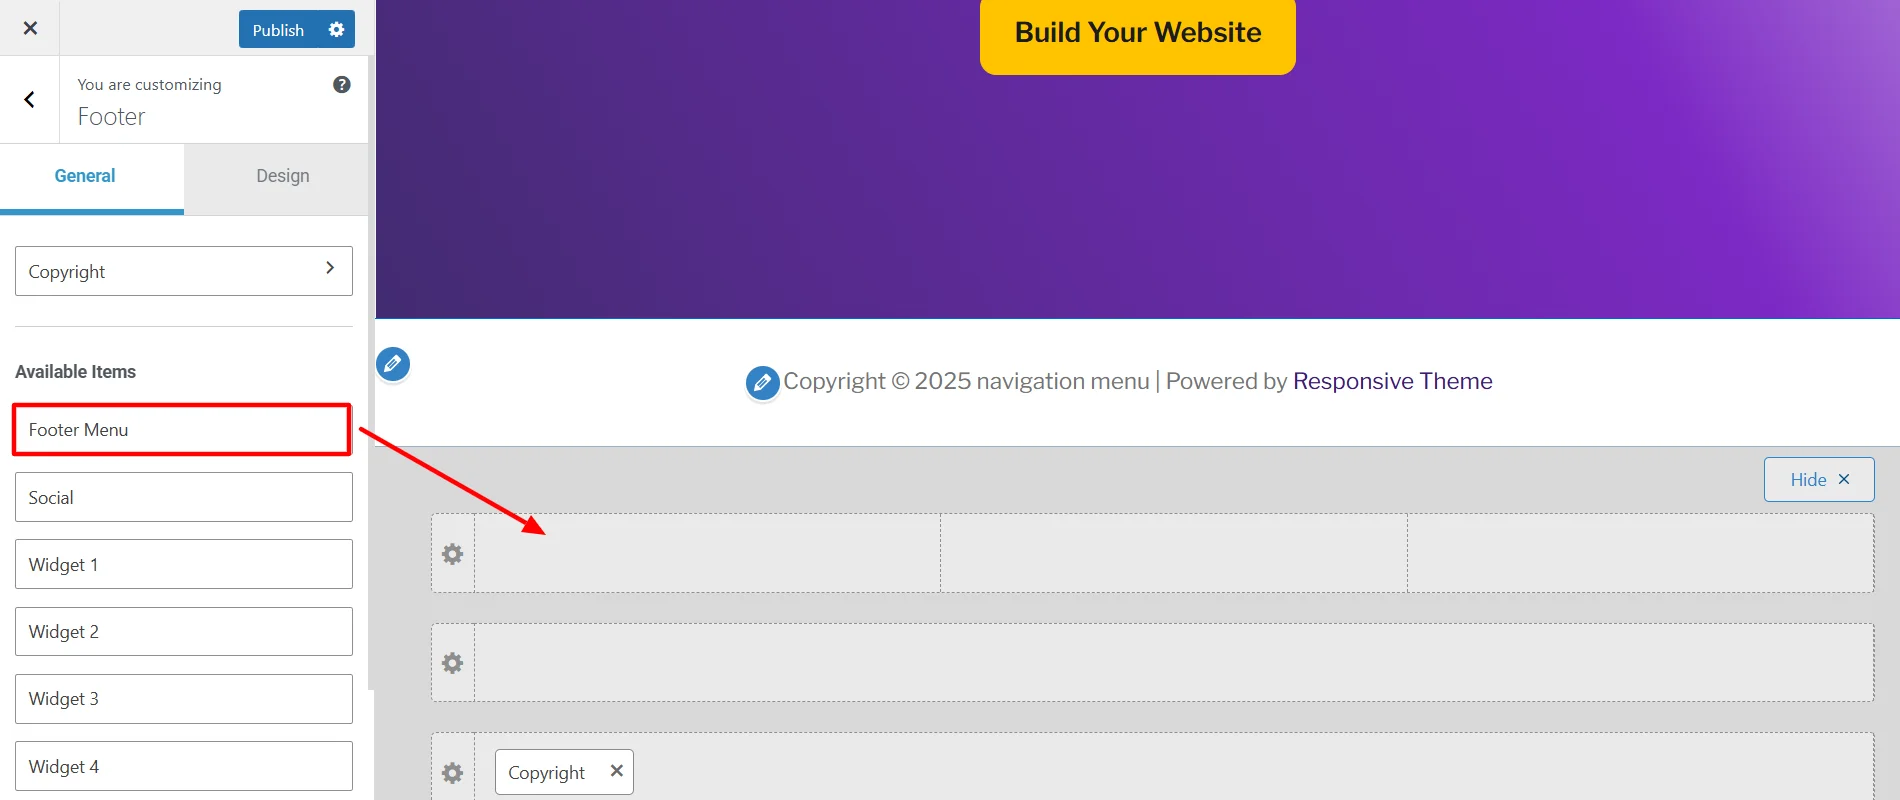
From your WordPress dashboard, navigate to the theme customizer from Appearance > Customize.
To edit the footer, navigate to Footer from the Customizer settings.

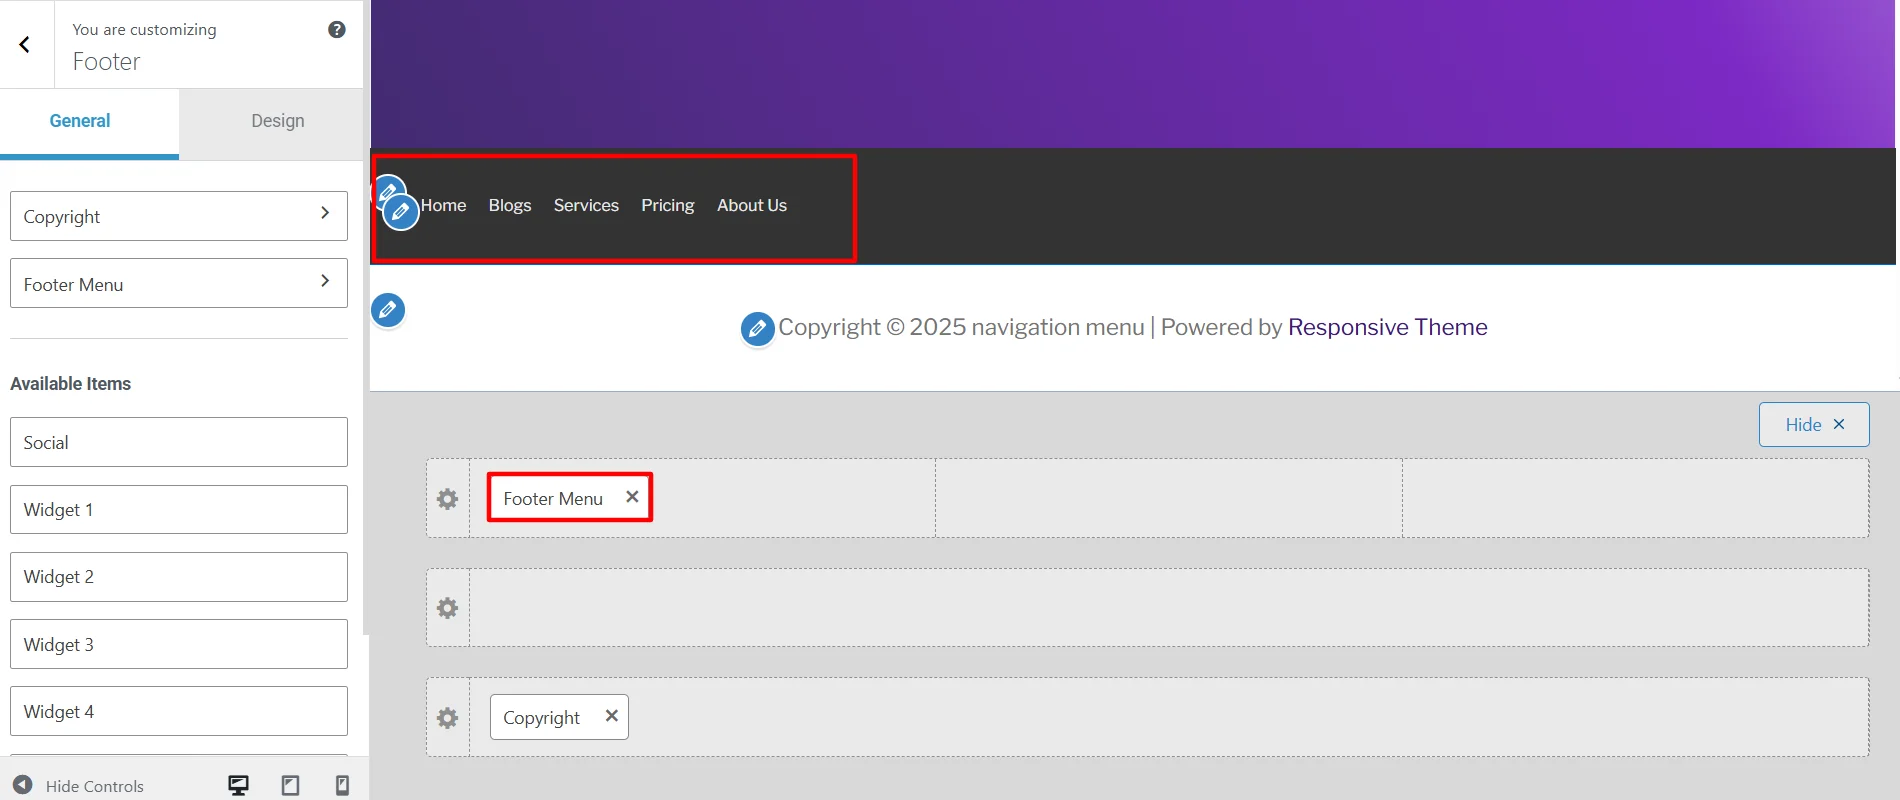
To add the navigation menu in the Footer, simply drag and drop the Footer Menu widget.
Once you add the menu to the footer, click on the Footer Menu widget to further customize it.
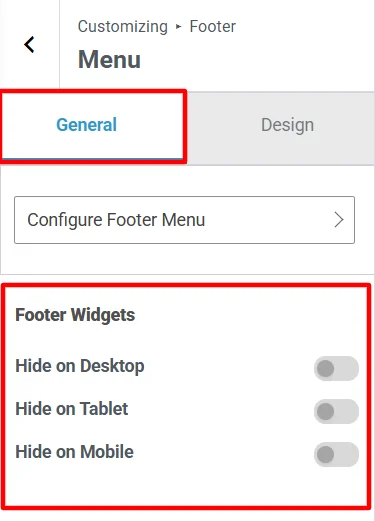
General Customization
The general customization options of the footer menu enable you to set basic responsive settings that allow for its display on different devices.
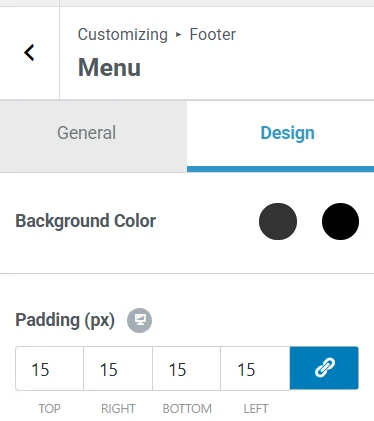
Design Customization
The design customization options of the footer menu enable you to customize the normal and hover background colors of the footer menu.
Additionally, it allows you to adjust the padding of the footer menu in the website footer.
Once you have customized the navigation menu in the footer, you can click Publish and make the menu live in the footer.
FAQ
A navigation menu functions as a website map, enabling you to easily locate and explore the key pages and sections on a website. It is typically present in the header or footer section of your website, displaying essential links and buttons that redirect to other pages on the website.
To create a navigation menu in WordPress, you can follow these steps:
1. Install and activate a Classic theme (We recommend using the Responsive Theme)
2. From the dashboard, navigate to Appearance > Menus
3. Click on Create New Menu and add a unique name to it, then set its location.
4. Add the pages you want to include in the menu and organize the items as desired.
5. Once all these changes are done, click Save Changes.
A sub-menu, also known as a drop-down menu, is a secondary menu that appears when a user hovers over or clicks any primary menu item. It allows for additional navigation options without cluttering the main menu.
To add a sub-menu to your website, you can add the sub-menu items under a primary menu.
Suppose you provide three different services, and you want to show them in your menu via pages for each.
To do this, when creating your menu, you can add all your service pages, such as service A, B, and C, and a primary custom link page to include overall services in the menu. Next, you can organize the items accordingly, keeping the main custom link on top and its sub-items dragged under the custom link.
Conclusion
The navigation menu is a simple element that can significantly enhance your user experience on the website. It will not only help you improve website visits but also increase your business conversions.
Following the simple steps outlined in the guide, you can easily create a structured and intuitive menu for your WordPress site.
Use Cyberchimps Responsive theme to easily customize your website’s navigation menu.
Further, if you liked this article, you can also consider reading:
- How To Edit Footer In WordPress – 3 Easy Methods
- What is a Header Footer Builder in WordPress?
- How to Change Fonts in WordPress? (4 Simple Ways)
Grab the Responsive Theme today!


