
Are you looking to add a table of contents to your Elementor website?
Your visitors might often face problems navigating your extensive web page content. However, you can integrate a table of contents to enhance their experience.
Whether it’s a blog, business site, or other content-rich platform, implementing a table of contents can significantly enhance the navigation and readability of your website,
We will provide detailed guidance on each step and help you create one for your Elementor website.
What is the Table of Contents Widget?
A table of contents widget enables you to effortlessly create and showcase simplified content of your website’s page or post.
This widget can enhance the user experience by providing easy navigation and improving the overall accessibility of your content by listing headings such as H1, H2, H3, etc., and providing clickable links.
Integrating a table of contents into your web page is straightforward and involves just a few simple clicks. You can customize the appearance of the table of contents to align with your site’s unique style and layout perfectly.
This widget is a time-saving tool that automatically scans and generates a list of headings in the content based on your page’s structure.
Pre-requisites for Adding Table of Contents in Elementor
Ensure you have the following plugins to create a table of contents on your Elementor website.
Elementor Page Builder

Elementor is the widely famous WordPress page builder plugin that allows you to develop and customize websites without coding. It offers pre-designed templates, design options, and advanced styling capabilities.
Moreover, with its drag-and-drop interface, users can effortlessly move various elements and widgets according to their requirements, thus creating and modifying web pages visually.
Elementor lets you achieve a professional-looking website quickly and easily with ultimate functionality and appearance.
Responsive Addons For Elementor

Another robust plugin we will need is the Responsive Addons For Elementor, which provides 80+ free advanced widgets and 250+ ready-to-use templates.
Additionally, it offers advanced customization options, including responsive controls, widget modification, and design elements specifically designed for desktop, mobile, and tablet views.
Also, Responsive Addons for Elementor add to user experience and engagement.
This tool is especially useful for developers and designers who want to swiftly and effortlessly craft professional, dynamic, and mobile-friendly websites.
How To Add Table Of Contents With Elementor
[Note: To add a FAQ widget, a website template must be built with the Elementor page builder].
Cyberchimps offers 250+ Elementor templates you can use to build your website instantly.
The Responsive Addons for the Elementor plugin can significantly boost your website design capabilities. It provides a wide range of advanced and customizable widgets that integrate seamlessly with Elementor.
Now, let’s look at adding a table of contents section with Responsive Addons for Elementor.
Step 1: Install and Activate Responsive Addons for Elementor Plugin
Go to the WordPress dashboard and click Plugins > Add New from the menu.
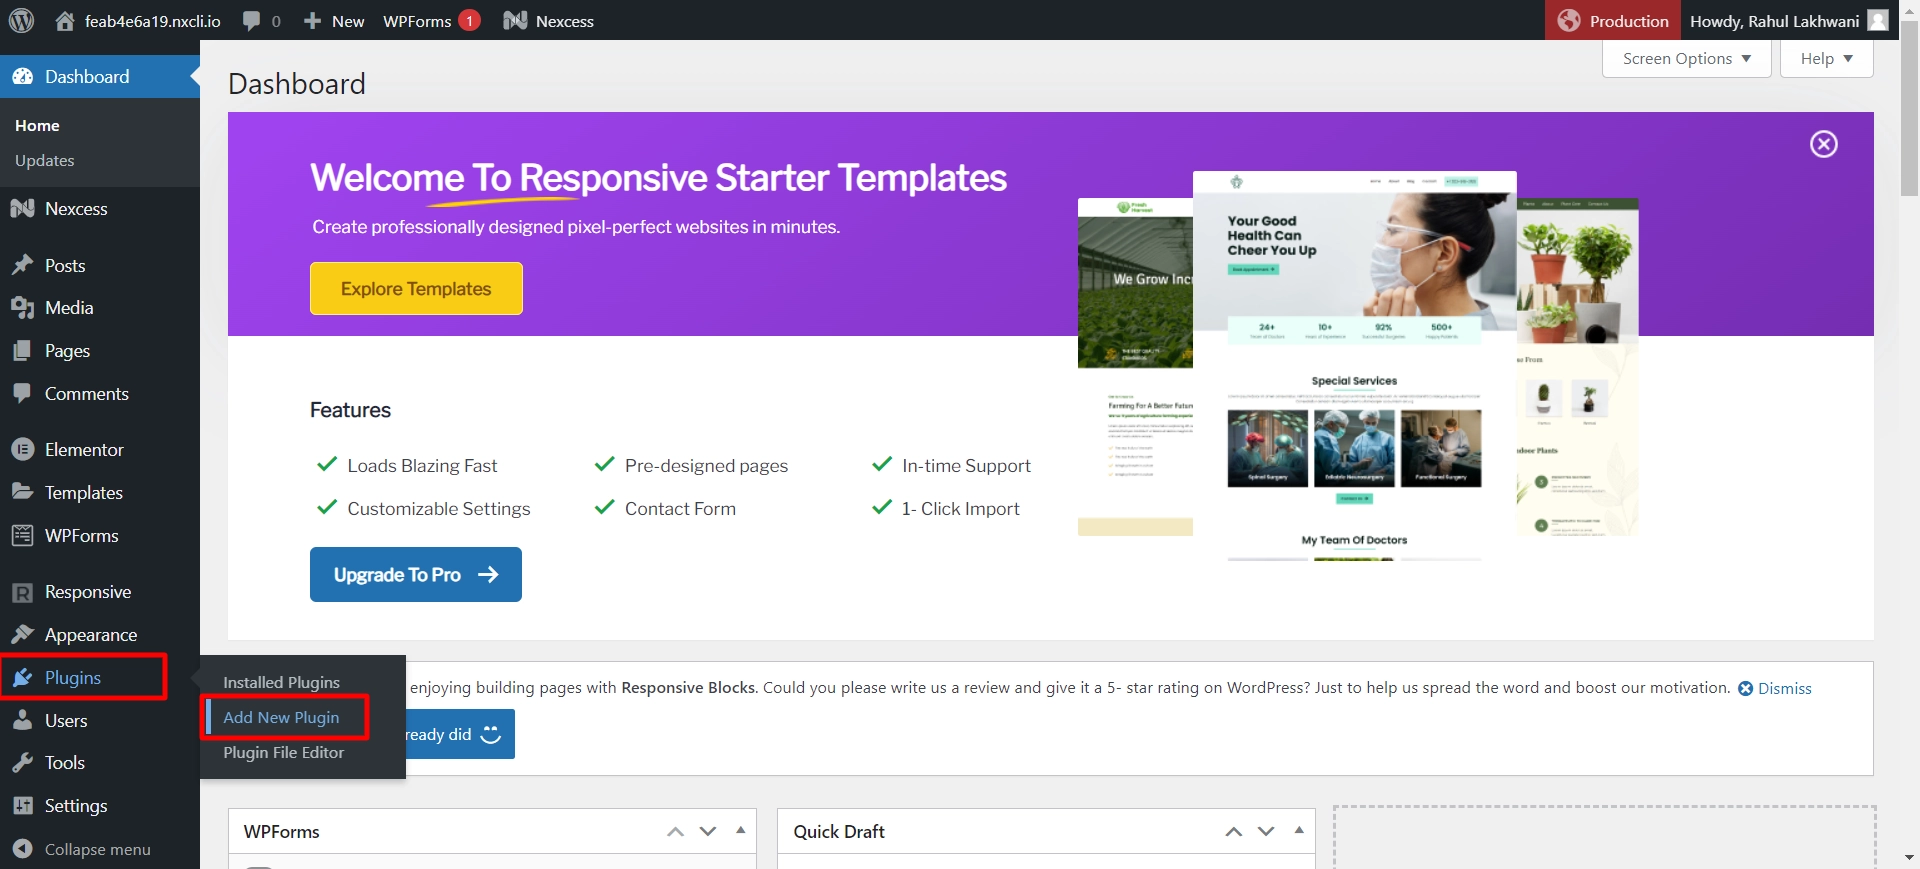
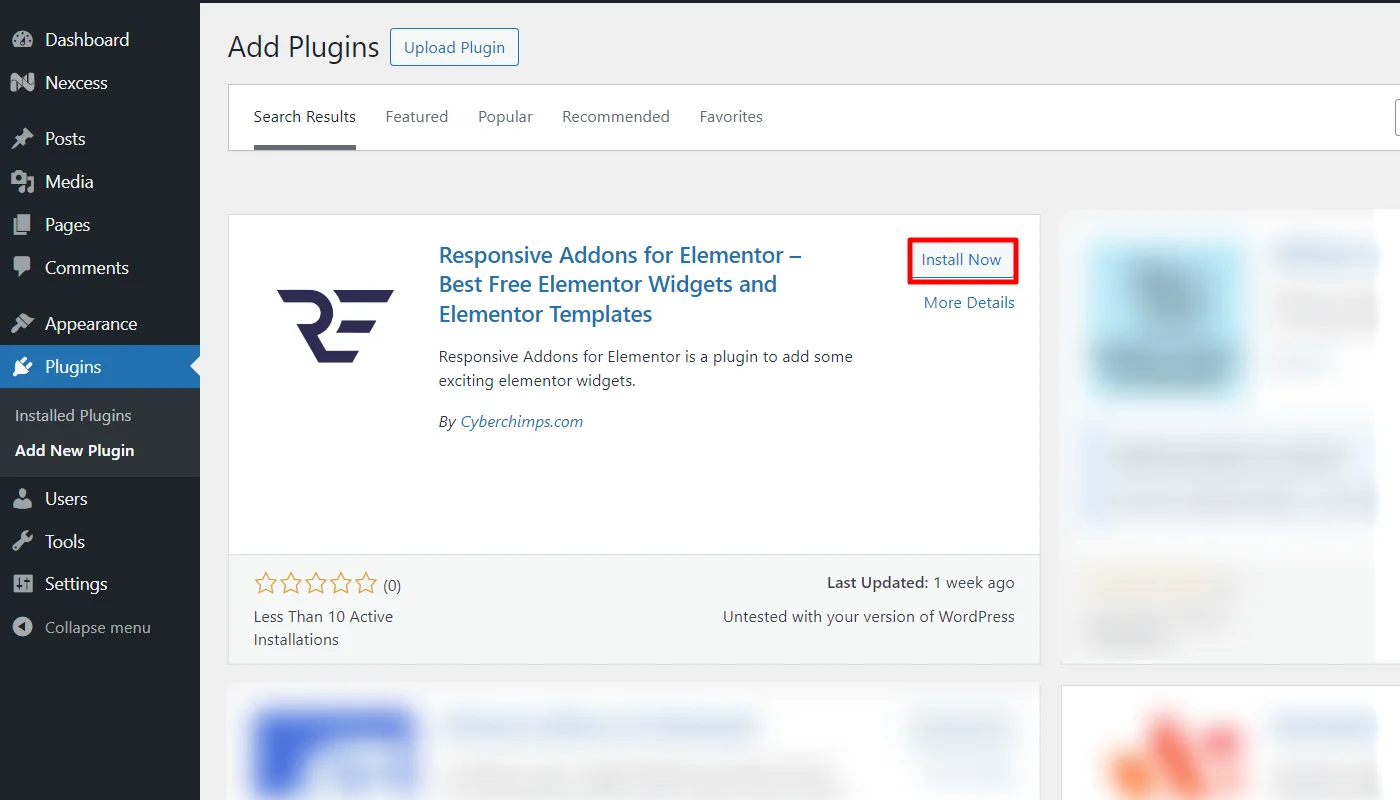
Search for Responsive Addons for Elementor in the search bar to find the plugin.

Click on Install Now.
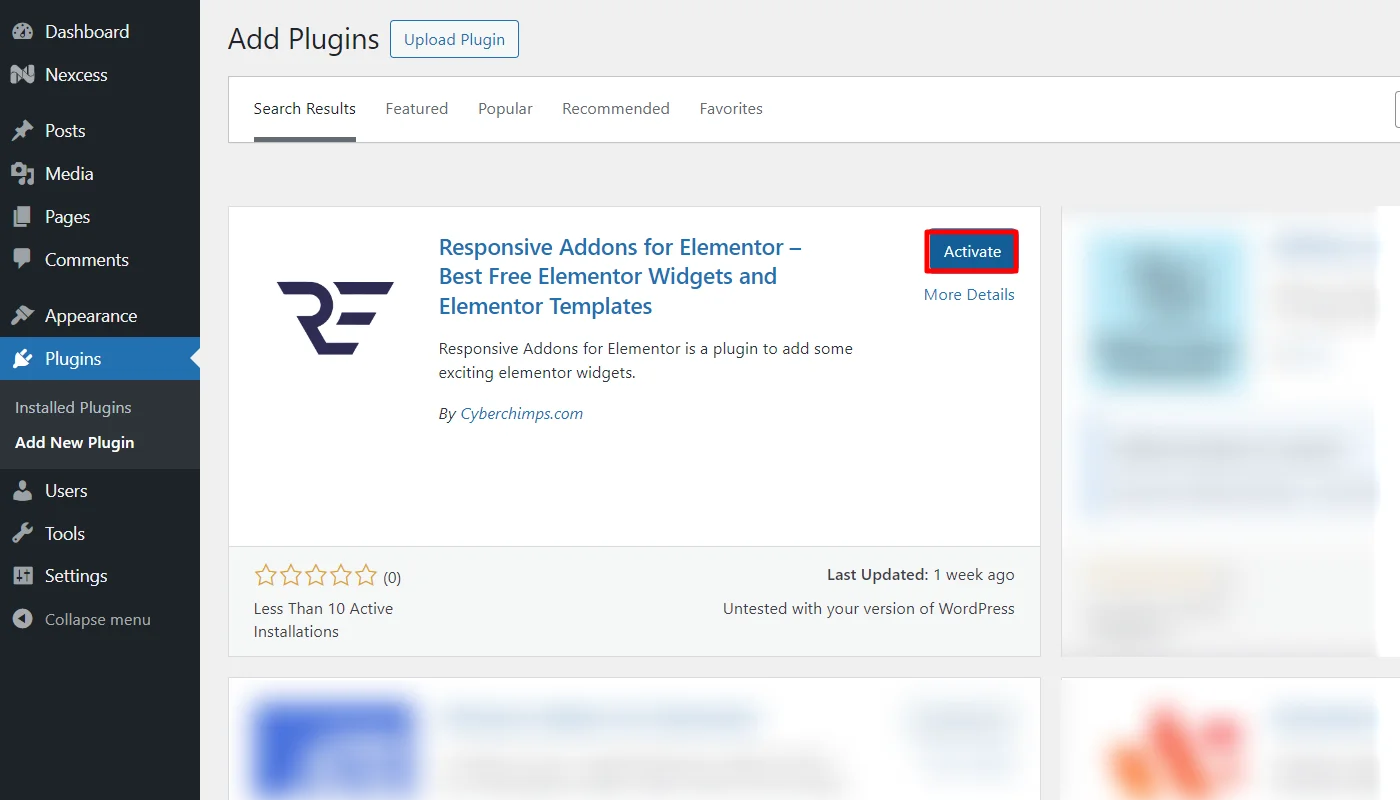
Once the download is complete, click on Activate to activate the plugin.
Step 2: Add the Table of Contents to your Page
For this guide, we will use a ready-to-use Event Conference template, but you can use any free WordPress template.

Click on Edit with Elementor.

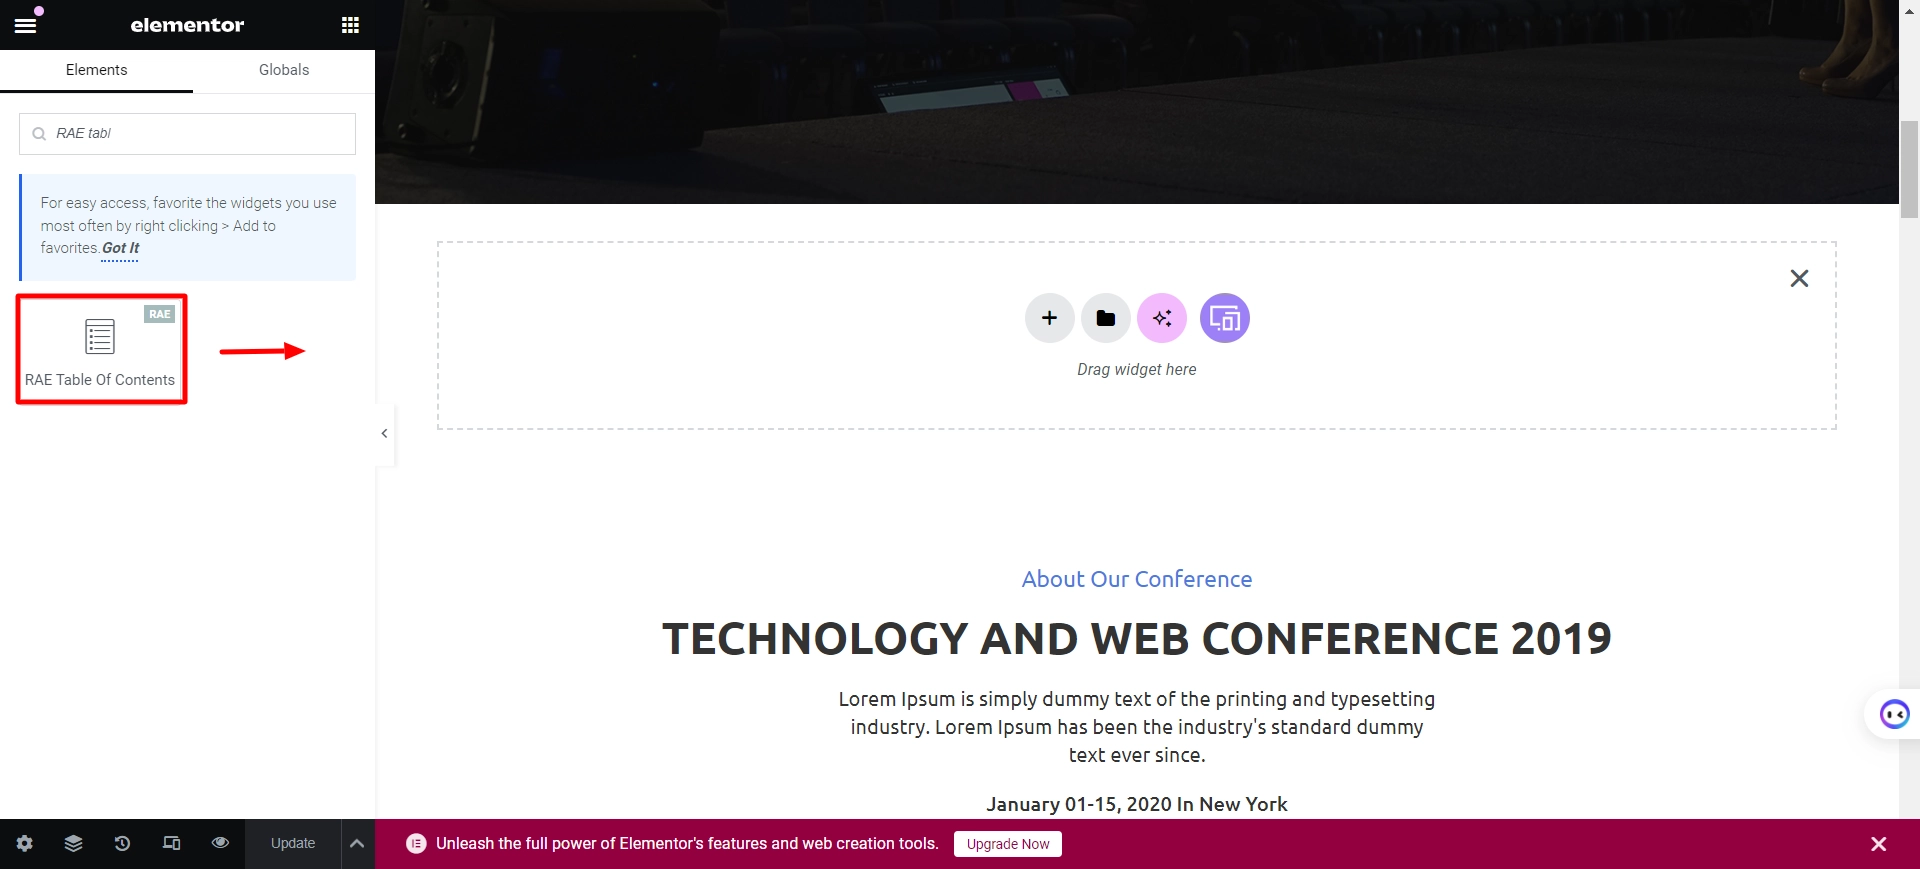
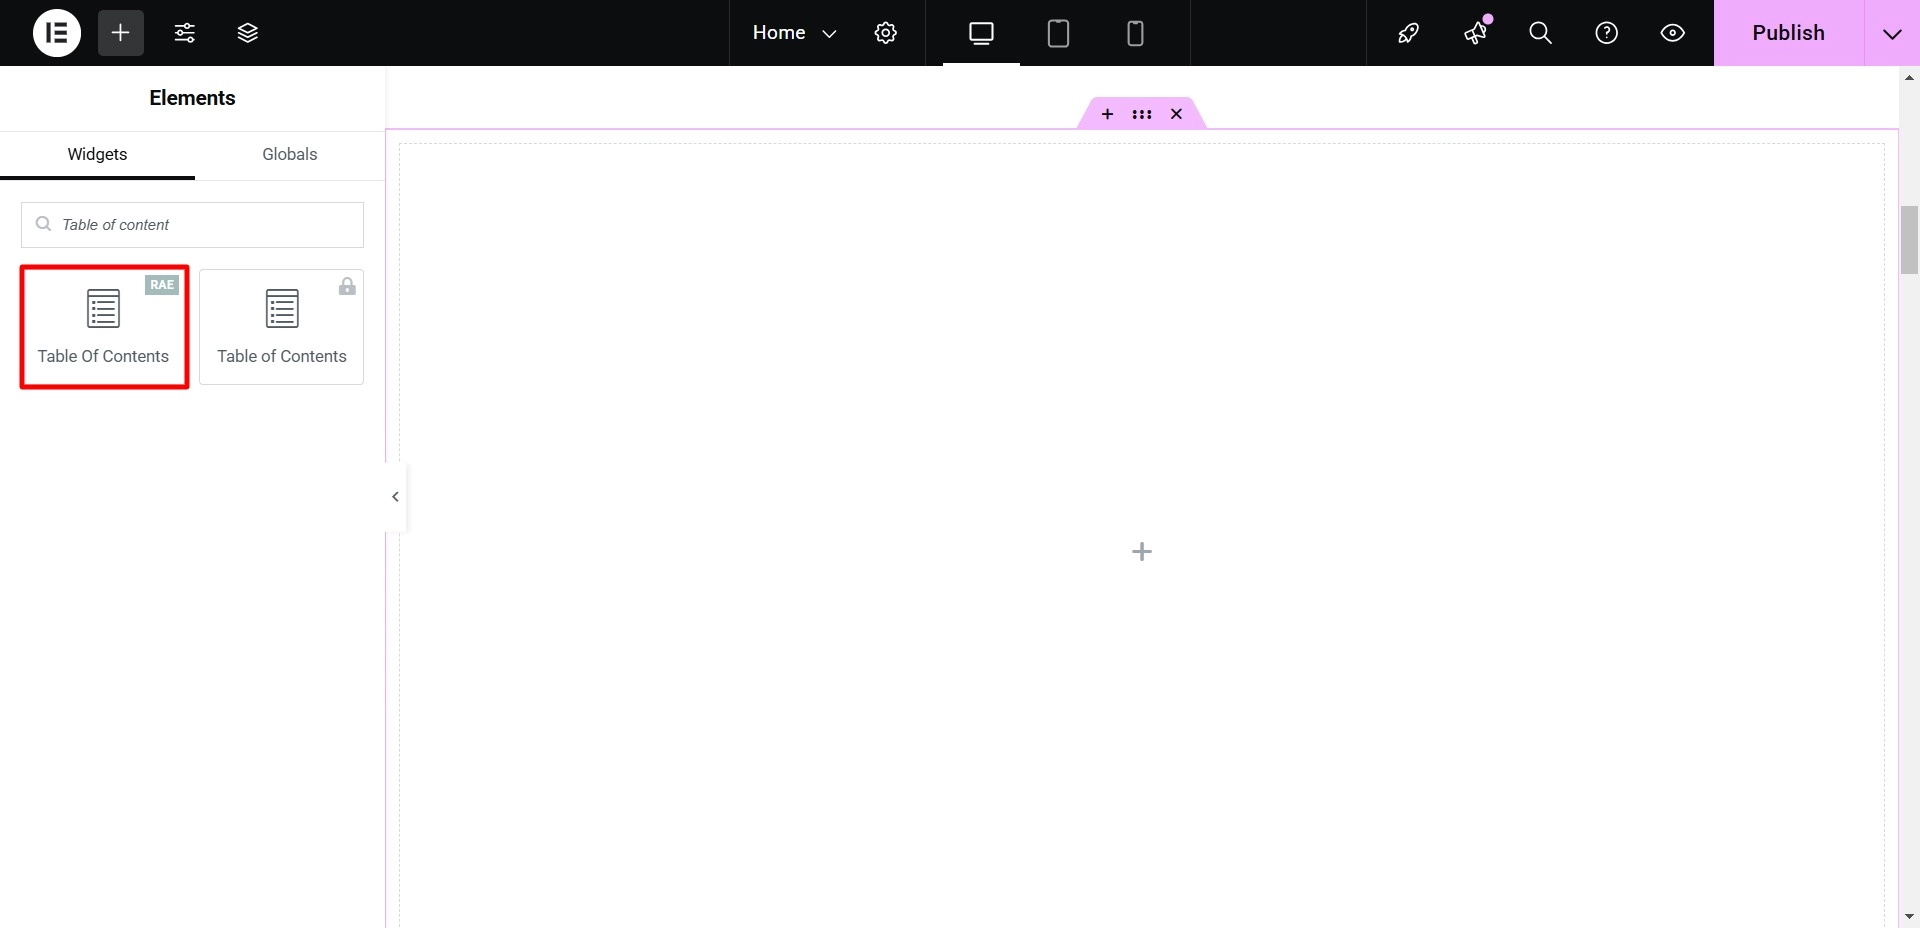
Step 3: Search for the RAE Table Of Contents
Search for the RAE Table Of Content widgets in the Elementor search function.

Drag and drop the widget to the desired location on the page.
Step 4: Customize RAE Table of Contents
Let’s look into content customization of the table of contents.
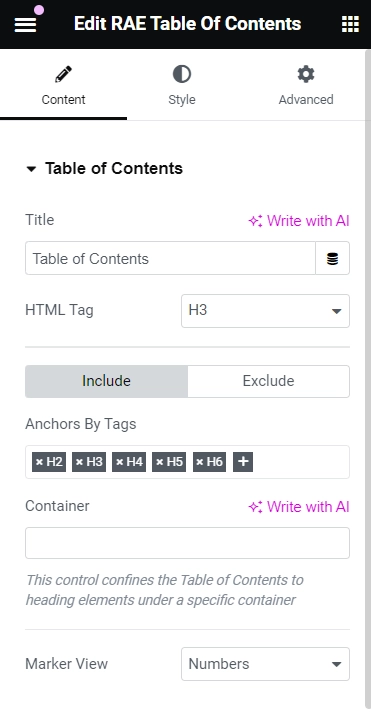
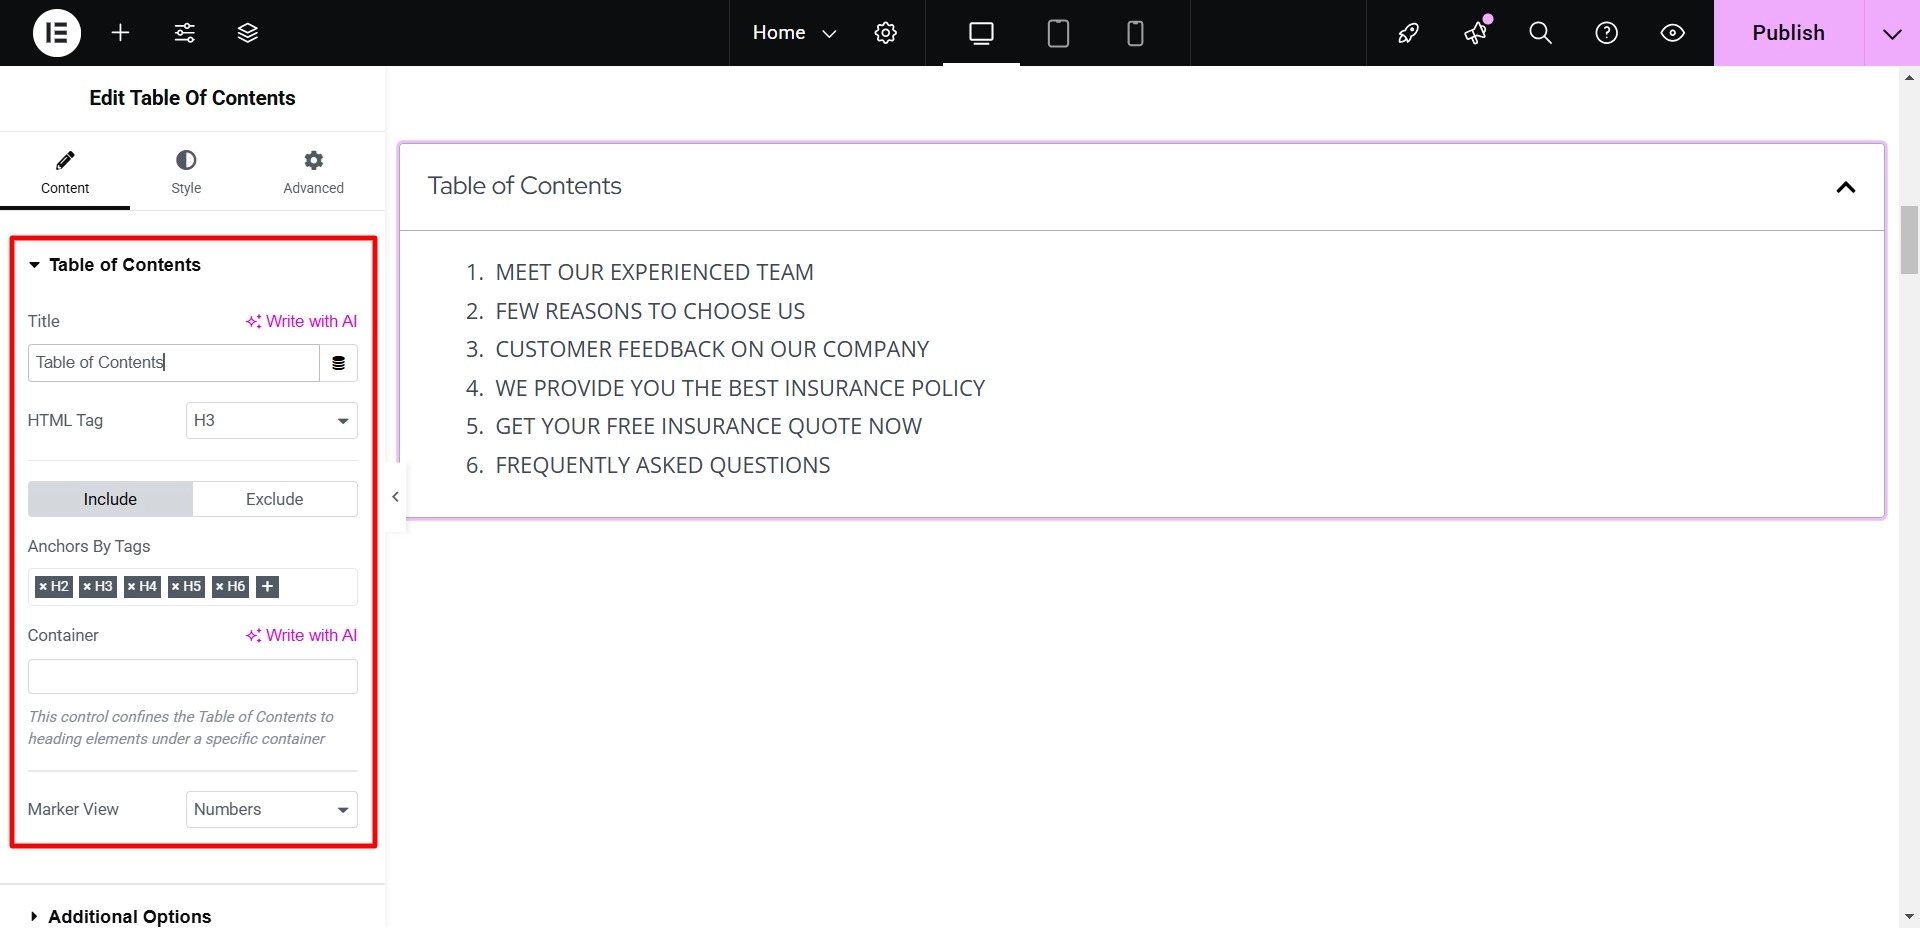
Content
- Title: You can specify the title for the table of contents box.
- HTML Tag: Choose the appropriate HTML tag (H2 to H6 or div) for your heading. This is the format in which your heading will be displayed.
- Include :
- Anchors By Tags – Select which tags should be included in the table of contents.
- Container – Restrict the list to include only tags from a specific container.
- Exclude:
- Anchors By Selector – Enter CSS selectors in a separate list to be excluded.
- Marker View:
- Icon (available only if Marker View is set to Bullets) – Click the Icon Library to select an icon or choose None to use any bullet icons.
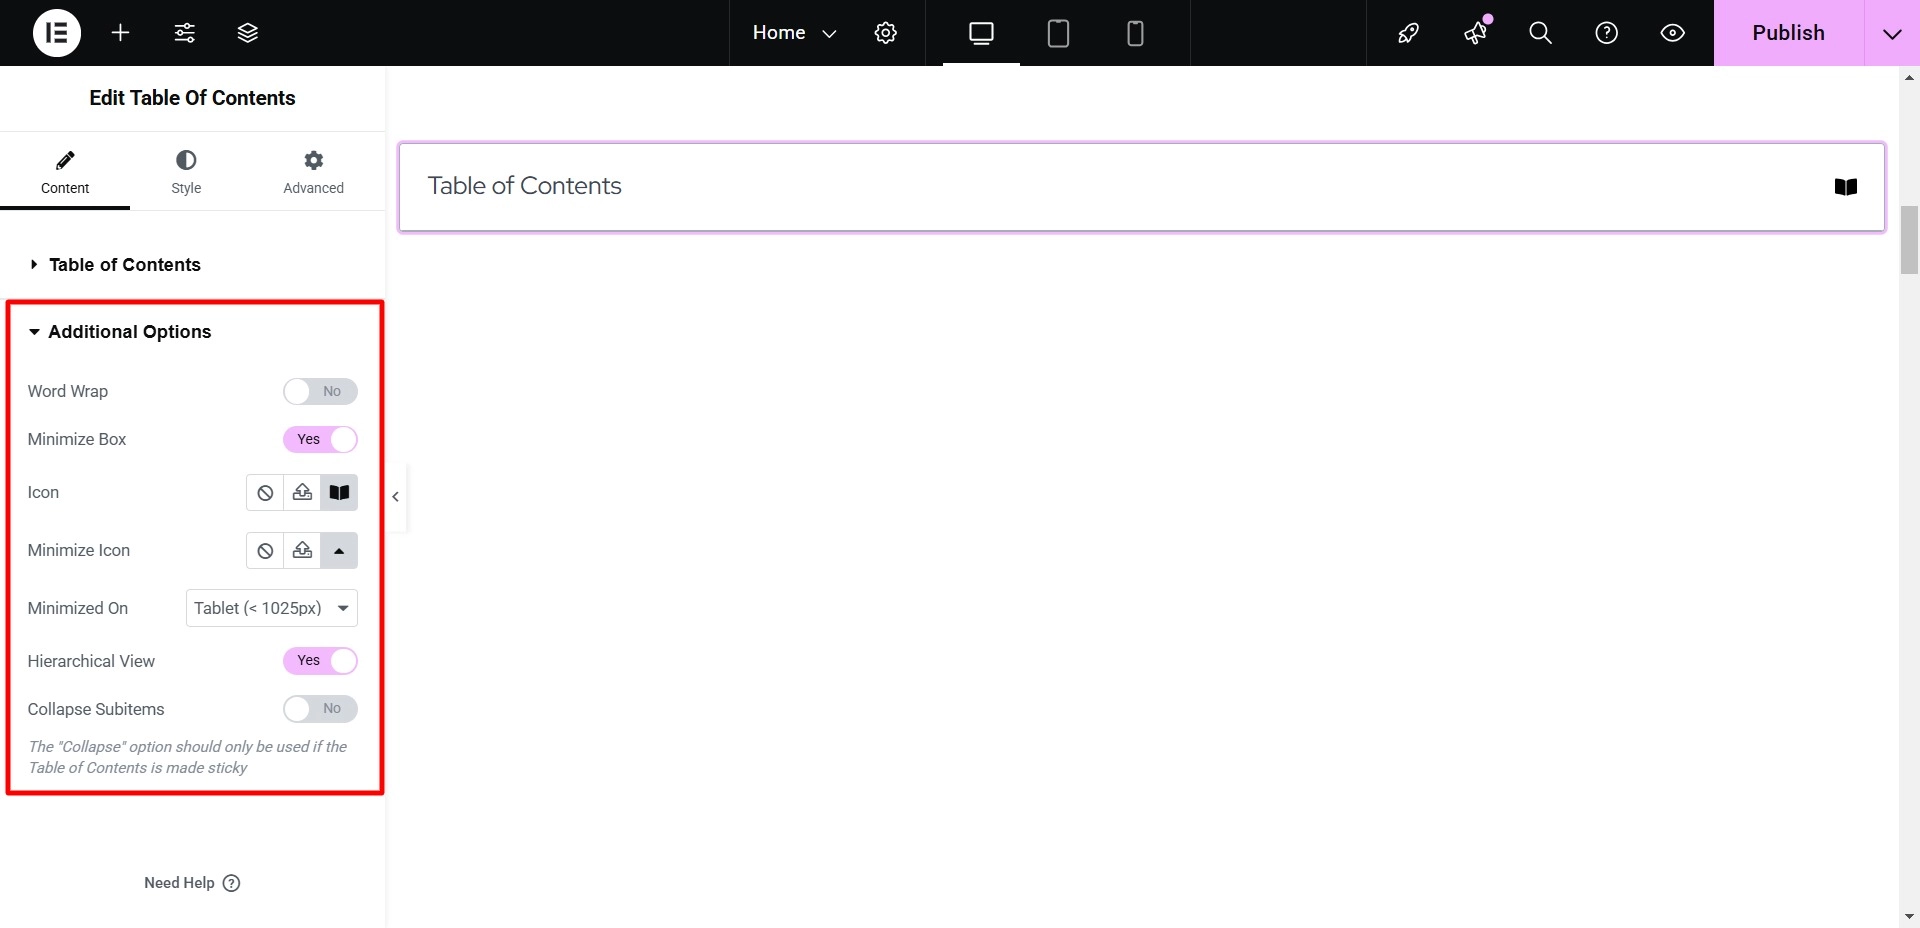
Step 5: Additional Options for RAE Table Of Content.
The Additional Options will give you more advanced customization options.
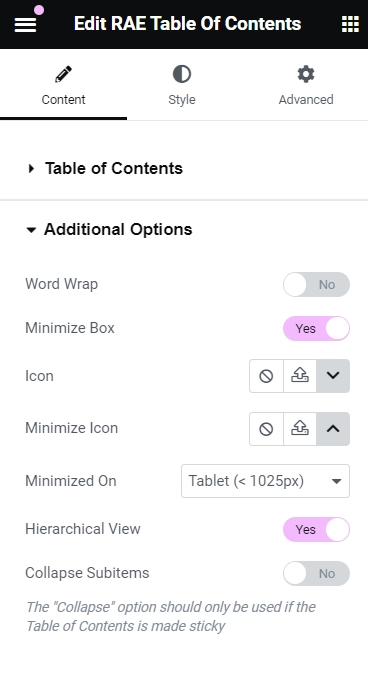
Additional Options
- Word Wrap- You can set this to Yes to allow the list items to wrap when they are too long to fit in a single line.
- Minimize Box- Choose Yes to enable the table of contents to be collapsed or No to keep it expanded by default.
- Icons – Use the Icon Library to choose an icon displayed when the widget is minimized, indicating that the user can expand it by clicking.
- Minimize Icon- Use the Icon Library to choose an icon displayed when the widget is expanded, indicating that the user can minimize it by clicking. You can also upload an SVG icon or choose None to display no icon.
- Minimized On – (This option is only available if the Minimize Box is set to Yes.) Choose to minimize on Mobile, Tablet, or None devices.
- Hierarchical View- Enable this to display list items with indentation based on tag hierarchy.
- Collapse Subitems- (This option is only available if Hierarchical View is set to Yes.) Enable this to collapse nested lists and only show top-level items.
Step 6: Styling of RAE Table Of Content.
Now, let’s style your created RAE Table Of Content
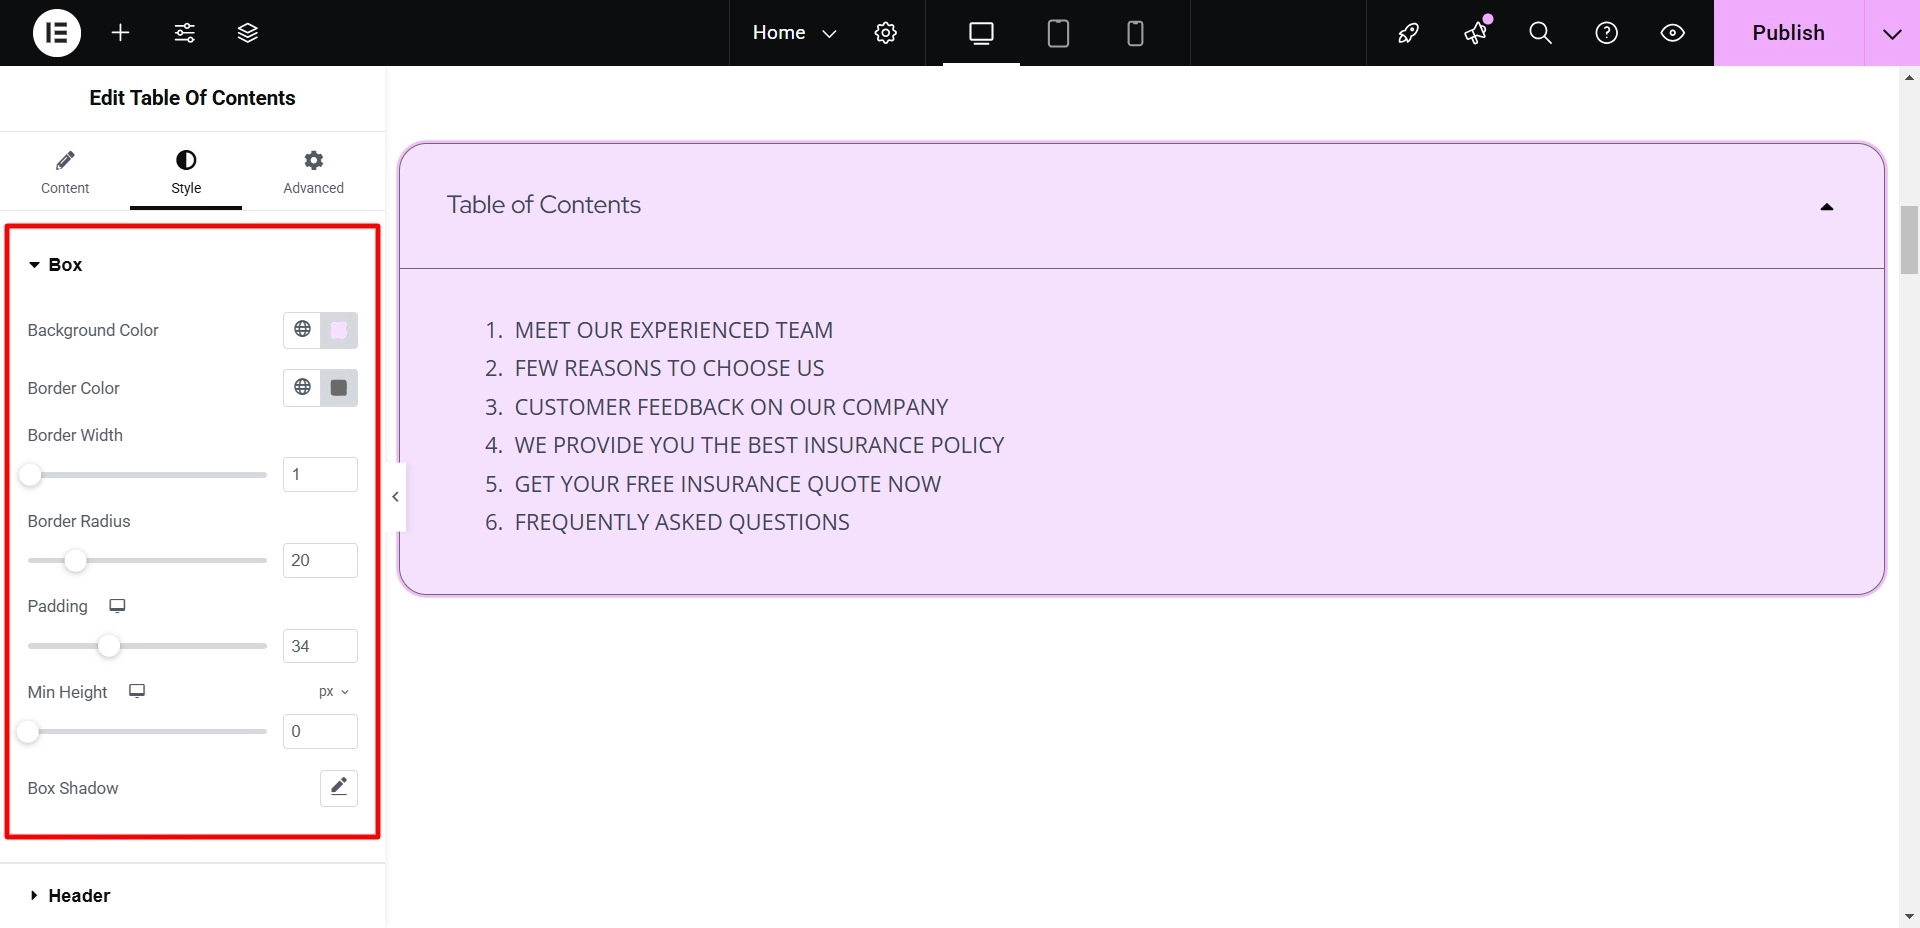
Box
This will allow you to customize the box style of the WordPress table of contents.

Box Style
- Background Color – Choose a suitable color for the table of contents box.
- Border Color – Select a border color that complements the box’s design.
- Border Width – Determine the appropriate width for the border of the box.
- Border Radius – Choose a border-radius that creates a visually appealing look for the box.
- Padding – Select the padding that enhances the spacing and alignment within the box.
- Min Height – Set the minimum height to ensure the box has a consistent size.
- Box Shadow – Customize the box shadow for added visual depth and dimension.
Header
This option will let you style the header.
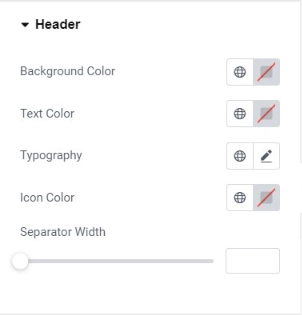
Header
- Background Color- Choose the background color for the table of contents header.
- Text Color – Select the text color for the header.
- Typography – Customize the typography for the header text.
- Icon Color – Set the color for the expand/minimize icon.
- Separator Width – Adjust the width of the header’s border bottom.
List
This feature will allow you to modify the listed part of the Table Of Content Elementor.

List
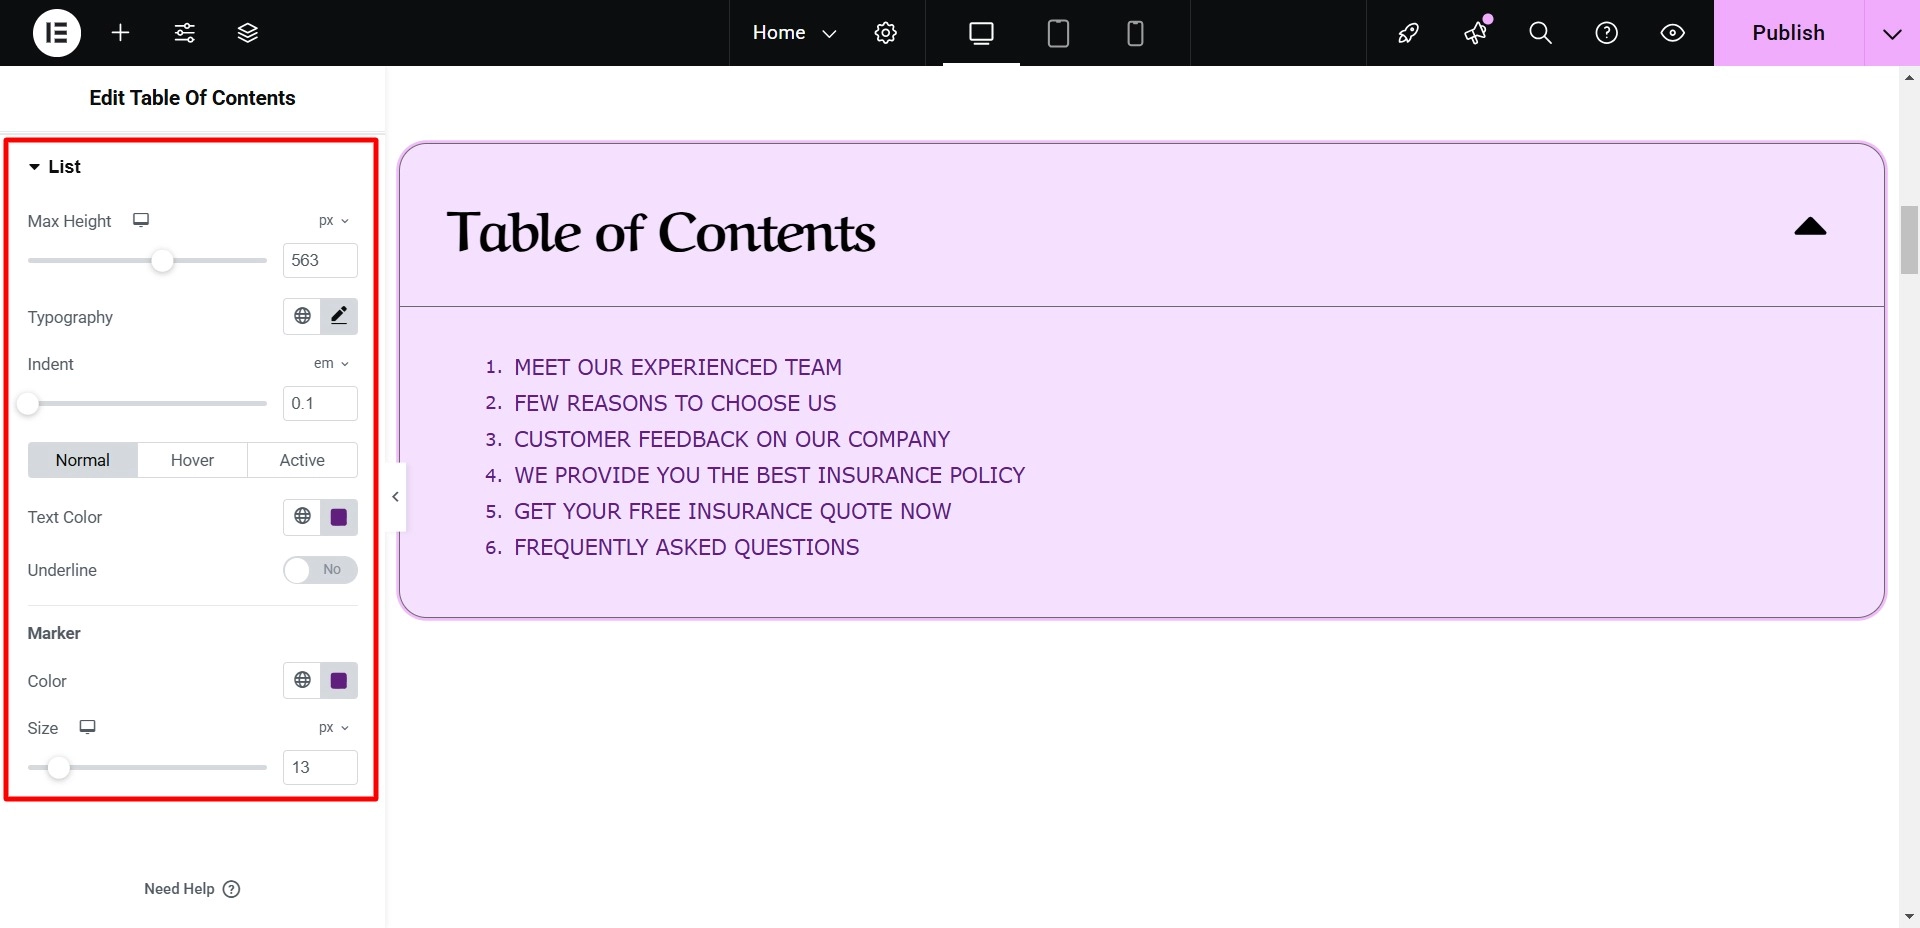
- Max Height – Set the maximum height for the list items box.
- Typography – Choose the typography for the list of items.
- Indent – Set the indentation for sub-items.
- Text Color – Select the color for Normal, Hover, and Active states.
- Underline – Choose whether to show underline for the list items.
- Color – Choose the color for the list icon.
- Size – Adjust the size of the marker icon.
Once you have explored all the settings, let’s look at how to edit the Table of Contents.
First, drag and drop the widget onto the page.
By default, the Table of Contents widget will appear like this:

The first setting under the Content tab is the Table of Contents itself. I will include all the tags I want to display in my Table of Contents.
Under Additional Options, I’ll add an Icon and a Minimize Icon, leaving the other settings as they are.
Now that I’m done with the Content tab let’s move on to the Style tab.
Here, I will change the box’s Background Color, Border Color, Width, and Radius and adjust the Padding.
Under the Header section, I will change the Text Color, adjust the Separator width, and modify the Typography.
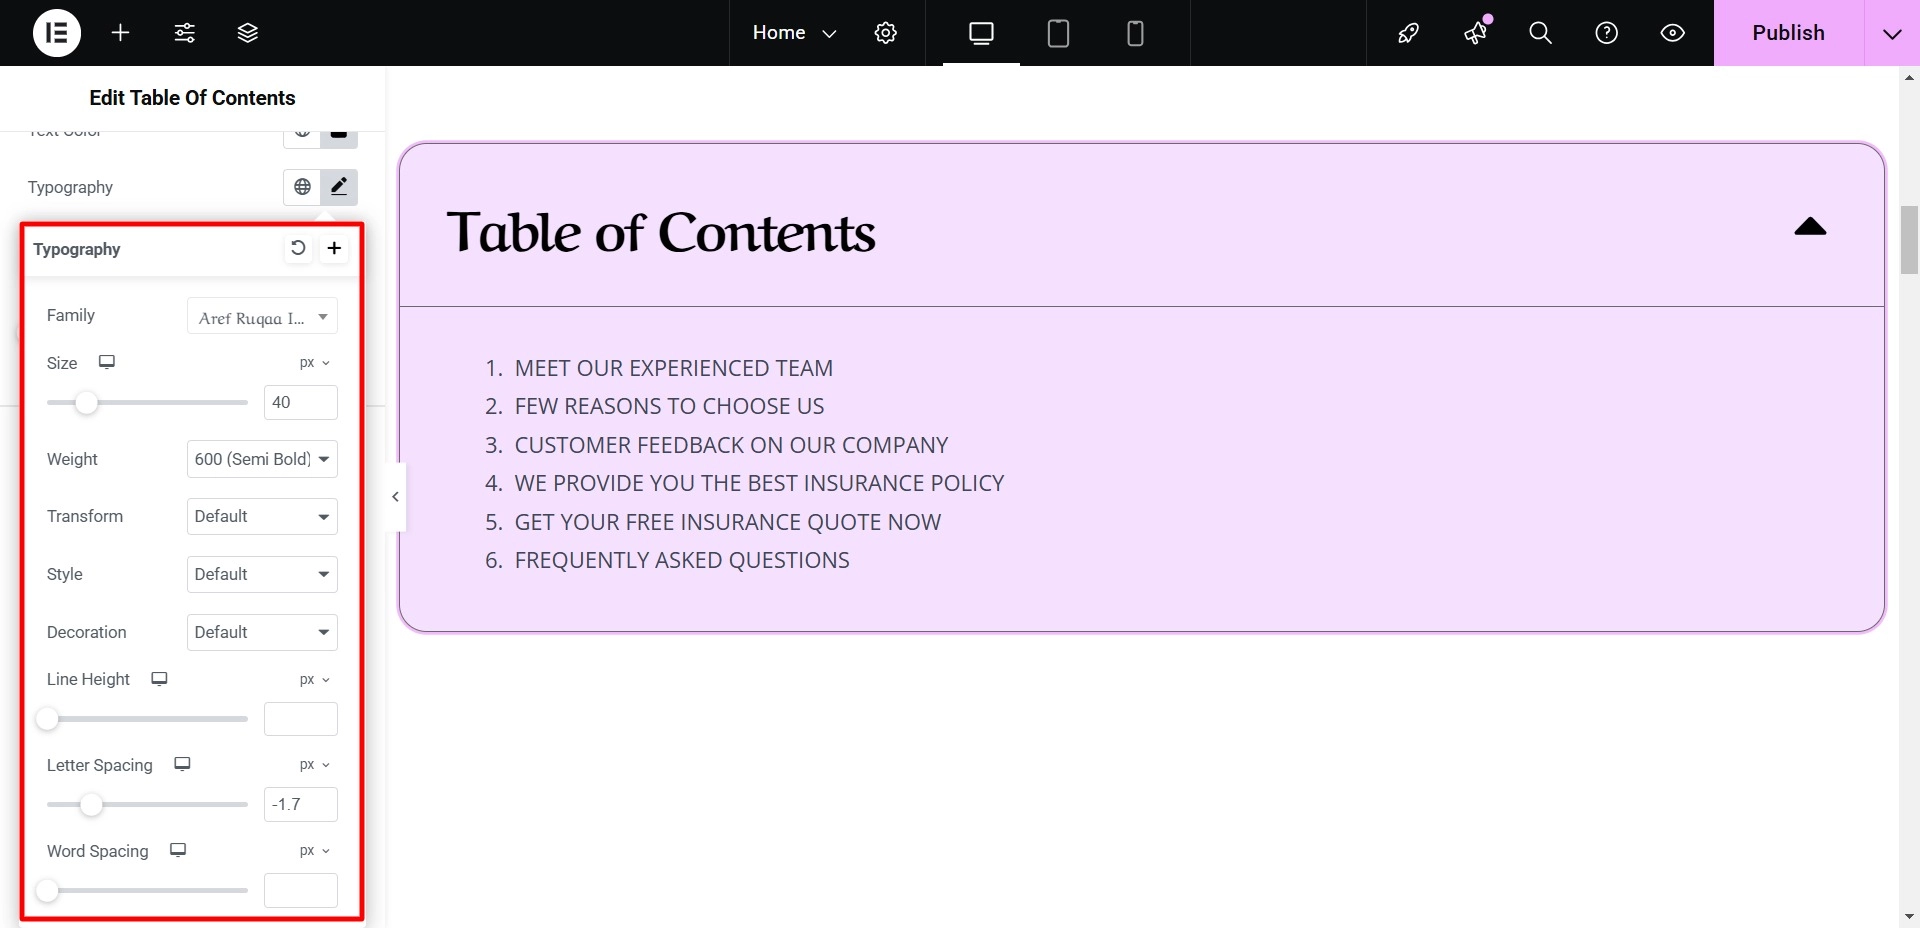
In the List section, I will adjust the Maximum Height, Typography, and Marker Color.
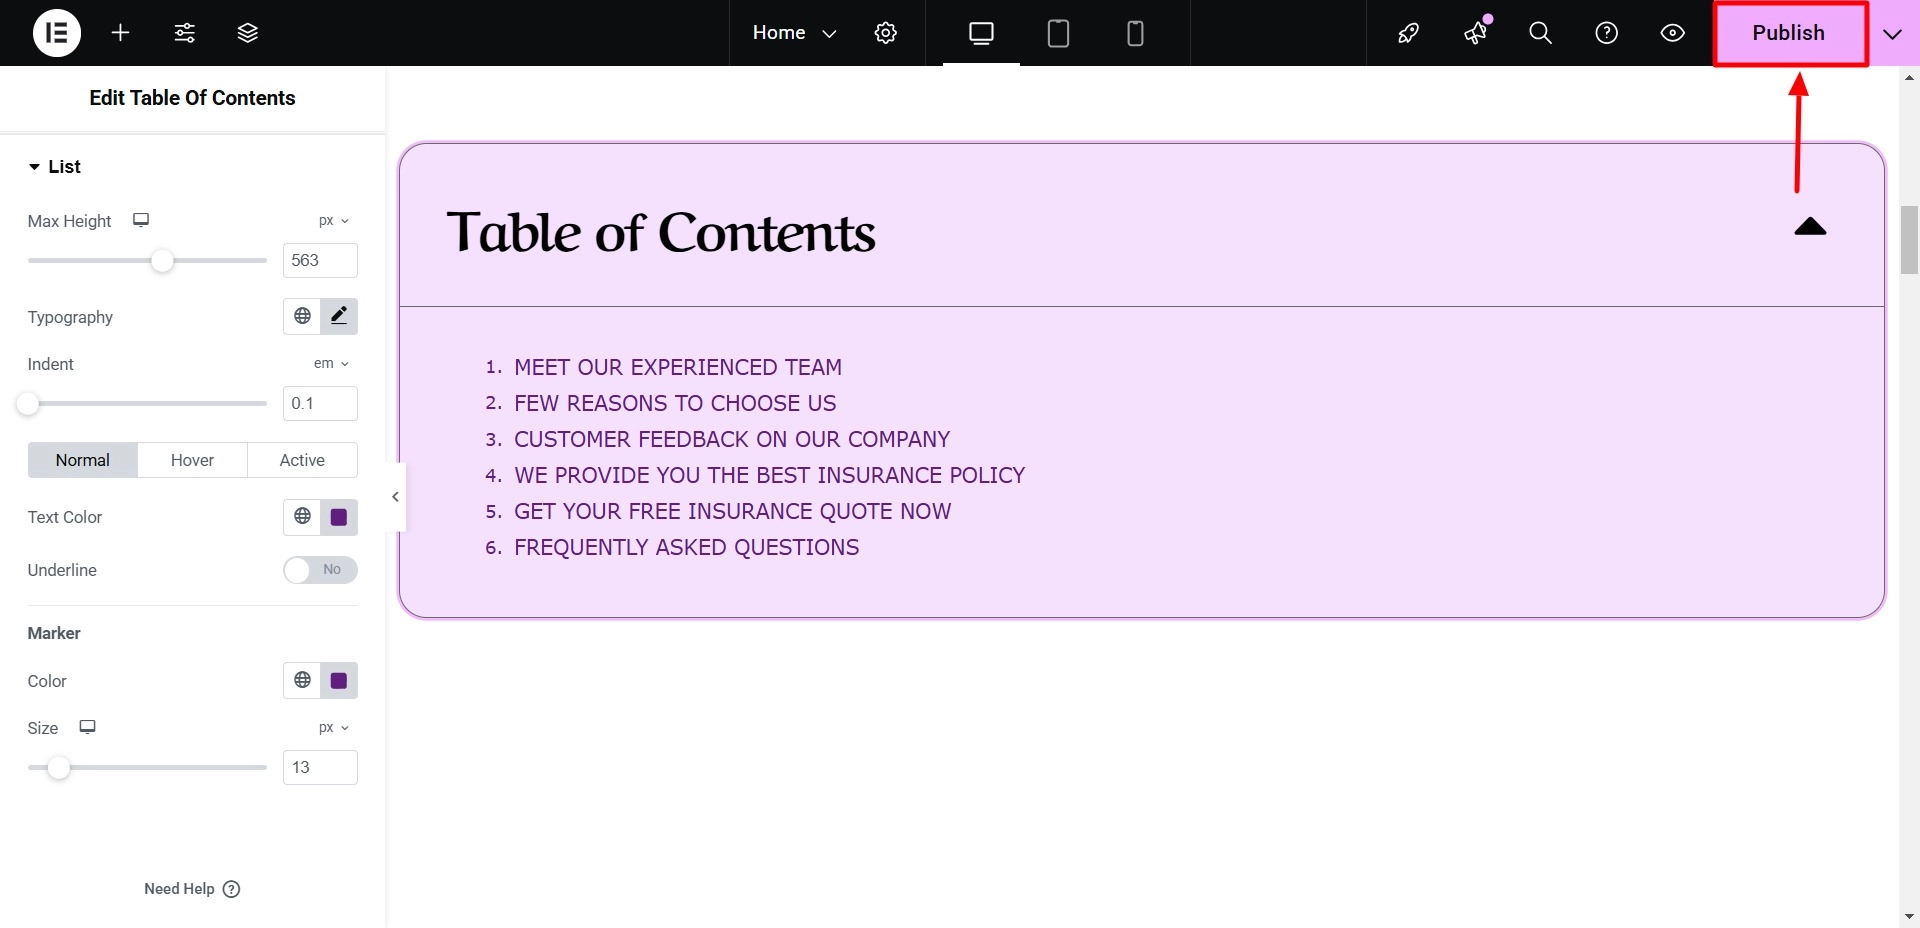
Once all the changes are made, click on Publish.
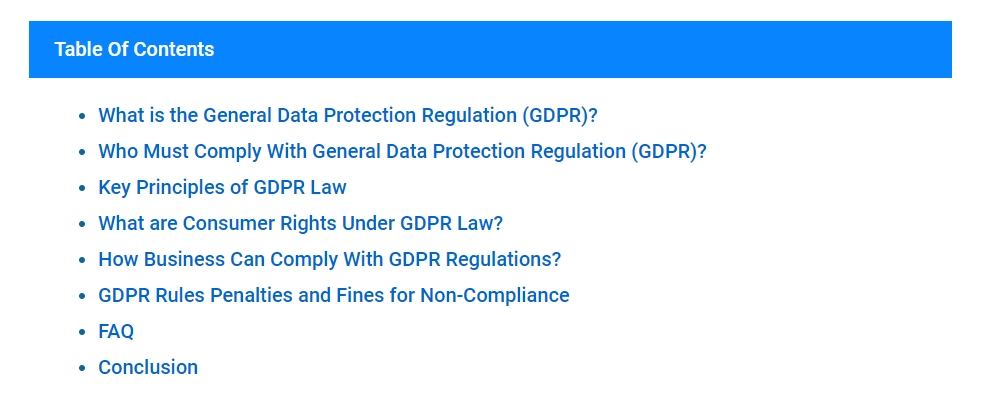
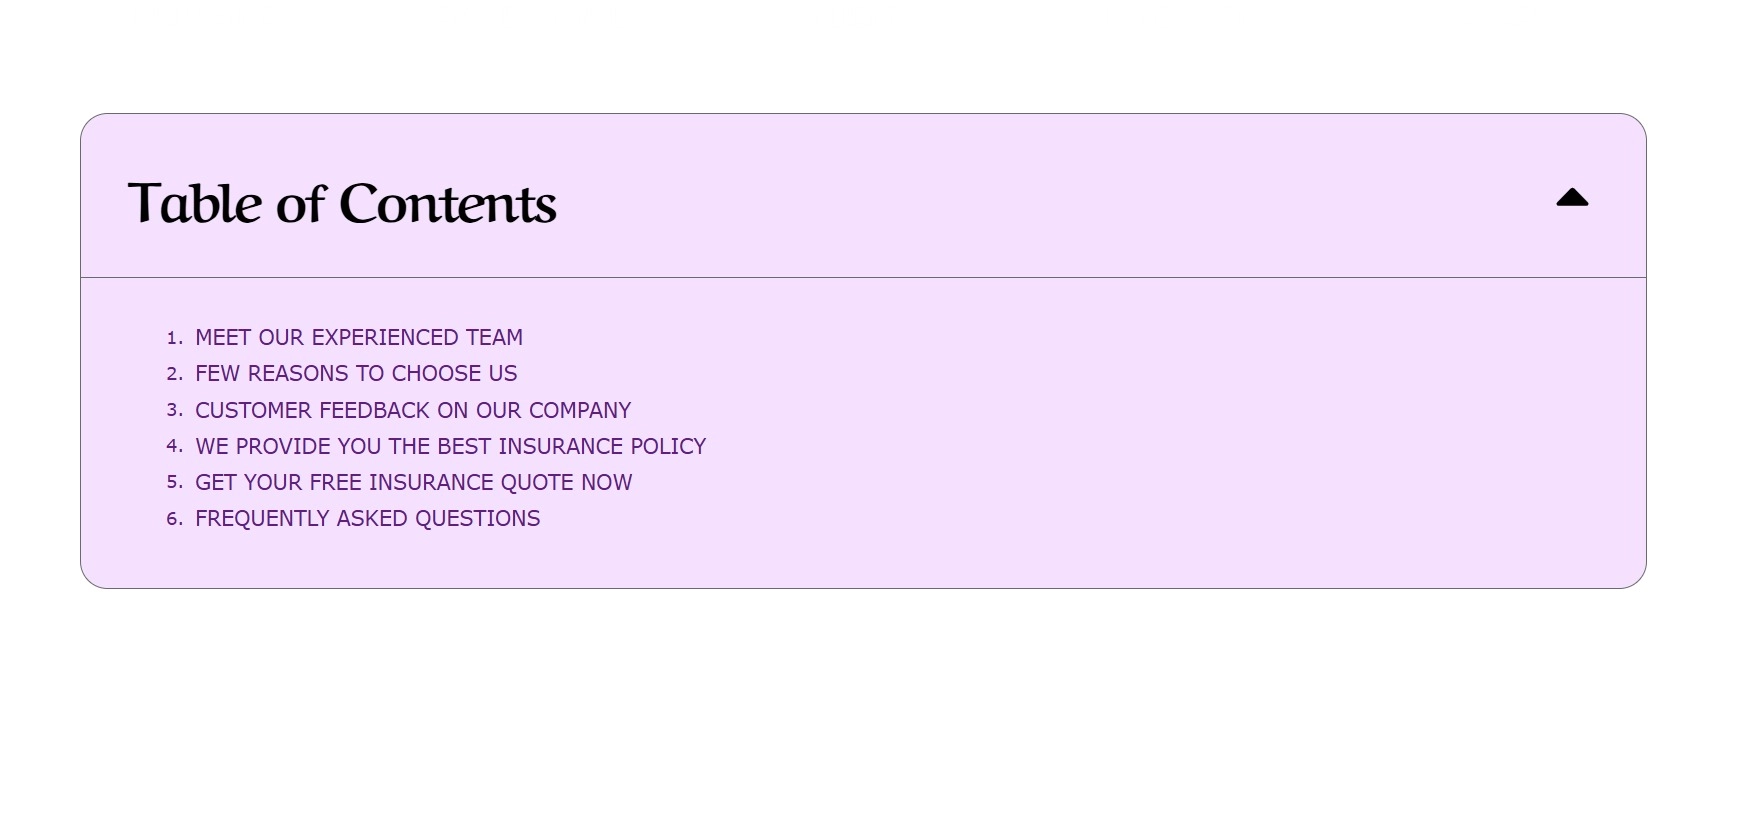
This is what your final result will look like:
FAQ
To add a table of contents to your Elementor-made WordPress site, follow these steps:
1. Install and Activate Responsive Addons for Elementor
2. Open the page where you want to add a table of contents (Use an Elementor template)
3. Edit with Elementor
4. Search for the table of contents widget
5. Drag and drop the widget
6. Modify questions and answers for the widget
7. Customize the table of contents widget
An Elementor table of contents (TOC) serves as a helpful guide for users navigating long web pages. It offers a structured overview of the page’s headings to enhance the user experience.
Yes, you can add a Table of Contents for free to enhance the navigation process for your WordPress website.
Conclusion
Adding a table of contents to your Elementor-powered WordPress website improves user navigation and experience.
The Responsive Addons for Elementor plugin helps seamlessly add a Table of Contents to your site without coding.
This detailed article has covered all the necessary steps, from installing the plugin to customizing and styling the Table Of Content widget to match your website’s look.
If you’ve liked reading this article, you can also consider reading:
- How To Add Modal Popup In Elementor
- How To Add Audio Player To Your Elementor Website
- How To Add Google Maps To Your Elementor Website
Looking to include a table of contents widget on your website? Get the Responsive Addons for Elementor today! Also, consider installing the Responsive theme, a versatile website theme designed to improve your website creation experience.


