
Are you looking to change fonts in WordPress to boost your site’s look?
Updating the fonts on your website can improve readability and add a professional touch. It is also great for reinforcing brand identity!
Changing fonts on your WordPress site is easy and does not require great technical skills.
We think this is one of the fastest ways of making your site look more professional.
Whether you want something subtle or modern, there are tons of ways to personalize your typography.
In this guide, we’ll show you four easy ways to change fonts in WordPress.
What Are Fonts?
Fonts define the style and appearance of text, including shape, size, and spacing. They typically include numbers, symbols, letters (lowercase and uppercase), and punctuation marks.
Web fonts are designed for use on the web. Instead of being installed on the user’s computer, the browser downloads them from the internet when the user accesses a website.
When people visit your site, the browser dynamically pulls web fonts from the font provider. If you optimize them properly, they will appear on your site within seconds.
This enables designers to use unique fonts that are not restricted by the fonts that live on a user’s system, bringing typography uniformity across platforms and devices.
How Font Choices Impact Your Website Users
Font choices on a website strongly influence user experience, readability, and brand image, affecting how users engage with the content and overall design.
Here’s a more in-depth explanation:
1. Readability and Accessibility
- Selecting readable fonts with clean shapes and adequate spacing is essential for user engagement and understanding.
- Make sure fonts are large enough to be readable and that there is enough contrast between the text and background color for maximum readability.
- Think about users with visual disabilities and select fonts that are legible to all.
2. User Experience (UX)
- Fonts help you build a visual hierarchy that leads users through your content while highlighting important information.
- Fonts offer the potential to enhance the site’s design and thus make it more interactive for users to browse.
- It could show a specific tone and personality that perfectly match the brand identity and value.
3. Brand Identity
- A similar font style across the website strengthens personal brand identity and produces a seamless user experience.
- Different fonts convey different emotions; hence, choosing the right fonts is essential if they match the brand’s objective and target group.
- The well-chosen font reflects professionalism and reliability, which makes a brand trustworthy.
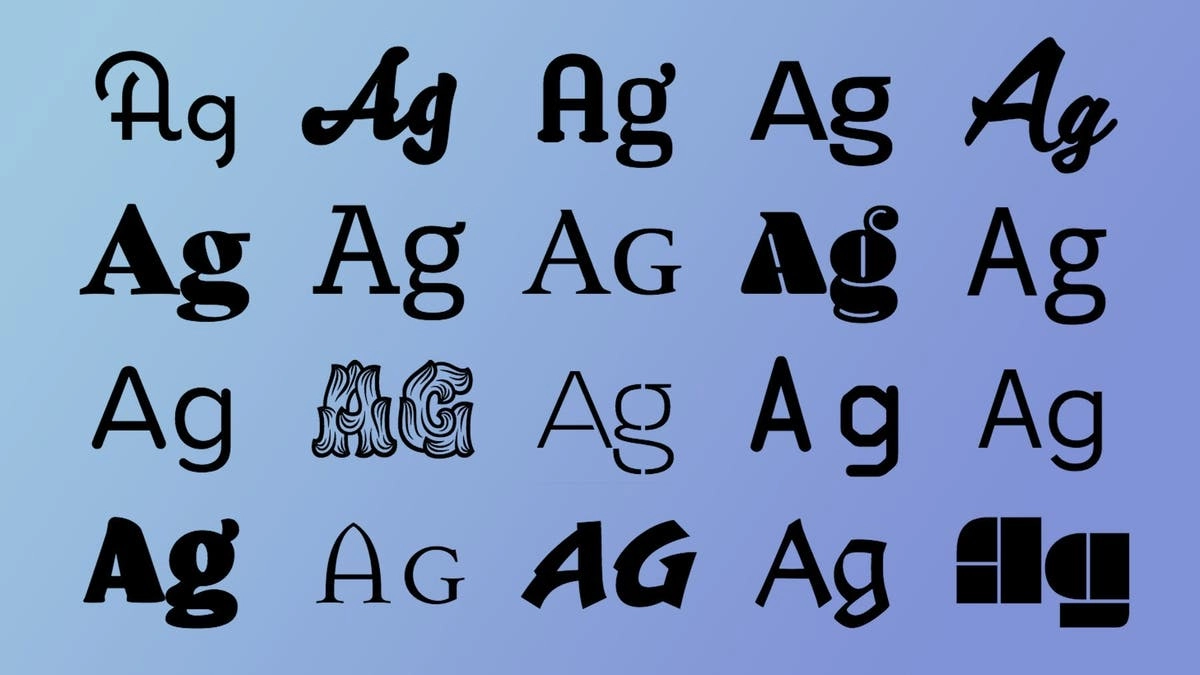
4. Examples of Font Selections and Their Consequences
- Serif fonts (e.g., Times New Roman, Georgia) are generally associated with tradition, formality, and dependability.
- Sans-serif fonts (e.g., Helvetica, Arial) have a modern, simple, and clear feel.
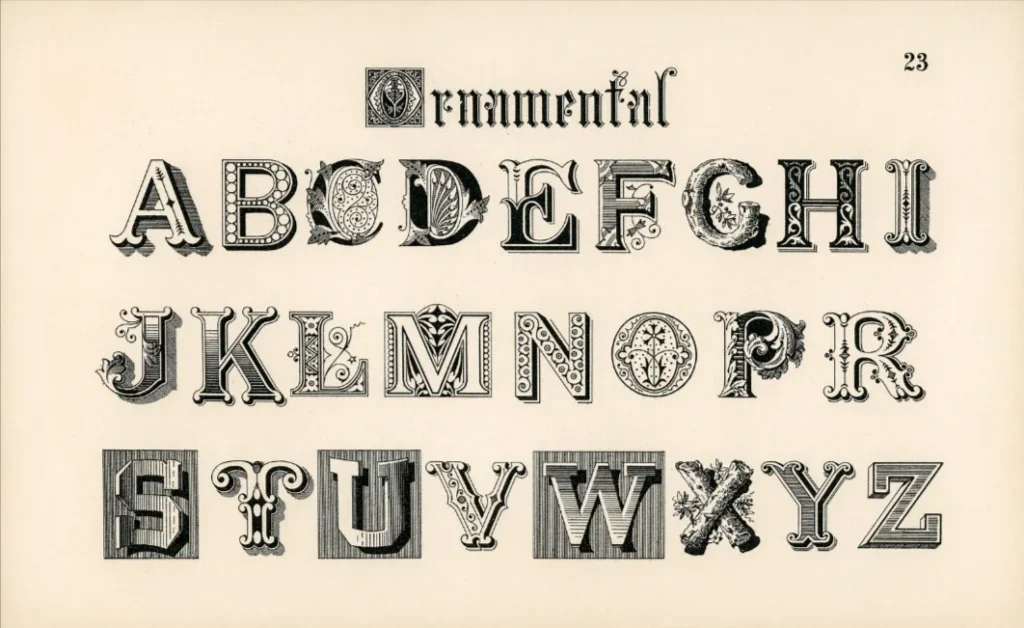
- Ornamental fonts can be used for headings or other special purposes to give a visual appeal, but they should never be used for a block of text.
This is how a Ornamental fonts looks like.
How to Change Fonts in WordPress
You can switch fonts in WordPress in various ways. Let’s discuss the four easiest ways to do that.
1. Using the Theme Customizer Options
If your theme supports it, you can change the site’s font to whatever you like from the WordPress theme customizer. The customizer allows you to change fonts and see the results in real time, making it easier to find the perfect style for your site.
We will take Responsive theme as an example here. If you want to know how to install Responsive theme, you can refer to this documentation – How to Install and Activate Responsive Theme.

Remember that the options might vary from one WordPress theme to another.
To use Responsive Theme’s typography presets, follow these steps:
To start, go to your WordPress dashboard. Click on Appearance > Customize.

Next, click on Global Settings.
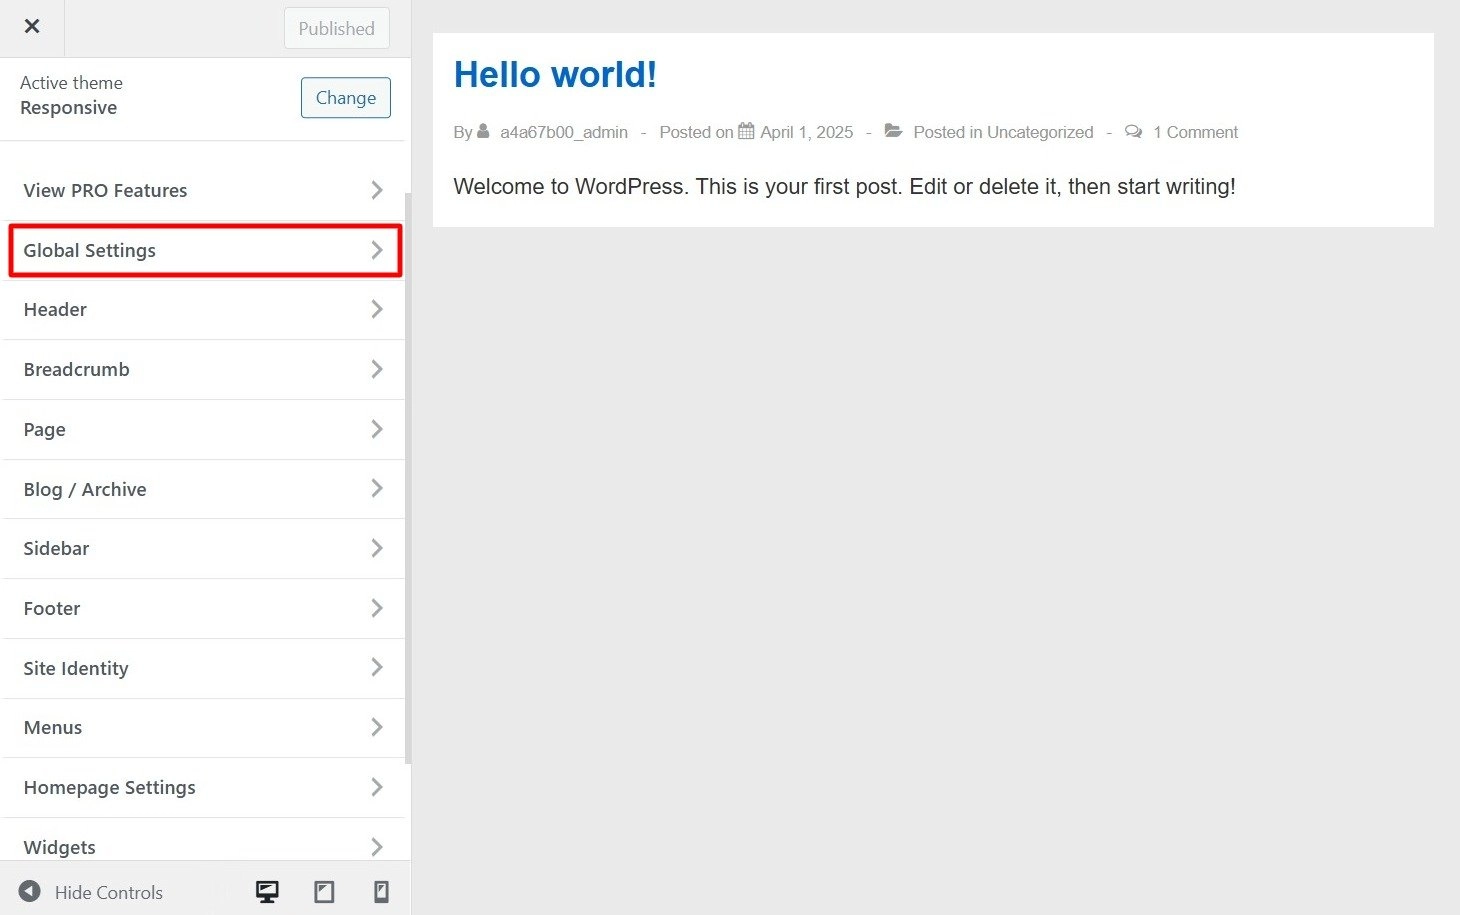
Now, go to Typography.

You will see combinations of different sets of typography presets in the font combinations.

You can experiment with all of the available preset options, choose a preset that matches your needs, and click Publish to make the changes live.
Benefits of Using Typography Presets
Typography presets make it easy to select text styles that align with your brand. It presents a professional look without need for manual customization.
It lightens your work of matching a header style for your website and makes things much more accessible.
For example, if you want to change header styles h1, h2, or h3 across your site, you will have to do so individually, whereas with this feature, you can do so with a single click directly from the customizer.
2. Using a Plugin To Change Fonts
Another option for changing WordPress fonts is to install a WordPress plugin like Fonts Plugin.
It is a typography plugin for WordPress that allows you to add thousands of Google fonts and variants to your site.
First, you should install and activate Fonts Pugin. For assistance, see our article about installing a WordPress plugin.
Upon activation, the Fonts plugin will have a quick-start guide in your WordPress dashboard. Navigate to Fonts Plugin > Customize Fonts to start editing fonts.

This opens the plugin’s customization options in your theme’s Customizer. On this page, click the menu for Basic Settings.

From the typography setting panel you can customize your content, headings, and buttons.
Expand the dropdown for each text element and choose your preferred font.

Once you’ve done this, remember to click the Publish button, and the Fonts Plugin will update the changes.
3. Manually Adding Google Fonts Using Custom CSS
There are two ways to add Google Fonts using custom CSS in WordPress:
- Using the Additional CSS feature in the WordPress Customizer (Recommended).
- Creating a Child Theme (Not recommended unless necessary, as it involves modifying theme files).
I’ll walk you through both methods.
Method 1: Using Additional CSS (Recommended)
This is the easiest and safest way to add Google Fonts without modifying theme files.
The Responsive theme includes an Additional CSS feature within the WordPress Customizer, allowing you to add custom styles easily.
Here’s how you can do it:
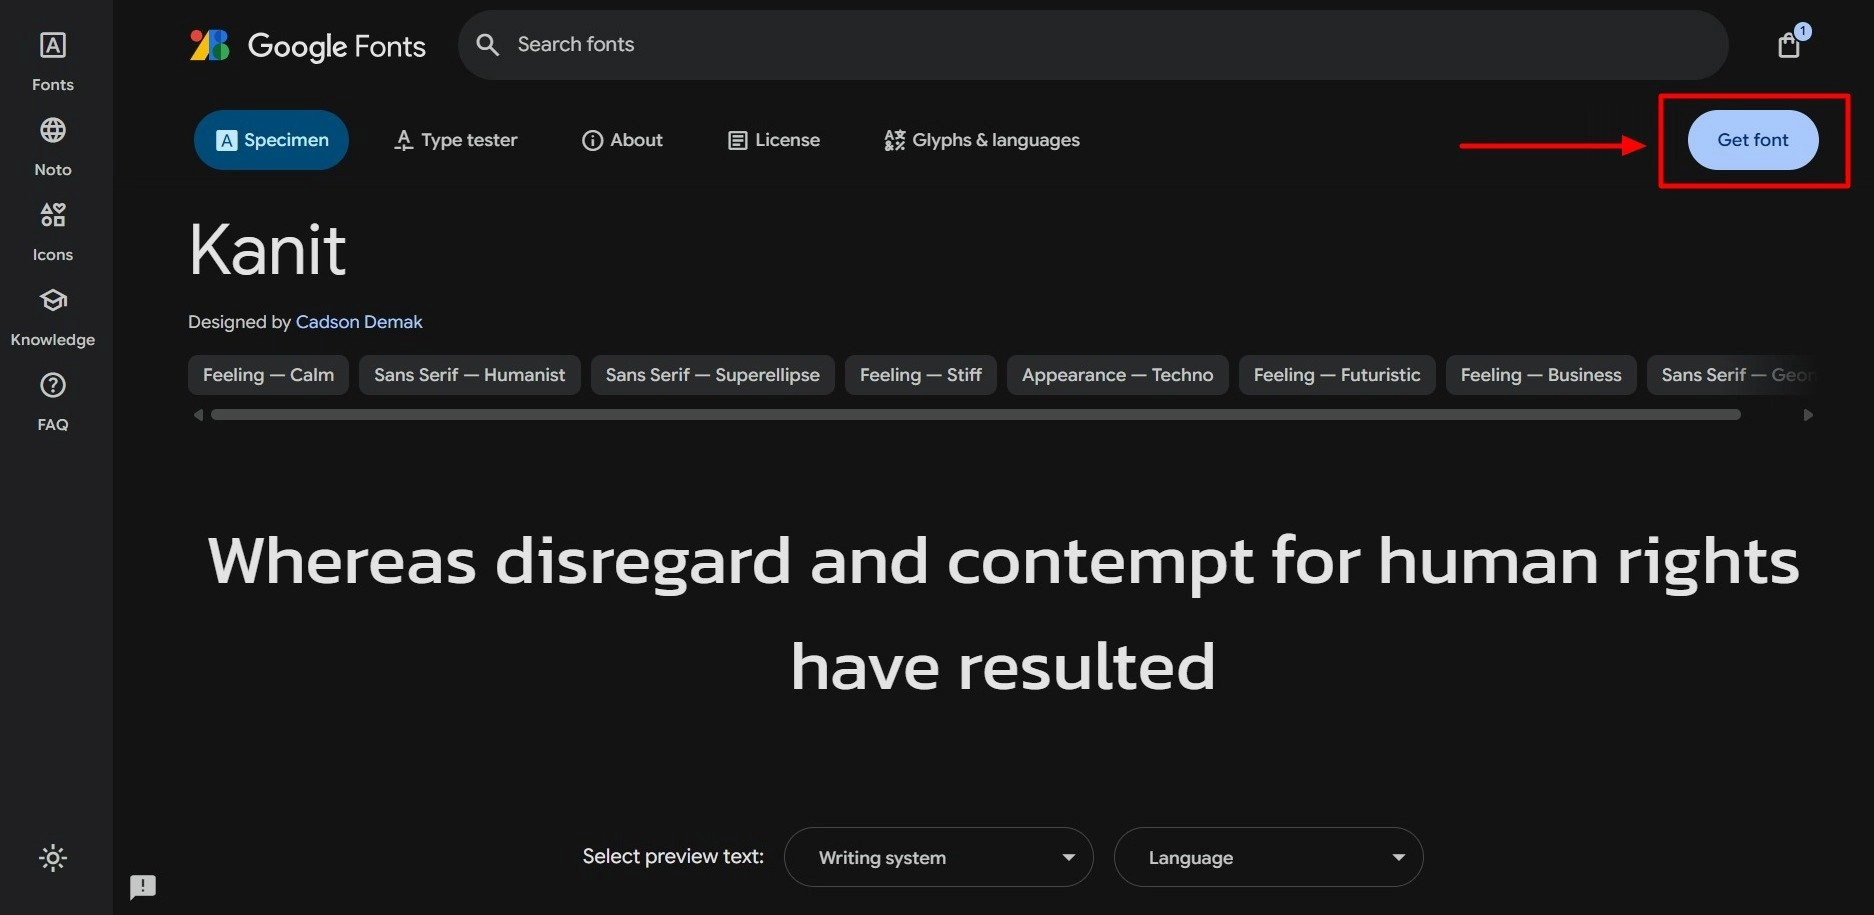
Step 1: Choose a Google Font
Visit Google Fonts.
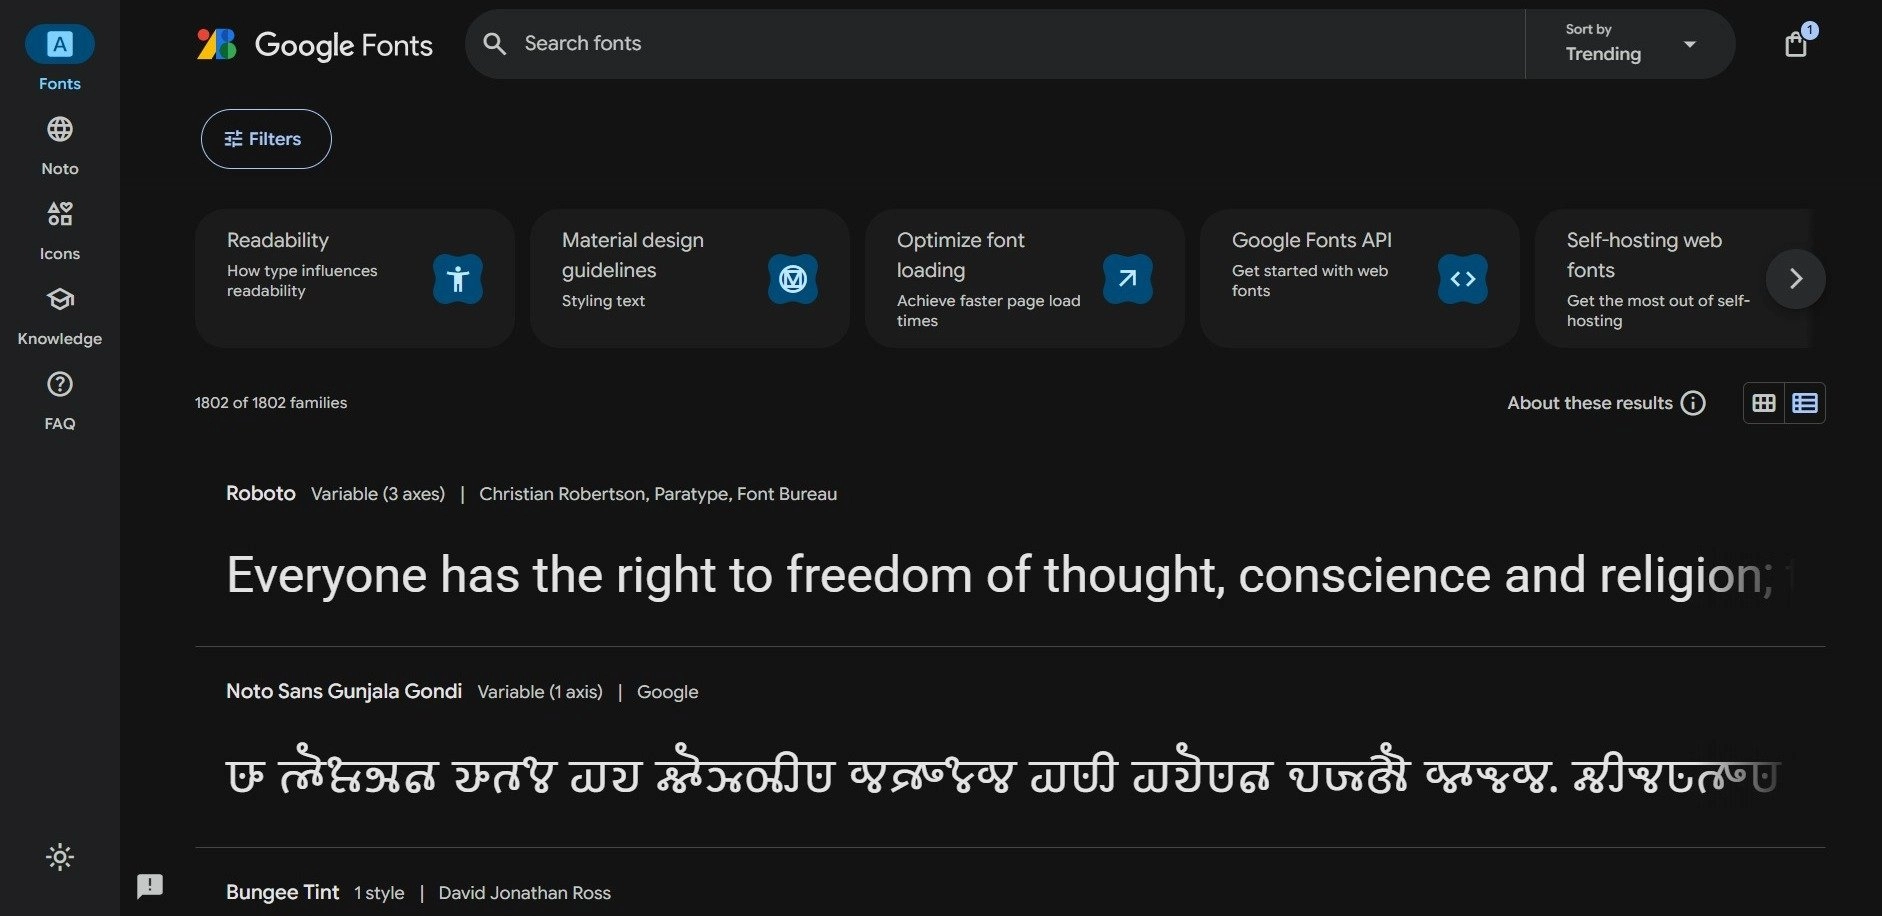
Browse and select the font you want to use, and then click on Get Font.
Then, click on Get embed code.
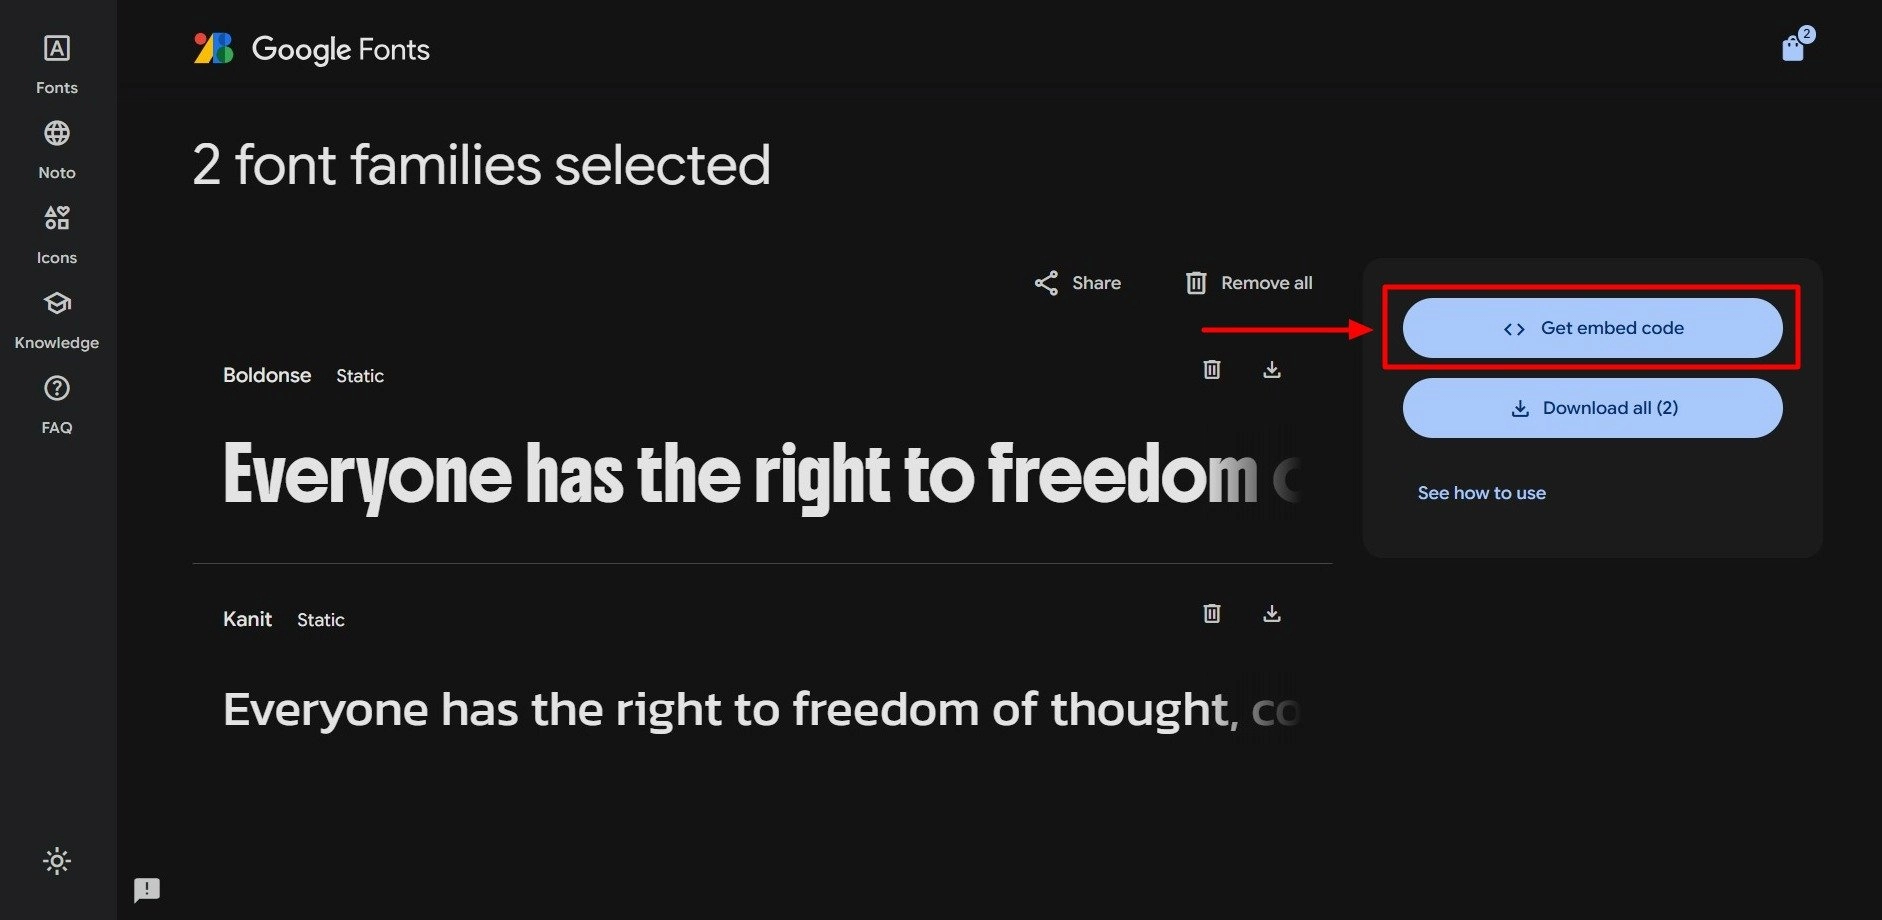
Now, copy the @import URL provided by Google.
Step 2: Add the Font to Additional CSS
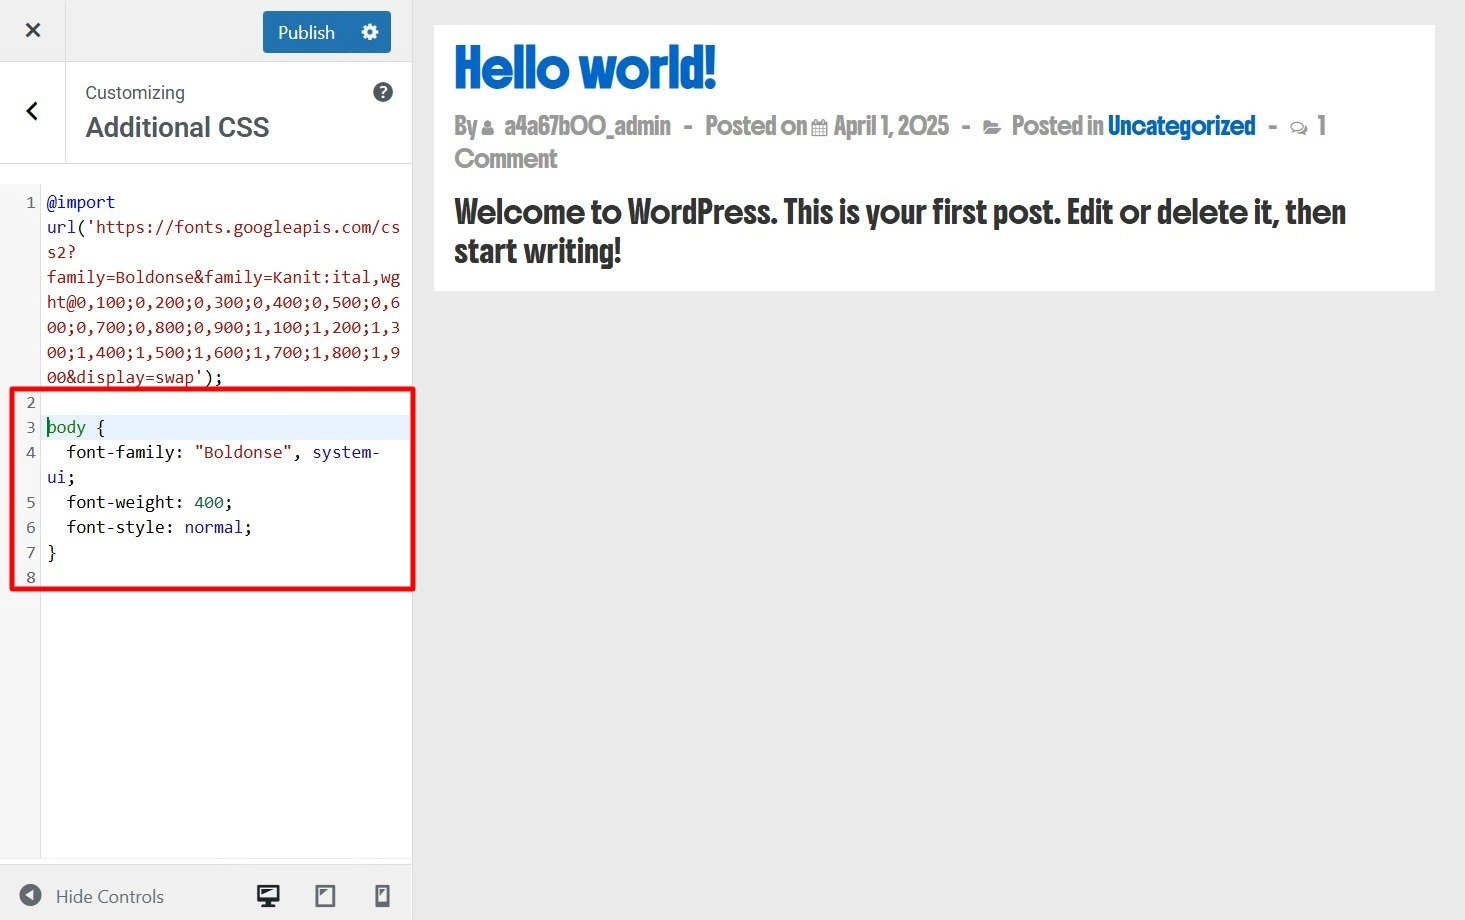
In your WordPress dashboard, go to Appearance > Customize > Additional CSS.
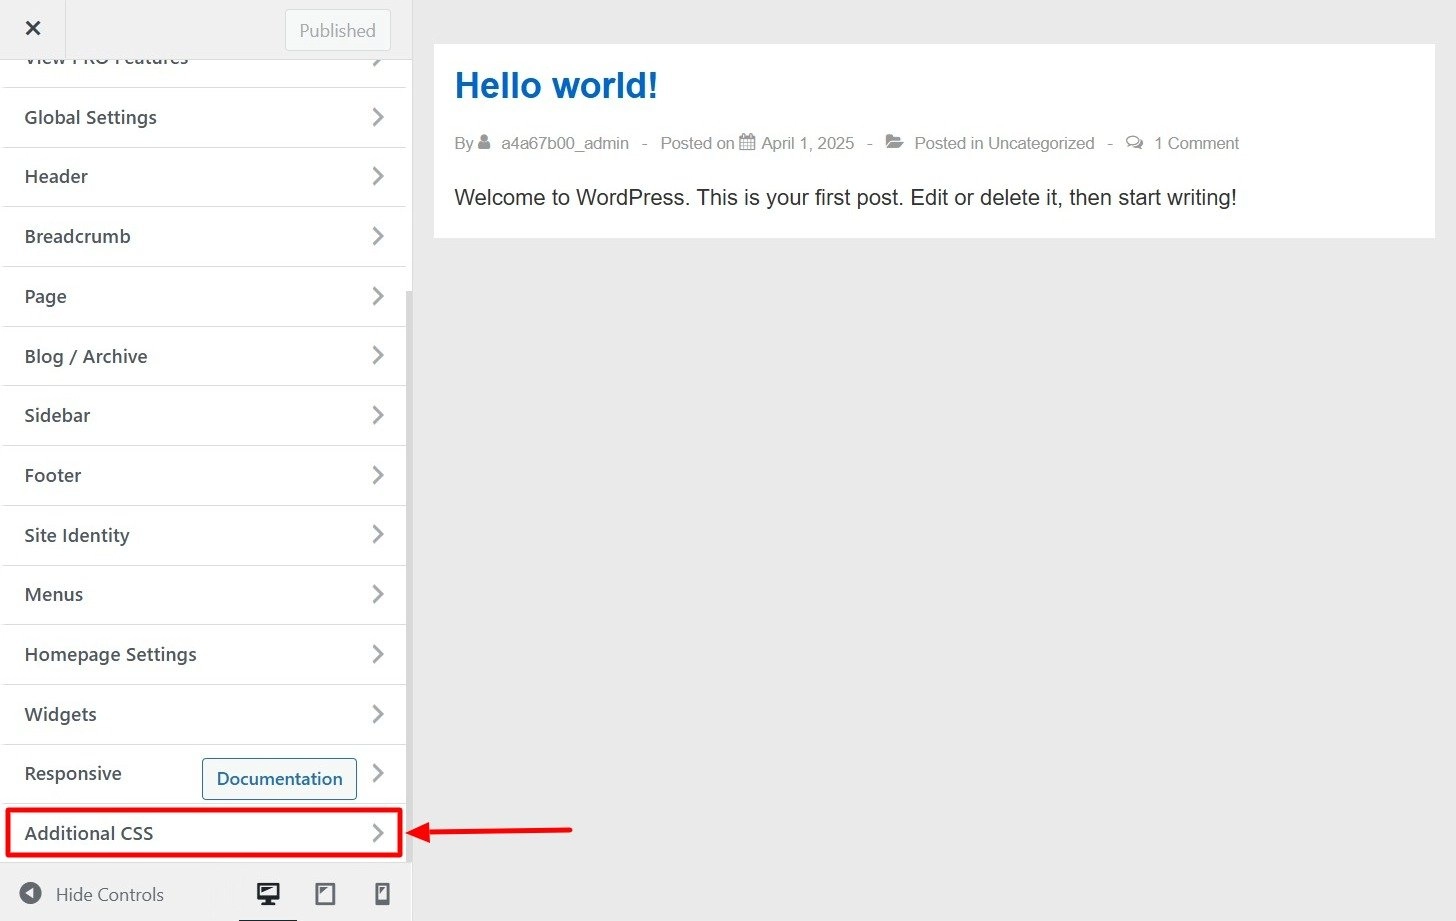
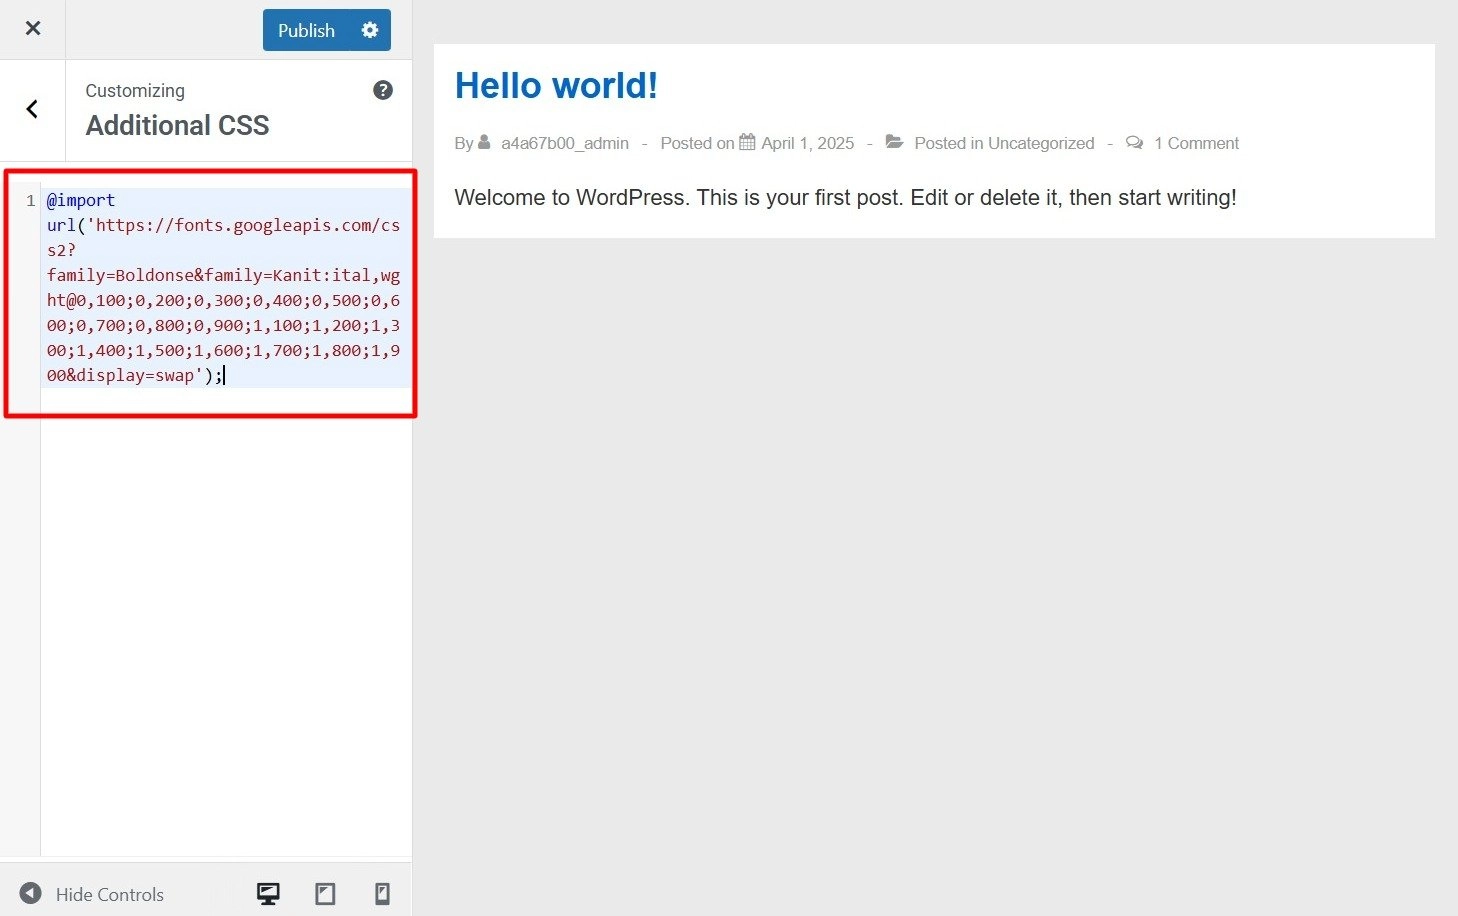
Paste the following code at the top
Step 3: Apply the Font
Now, apply the font to elements on your website
Click Publish to save the changes.
Method 2: Using a Child Theme (For Developers Only)
This method involves modifying your theme’s files, which is riskier unless you’re comfortable with coding.
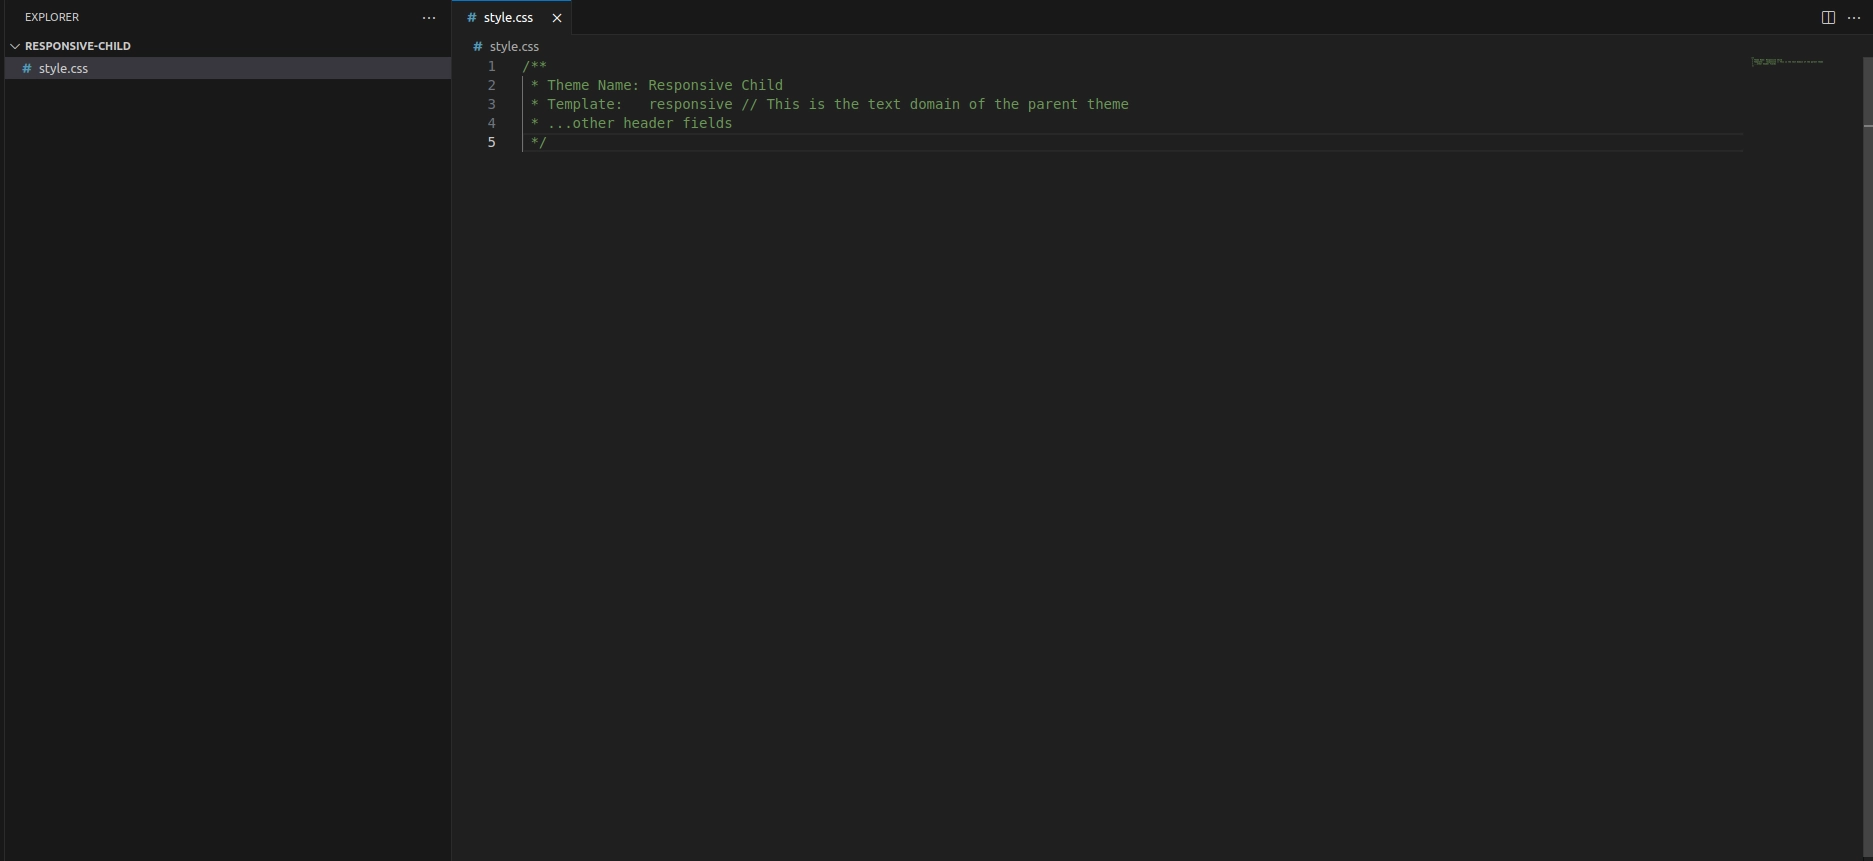
Step 1: Create a Child Theme
- In your WordPress installation, navigate to
wp-content/themes/. - Create a new folder (e.g.,
Responsive-child). - Inside this folder, create a
style.cssfile and add this at the top:
Step 2: Add Google Fonts to the Child Theme
- Open the
functions.phpfile in the child theme. - Add this code to enqueue the Google Font:
function add_google_fonts() {
    wp_enqueue_style('google-fonts', 'https://fonts.googleapis.com/css2?family=Roboto:wght@400;700&display=swap', false);
}
add_action('wp_enqueue_scripts', 'add_google_fonts');
3. Open the style.css file in the child theme and embed this code:
@import url('https://fonts.googleapis.com/css2?family=Boldonse&family=Kanit:ital,wght@0,100;0,200;0,300;0,400;0,500;0,600;0,700;0,800;0,900;1,100;1,200;1,300;1,400;1,500;1,600;1,700;1,800;1,900&display=swap');

body {
  font-family: "Boldonse", system-ui;
  font-weight: 400;
  font-style: normal;
}
Save the file and activate your child theme from the WordPress dashboard.

4. Uploading Custom Fonts to WordPress
If you’re using a block-based WordPress theme like Twenty Twenty-Two, you can easily change your site font using the full site editor (FSE).
This full site editor will let you customize any part of your WordPress theme using blocks, just like editing posts or pages using the WordPress content editor.
Just to remind you, FSE is still in beta testing, and only a small number of themes have made themselves compatible with it.
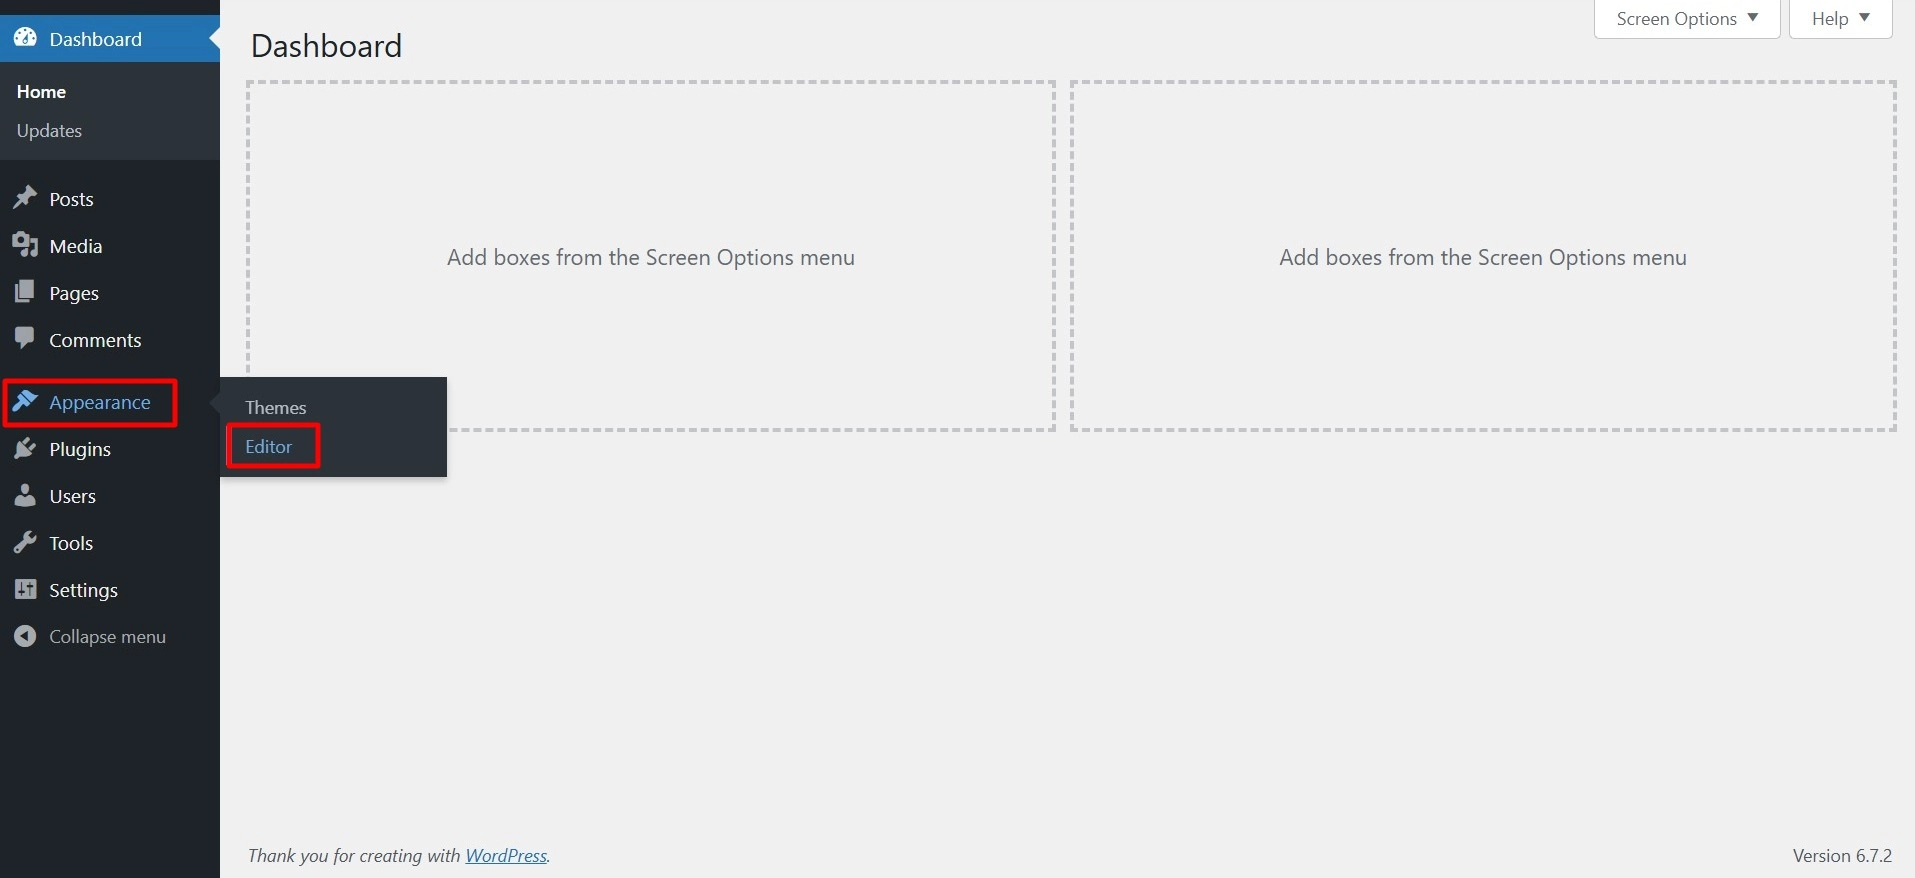
I’ll be using the Twenty Twenty-Five theme for this article. From our WordPress admin panel, go to Appearance > Editor.
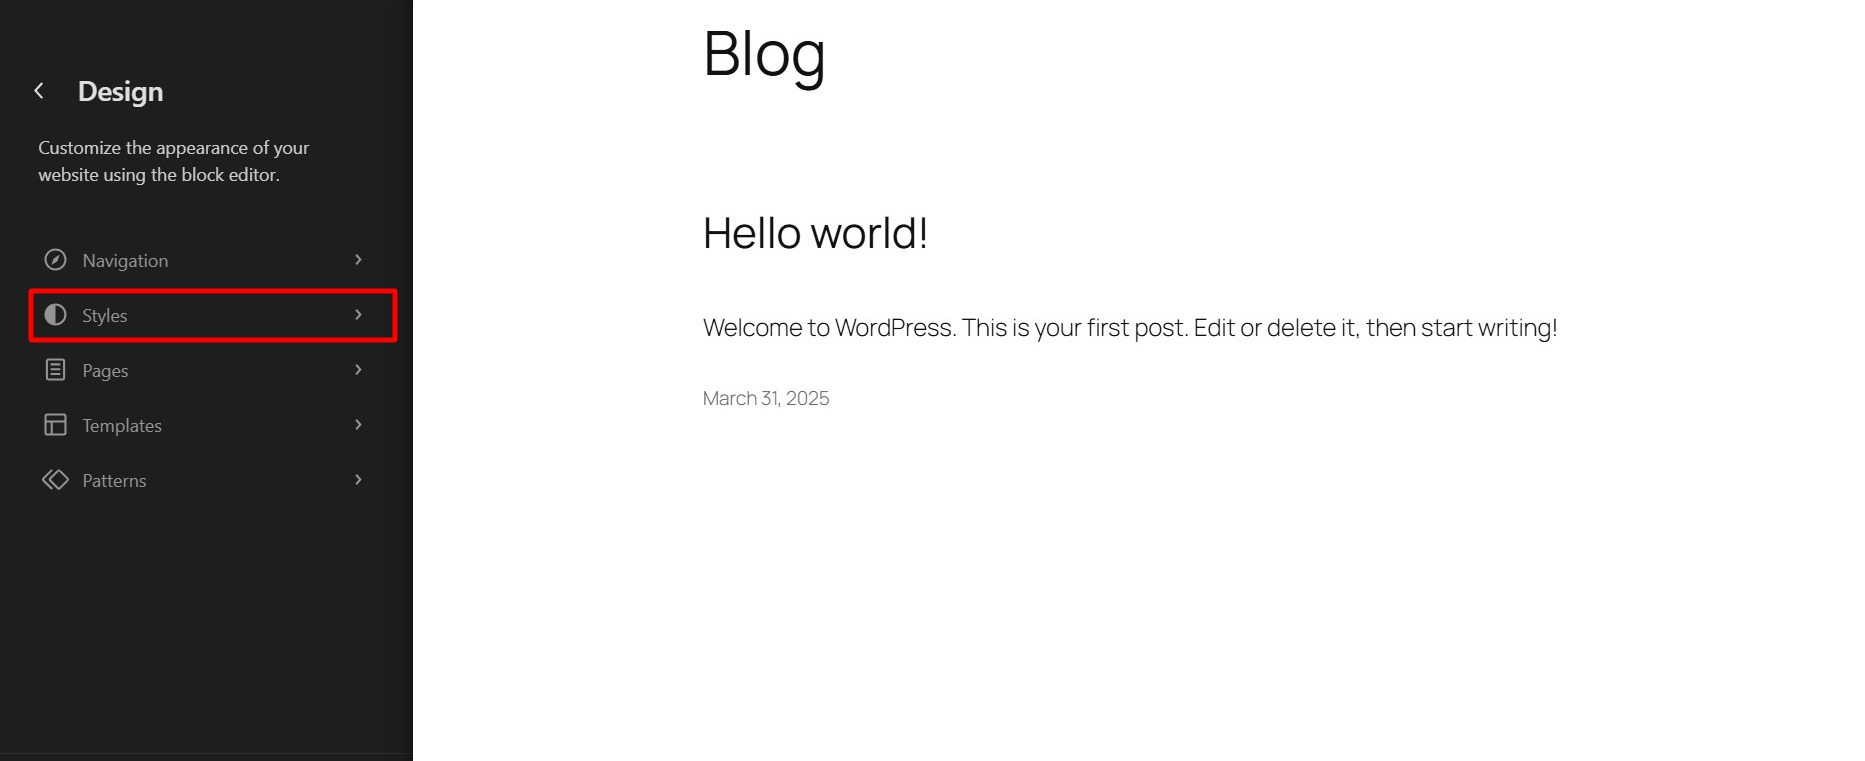
This will open the full site editor for your WordPress theme.
Now, you can click on the Styles icon.
Then click on the Typography option.
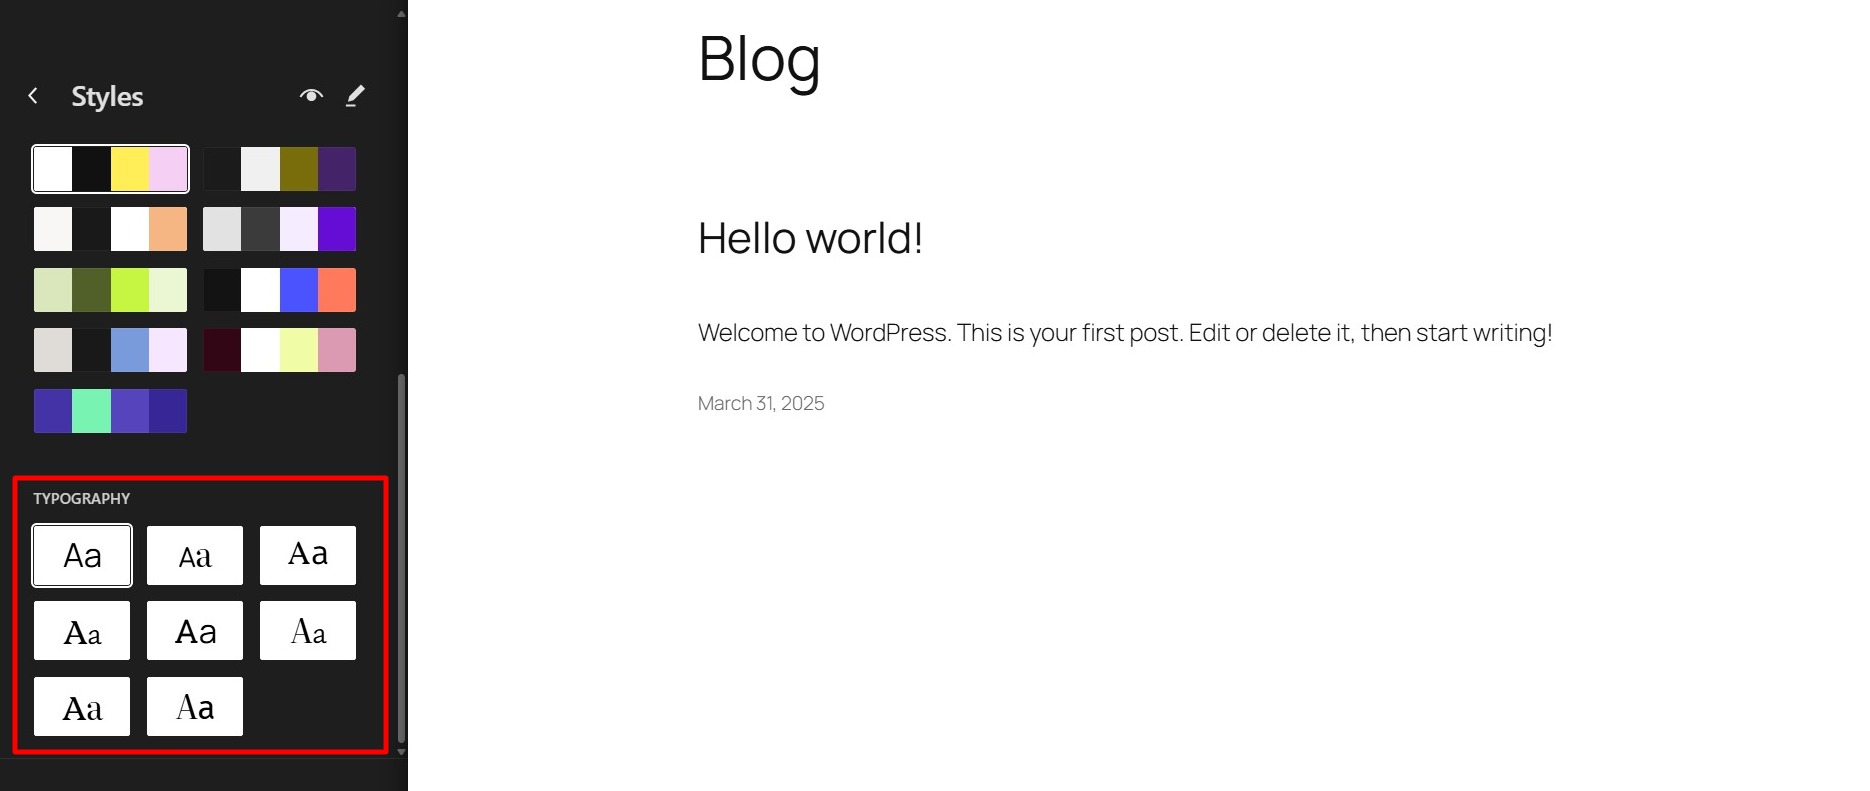
Now, select a font you want to apply and then click on Save.
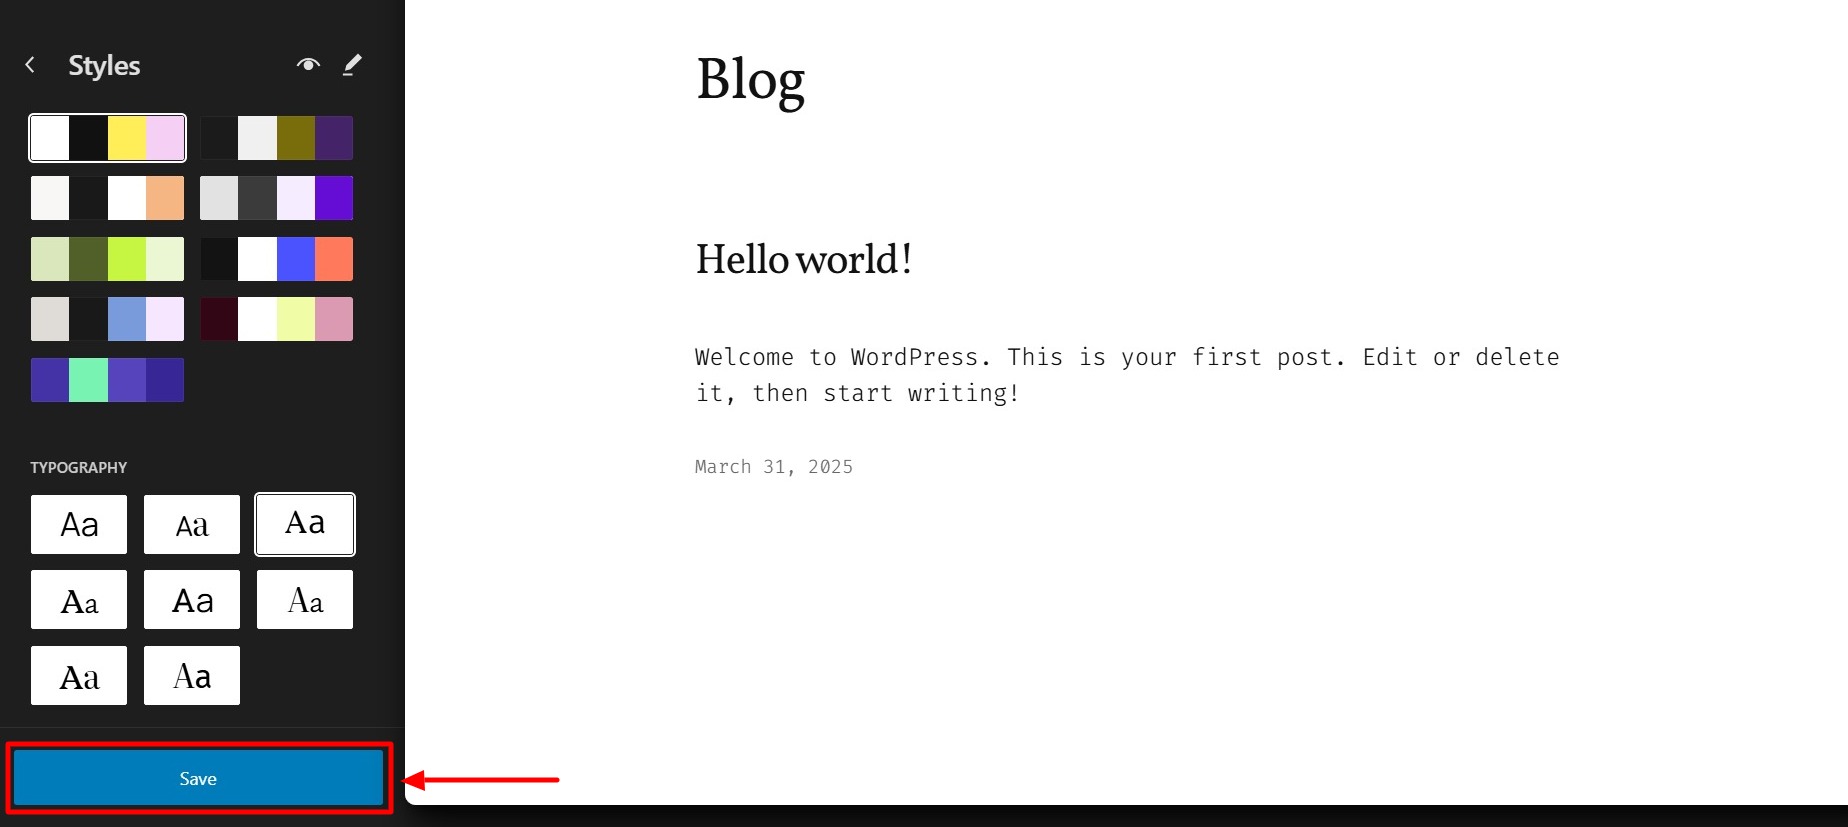
Thus, the font is changed using the full site editor.
FAQ
To change fonts in WordPress without plugins you can use themes like Responsive theme. Here’s how to do it:
1. Go to your WordPress dashboard.
2. Click on Appearance > Customize.
3. Find the Typography or Fonts section.
4. Choose the fonts you want for your headings, body text, etc.
5. Click Publish or Update to save your changes.
You can change the font size in the Block Editor, but not the font style.
If you are using the default Twenty Twenty-Five WordPress theme, this uses the Source Serif Pro for headings and an easy-to-read sans-serif font.
Conclusion
There are many ways for changing fonts within WordPress. If you use a standard theme, the easiest way is probably to install a plugin.
Consider a theme like Responsive theme because it allows easy customization options like font update, header-footer presets, and more.
Lastly, if you are a developer that likes hands-on work or only needs a couple of options, manually adding fonts may sometimes be a good option for you.
If you enjoyed this article, you might also want to give these a read:
- How to Optimize Your WordPress Site for Mobile Users
- What is a Header Footer Builder in WordPress?
- WordPress Theme vs Template – What Is The Difference?
Want to change fonts and enhance your website’s look? Consider using the Responsive theme by Cyberchimps.


