
Are you trying to find ways to edit Footer in WordPress?
The footer undoubtedly serves as a crucial element for website navigation and complements the user experience. It is much more than a mundane part of your website; it serves multiple functions.
If you are a WordPress user concerned about how to edit your WordPress footer end-to-end, this article is for you.
In this article, we will discuss ways to edit the footer of your WordPress website, providing step-by-step guides for each approach.
Make sure you read through the end to learn about each in detail!
What is a WordPress Footer, and Why Should You Customize it?
Well, before we dive deeper into our guide to learn how we can edit the website footer, we must clear the basics.
A WordPress footer is the bottom-most section of a WordPress site. It is generally responsible for providing a summarized navigation.
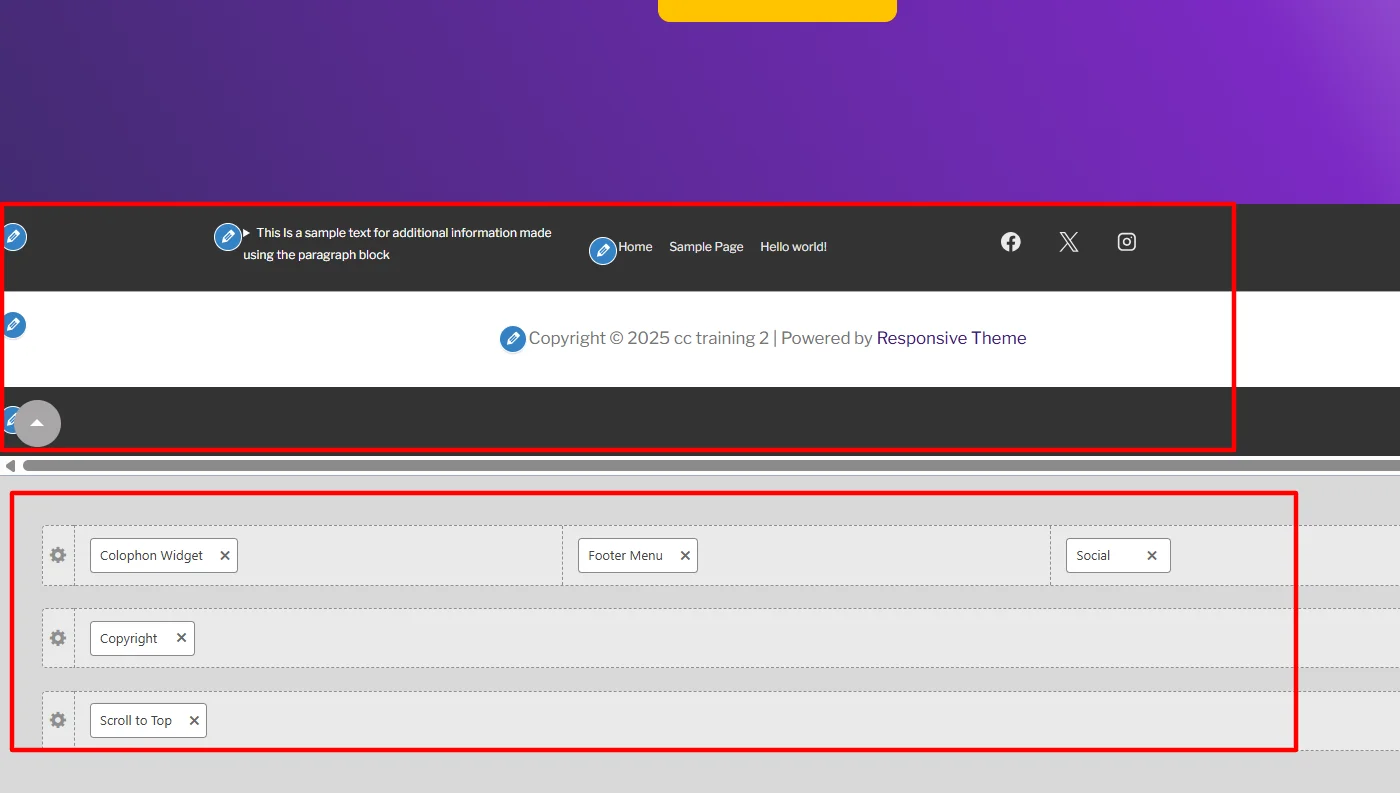
Below, you can see a sample footer of our Cyberchimps website:
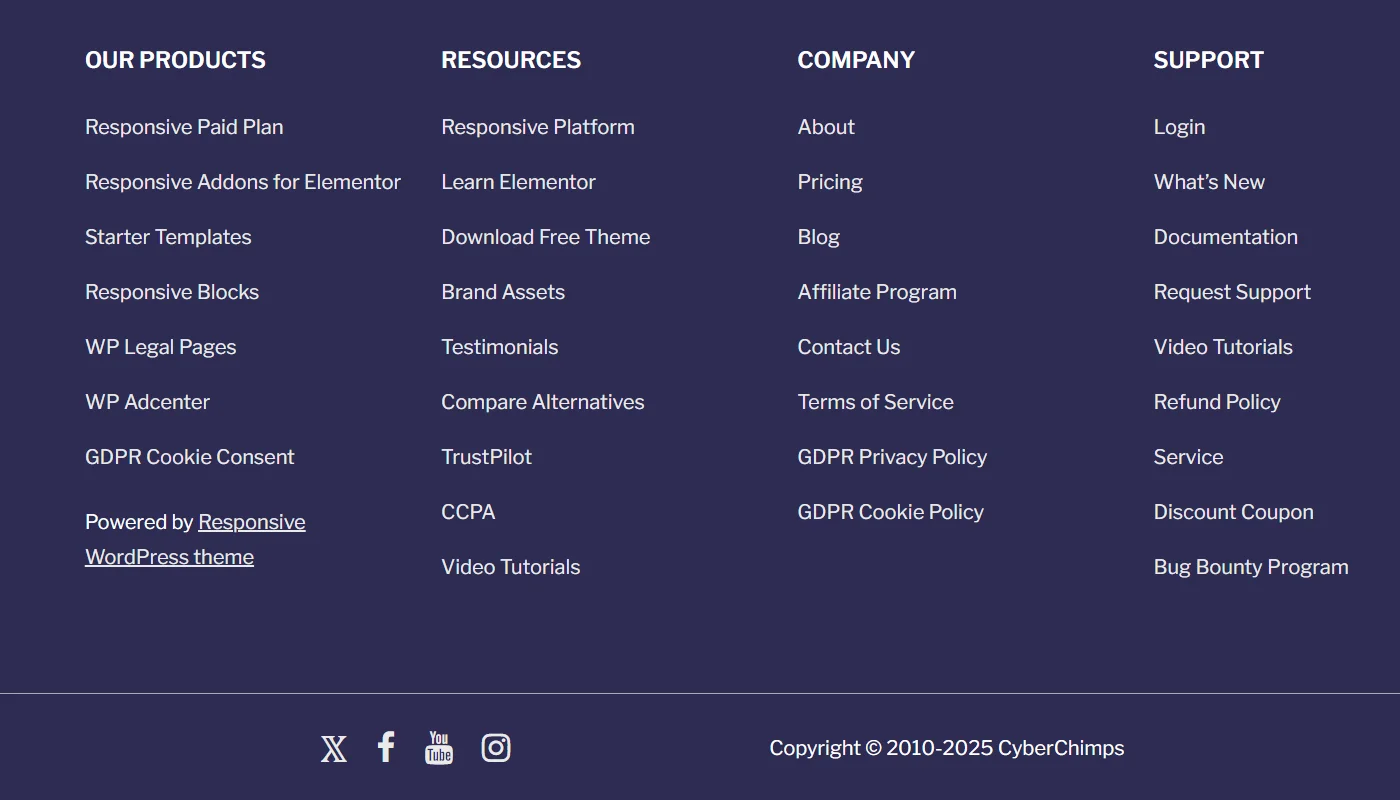
It provides crucial information, including a broad website map with essential website pages, copyright details, social links, and some additional information.
This section helps your website visitors directly navigate to other pages of the site once they have skimmed a specific page. It also improves website accessibility and performance and rewards your site with a higher SEO score, which helps you rank higher on SERP.
This may have given you a simple yet straightforward overview of the role of the footer, and you can also partially answer the second question, which is why you should edit or customize your website footer.
Generally, when you begin creating a WordPress website, the default footer section of your website is very basic and does not show any information.
Here’s a sample of the default website footer when I tried a new website:

Moreover, if you attempt to import a starter template to your website via any other means, you won’t be able to customize it according to your desired appearance.
Hence, it is mandatory to customize your website footer, add all necessary details and links, and match it with your website’s aesthetics.
How To Edit Website Footer – 3 Easy Ways
While researching this article, I tried and tested seven to eight methods that let you easily add and customize your WordPress website’s footer.
However, apart from a few, I did not find all of these methods very convenient. Based on my experience using these methods, I have noted them in the guide, depending on their convenience.
But before I dive further into the article, there are a few key points that you must not forget before proceeding.
- If you have already worked on another part of your website or are making changes to your existing website, make sure you back up your site before you update it.
- If you have an operational website, It is recommended that you try to update on the staging site at first (if you don’t have a staging site, here’s a guide on How to Create a Staging Site for WordPress)
Now, let’s deep each approach in detail with their detailed step-by-step guide:
1. Using A Theme Customizer
WordPress is popularly known for its ease of use and flexible customization options. It is always considered a go-to option for users who do not prefer extensive coding or technical requirements.
While the WordPress CMS made this possible, the WordPress theme customizer played a major role in making this happen.
What is a WordPress Theme Customizer?
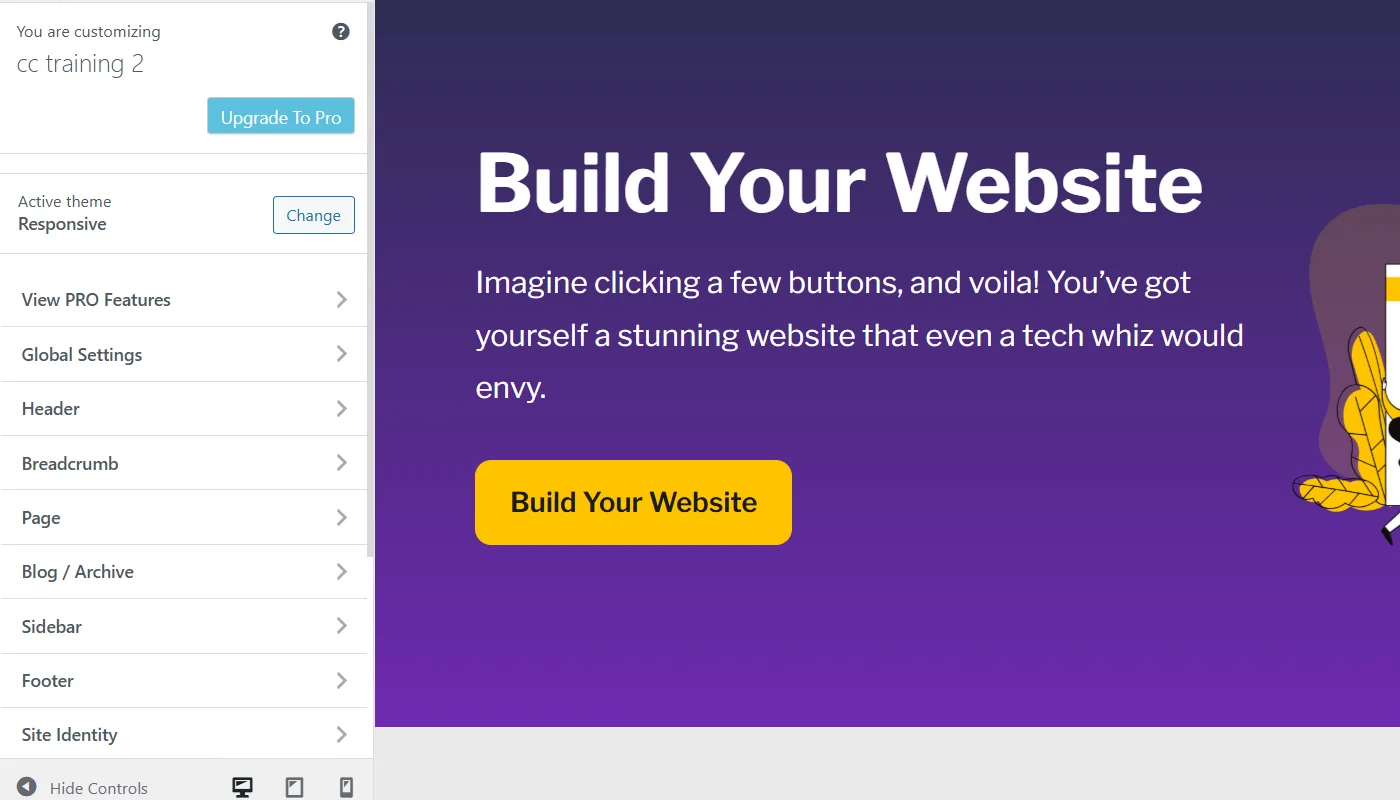
For those who don’t know, you can consider WordPress theme customizer, a built-in tool in WordPress themes that allows you to make changes and modify the appearance of WordPress sites in real time.
The theme customizers provide an interface for changing all the visual elements in the website’s different sections, including the footer.
Moreover, it allows you to keep track of changes you make on your site’s backend before it goes live with the preview feature.
How To Edit a WordPress Footer with Theme Customizer?
Using the theme customizer was significantly easier than others while editing the footer.
However, it is essential to note that not all themes offer the same convenience and functionality.
I tried a few of the popular themes and found the Responsive Theme to be the easiest to customize.
For tutorial purposes, I will show you how to edit the footer using Responsive Theme’s customizer
To install the Responsive WordPress theme, follow the following steps:
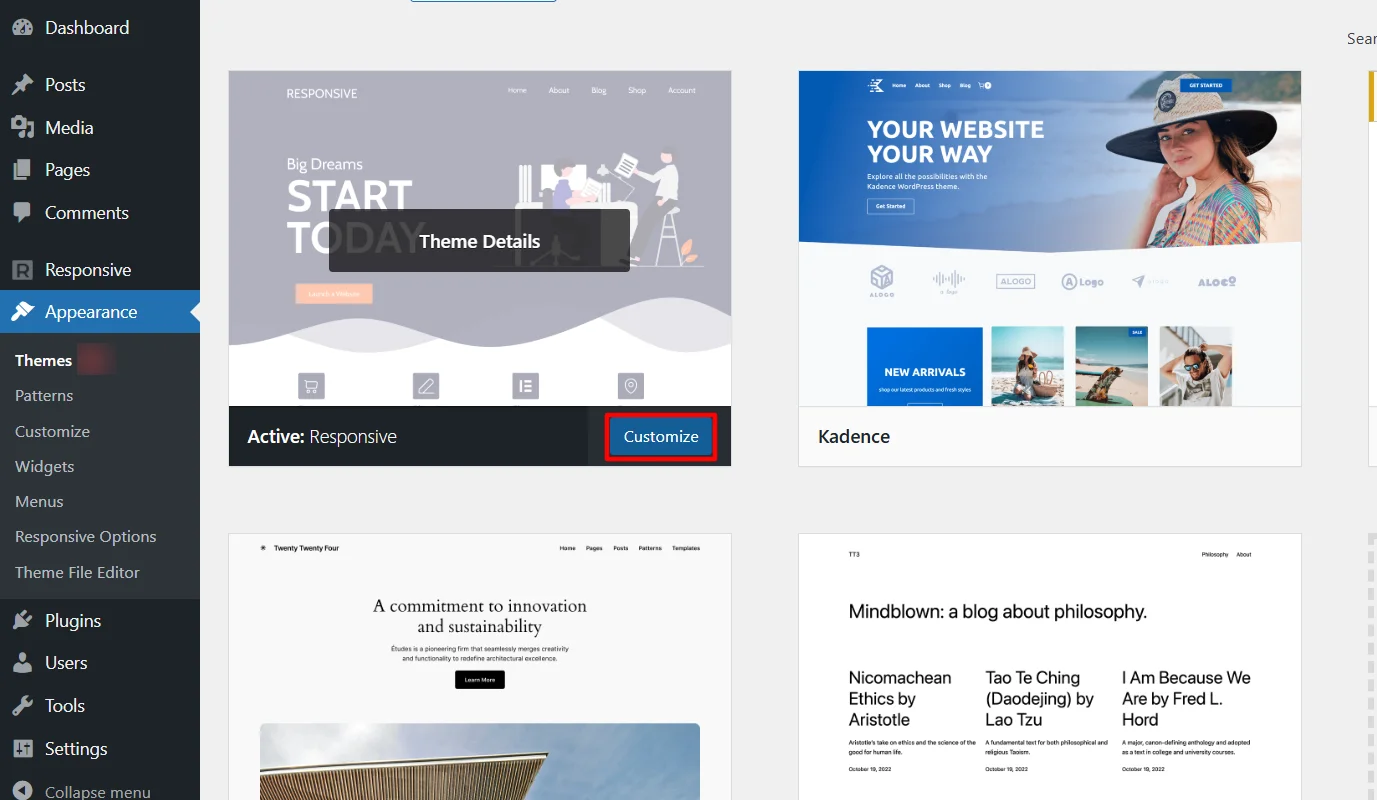
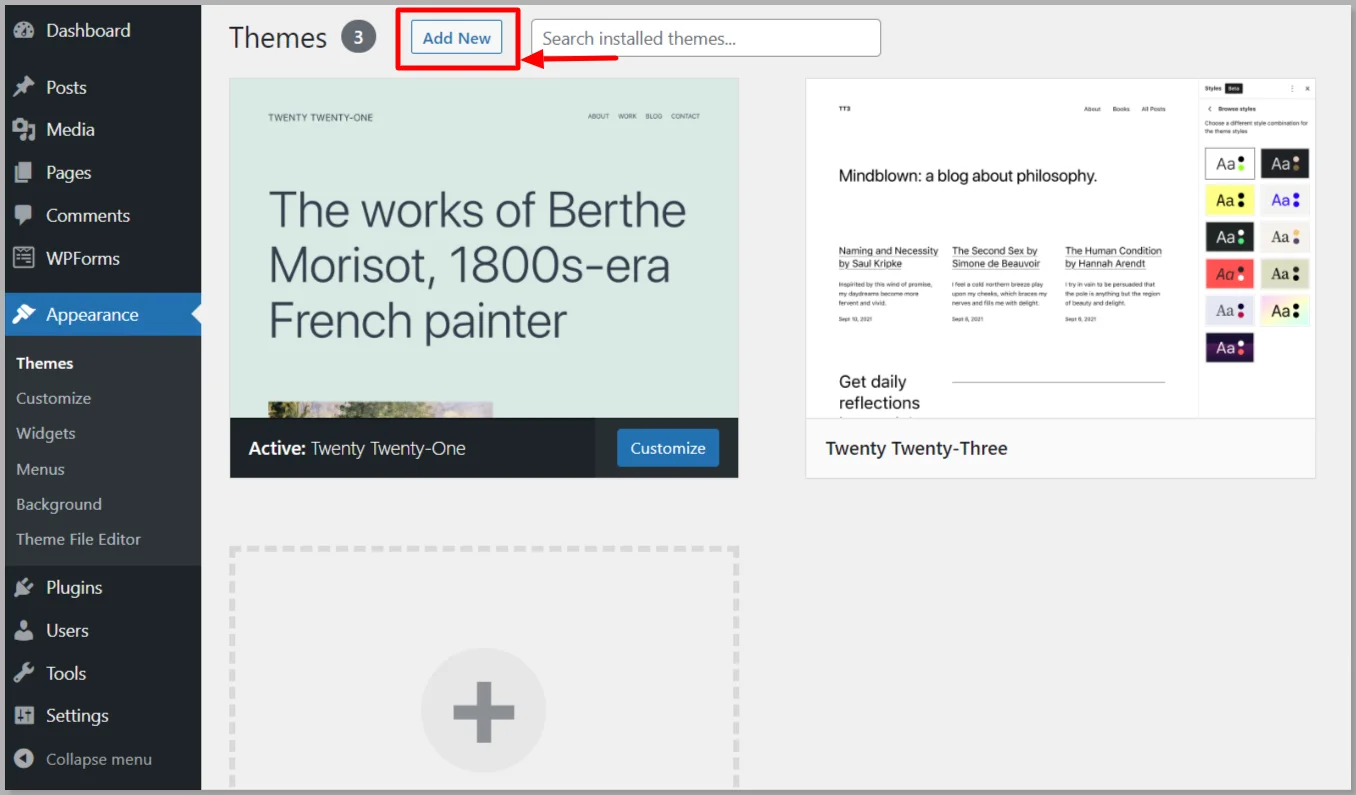
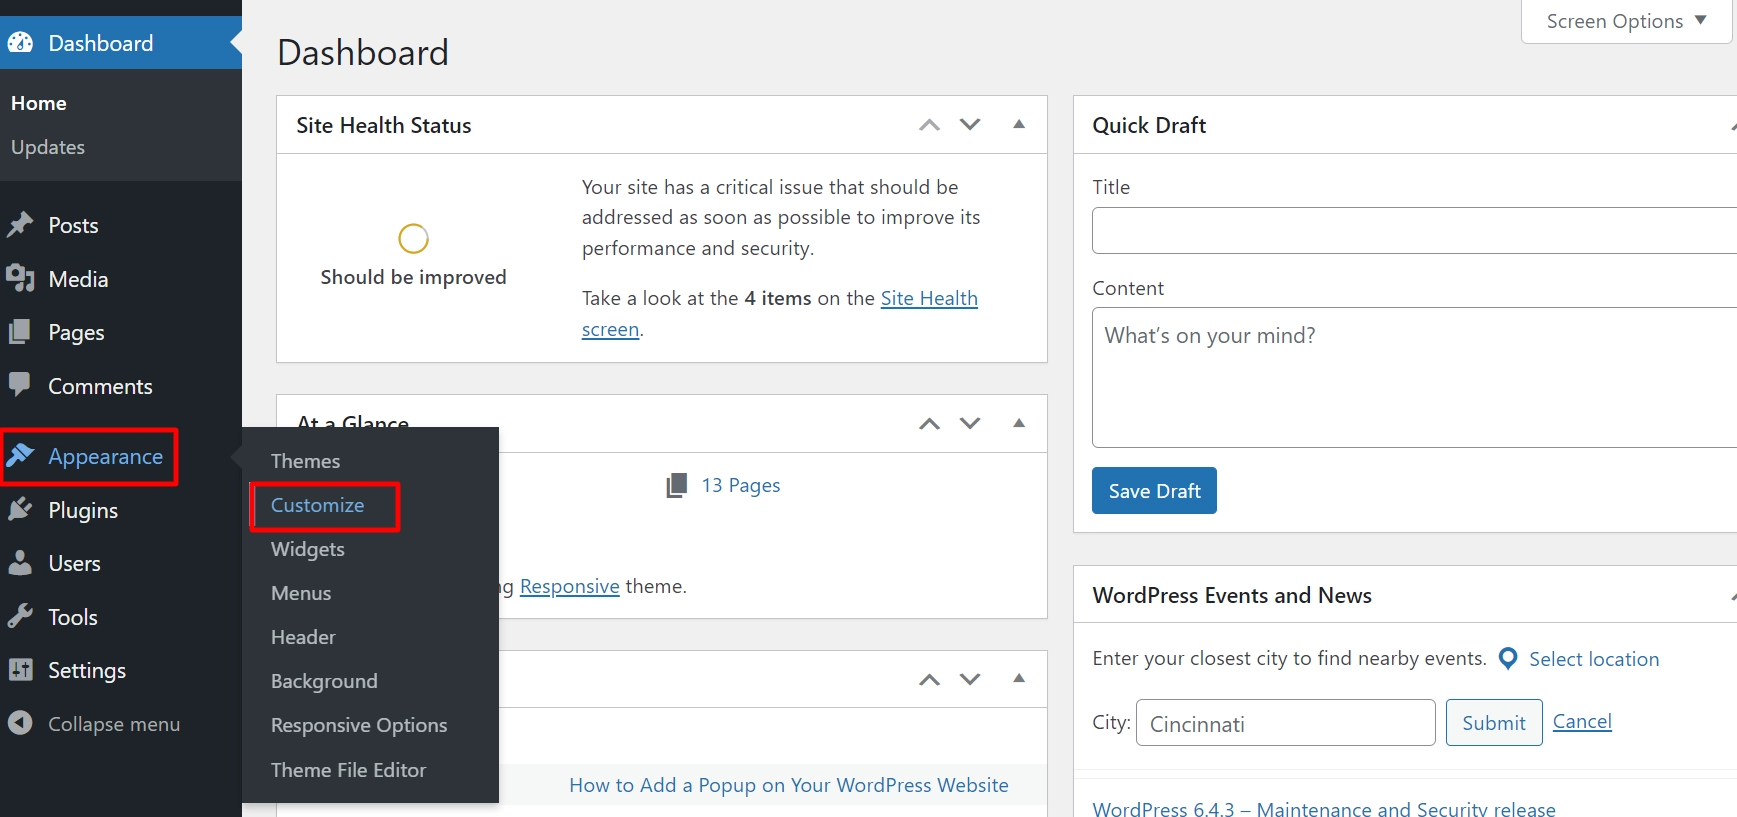
Go to your WordPress dashboard and navigate to Appearance > Themes.
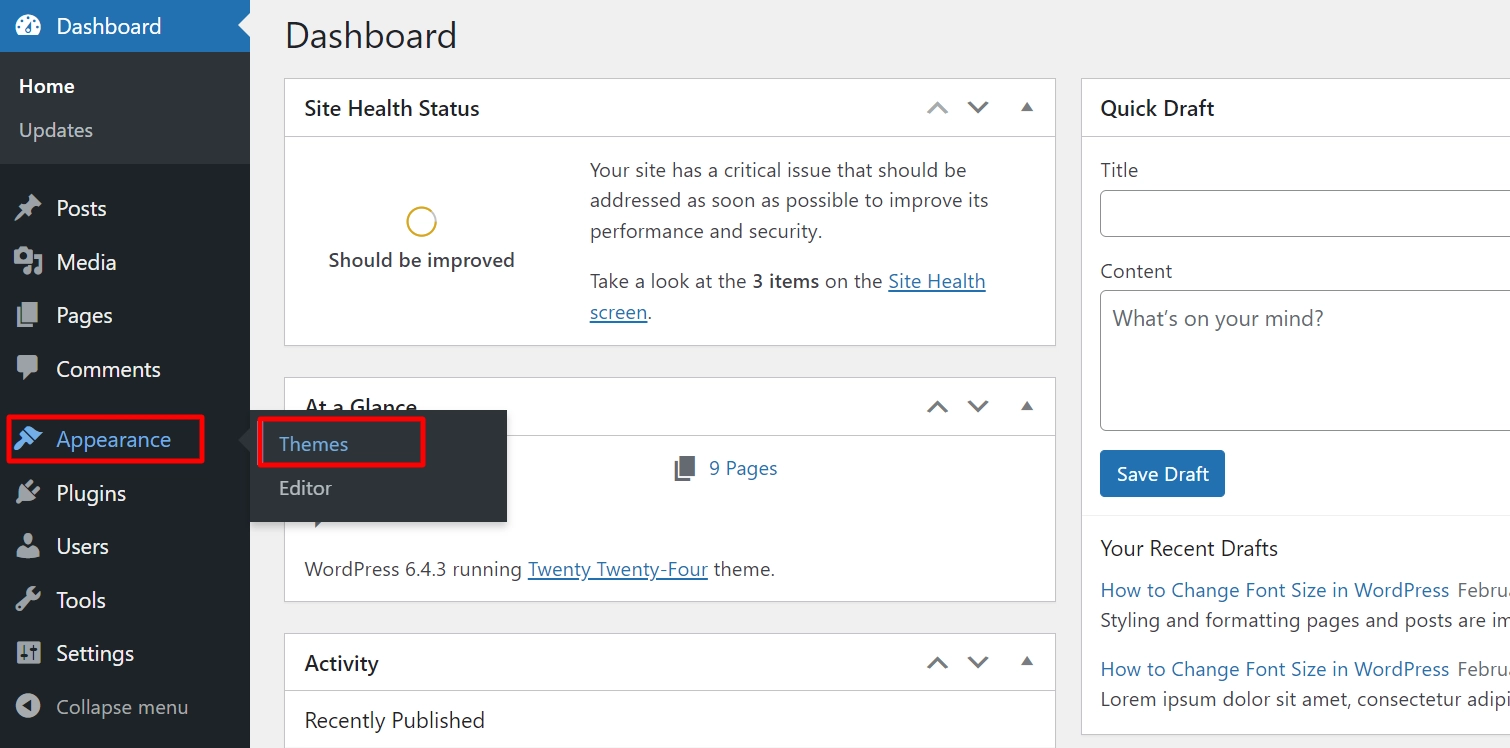
Next, click Add New.
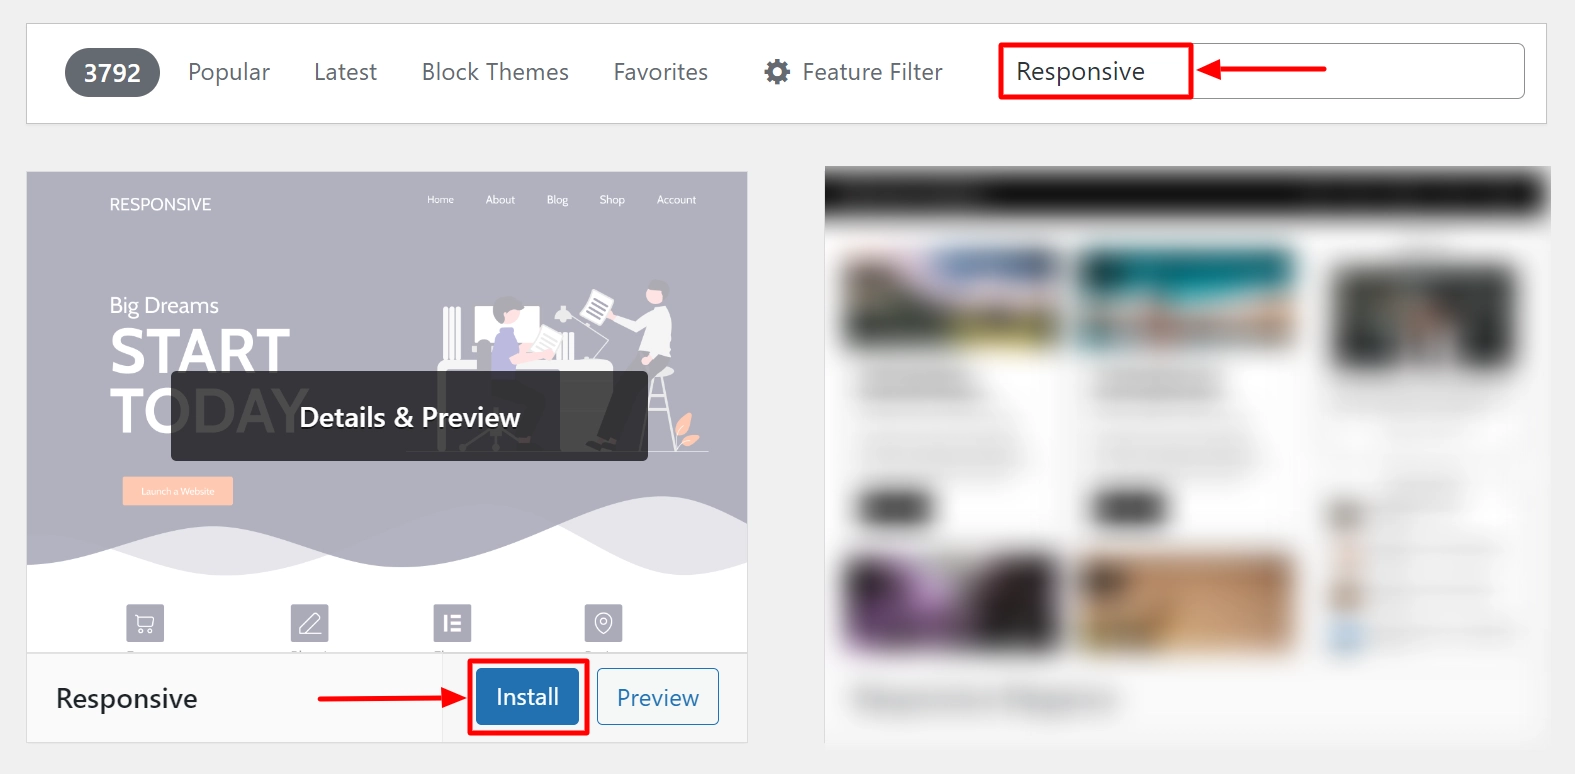
Search for the Responsive and click Install.
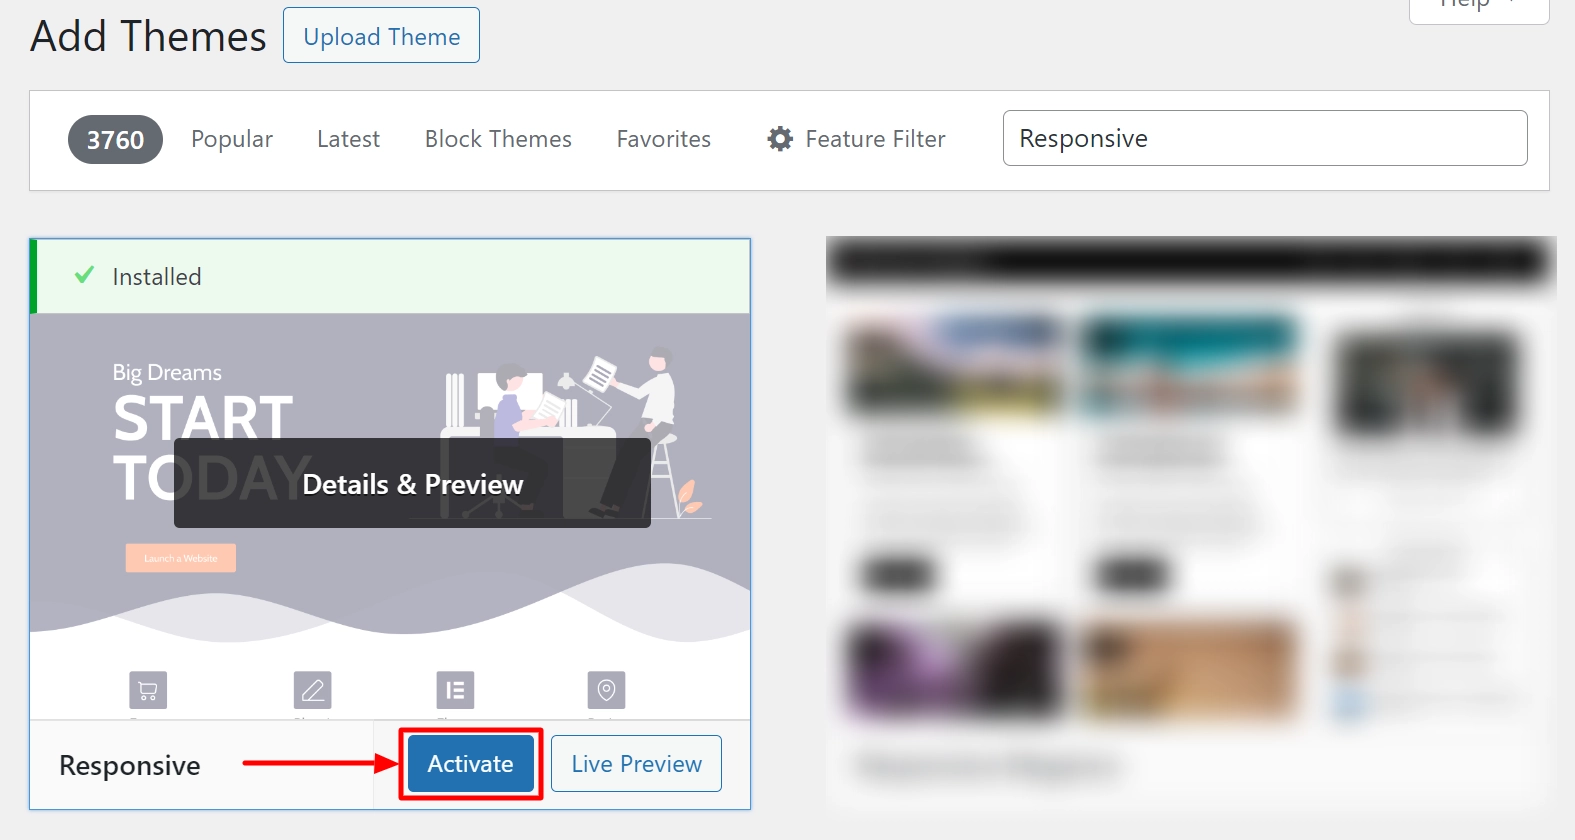
Then click Activate, and the theme will be ready to use.
Once you have the latest version of the Responsive Theme, navigate to the theme customizer from Appearance > Customize.
Adding and Editing Footer with Footer Builder
Using the Responsive theme footer builder, you can customize and style your website footer end to end.
To edit the footer, navigate to Footer from the customizer settings.
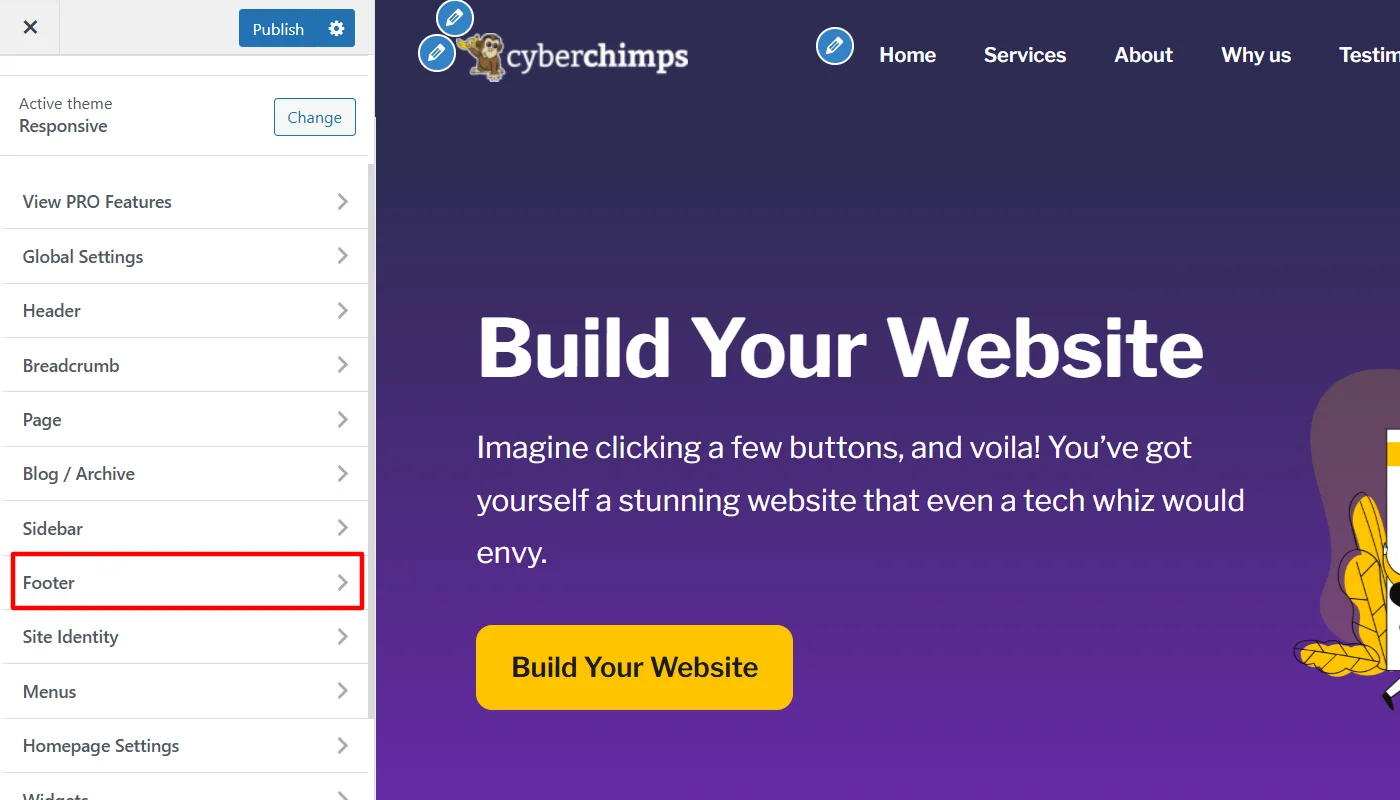
Next, you will be redirected to add and edit the elements you want to include in the footer section of the article. The Footer layout is divided into three rows:
- Above Footer
- Primary Footer
- Below Footer

By default, the rows in the footer display only three columns in the above footer and one each in primary and below; however, in the above settings, you can add up to six columns.
However, you can change and customize each row by clicking on the settings icon.
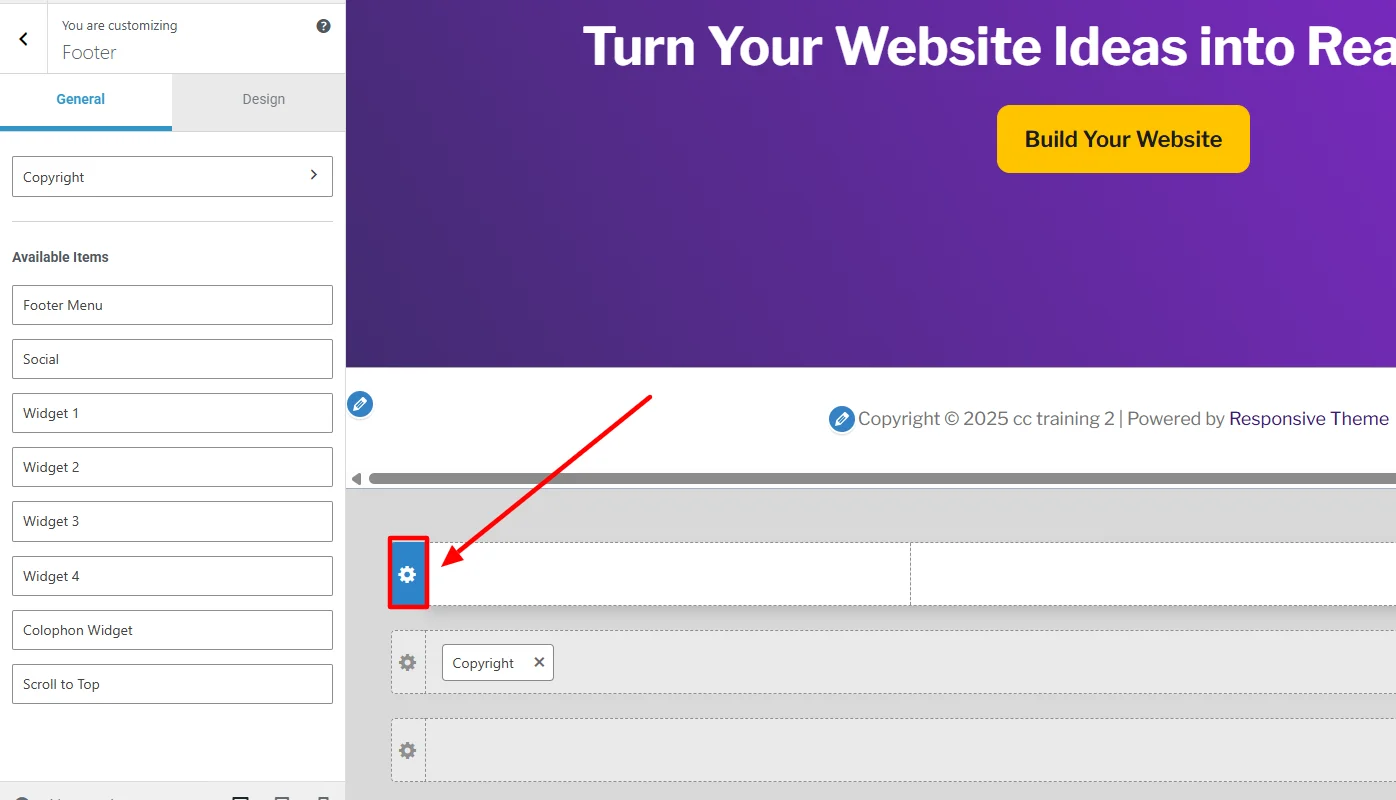
This allows you to use the following settings:
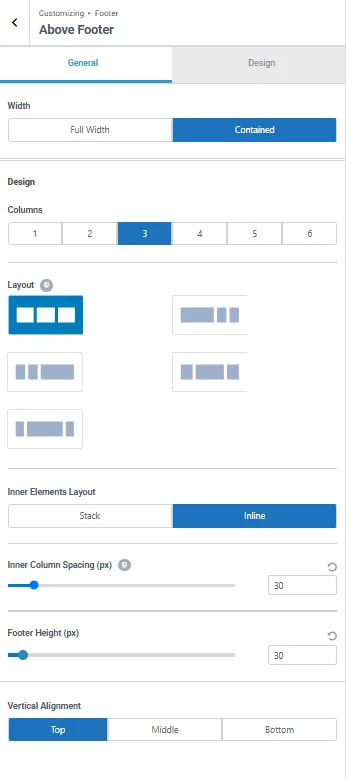
Width: You can either keep the footer width full across the screen or contained within the layout.
Columns: Choose the number of columns to display in each row.
Layout: You can adjust the layout of the rows depending on the number of columns you want to display in each row.
Inner Elements Layout: You can further customize the element’s appearance within each container between stack and inline.
- The Stack option will display the element components in the container vertically.
- Conversely, the Inline option will display the element components horizontally in the container.
Inner Column Spacing: As the setting suggests, it allows you to adjust the inner spacing of each column of the edited row.
Footer Height: This option allows you to adjust the height of each row in the column.
Furthermore, while building your footer via default settings, you won’t find any information element or widget in the footer section apart from copyright details, which look as below:

You can use the below footer elements to build the footer with a drag-and-drop method in any of the rows of the footer section:
- Colophon Widget
- Scroll to Top
- Copyright
- Footer Menu
- Social
- Widget 1
- Widget 2
- Widget 3
- Widget 4
To help you understand better the default row settings, I have added elements in each row and column that will help you understand how it looks when you use the settings and can compare with the default footer appearance.
You can also further improve the design and settings of each of these elements added in the footer by clicking on each and making changes as required.
For example, when I clicked on the Social Element, I added in the right side of the above footer. It allowed me to customize the following general and design options.
Similarly, each element you add to the footer can be individually customized and styled.
Moreover, the footer customization with the Responsive theme customizer also allows you to style the design of the overall footer.
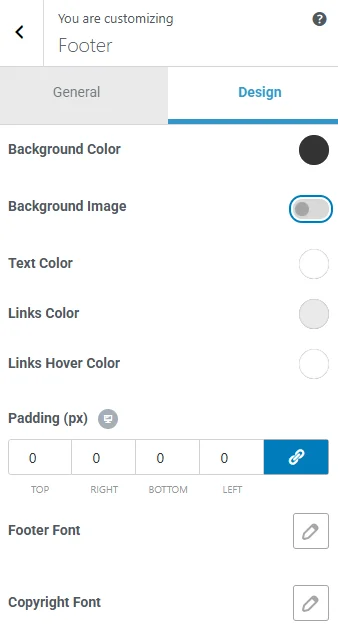
When you click on the Design option, it provides you with the following options:
- Copyright Font: This enables you to precisely adjust and style the font of the copyright section in your footer.
- Background Color: This allows you to set the overall color of the footer’s background.
- Background Image: Toggling this function allows you to add an image in your footer.
- Text Color: This feature allows you to set a specific color for the content in the footer.
- Links Color: If you have added some links in the footer, you can set the color for it.
- Links Hover Color: This feature allows you to color-code the footer links when a user hovers over them.
- Padding enables you to set and adjust the website footer’s padding.
- Footer Font: With this, you can style the overall size, weight, font, and height pf the text content in the footer.
Using this method, you can make and edit WordPress website footers most conveniently with maximum customization features and styling flexibility.
Further, you can also consider checking out the other way; however, they are inefficient.
2. Using The Widgets Panel
Using a widget panel to edit your WordPress footer is an easy and convenient method, but it does not have many editing and customization options.
What is the WordPress Widget Panel and How is it Different from the Theme Customizer?
You can consider the theme customizer in WordPress to be similar to the widget panel; however, the theme customizer serves a much broader purpose.
The WordPress platform widget panel focuses on adding and managing widgets in specific areas of your website.

On the other hand, the theme offers a broader range of functionality, helping you manage customization options for every element on the website, including the widgets.
Now that you know the fundamental differences between them, let’s explore how you can use the widget panel to edit your website footer.
How to Use Widget Panel To Edit the Website Footer?
You can follow the following step-by-step process to customize the footer with the widget panel.
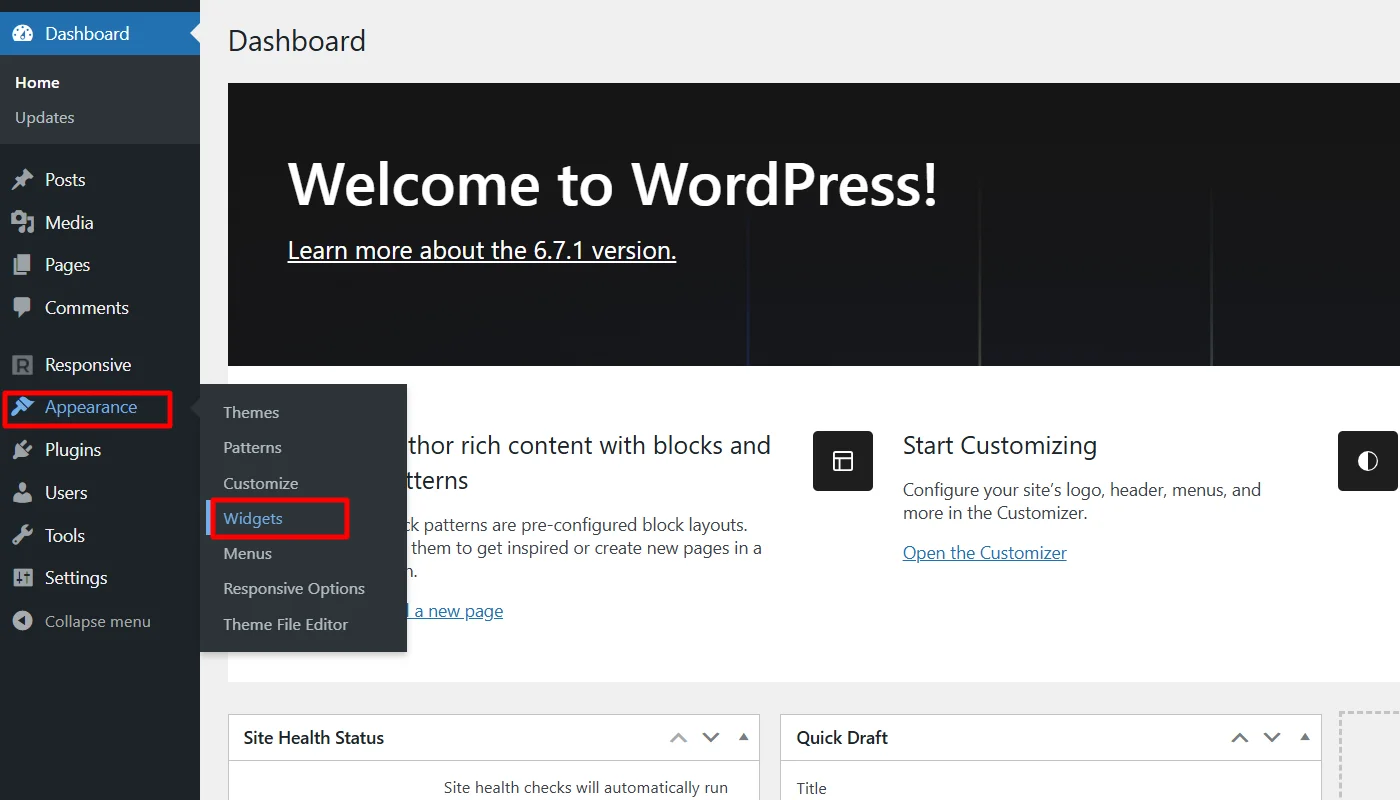
Go to your WordPress dashboard and navigate to Appearance > Widgets.
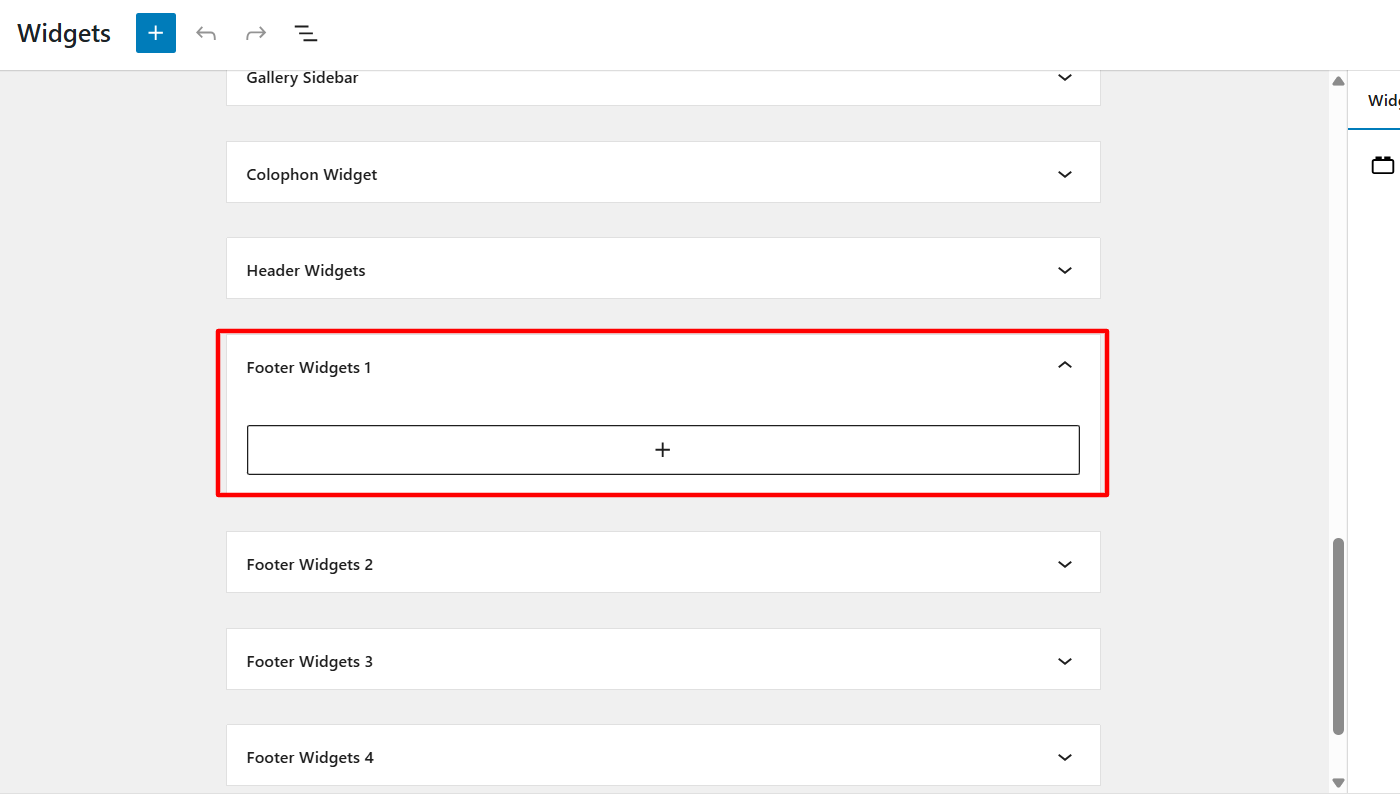
Scroll the page and locate the Footer Widget Area. It might be labeled ” Footer Widget 1,” “Footer Widget 2,” or “Footer Widget 3.”
(Footer widget labels may differ from theme to theme)
To create a footer, you must add widgets to these one by one. To add a widget in the footer, click on one of the labels and click on the (+) button.
Next, in the search panel, look for the widgets you want to add. For example, I am trying to add social icons here.
(Once I added the social icons widgets, it required me to search and add the buttons of specific social platforms individually)
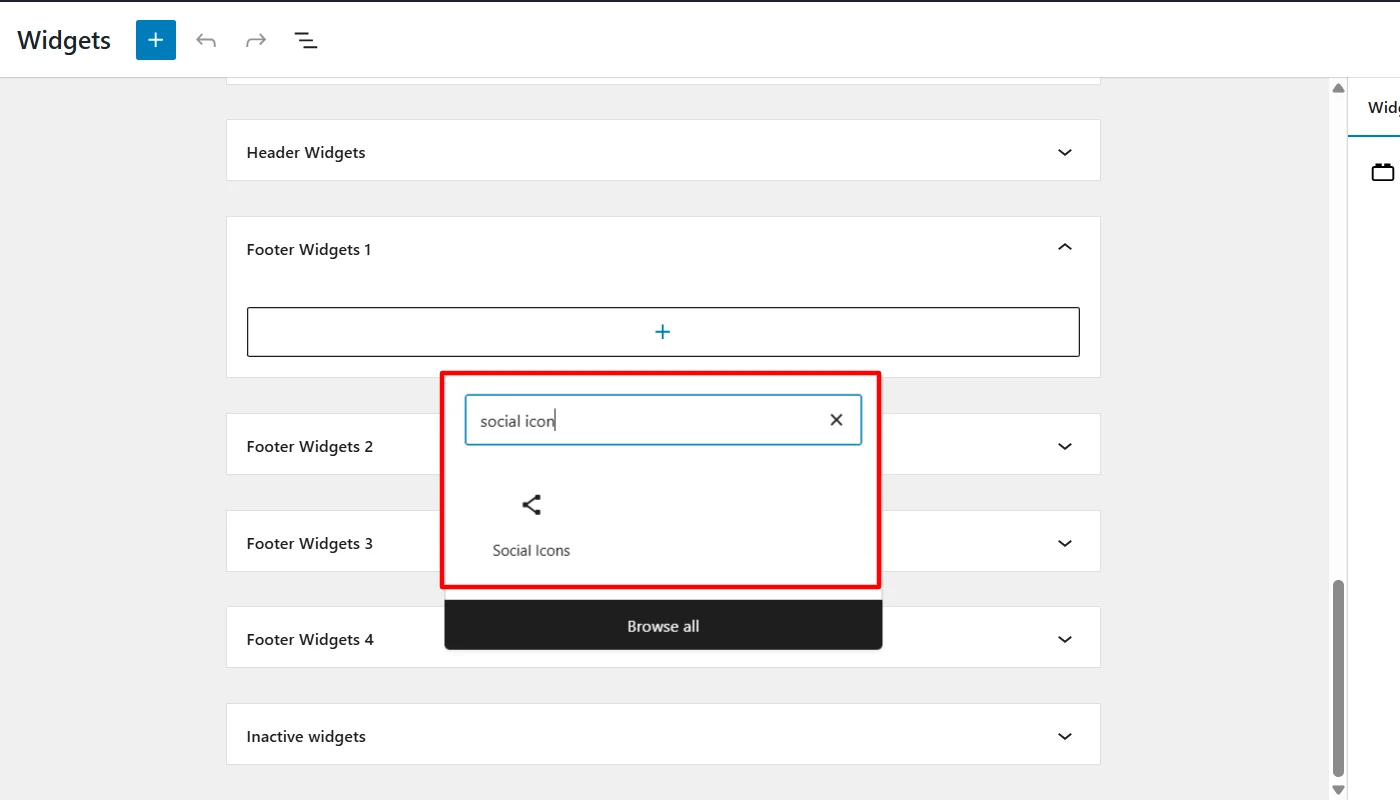
To customize the Social widget further, you can add a link to every social icon, adjust its location and alignment, and change the text for icons.
Once you are done with customizations, click the Update button. Similarly, you can click on other footer labels and add and edit the widgets in the footer section of your site.
3. Manually Adding With Footer.php
Another method you may use to add and edit your WordPress site’s footer is manually adding it with footer.php.
If you are from a completely non-technical background, footer.php might appear to be an alien term to you.
What is Footer.php?
The footer.php file in WordPress is a vital template that defines the footer section of your website. It comprises essential elements that must be included in the footer to improve the user experience.
You can think of it as a file with codes that control your footer appearance where you often find important website information, like:
- Copyright details (who owns the site)
- Links to privacy policies or terms of service
- Social media icons
and other relevant necessities.
Making it no more complex, let’s directly jump in and learn how to add and edit you website footer with footer.php.
How to Add and Edit Footer on WordPress with footer.php?
To add and customize the footer on your WordPress site, follow the below-mentioned steps:
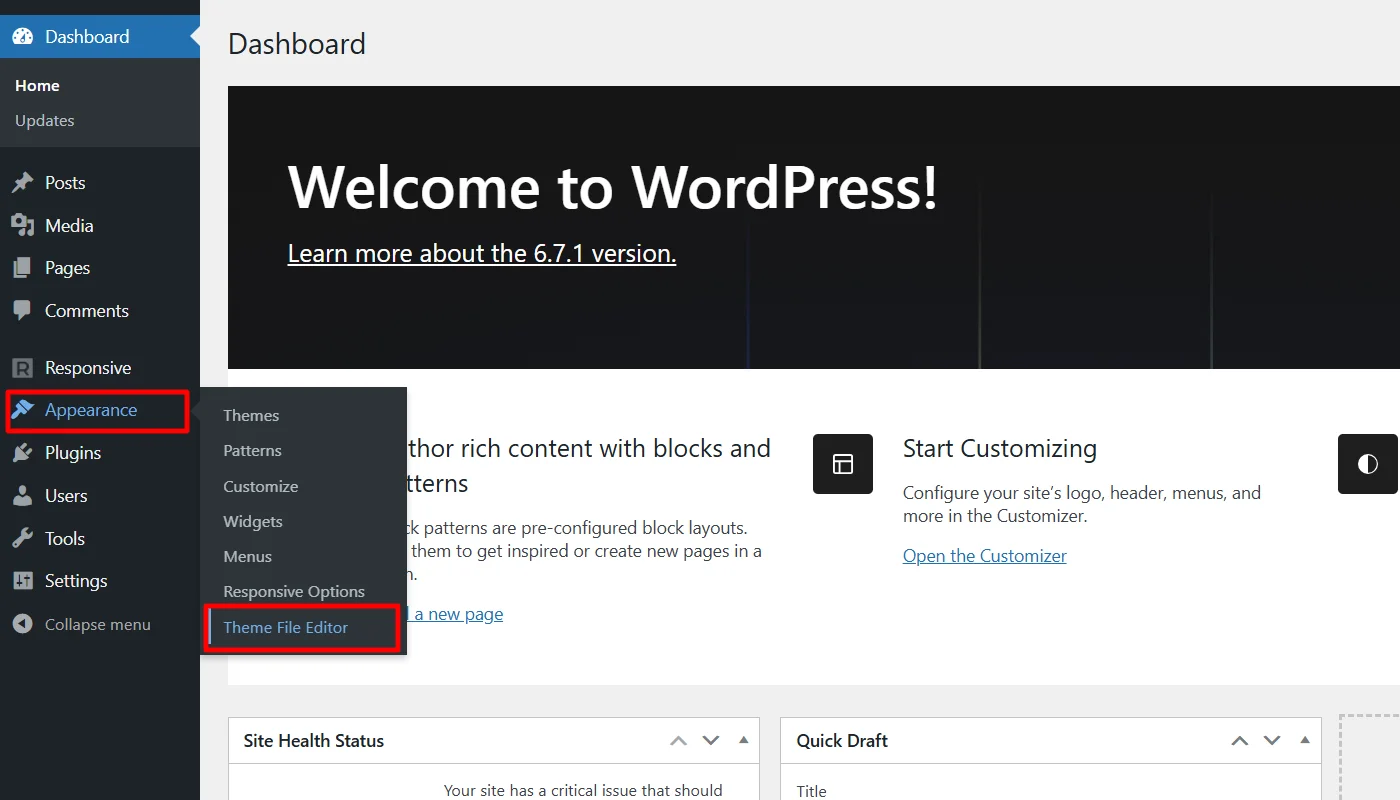
Go to your WordPress dashboard and navigate to Appearance > Theme File Editor.
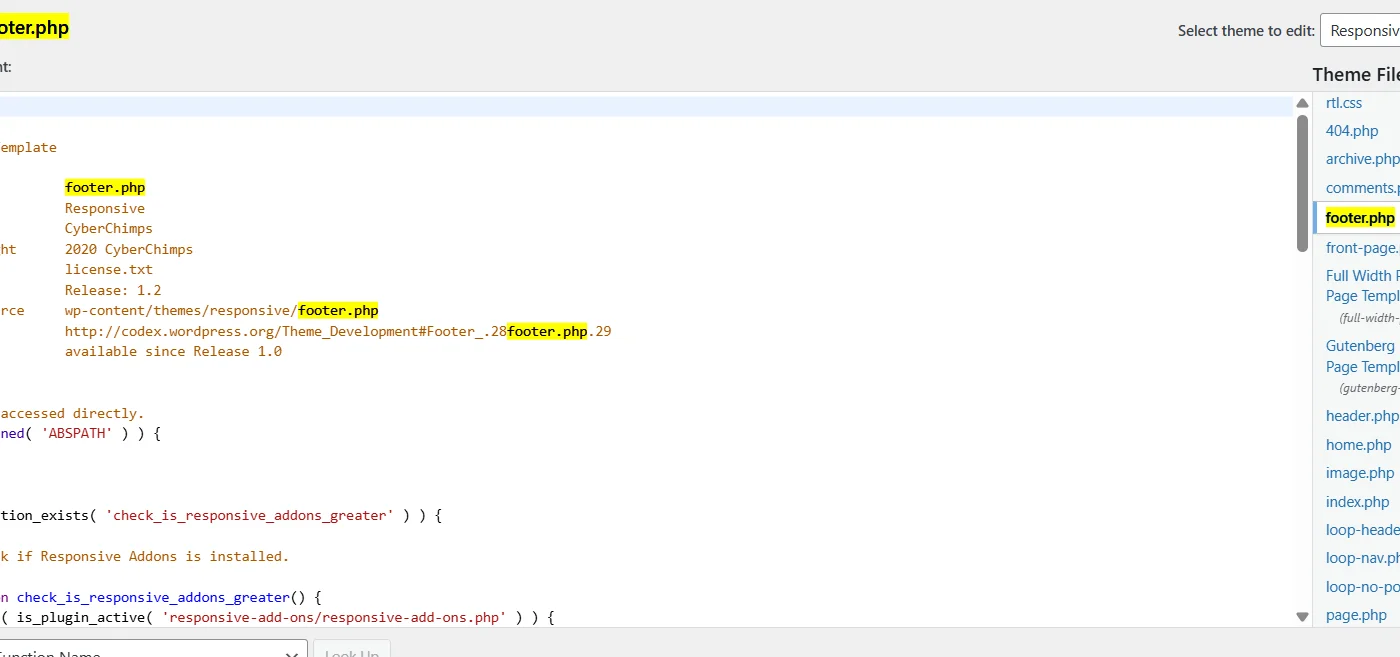
In the right panel, search and click on footer.php.
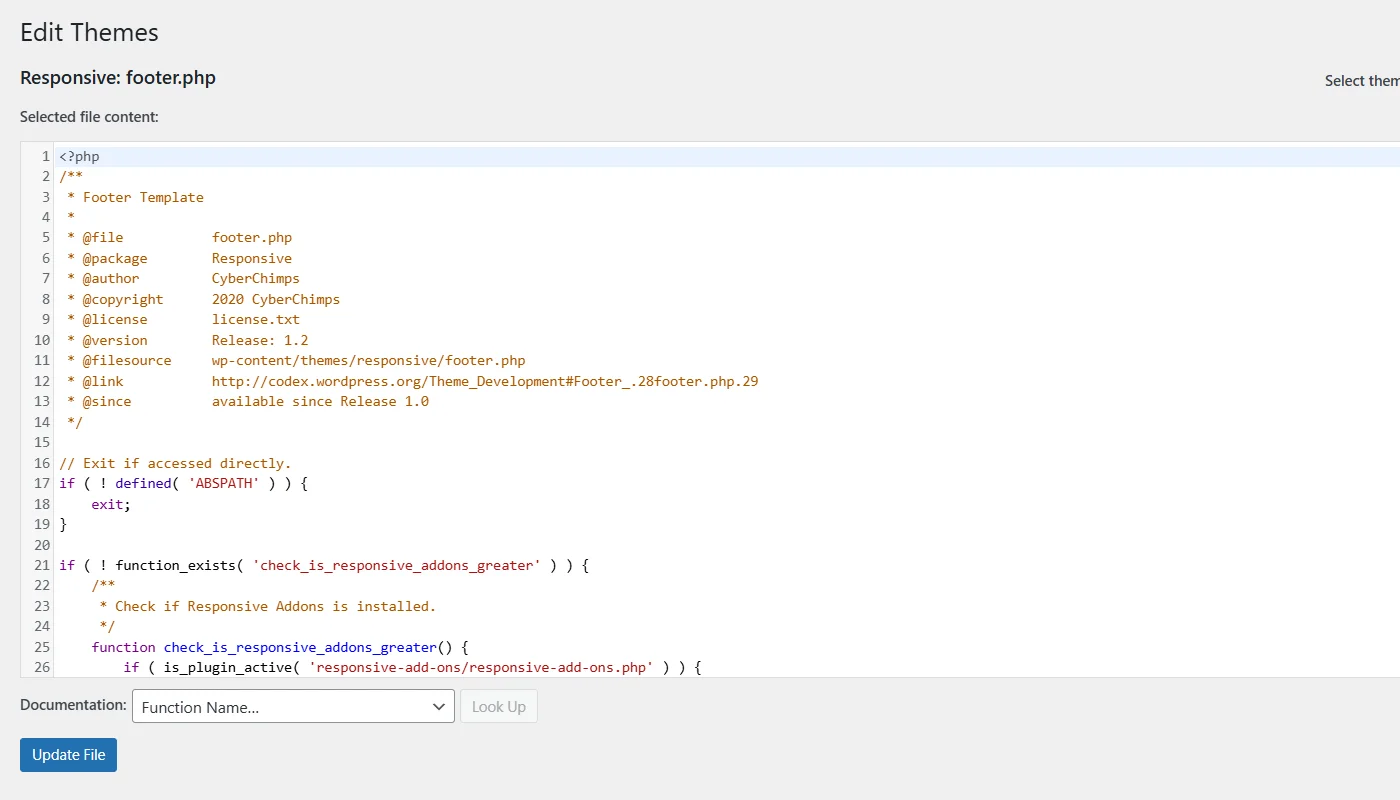
Here, in this case, we are adding a sample code to add the following code to include copyright info, social links, and a menu in our footer
<footer>
<div class="footer-content">
<p>© <?php echo date("Y"); ?> Your Site Name. All rights reserved.</p>
<div class="social-links">
<a href="https://facebook.com/yourprofile" target="_blank">Facebook</a>
<a href="https://twitter.com/yourprofile" target="_blank">Twitter</a>
<a href="https://instagram.com/yourprofile" target="_blank">Instagram</a>
</div>
<nav>
<?php
wp_nav_menu(array(
'theme_location' => 'footer-menu', // Make sure to register this menu in functions.php
'menu_class' => 'footer-menu',
));
?>
</nav>
</div>
</footer>Once added, click Update File
However, the footer built using this method will be very basic. To enhance it further, you will need to write and test better code, for which you might get help from a developer. Moreover, it is recommended that you avoid this method as it can be quite technical and may confuse you if you don’t have much coding experience.
Further, page builders like Elementor also allow you to build website footers. You can refer to How to Build a Custom Header/Footer in Elementor For Your Website.
FAQ
There are multiple ways to edit an existing footer in WordPress; however, editing a footer using the theme customizer is one of the most convenient and offers maximum flexibility.
But if you previously used any third-party page builder like Elementor to build your footer, the theme customizer changes won’t work as page builder codes overwrite other changes.
If your footer is not staying at the bottom, you can add the following CSS class to the footer:
min-height: 100vh; and position: relative; to the body and position: absolute; bottom: 0; width: 100%;
The footer file (footer.php) is located in your theme’s folder. You can access it from WordPress Dashboard > Appearance > Theme File Editor > footer.php
Conclusion
Overall, building and customizing a footer with the above-discussed methods is simple but needs attention throughout the editing process.
While we discussed three different methods, the first method—using a Responsive theme customizer—could best help you.
Further, if you found this article valuable, you can also consider reading:
- What is a Header Footer Builder in WordPress?
- What are Presets in WordPress? – An Ultimate Guide
- How To Add a Search Bar In WordPress
Check out the Responsive Theme from Cyberchimps to create a website under any niche.


