
Are you an expert traveler wanting to create a travel agency website that can turn visitors into bookings?
A website is the starting point to expand your travel business. Luckily, you don’t need to employ a web designer or learn the fundamentals of coding.
You can have a stunning travel website with WordPress, as there are many templates to help you create one.
This article will guide you through the step-by-step process of creating a travel agency website in a few simple steps, from choosing a theme to customizing it to your brand.
Let’s get started!
- Essential Requirements for Building a Travel Agency WordPress Website
- Benefits of Building a Travel Agency Website
- How to Build a Travel Agency Website With WordPress
- FAQ
- Conclusion
Essential Requirements for Building a Travel Agency WordPress Website
Before you actually go ahead and make your own travel agency website, there are couple of things that you’ll have to begin with. These are simple steps that will help you to make the foundation for your website.
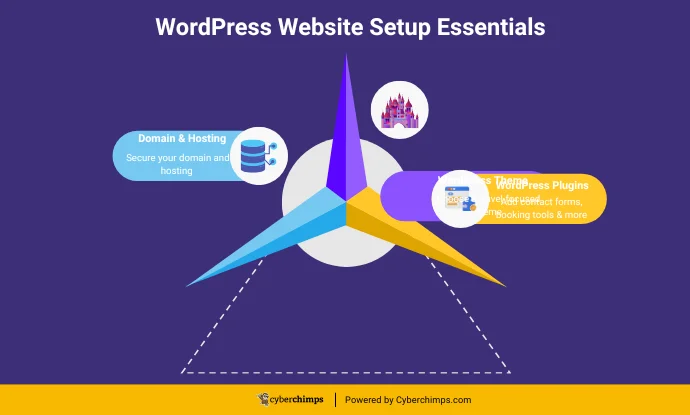
1. Domain and Hosting
To make a travel agency website, you’ll need a domain name (for example, www.yourtravelagency.com) and web hosting (a service that stores your website online).
There are several hosting providers that provide easy WordPress installation. This is the starting point to design a travel agency website in WordPress.
2. WordPress Theme
A WordPress theme decides the look of your website. To make a travel agency website, choose a theme that is specifically designed for travel businesses.
These themes are beautiful in terms of design and have booking functionalities to show your tour packages to your clients. Having a good theme will present your travel agency website with a professional and attractive appearance.
3. WordPress Plugins
Plugins add extra features to your site, like contact forms, reservation systems, and social networking icons.
When you create a travel agency website, plugins allow you to customize your website easily without programming. They are easy to install and can make your website more useful to your visitors.
Benefits of Building a Travel Agency Website
Having a travel agency website means more travelers, more trust in your services, and an opportunity to conduct more online business.
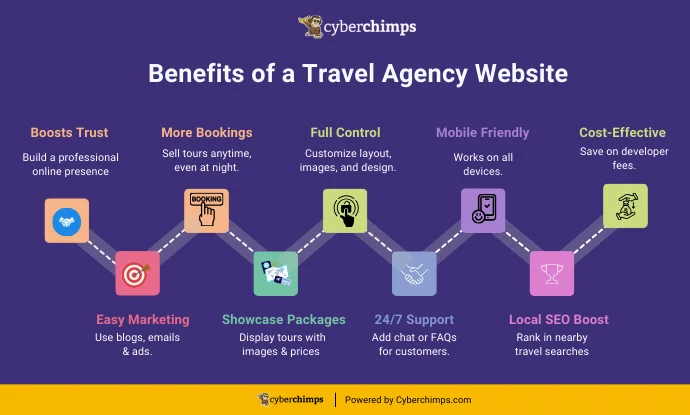
If you want to learn how to create a travel agency website, here are several reasons why you must get started today:
- Professional Design: Building a travel agency website gives your brand a professional dimension. Travelers tend to trust travel agencies that hold a good reputation online.
- More Bookings: A travel agency website allows late-night browsing for packages and tours with booking.
- Complete Control: When creating a travel agency website, you control the entire layout. You can control things such as design and images, and there are no restrictions from third parties!
- Mobile Responsiveness: Most WordPress themes are mobile responsive, so your site will work well on phones, tablets, and laptops.
- Low Cost: Learning how to make a travel agency website will save you money as there will be no need to hire a developer for small update requests.
- Easy Promotion: A website makes it easy by showing ads banners, collecting email addresses, publishing blogs, or any travel tips.
- Showcase Packages: When you build a travel agency website, you can display all your travel packages by publishing images, adding prices and descriptions on the website.
- Customer Support 24/7: You can add a chat option or FAQs to help customers when you are not available.
- Local Search Visibility: If your customers are looking for travel information for themselves, your website will increase the chances of being listed in search engine results.
A personalized travel agency WordPress website helps you grow and get more clients.
How to Build a Travel Agency Website With WordPress
Here’s how to make a travel agency website.
1. Choose a Web Hosting Provider and Get A Domain Name
The first step in creating a travel agency website is to set up web hosting and choose a domain name.
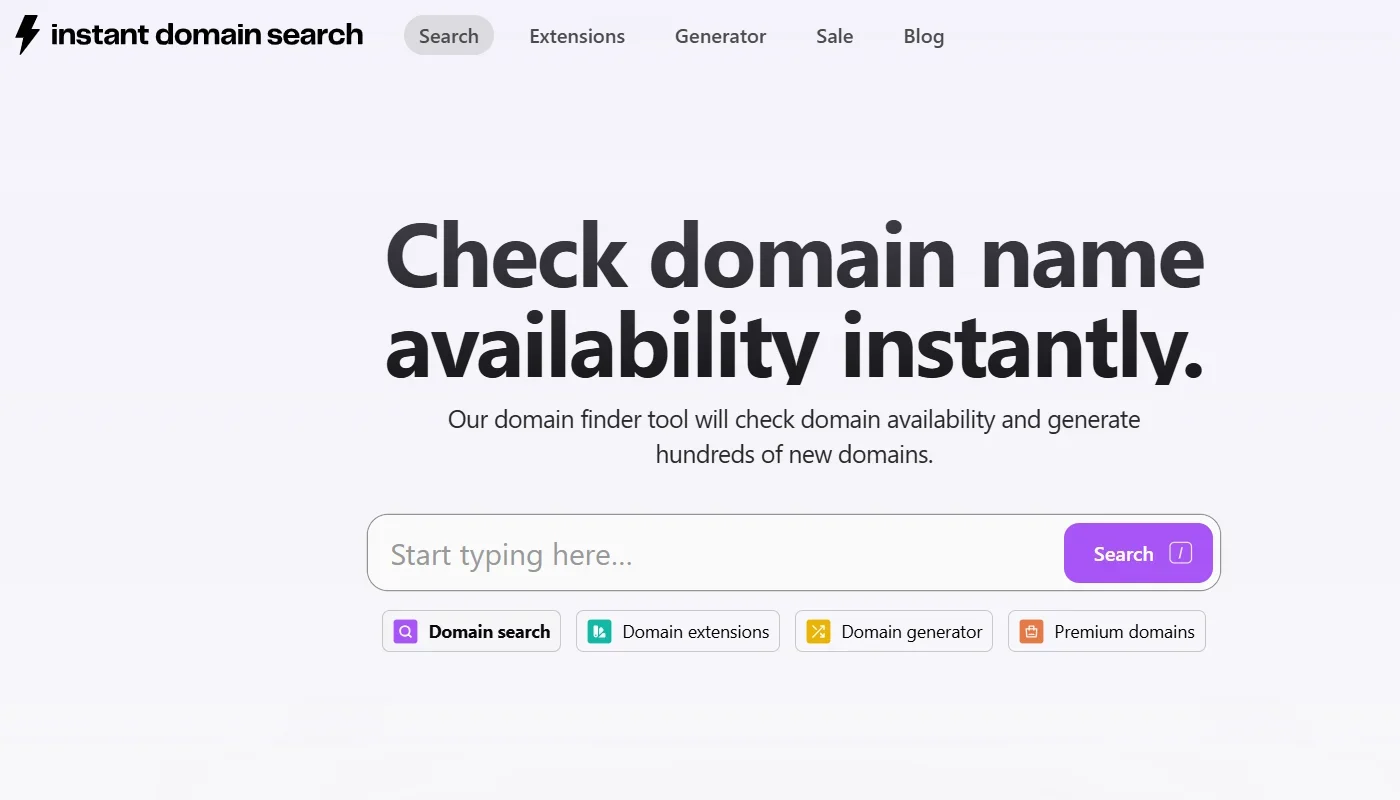
Get A Domain Name
Your domain name is your website’s address on the web; it’s how customers will find and recall you.
Here’s how to select a successful domain name for your travel agency website:
- Make it Short and Easy to Remember: Opt for a domain name that is simple to spell and remember.
- Use Keywords: Use keywords regarding travel and vacation to provide an SEO boost.
- Use.com: It is the most used and trustworthy domain extension. If your chosen.com is unavailable, use substitutes like.trip or .vacation.
- Ensure Availability and Registration: The domain name you want to register might be registered by another business, leaving you without access. Verify the availability of a domain name via a site like Instant Domain Search.
Now that your domain name is ready for your travel agency website, you will need a web hosting service.
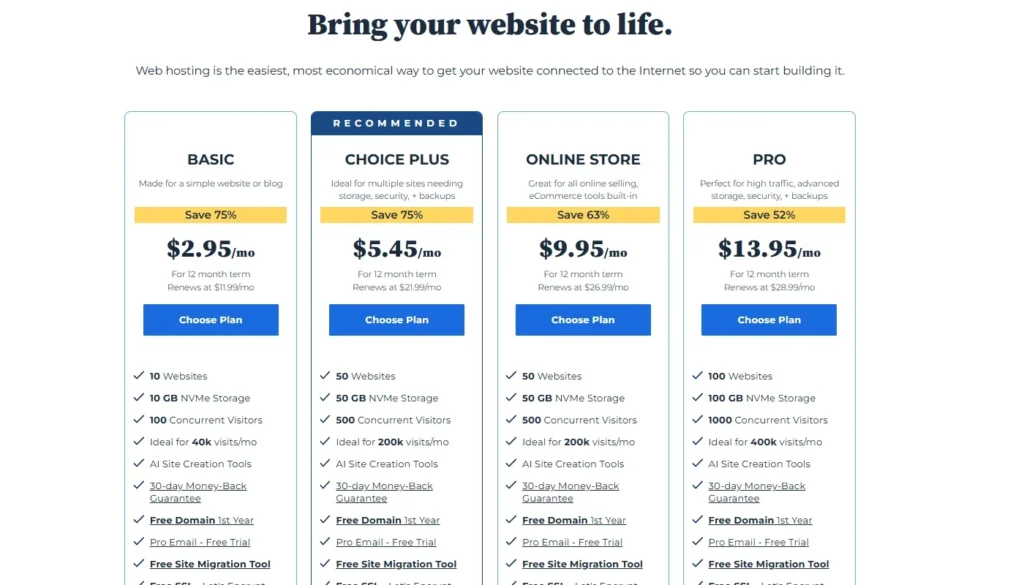
Choose a Web Hosting Provider
Most importantly, select a hosting provider that provides unlimited storage. If you have a large site with a lot of images, videos, and other media files for your travel website, it’s essential to look for unlimited storage.
The best hosting plans should provide flexibility with features. Along with this, try to see what kind of resources your web hosting provider offers versus what kind of management tools it gives you.
There are numerous hosting service providers, such as Bluehost and many more. You can select any one of these as your local hosting service provider.
We recommend using Bluehost as they offer excellent service.
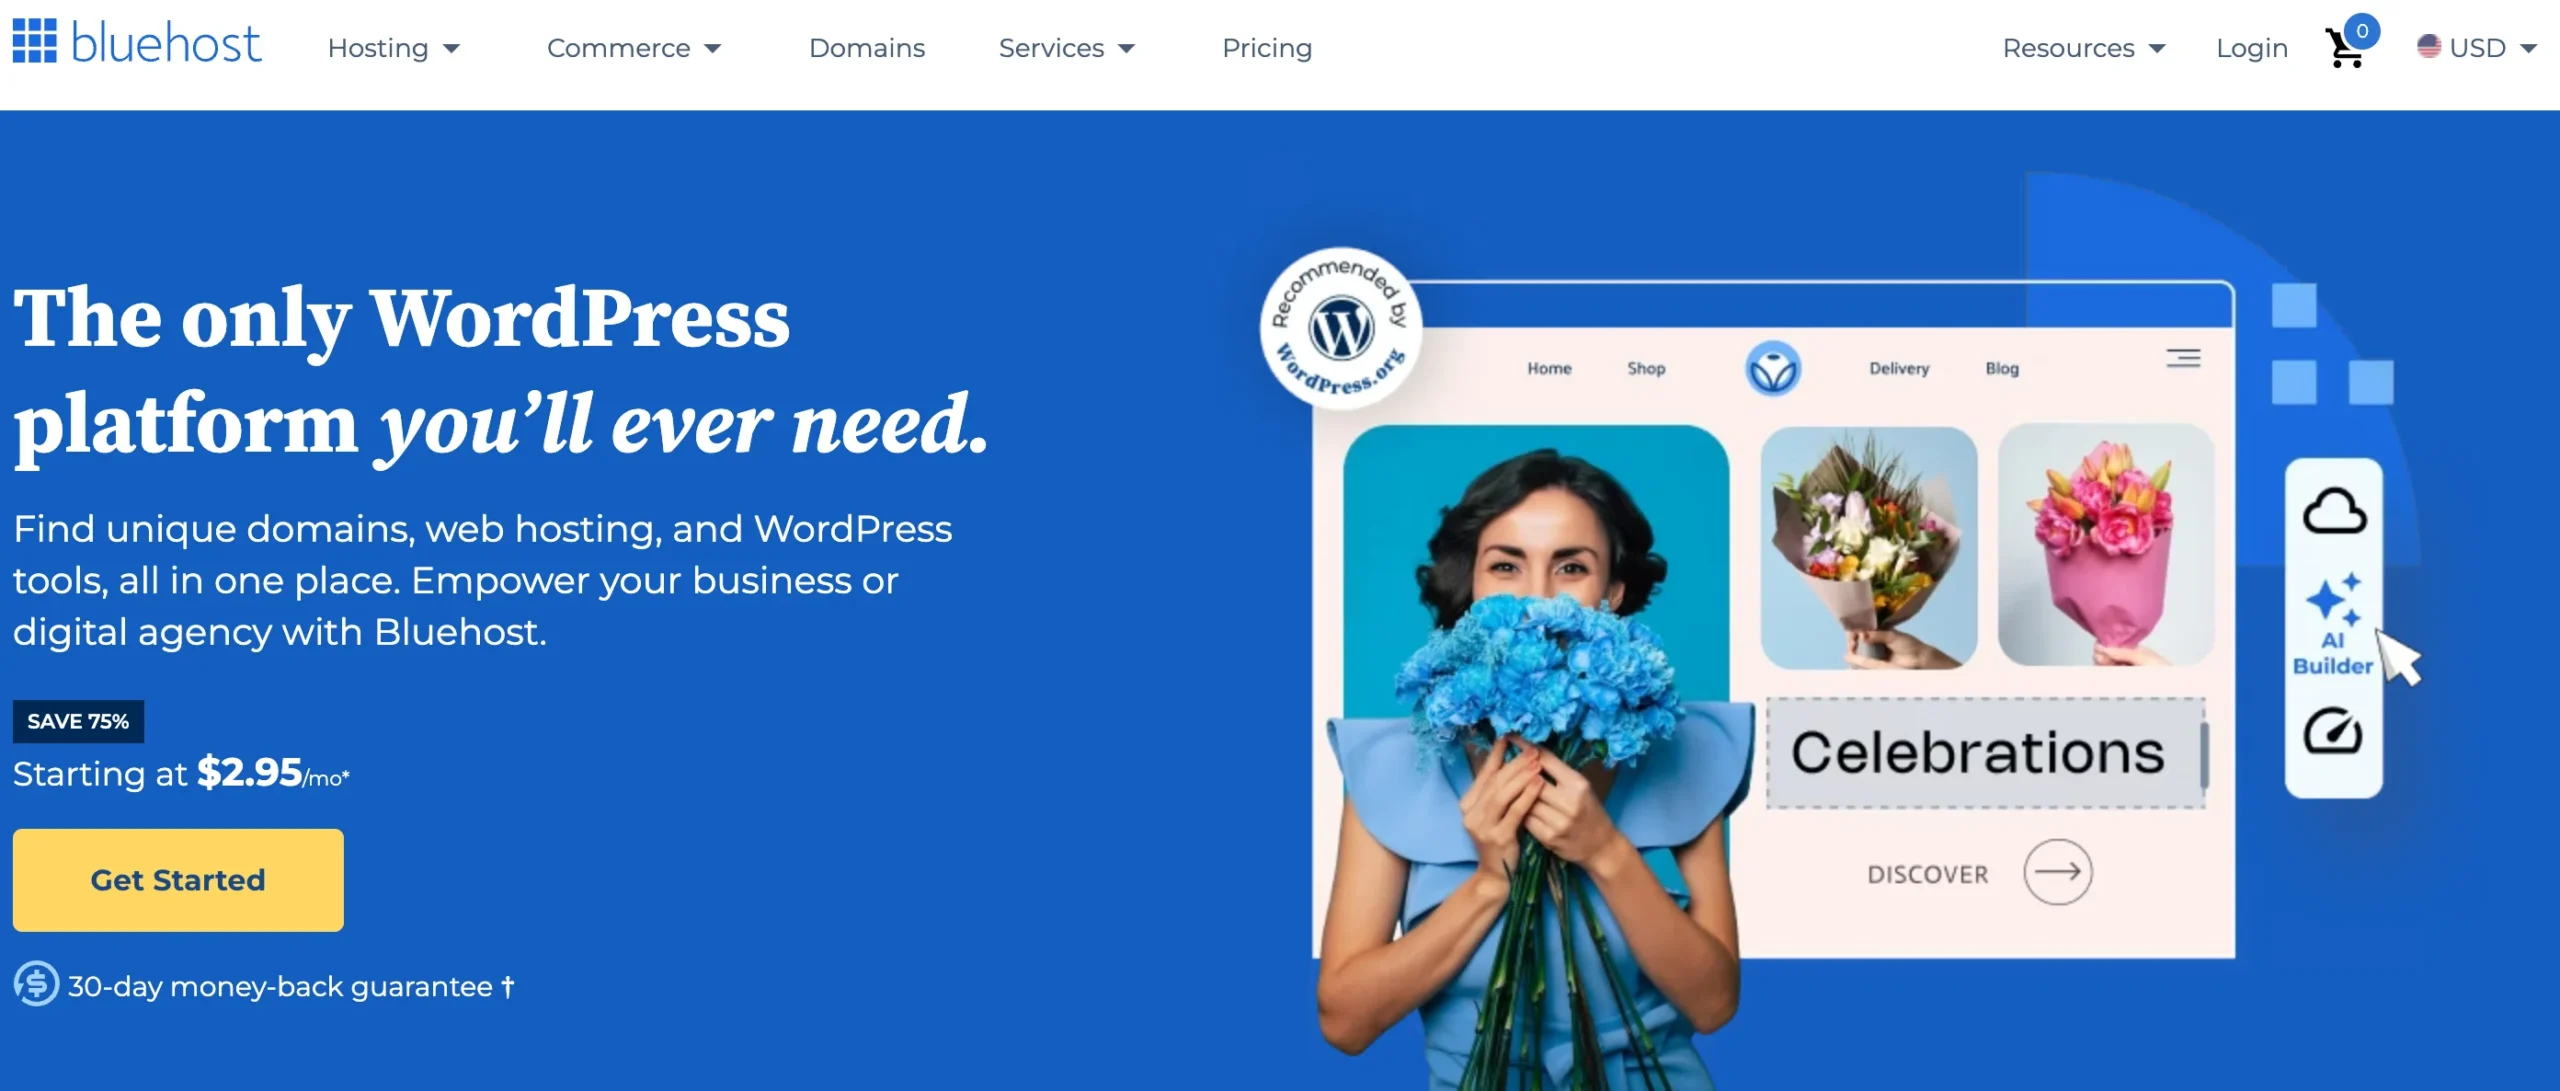
When you arrive at the Bluehost webpage, start by clicking the Get Started Now button.

After clicking, you will be taken to their signup page to choose a pricing plan.
Once you have registered for hosting, you can take the following steps.
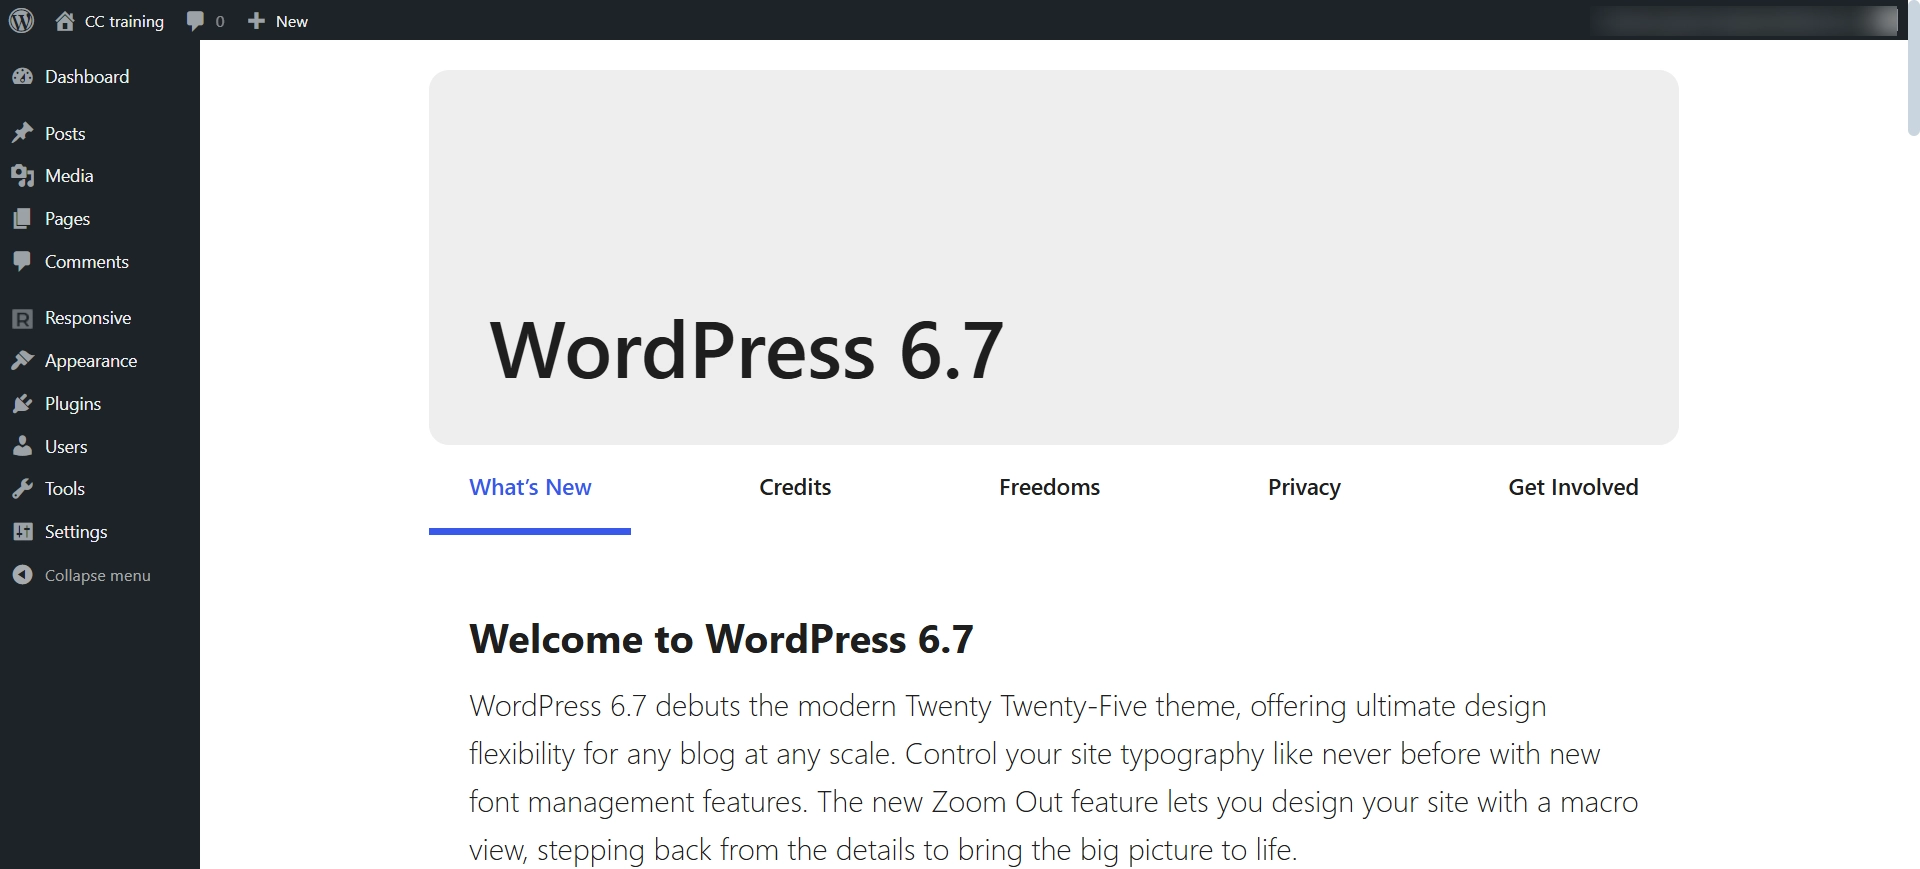
2. Installing WordPress
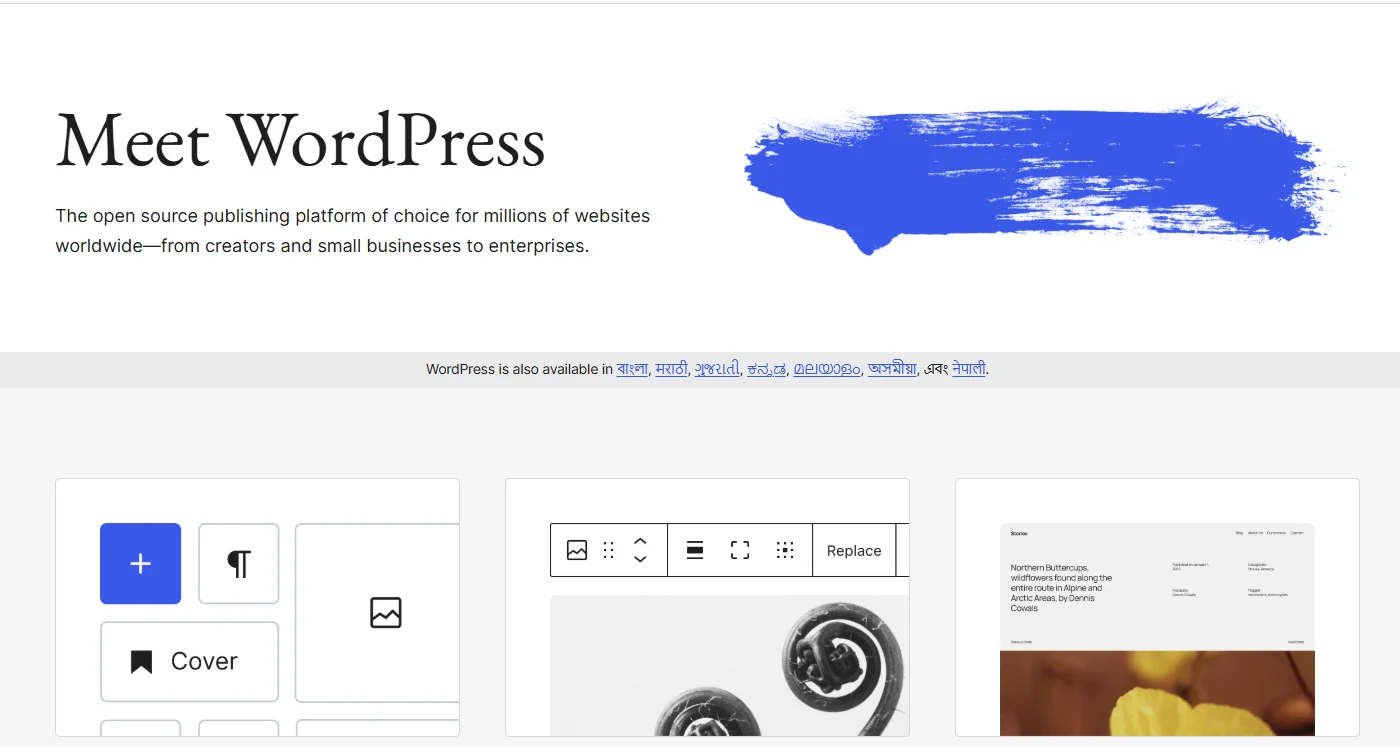
The next step in creating a travel agency website is to install WordPress. WordPress is the world’s most widely used content management system (CMS), with millions of sites running on it. It offers a flexible platform for your travel site.
Most web hosts offer a one-click WordPress download feature; if not, you can manually set up a WordPress website.
3. Selecting a WordPress Theme
Once you have installed WordPress, you require a simple theme with a simple layout and interface to design your travel agency website.
If you are still not sure what it is and believe it is something like a template, I must explain that both are different.
A WordPress theme is a collection of files that defines the visual appearance and feel of a WordPress site. It dictates how the website appears and allows you to alter the look without having to edit the WordPress software.
Even though there are various travel agency themes available in the WordPress repository, all may not be helpful to you, so select one that will be most helpful to you.
Cyberchimps Responsive theme is one such suggested theme that can be used for all purposes of designing a multi-purpose travel website.
4. Installing Responsive Theme

The Cyberchimps Responsive theme has over 20,000 active users. This theme offers a user-friendly interface for creating any website.
In addition, the theme seamlessly integrates with its freemium plugin, Responsive Plus, allowing you to create any website with just one click of import. Now, let’s understand how to install the theme.
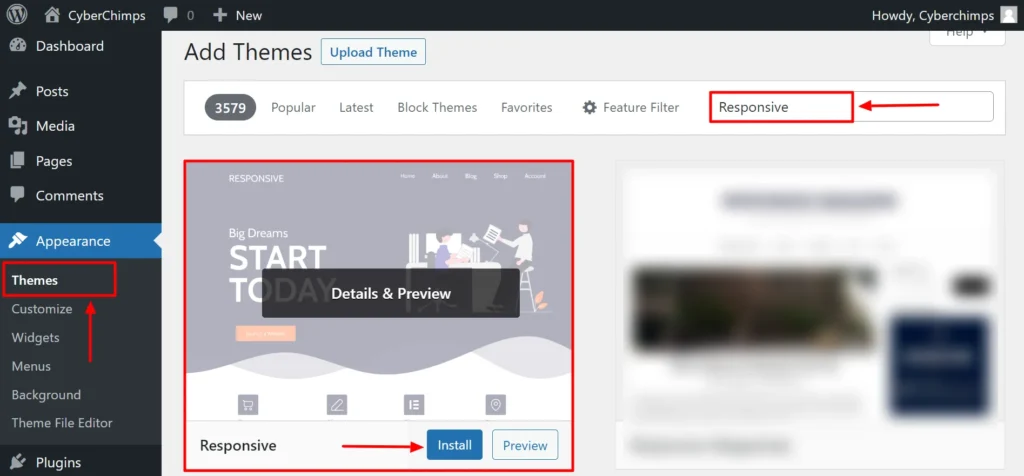
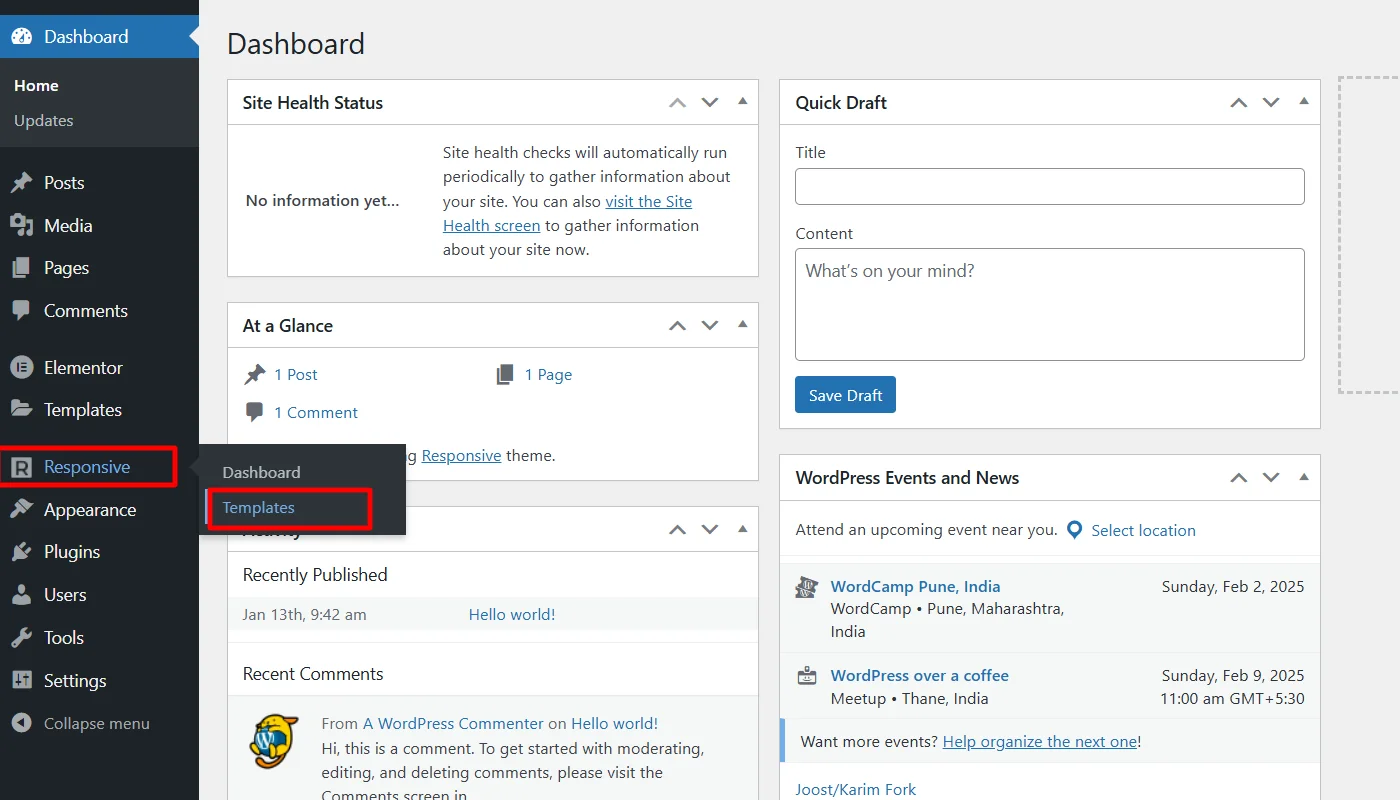
Log in to your WordPress admin dashboard.
Go to Appearance > Themes > Add New
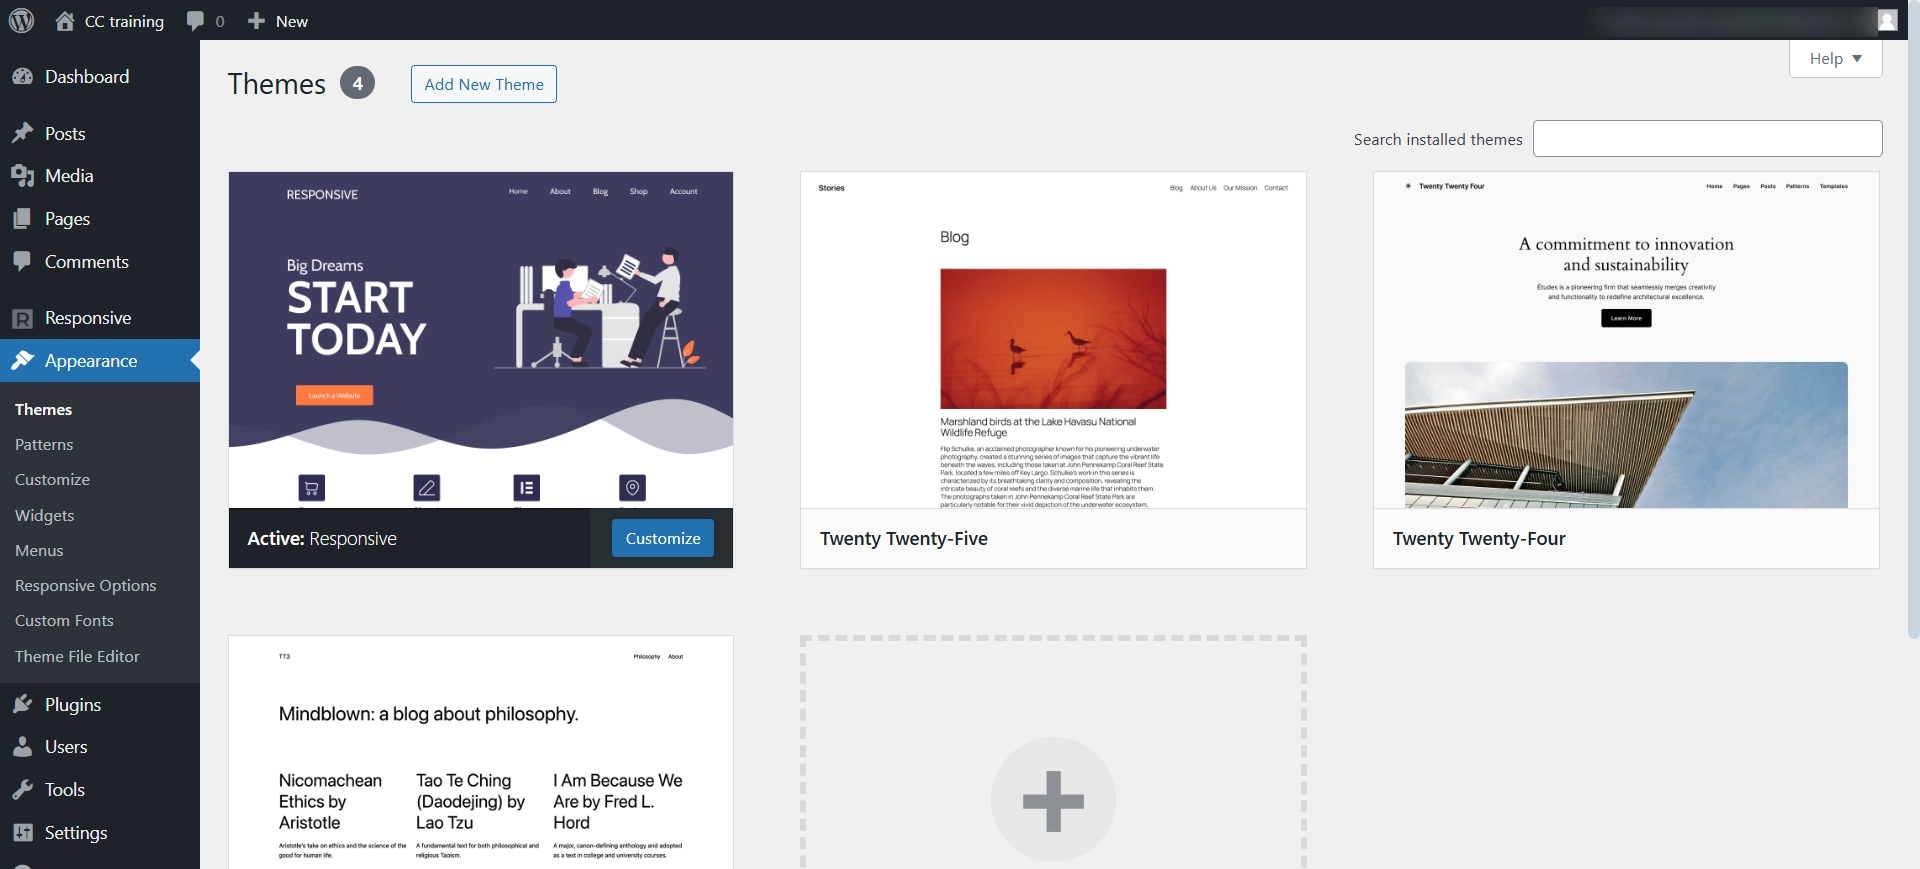
Search for Responsive on the search bar
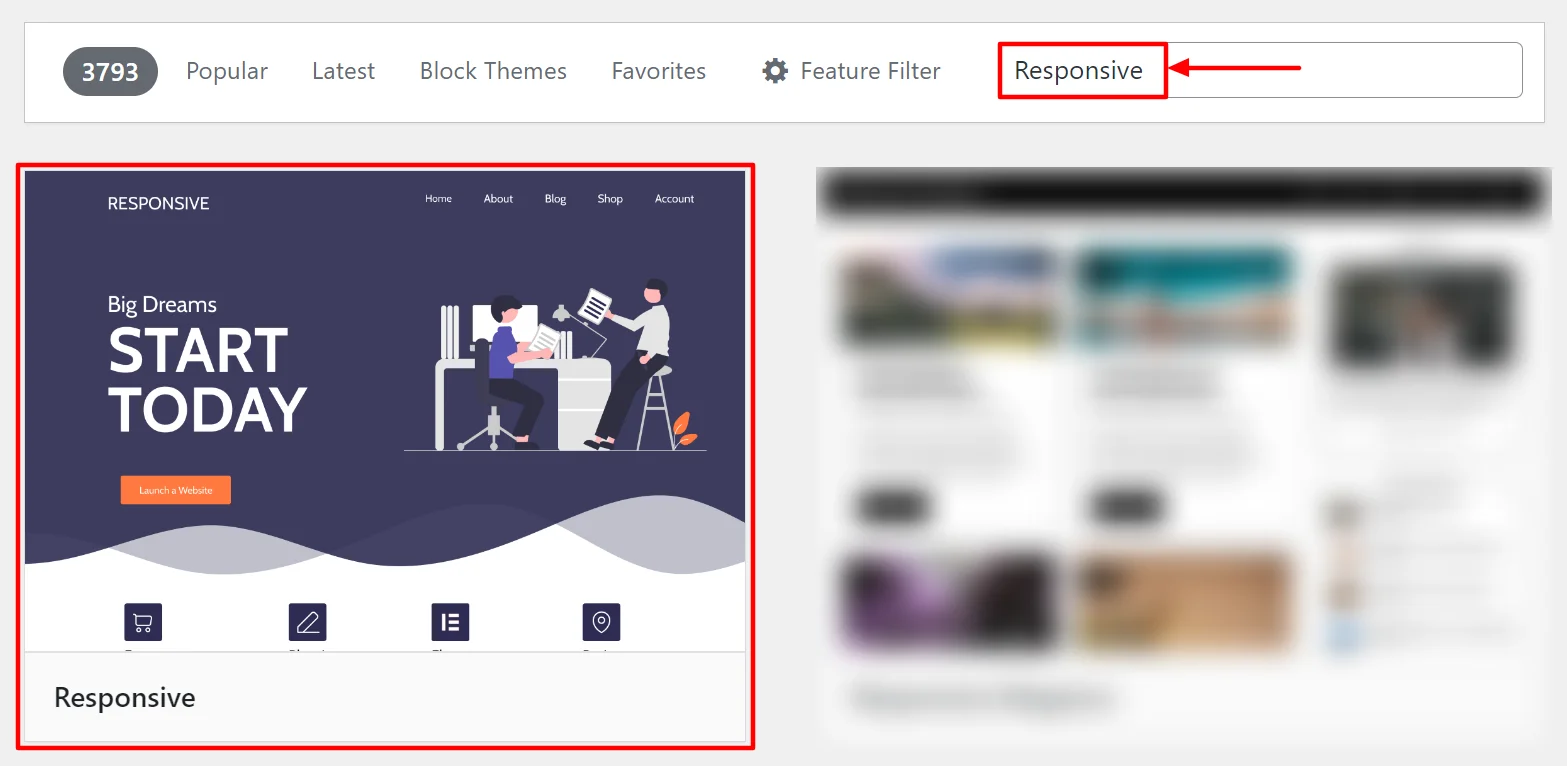
Click on Install Now to start installing the Responsive theme
Activate Responsive theme
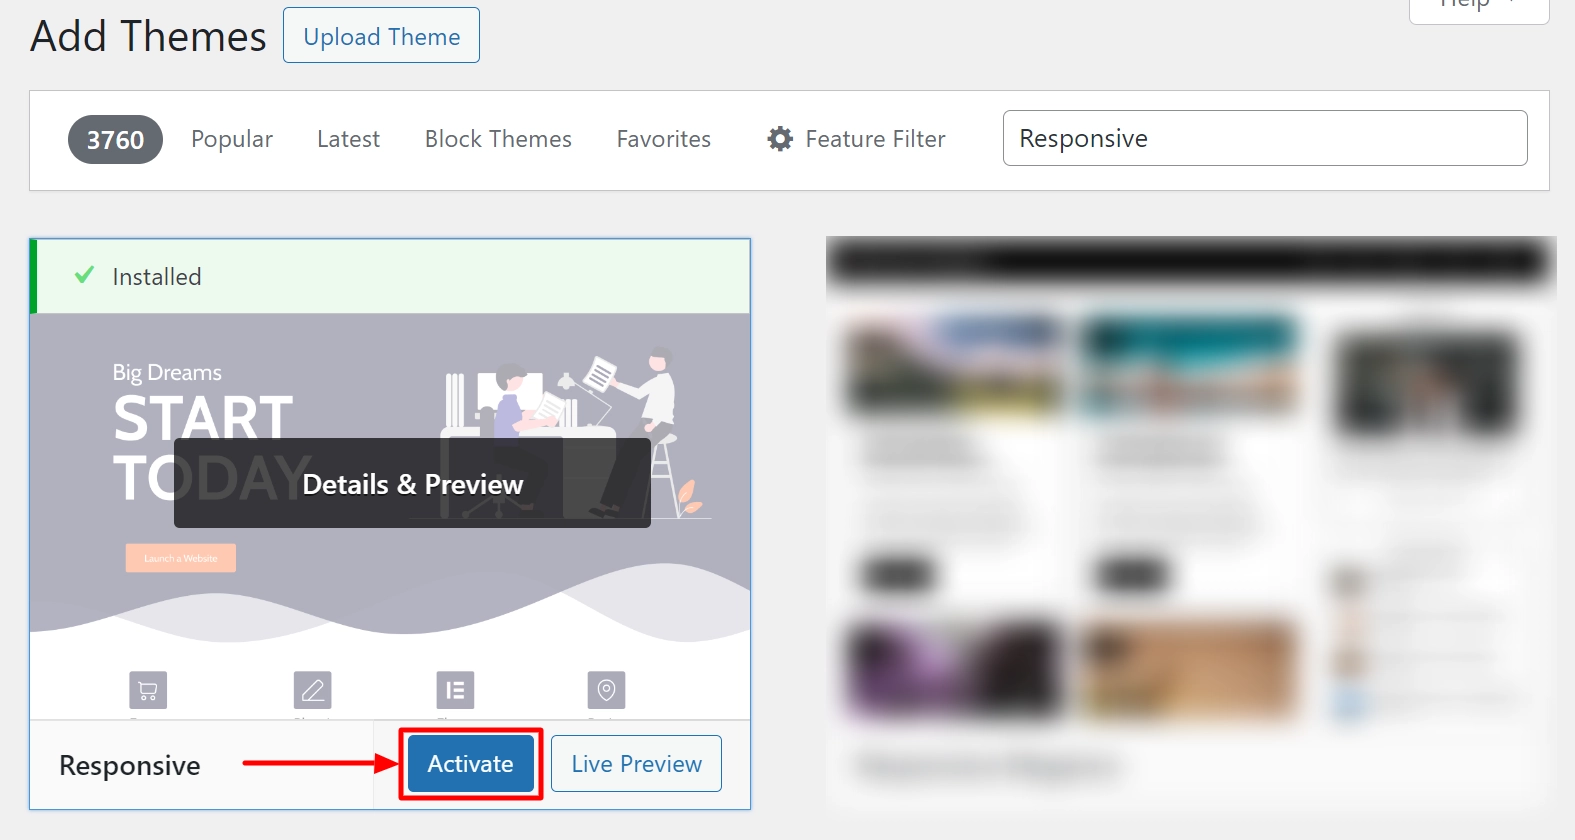
The Responsive theme has been activated and can be accessed from the dashboard.
5. Installing Responsive Plus Plugin – 250+ WordPress Templates
Now, we need a Responsive Plus Starter template plugin to download a travel website.
You can follow these steps to install the Responsive Plus plugin.
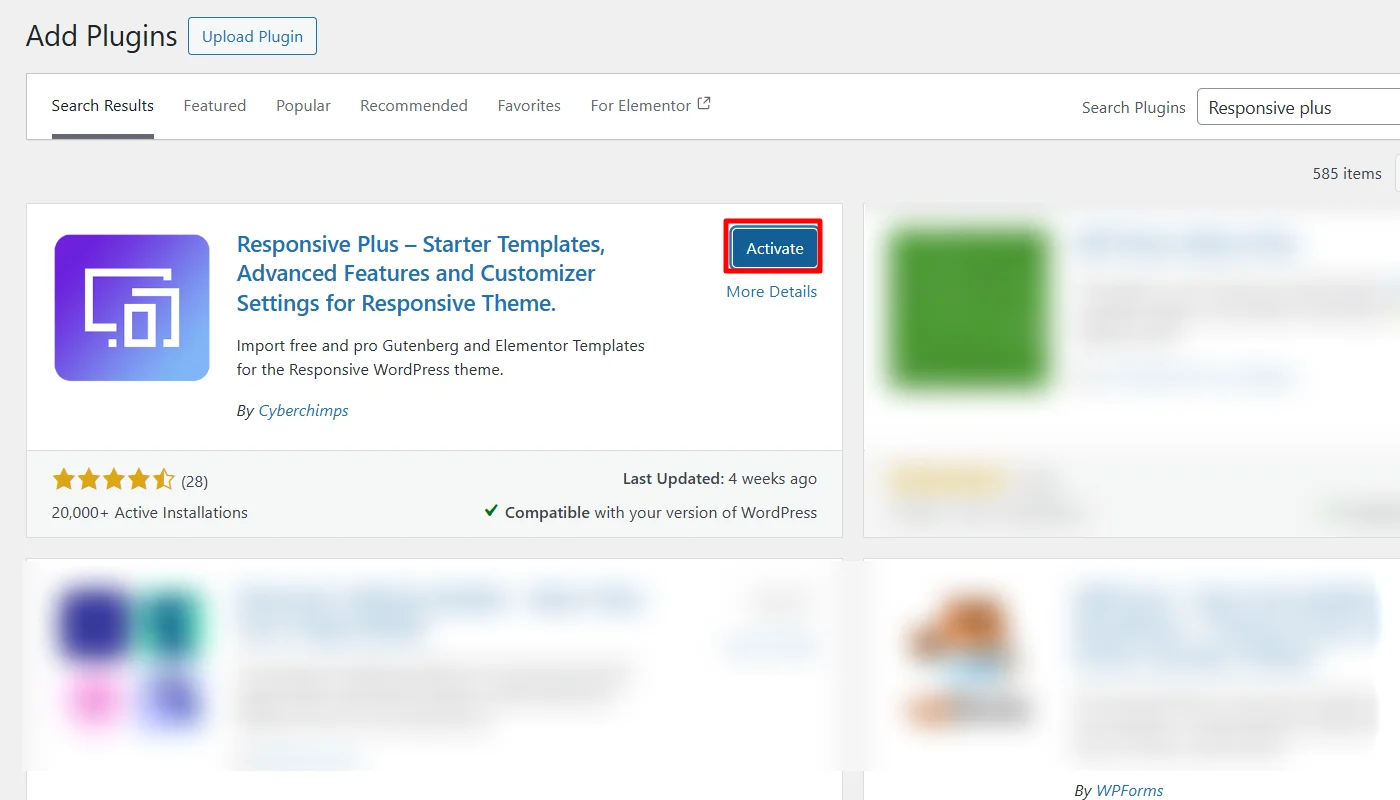
From your WordPress dashboard, navigate to Plugins > Add New Plugin.

Search for the Responsive Plus plugin in the search bar and click Install Now.
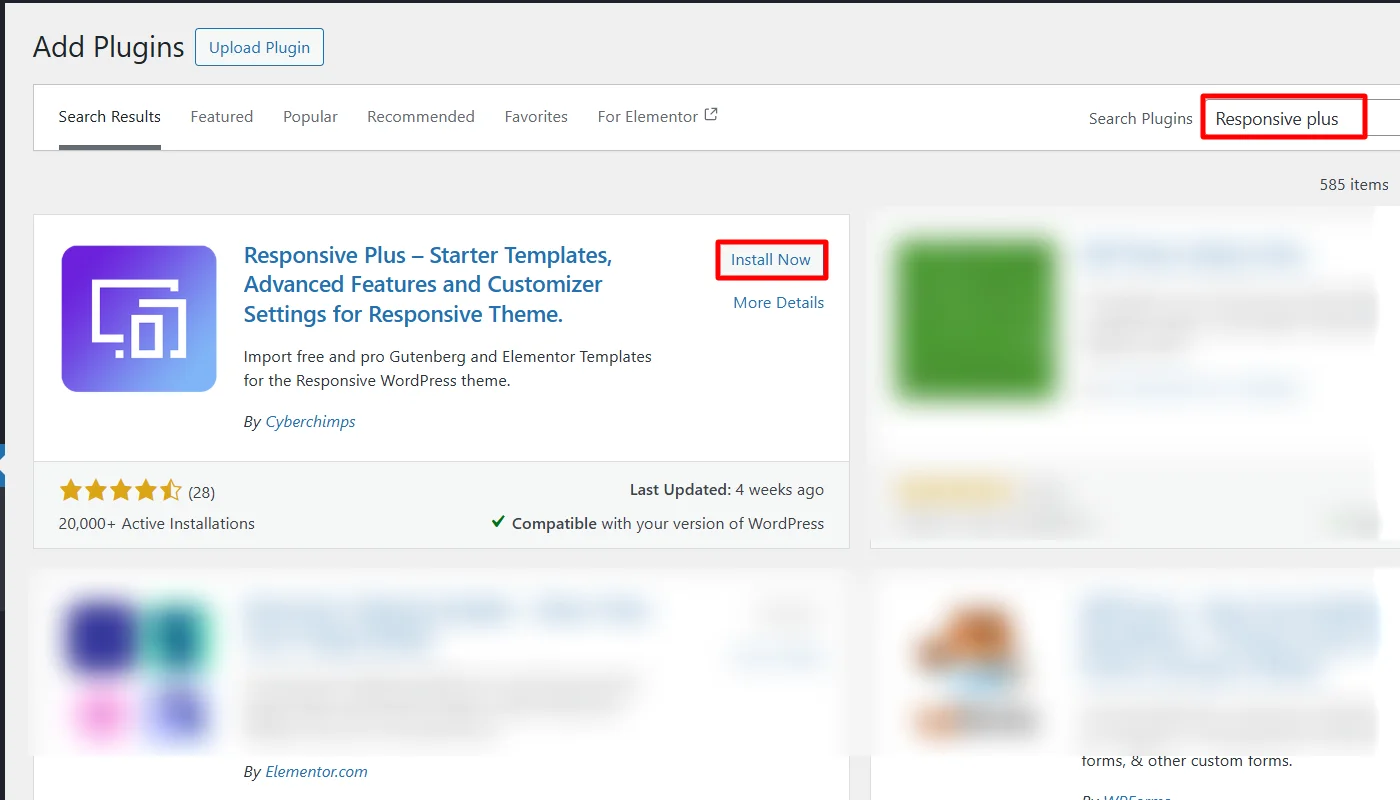
To activate the plugin, click on Activate after installation.
6. Import a Travel Agency Template
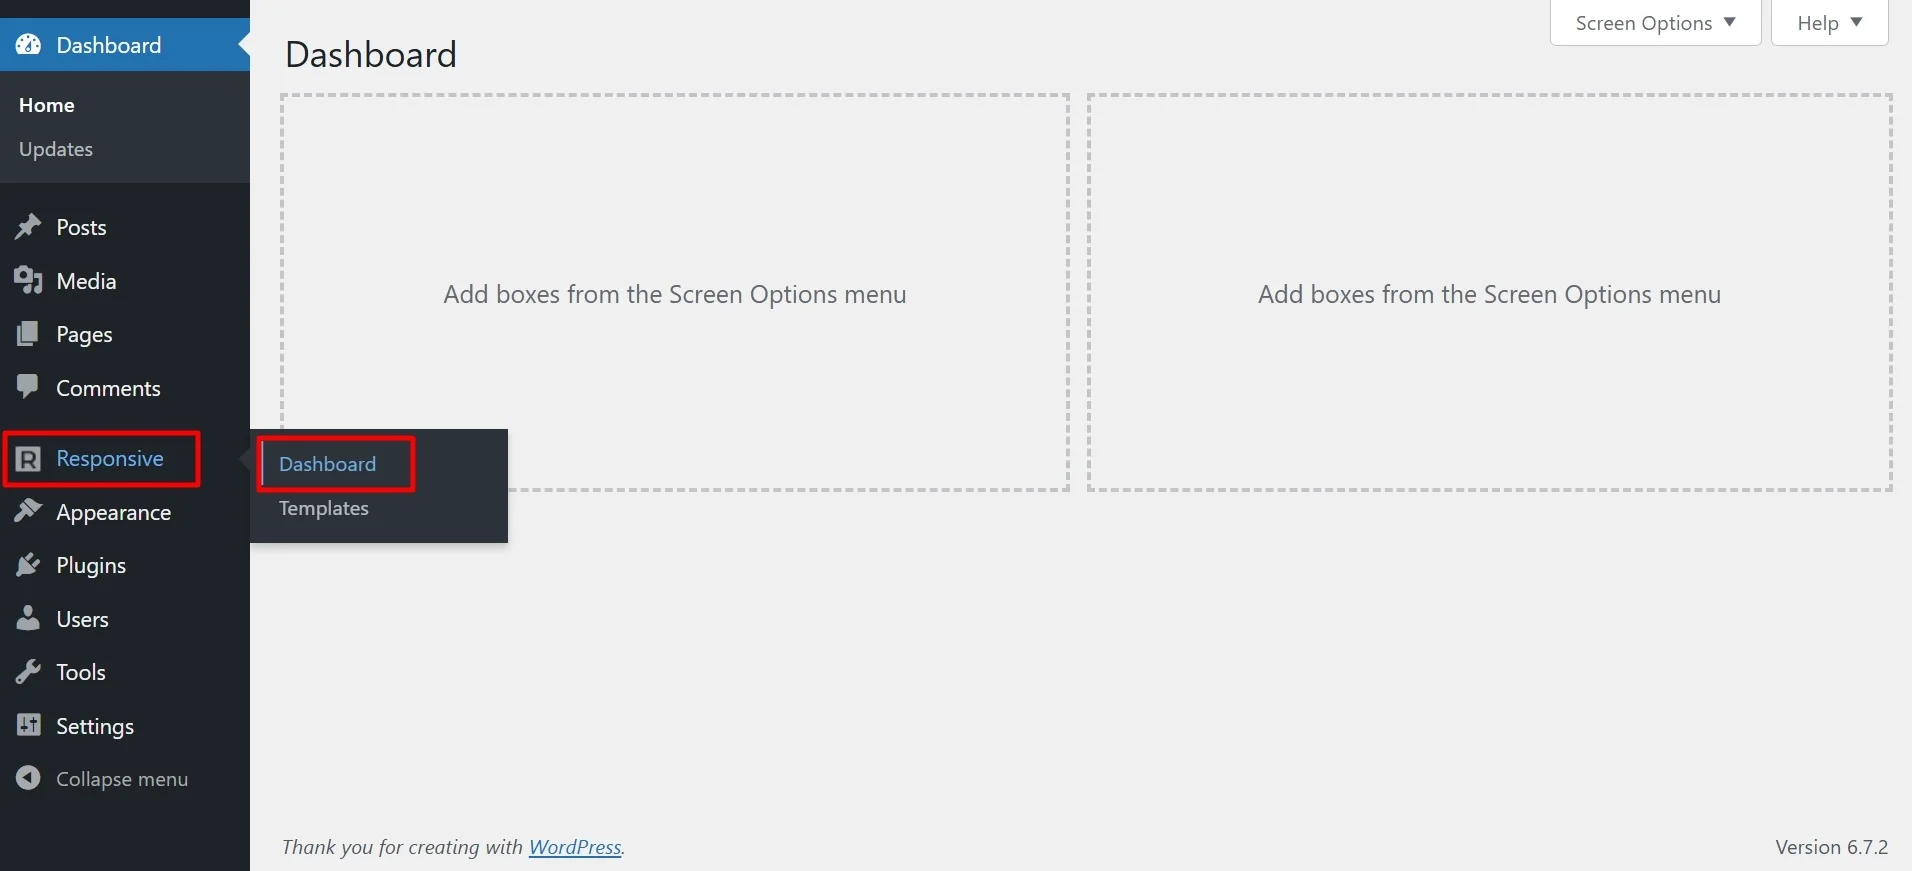
To import a template, first connect your Cyberchimps account and for that:
Go to Responsive > Dashboard in your WordPress admin panel.
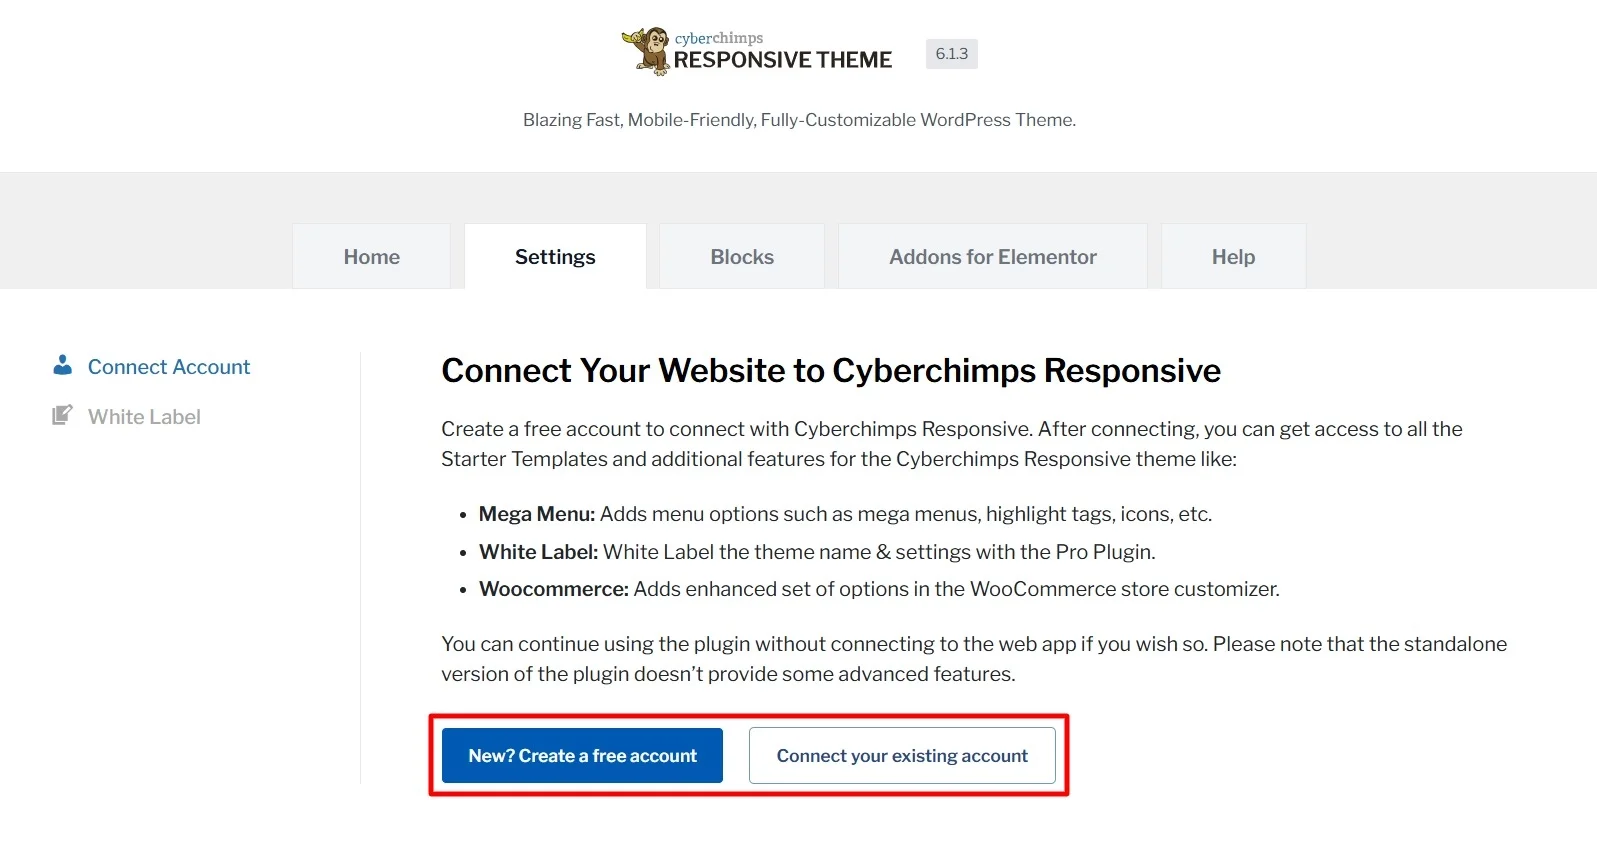
Under the Settings tab, click on New? Create a free account. If you already have an account, select Connect your existing account.
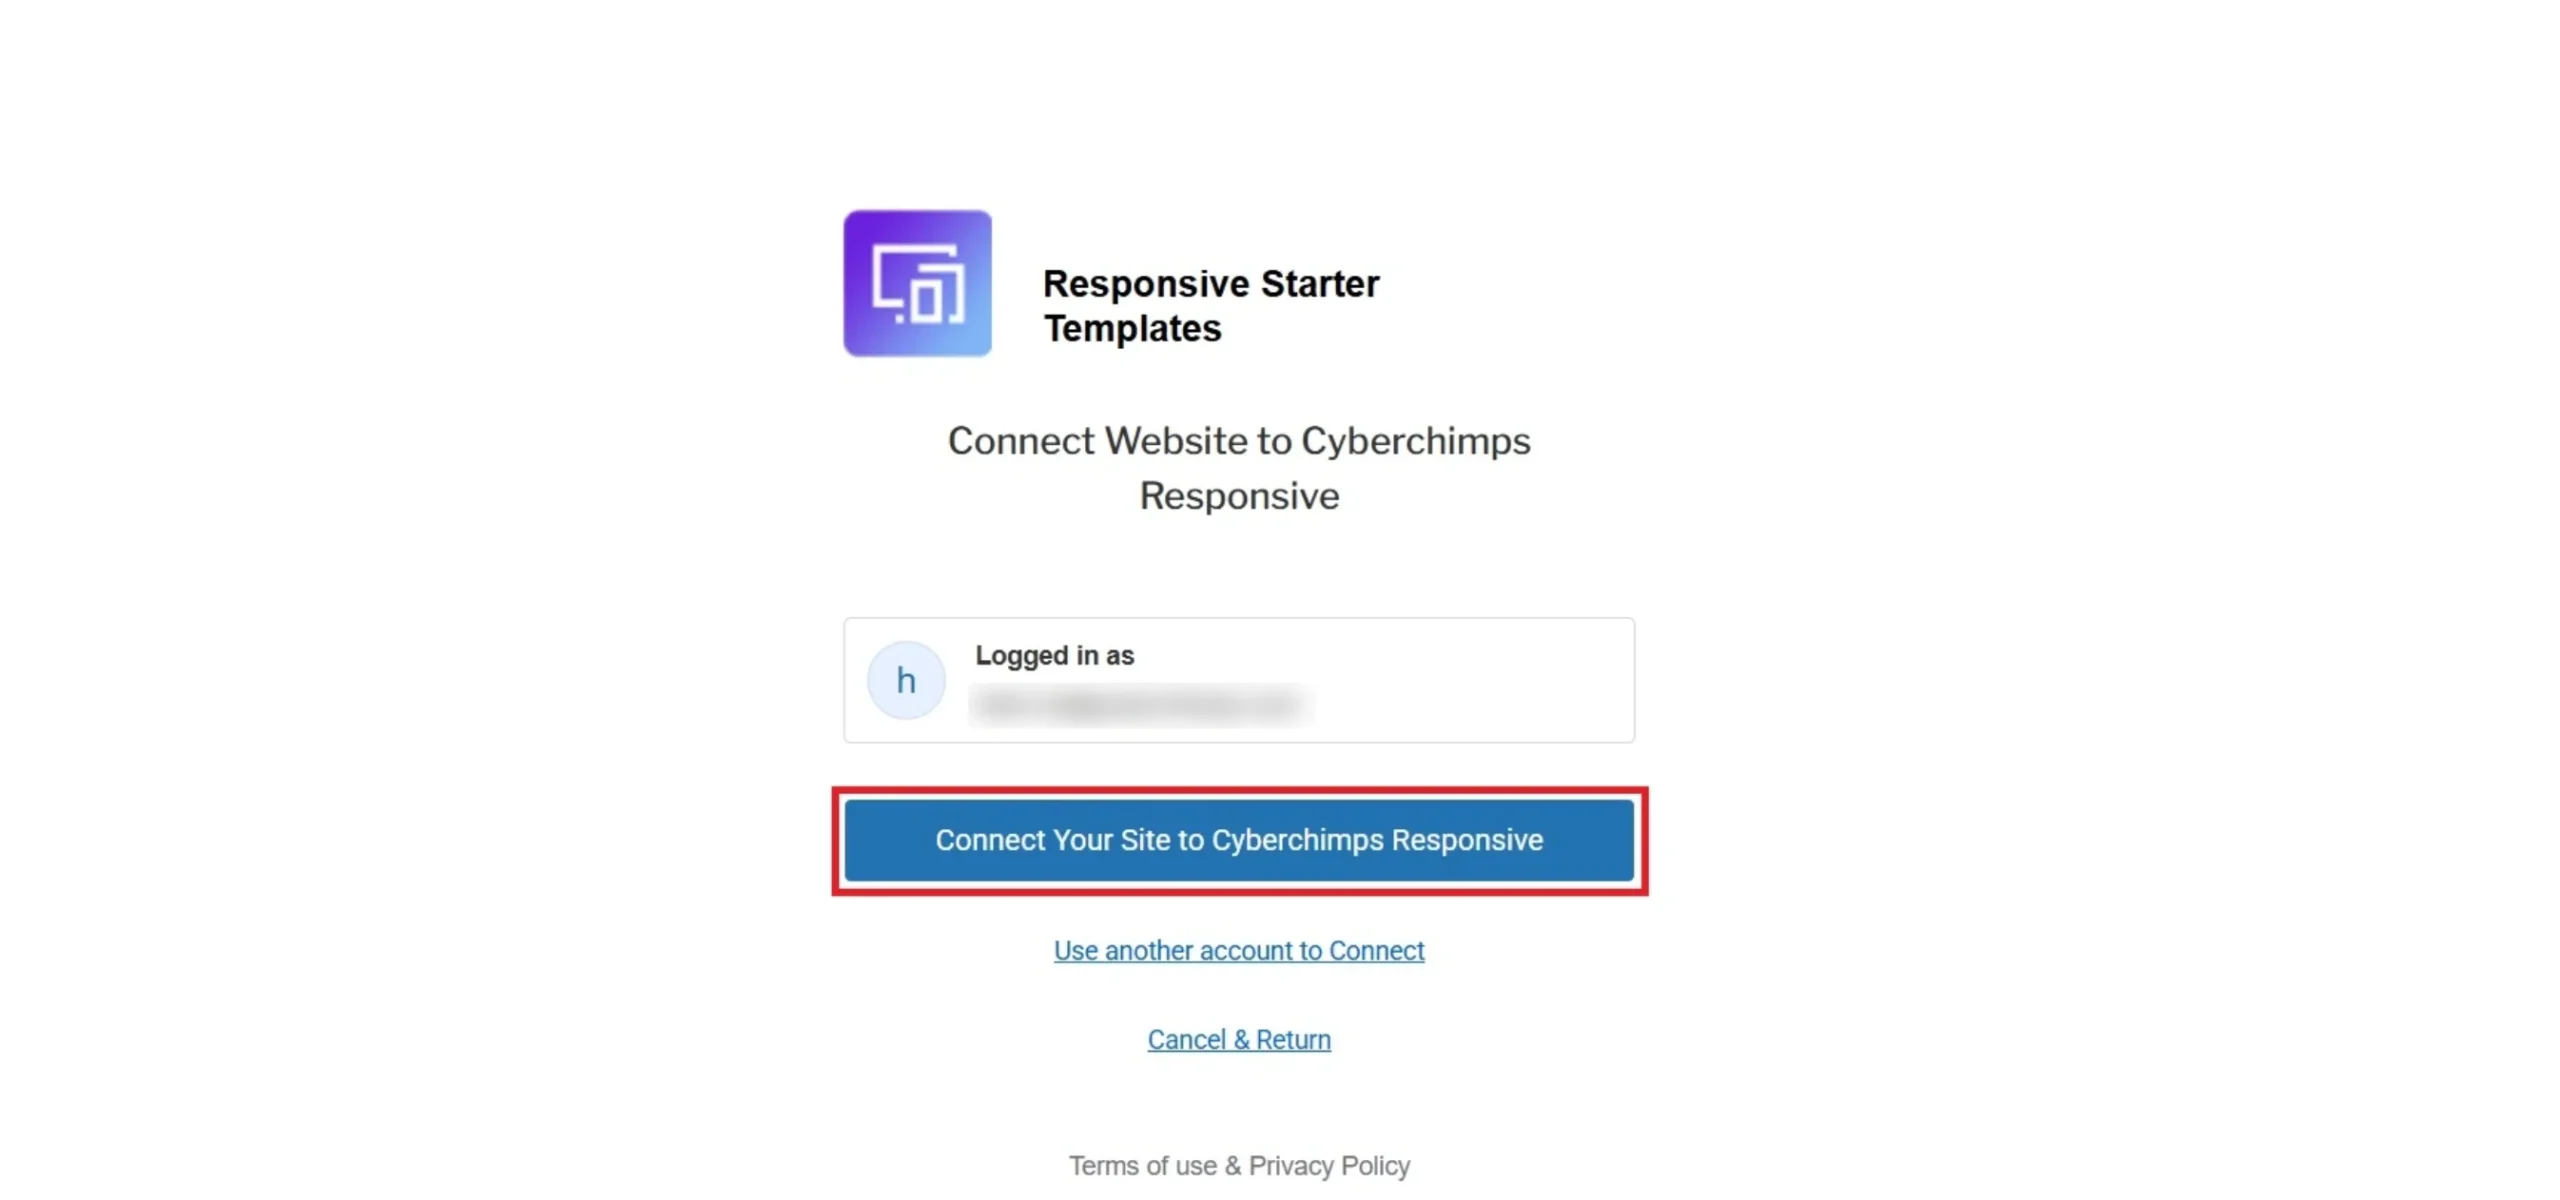
Fill in your details and click Sign up & Connect. Once signed up, click Connect Your Site to Cyberchimps Responsive to link your site.
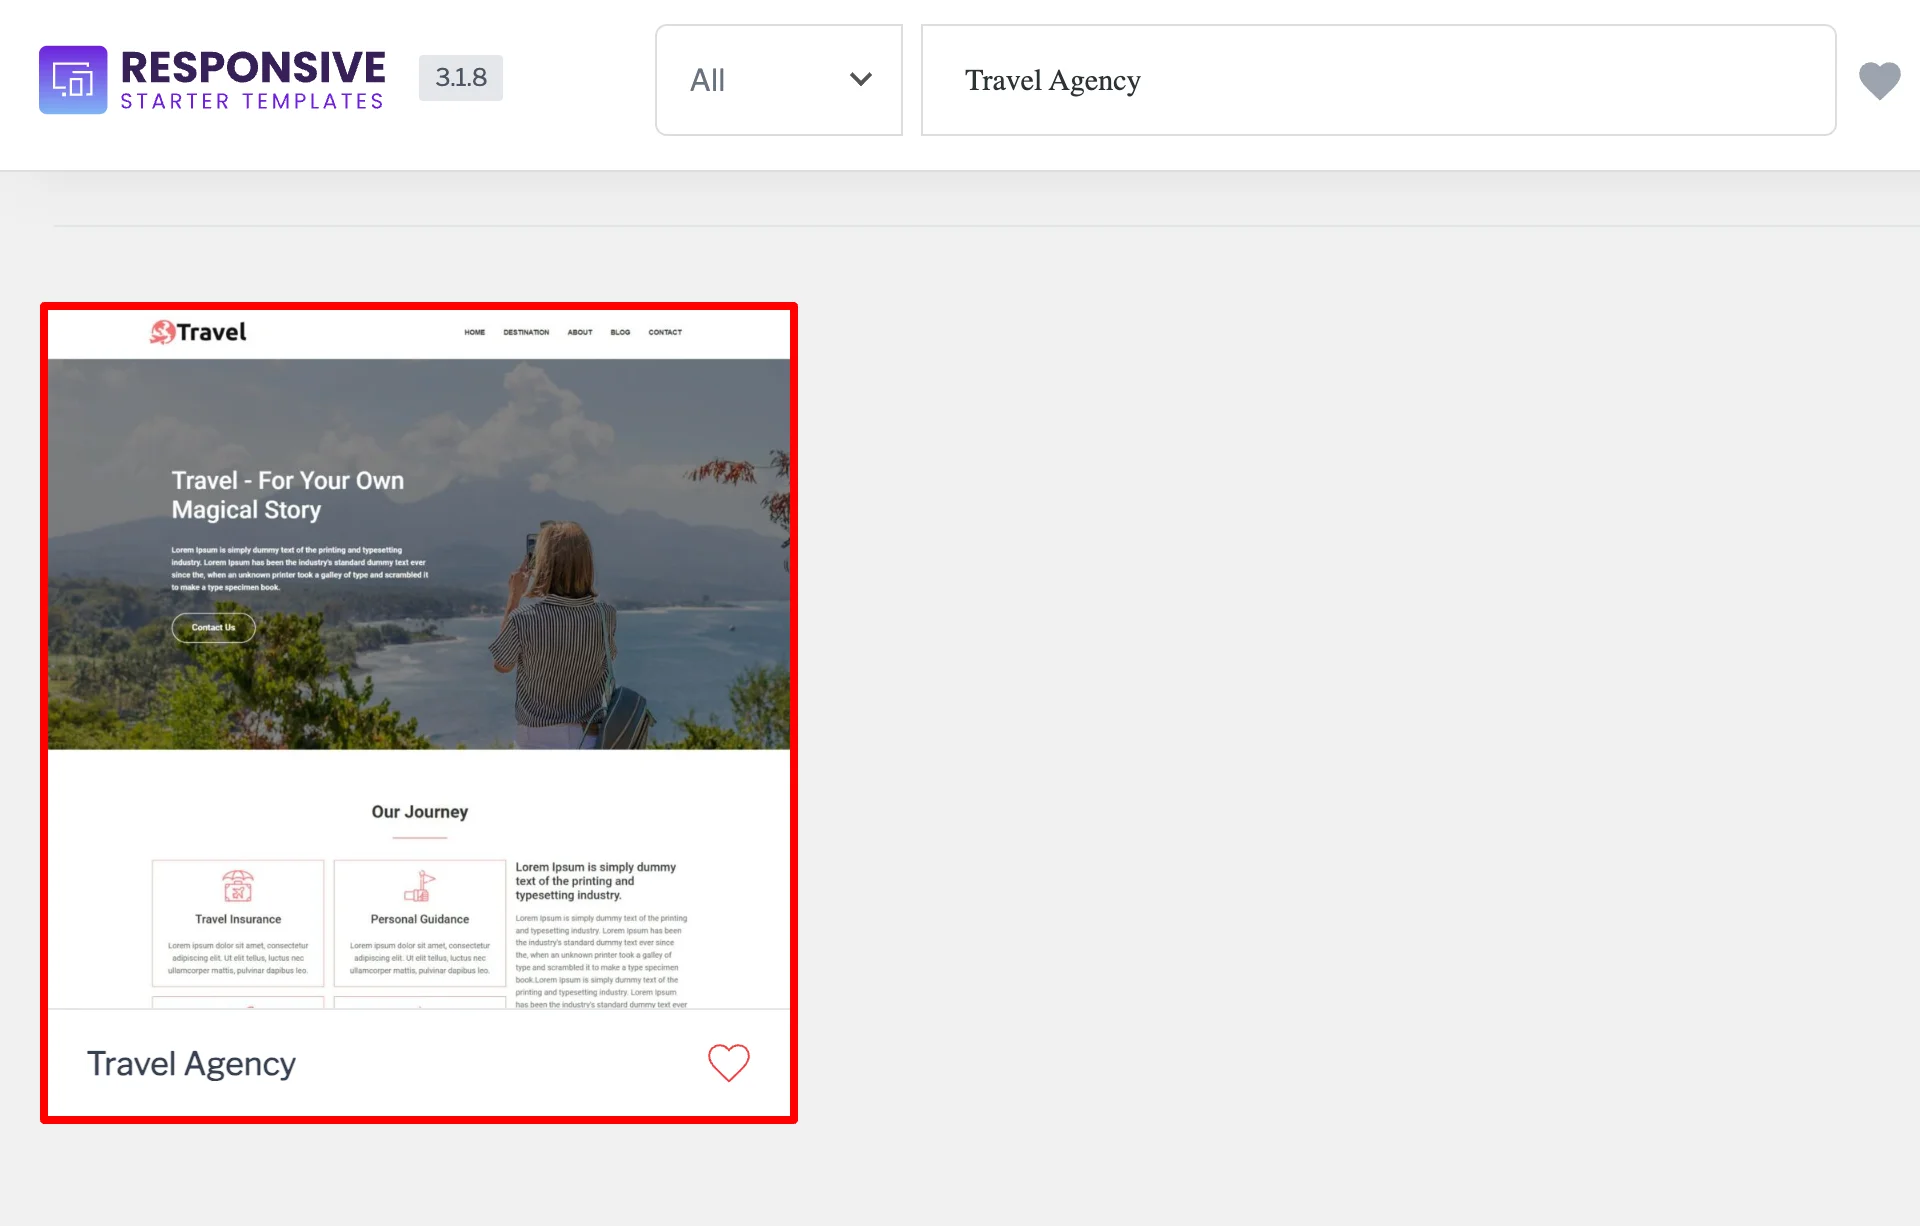
Now, let us start to import the travel template:
(Note: The plugin provides 250+ responsive website templates, as our main goal is to make a travel agency website. Let us import the Travel Agency template. You can also import another niche-specific template, e.g., Travel and Tourism, Travel Go , Travel Blog, etc.)
Steps to follow to import the Travel Agency template:
Hover on Responsive menu and click on the Templates button.
Search for Travel Agency in the search bar option and click on the Travel Agency template.
Click on the Import Site button.
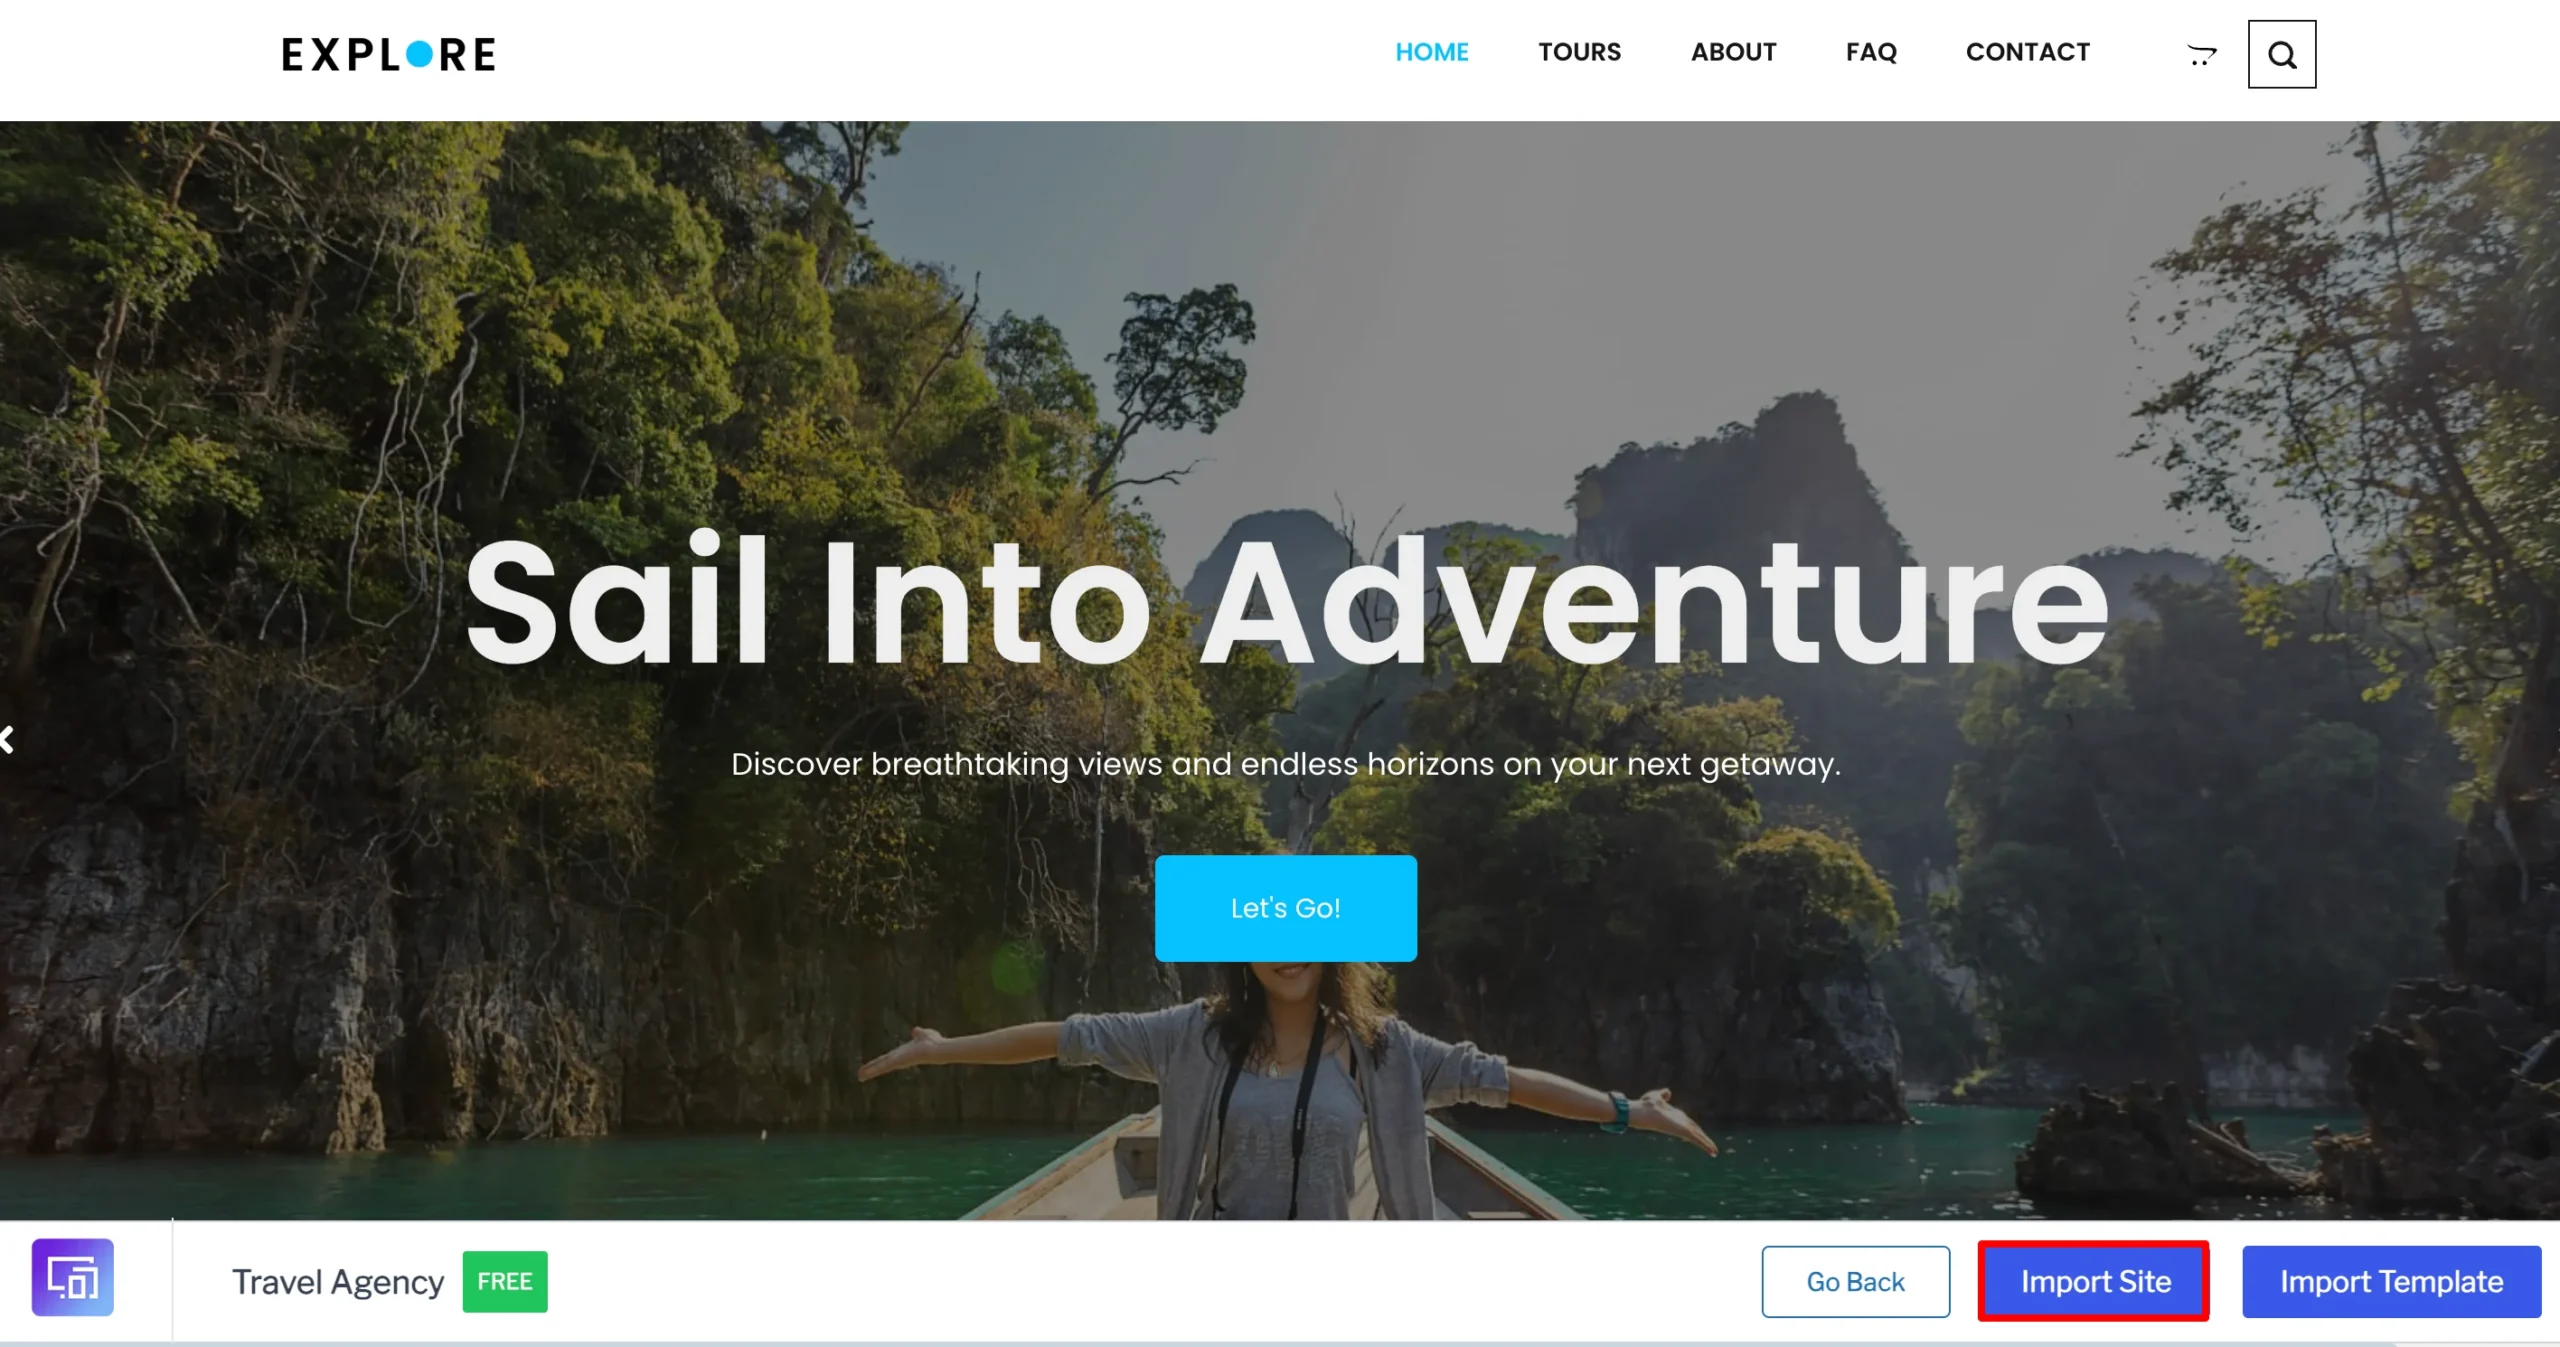
Once you click on import, a pop-up will appear asking you to subscribe and start importing
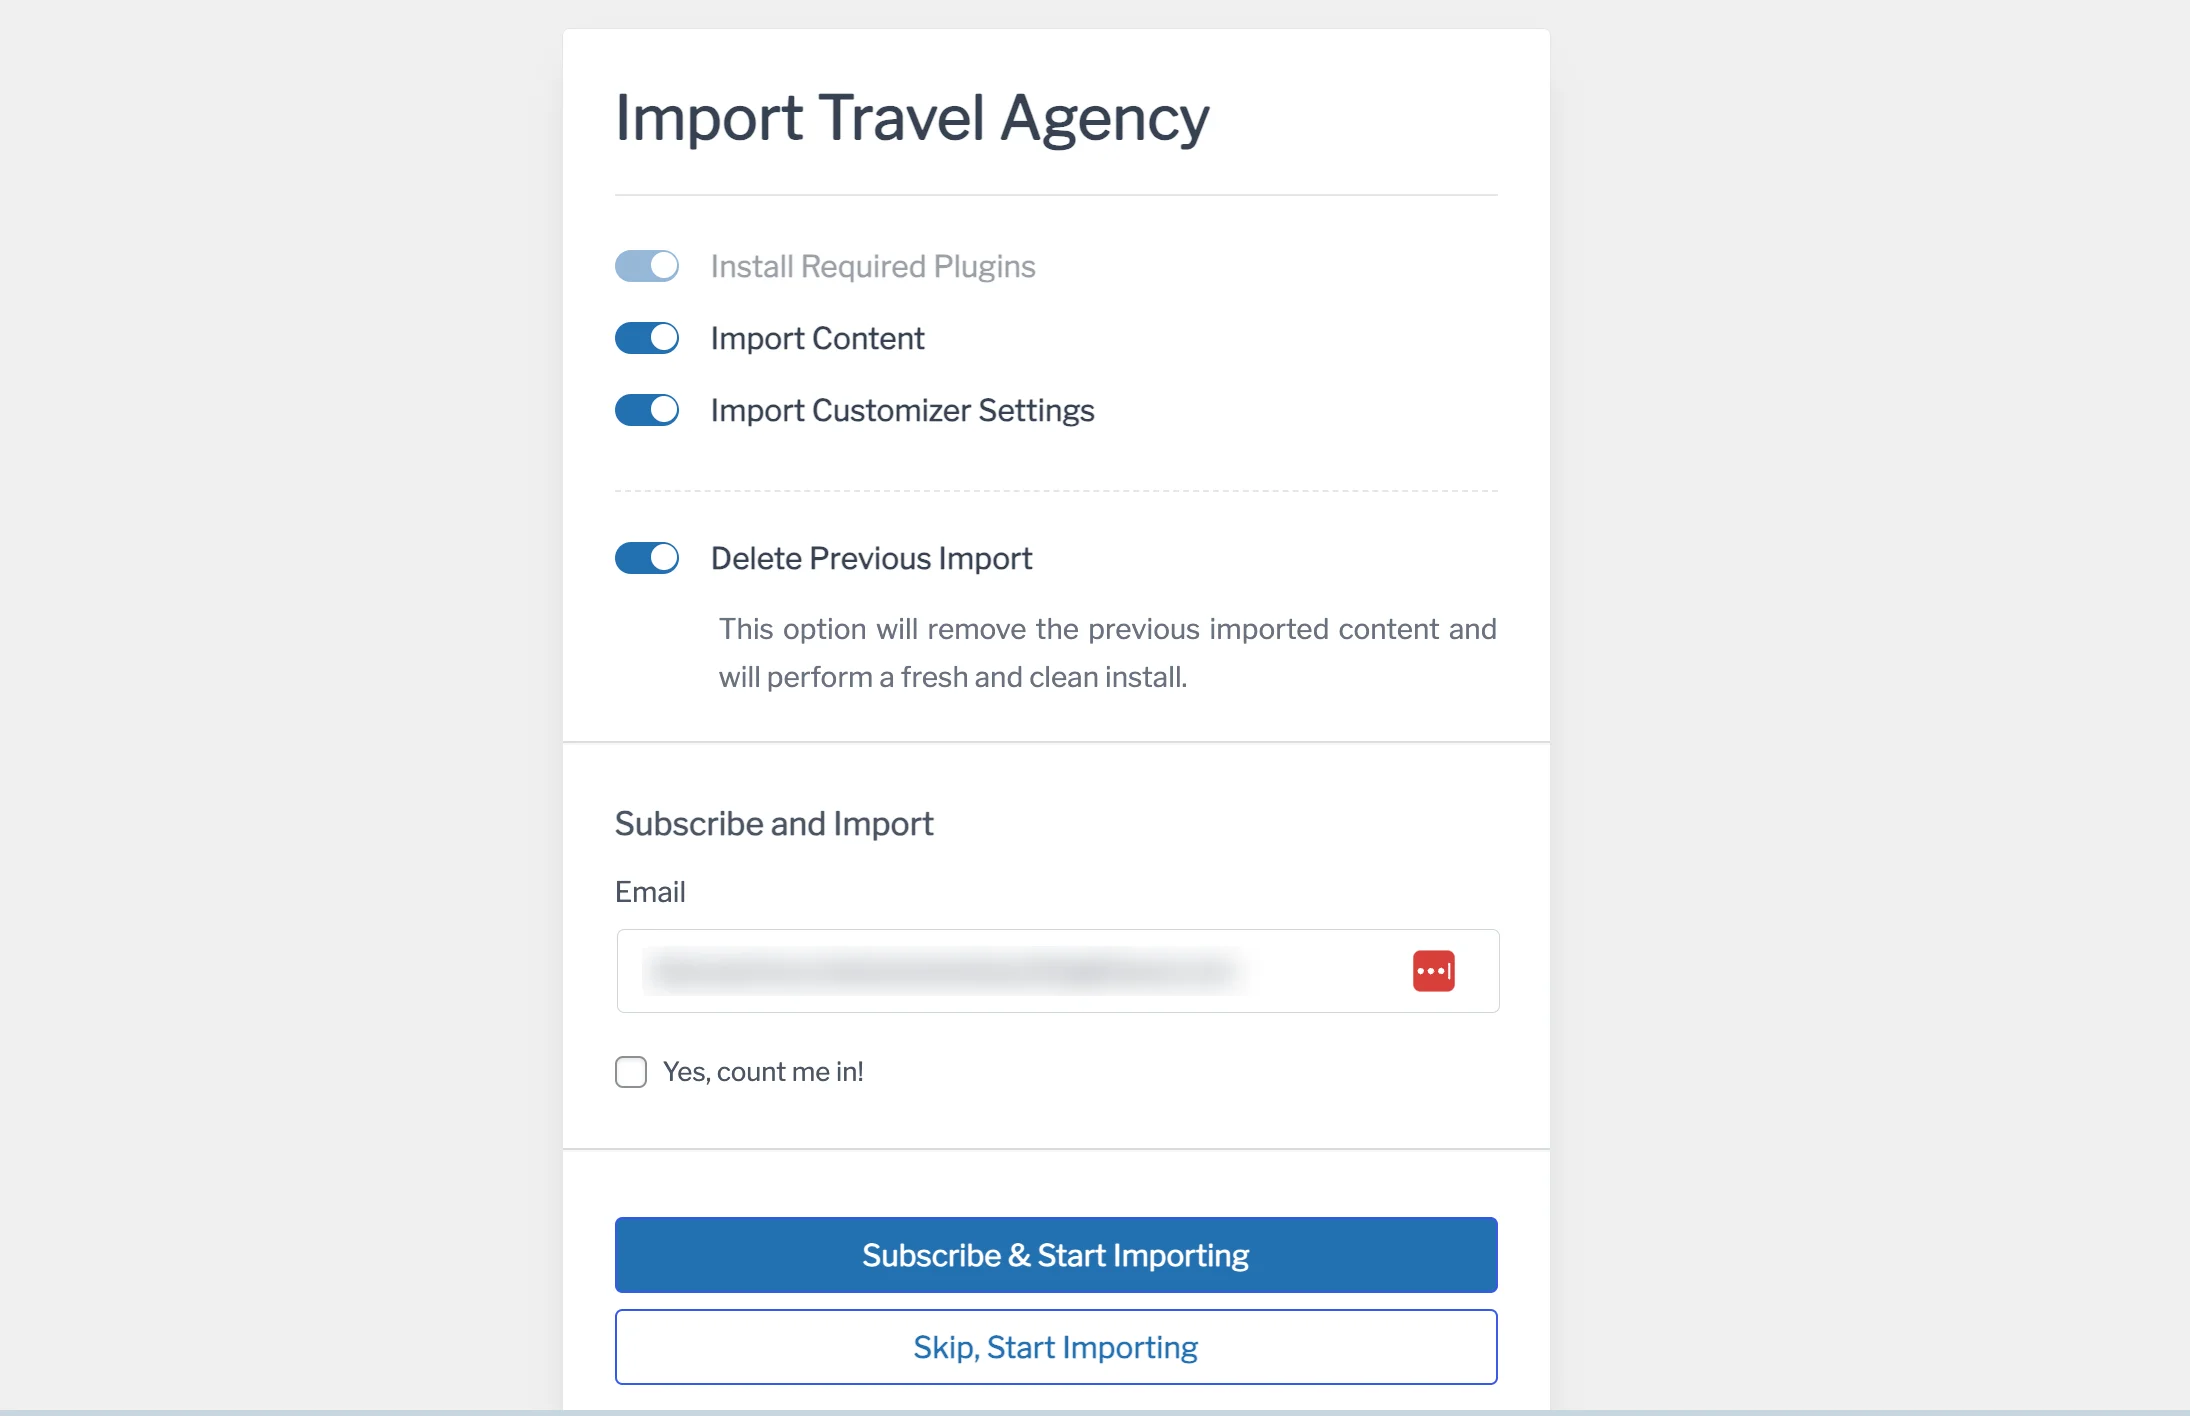
Once imported, click on Visit Website.
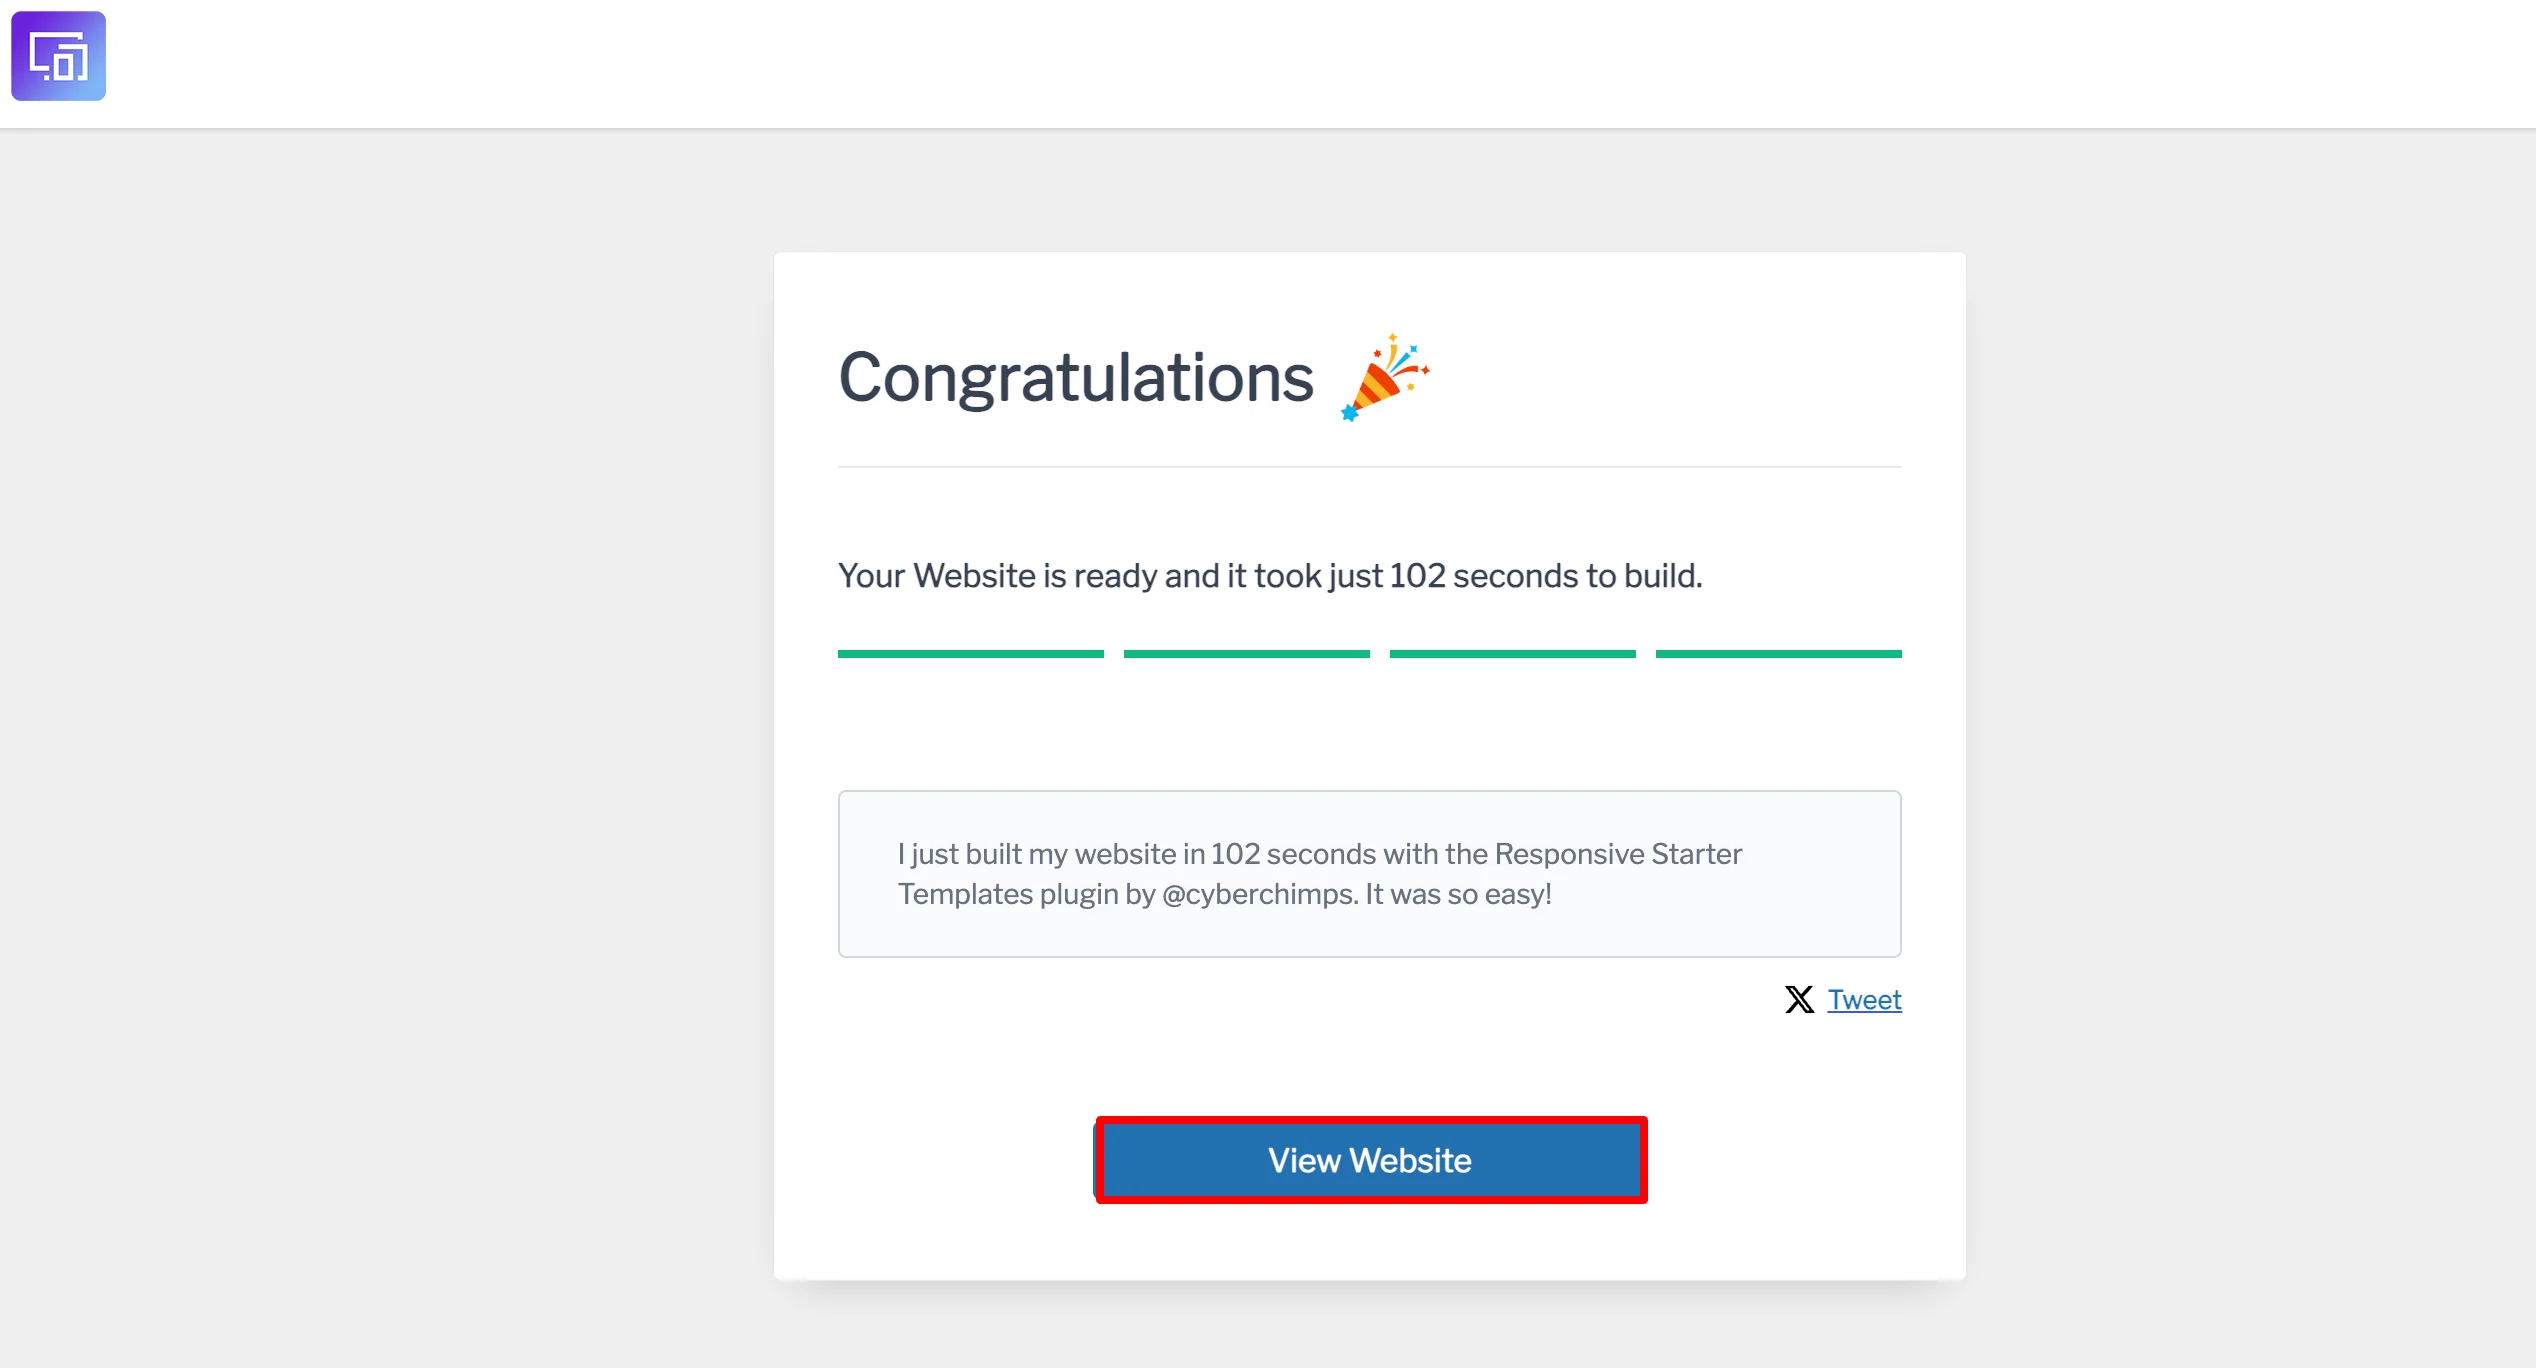
Now that you have launched your Travel website, it will look like this.

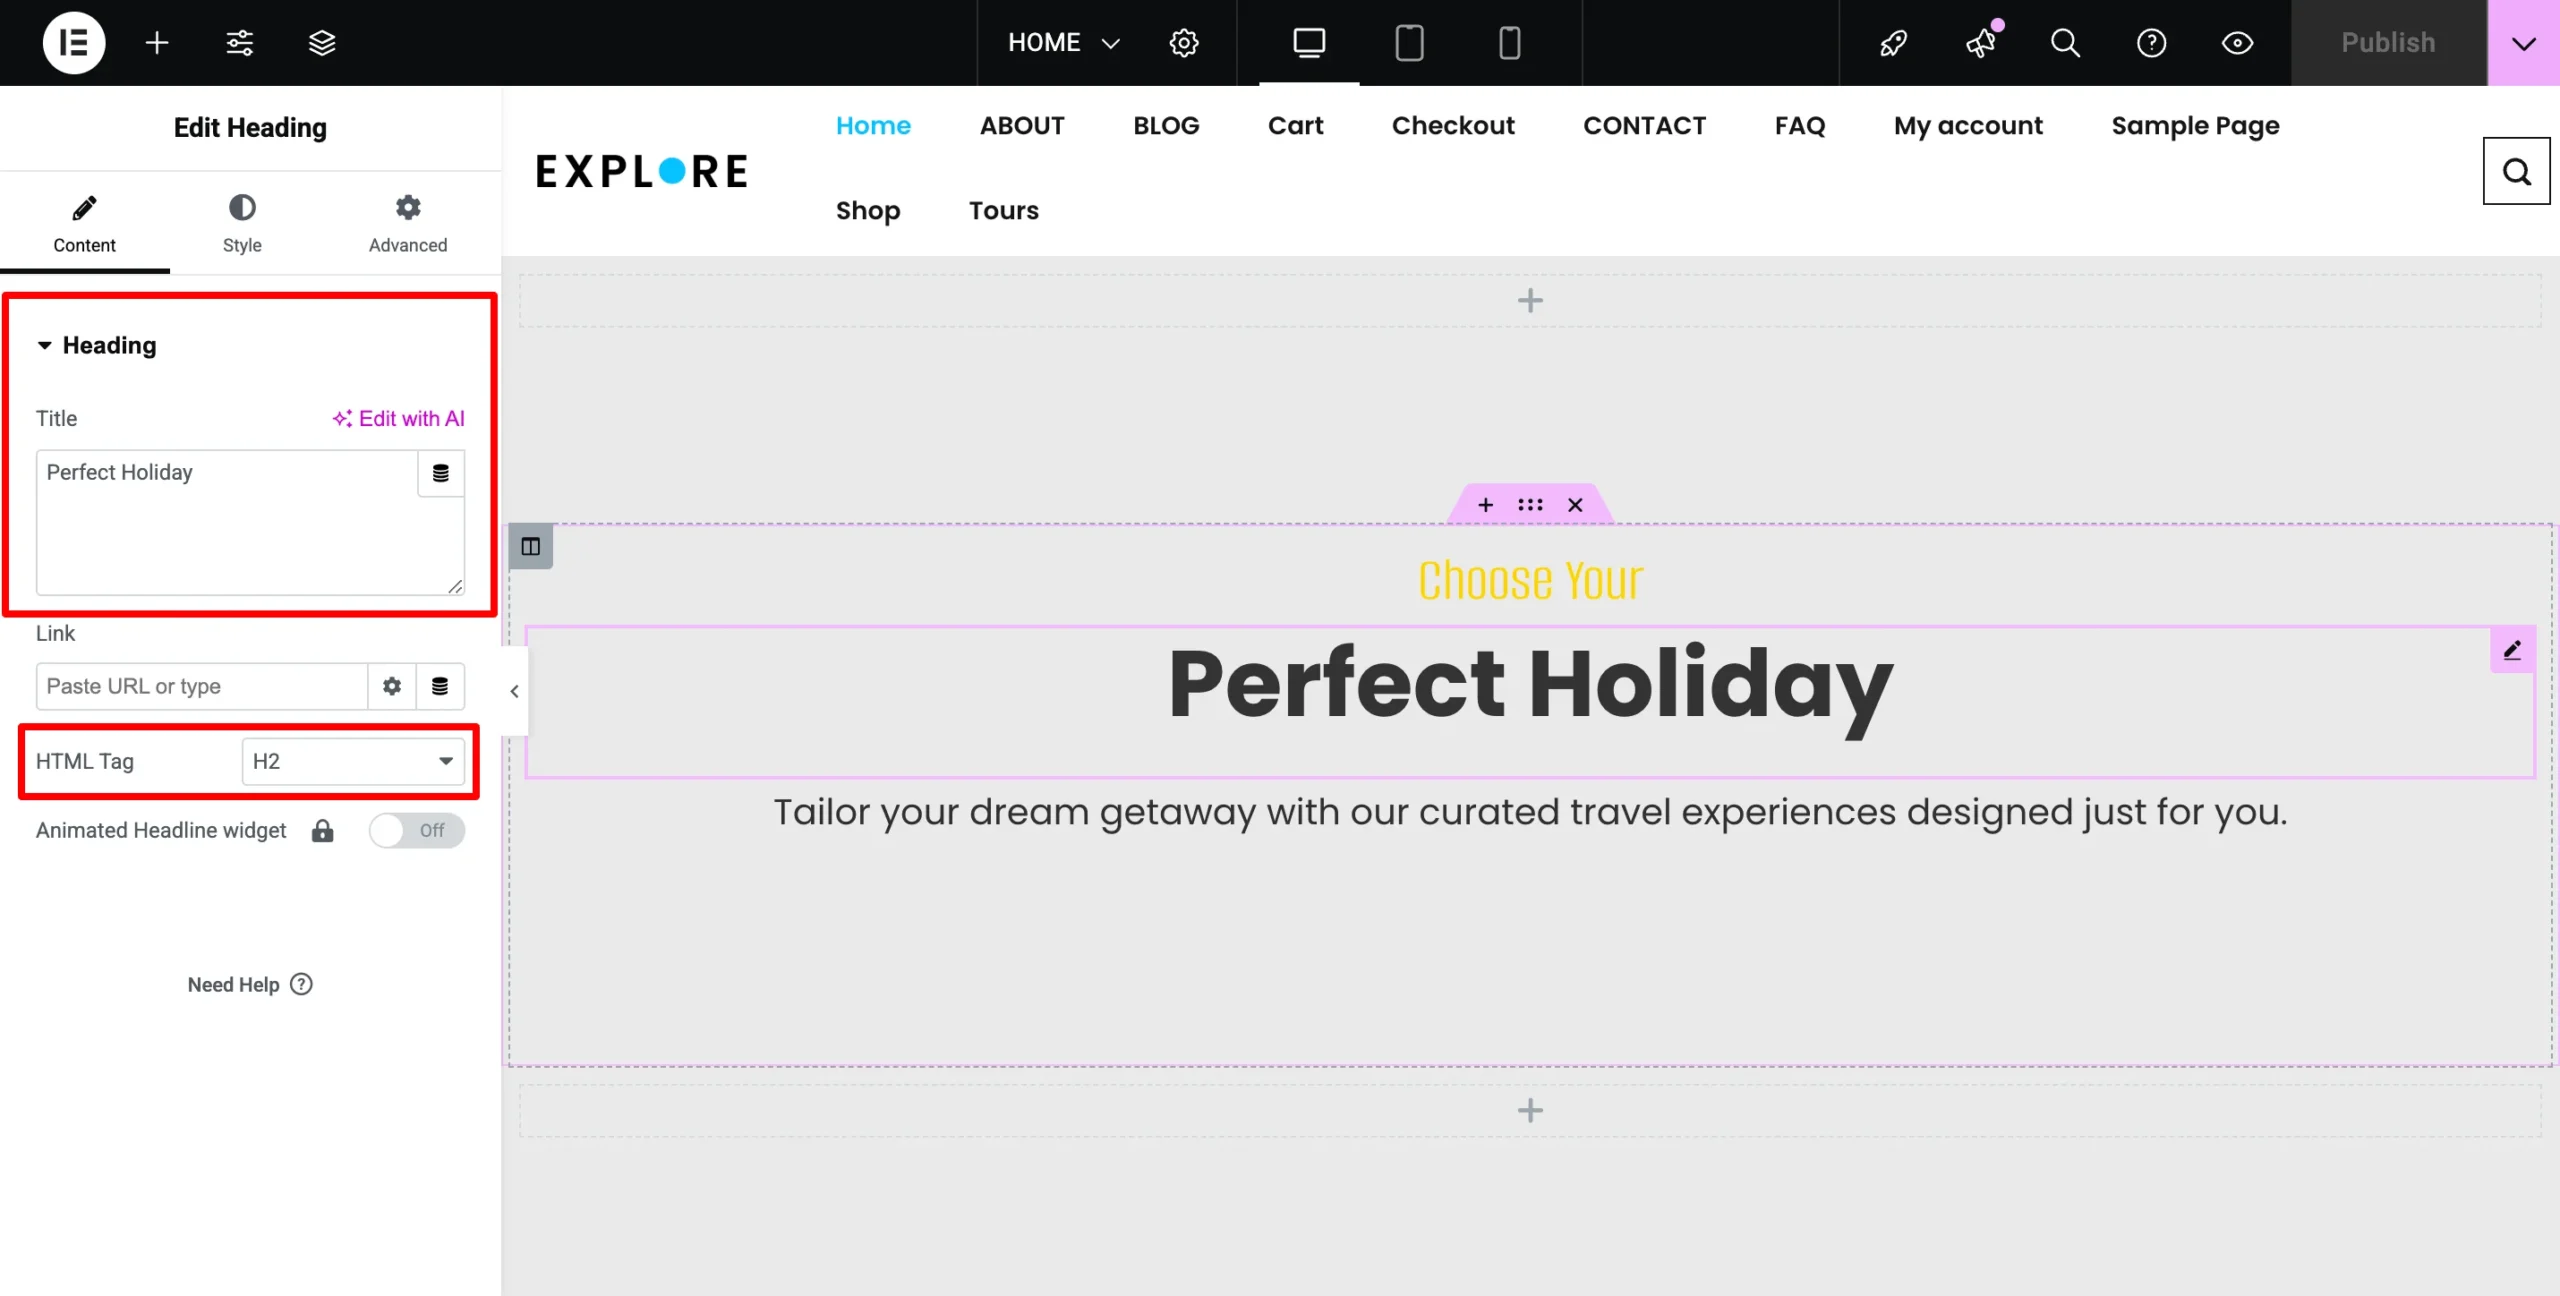
7. Customize the Travel Agency Template
Now that we have imported the website, it’s time to customize its content.
Click on Edit with Elementor to customize the content, images, and other elements as needed.

If you want to change the text on the website, simply click on the text, and you can edit it on the left side of the box. In addition, you can edit the H tag according to your website’s needs.
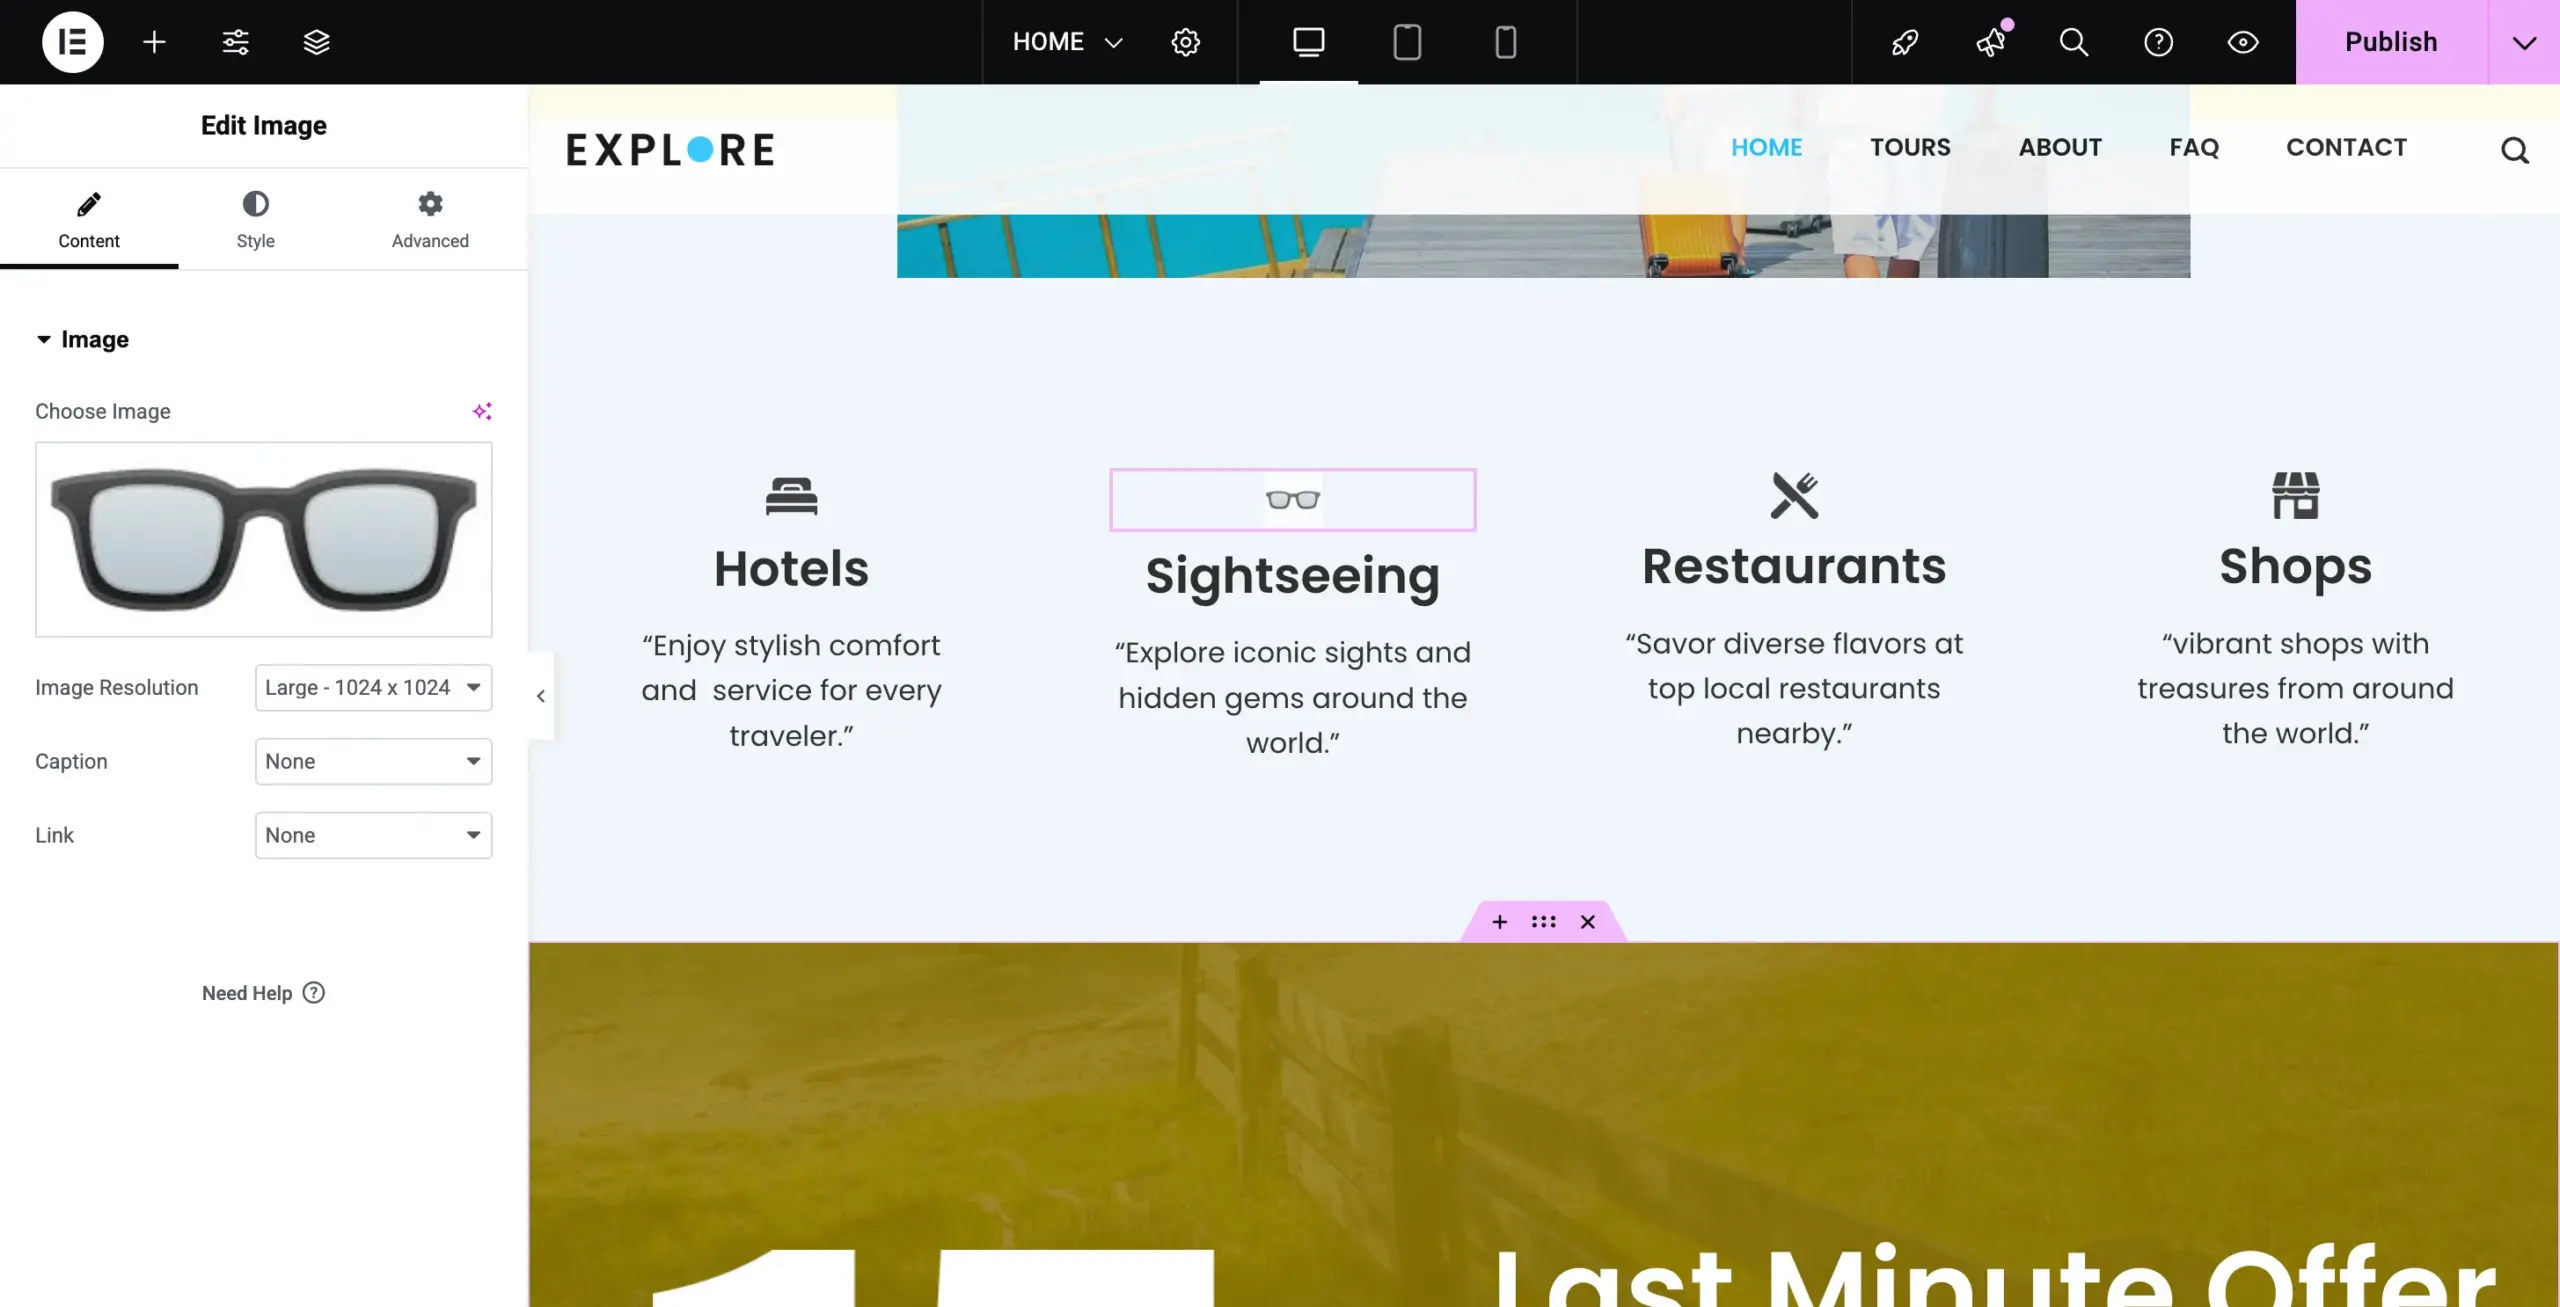
Similarly, if you want to add or change the image, you can simply click on the image.
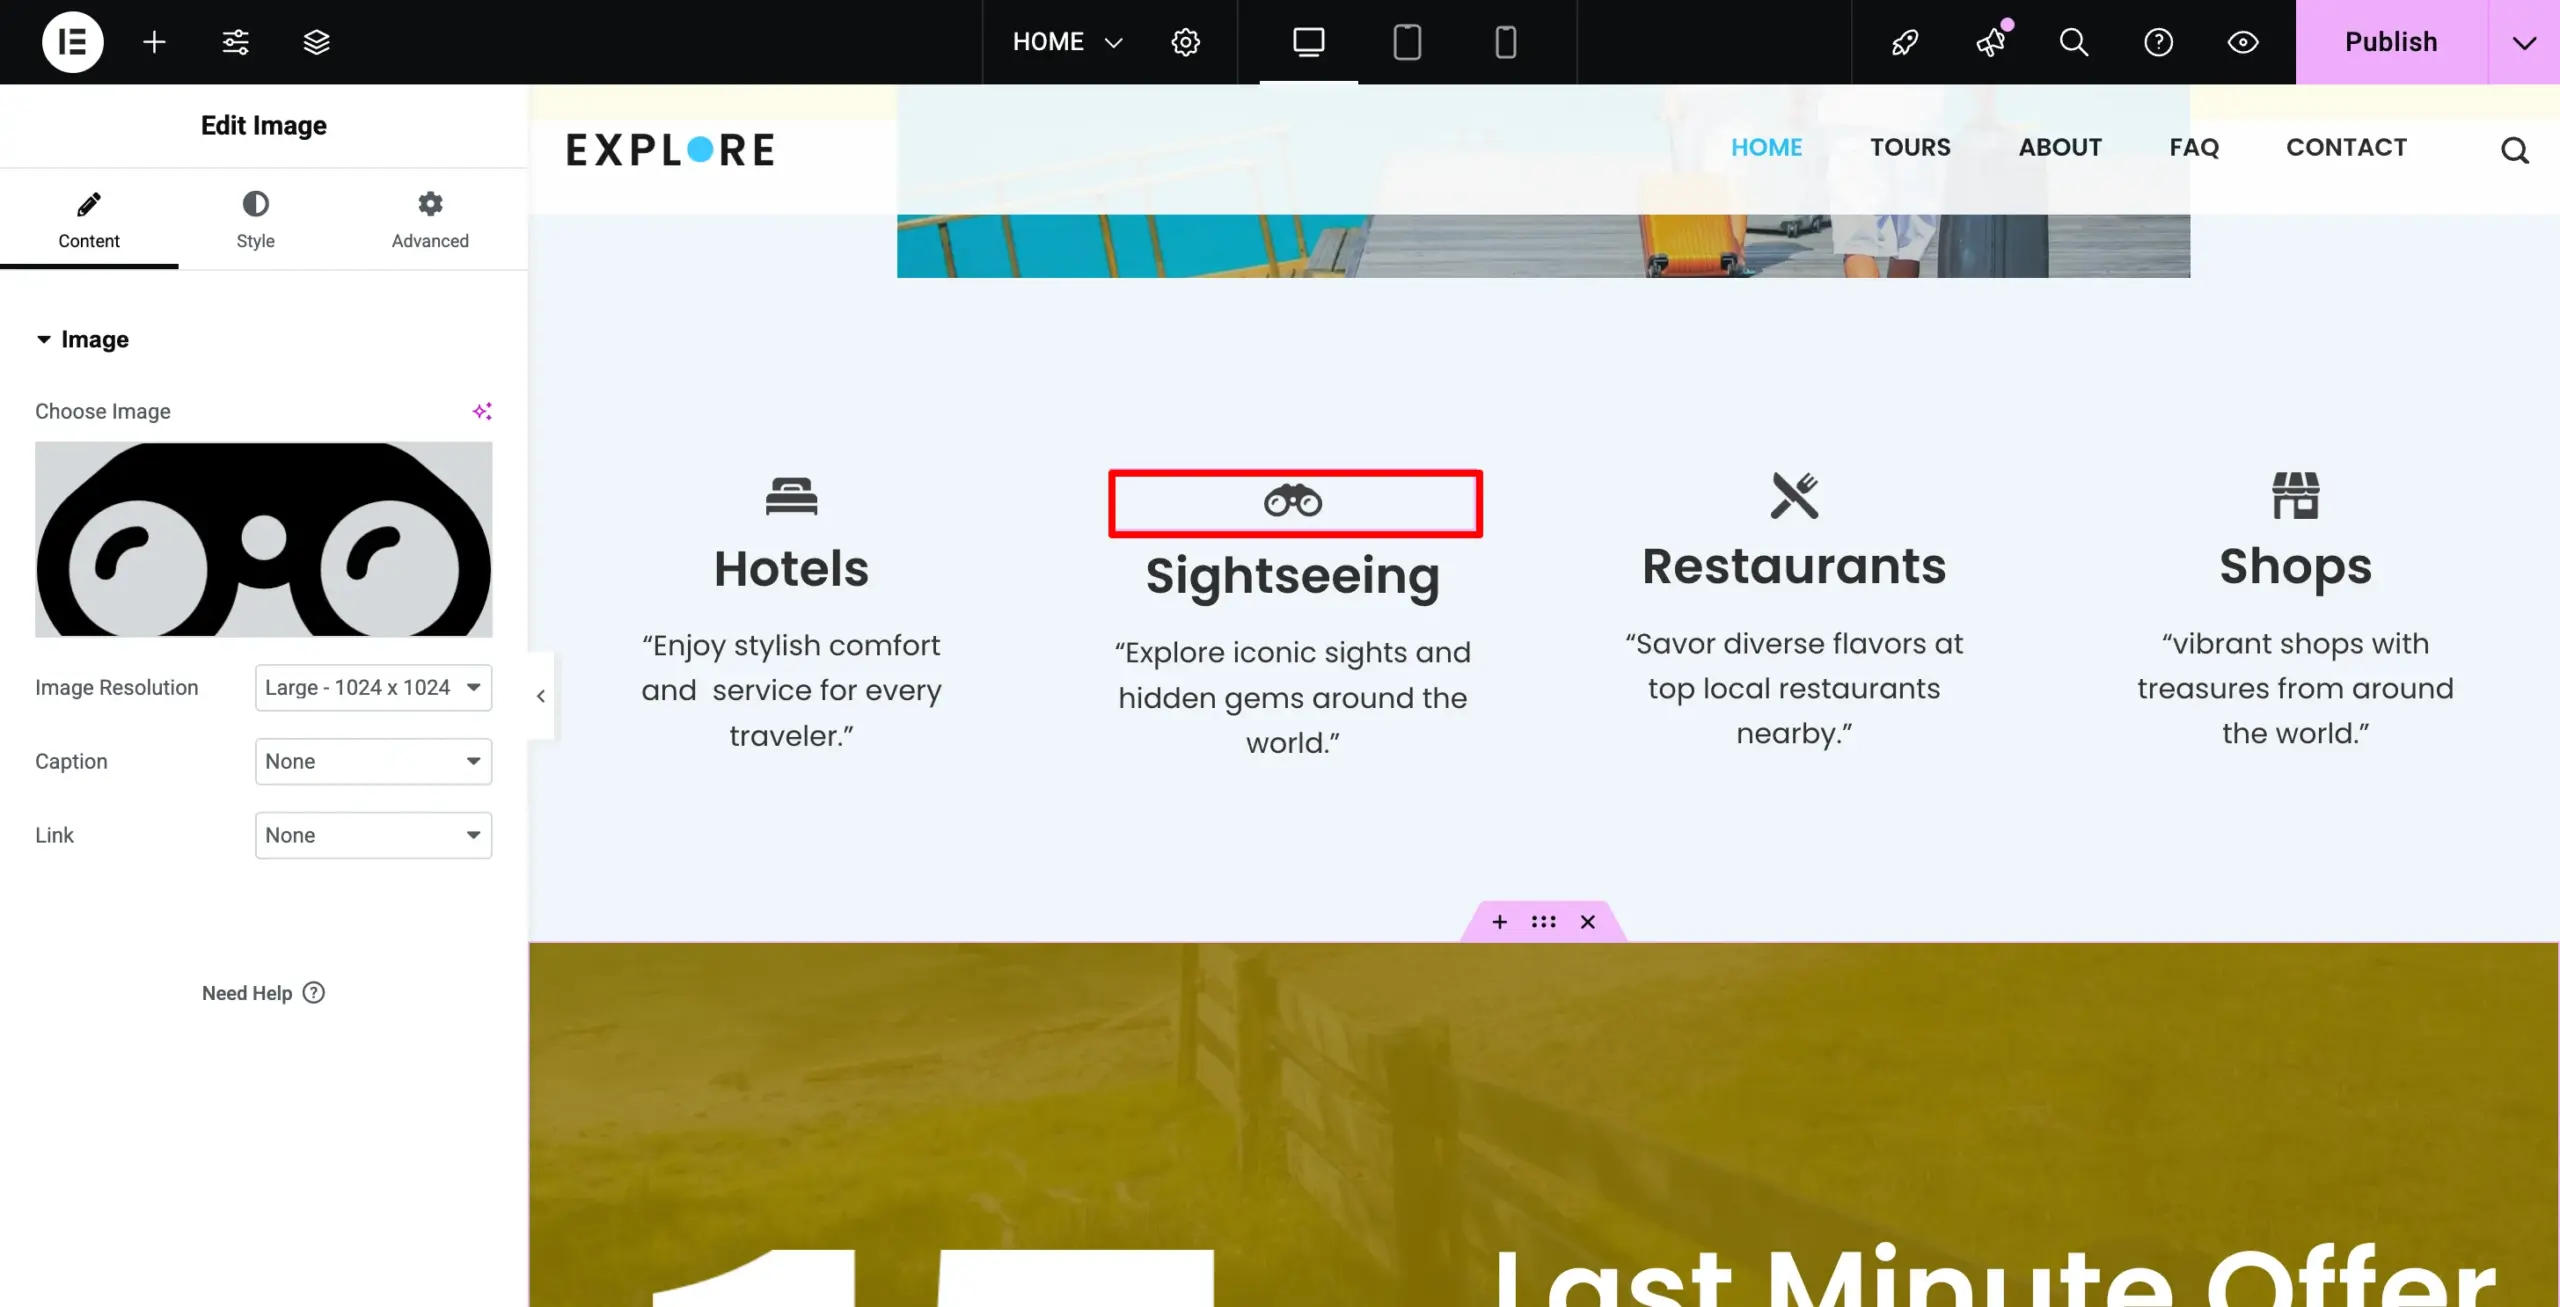
The left-hand image editor will open. Select an image from your device, upload it, and click on save. A new image will appear.
Now it’s time to publish your site once you are done making all the changes. Before launching, thoroughly check your site to ensure all content is high-quality and well-written.
And that’s it; you have successfully created a travel website.
FAQ
To build a travel agency website using WordPress, you can utilize the Responsive Plus plugin by Cyberchimps.
A good URL for a travel agency website is one that is easy and relevant to your company. Example: [NameOfYourCompany].com or [TravelLust.com].
Yes, you can create a travel website for free with free plugins and themes. But you might have to pay if you require premium hosting or themes.
Conclusion
With the tips and instructions in this guide, you are one step closer to making a travel agency website.
We hope this guide helped you create a travel agency website that sells tours and excursions online. Whether you are a tour guide or a travel agency owner, using a responsive theme will make customizing your site a breeze.
Having a travel website template from Responsive Plus will never be a headache, as it is well-designed and feature-rich.
Cyberchimps’ Responsive theme is an excellent option if you’re an independent travel enthusiast or proprietor looking to create your own travel website.
If you liked this article, you can also consider reading:
- Create A Professional Financial Consulting Website with WordPress
- How to Create a Wedding Website with WordPress
- Best WordPress Website Examples
- How to Create a Non Profit Website Using WordPress
Want to make a travel agency website with WordPress? Grab the Responsive Theme now!


